Visonic
Overview
Use the Visonic virtual keypad to connect to and operate a Visonic alarm panel in Local mode. It provides controls that are normally available on a physical keypad.
Use this page to:
- Connect directly to a Visonic panel through its access point or a USB connection.
- Authenticate with a valid installer code.
- View panel status indicators.
- Navigate panel menus.
- Perform arming and disarming operations.
- Access panel functions during installation, configuration, maintenance, and troubleshooting.
Before you begin
Preconditions
- Make sure the Visonic panel is powered on.
- Make sure the panel model supports Local mode.
- Have a valid panel installer code.
- Connect your device to the panel through its access point or a supported USB connection.
Dependencies
- Visonic control panel.
- Wi-Fi or USB connection to the panel.
Important limitations
warning
- Keep the mobile device connected to the panel through Wi-Fi or a supported USB connection while you use the virtual keypad.
Screen layout
The Visonic virtual keypad workflow has two stages:
- Connect to the panel in Local mode.
- Operate the panel with the virtual keypad.
Local mode connection screen
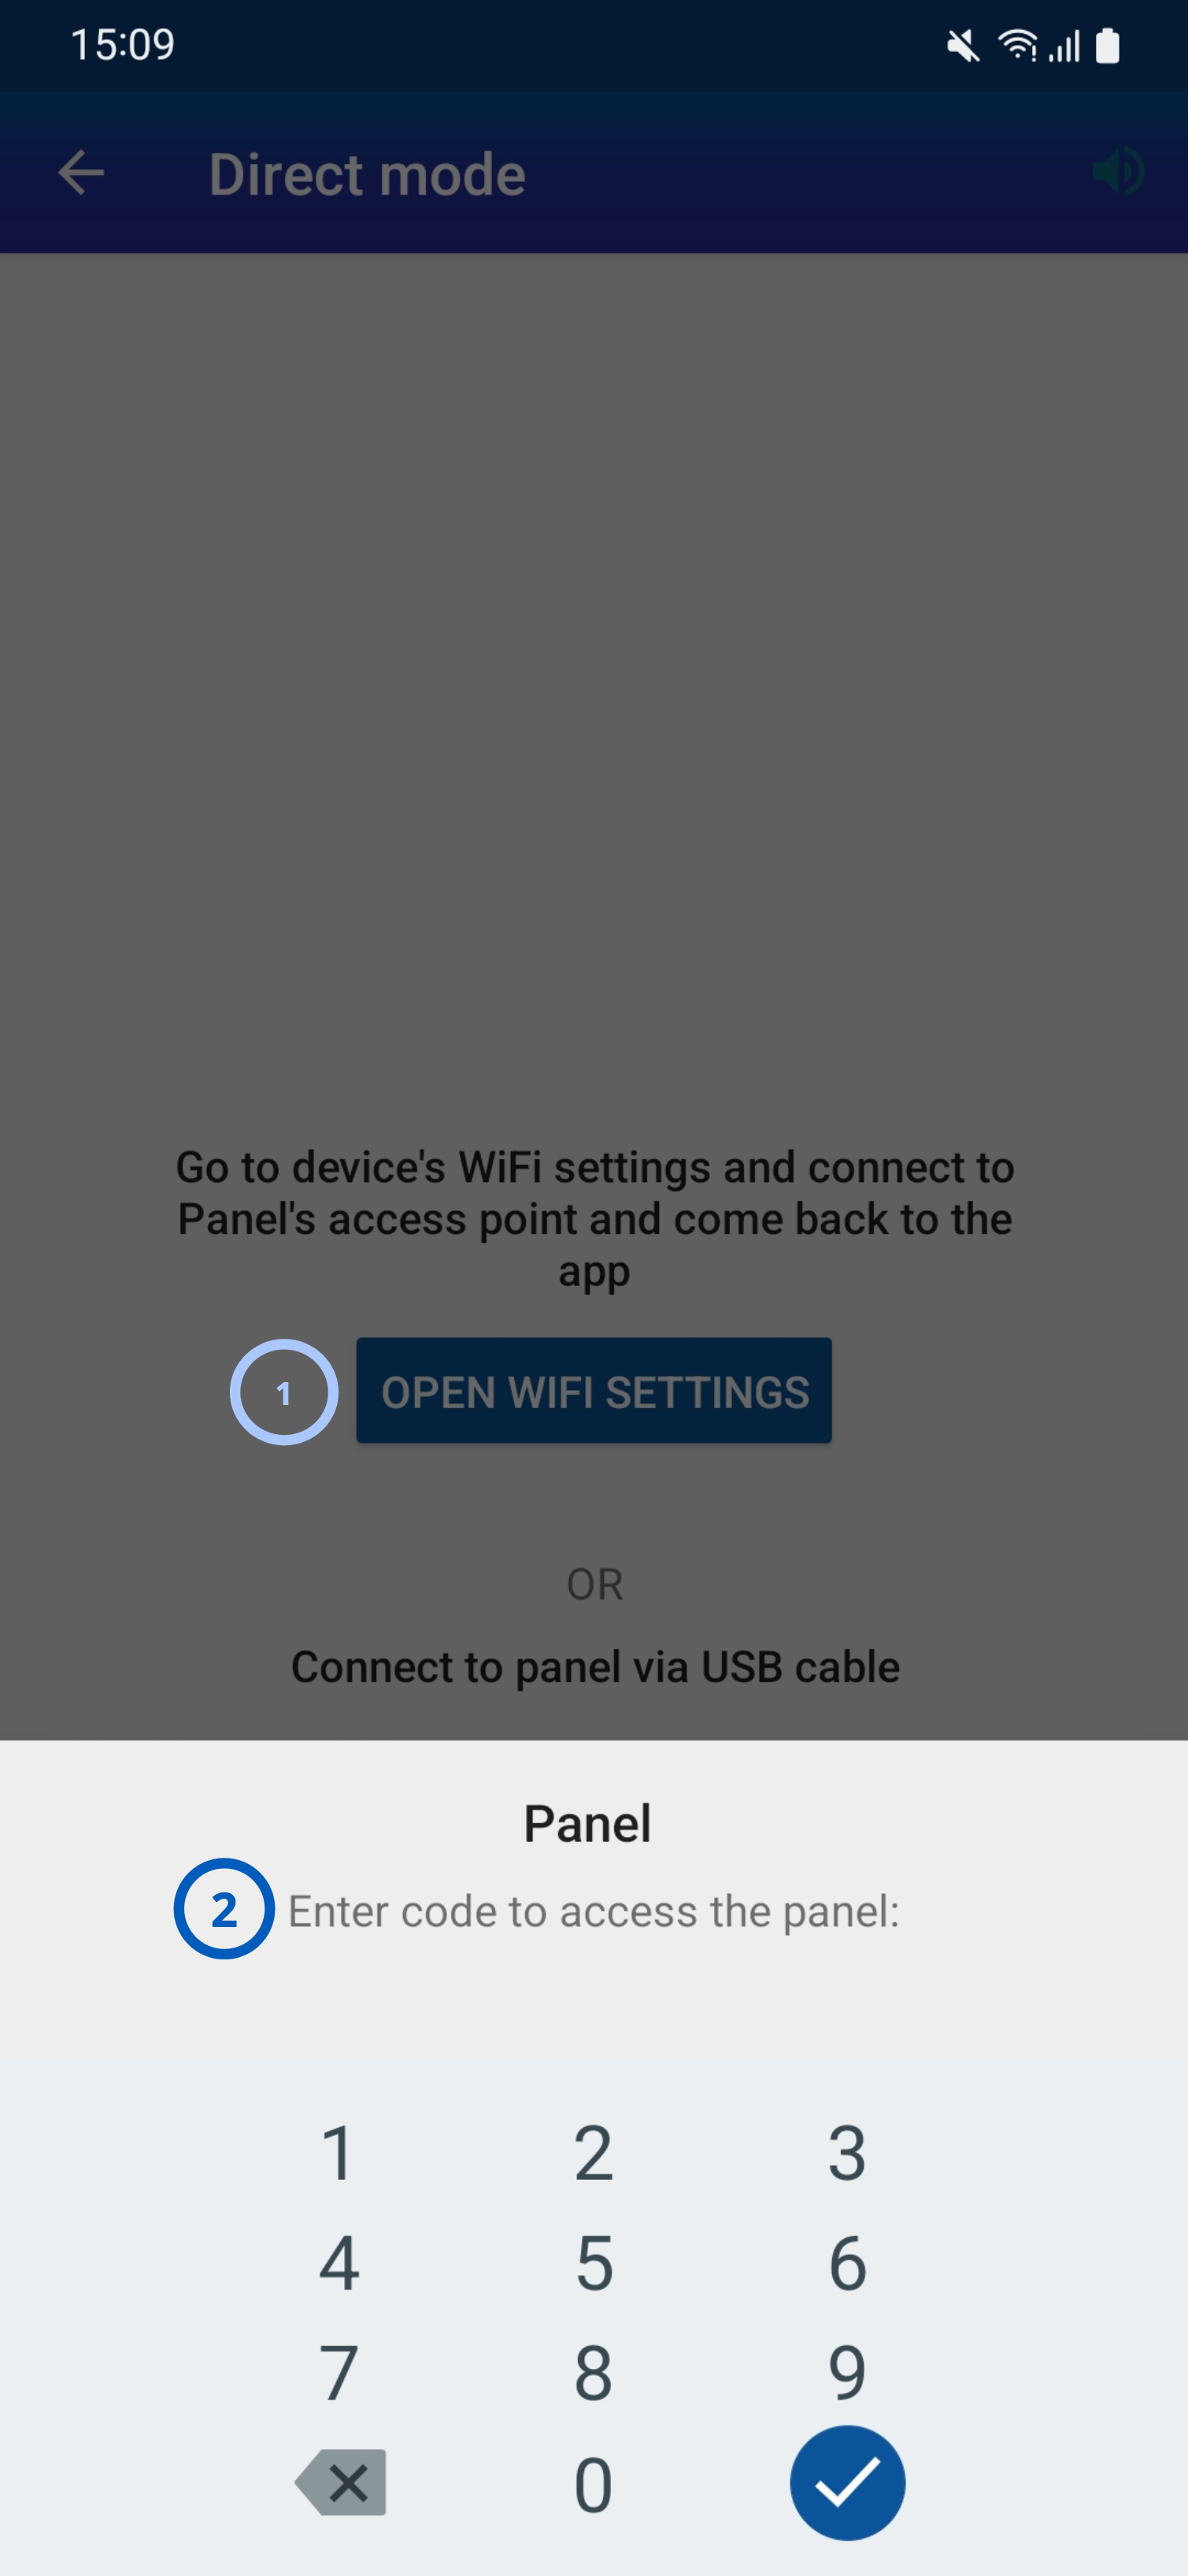
- Open Wi-Fi SettingsOpens your device's Wi-Fi settings so you can connect to the panel's access point.
- Access code and numeric keypadProvides a field and numeric keys for entering the panel access code after you connect to the panel.
Virtual keypad screen
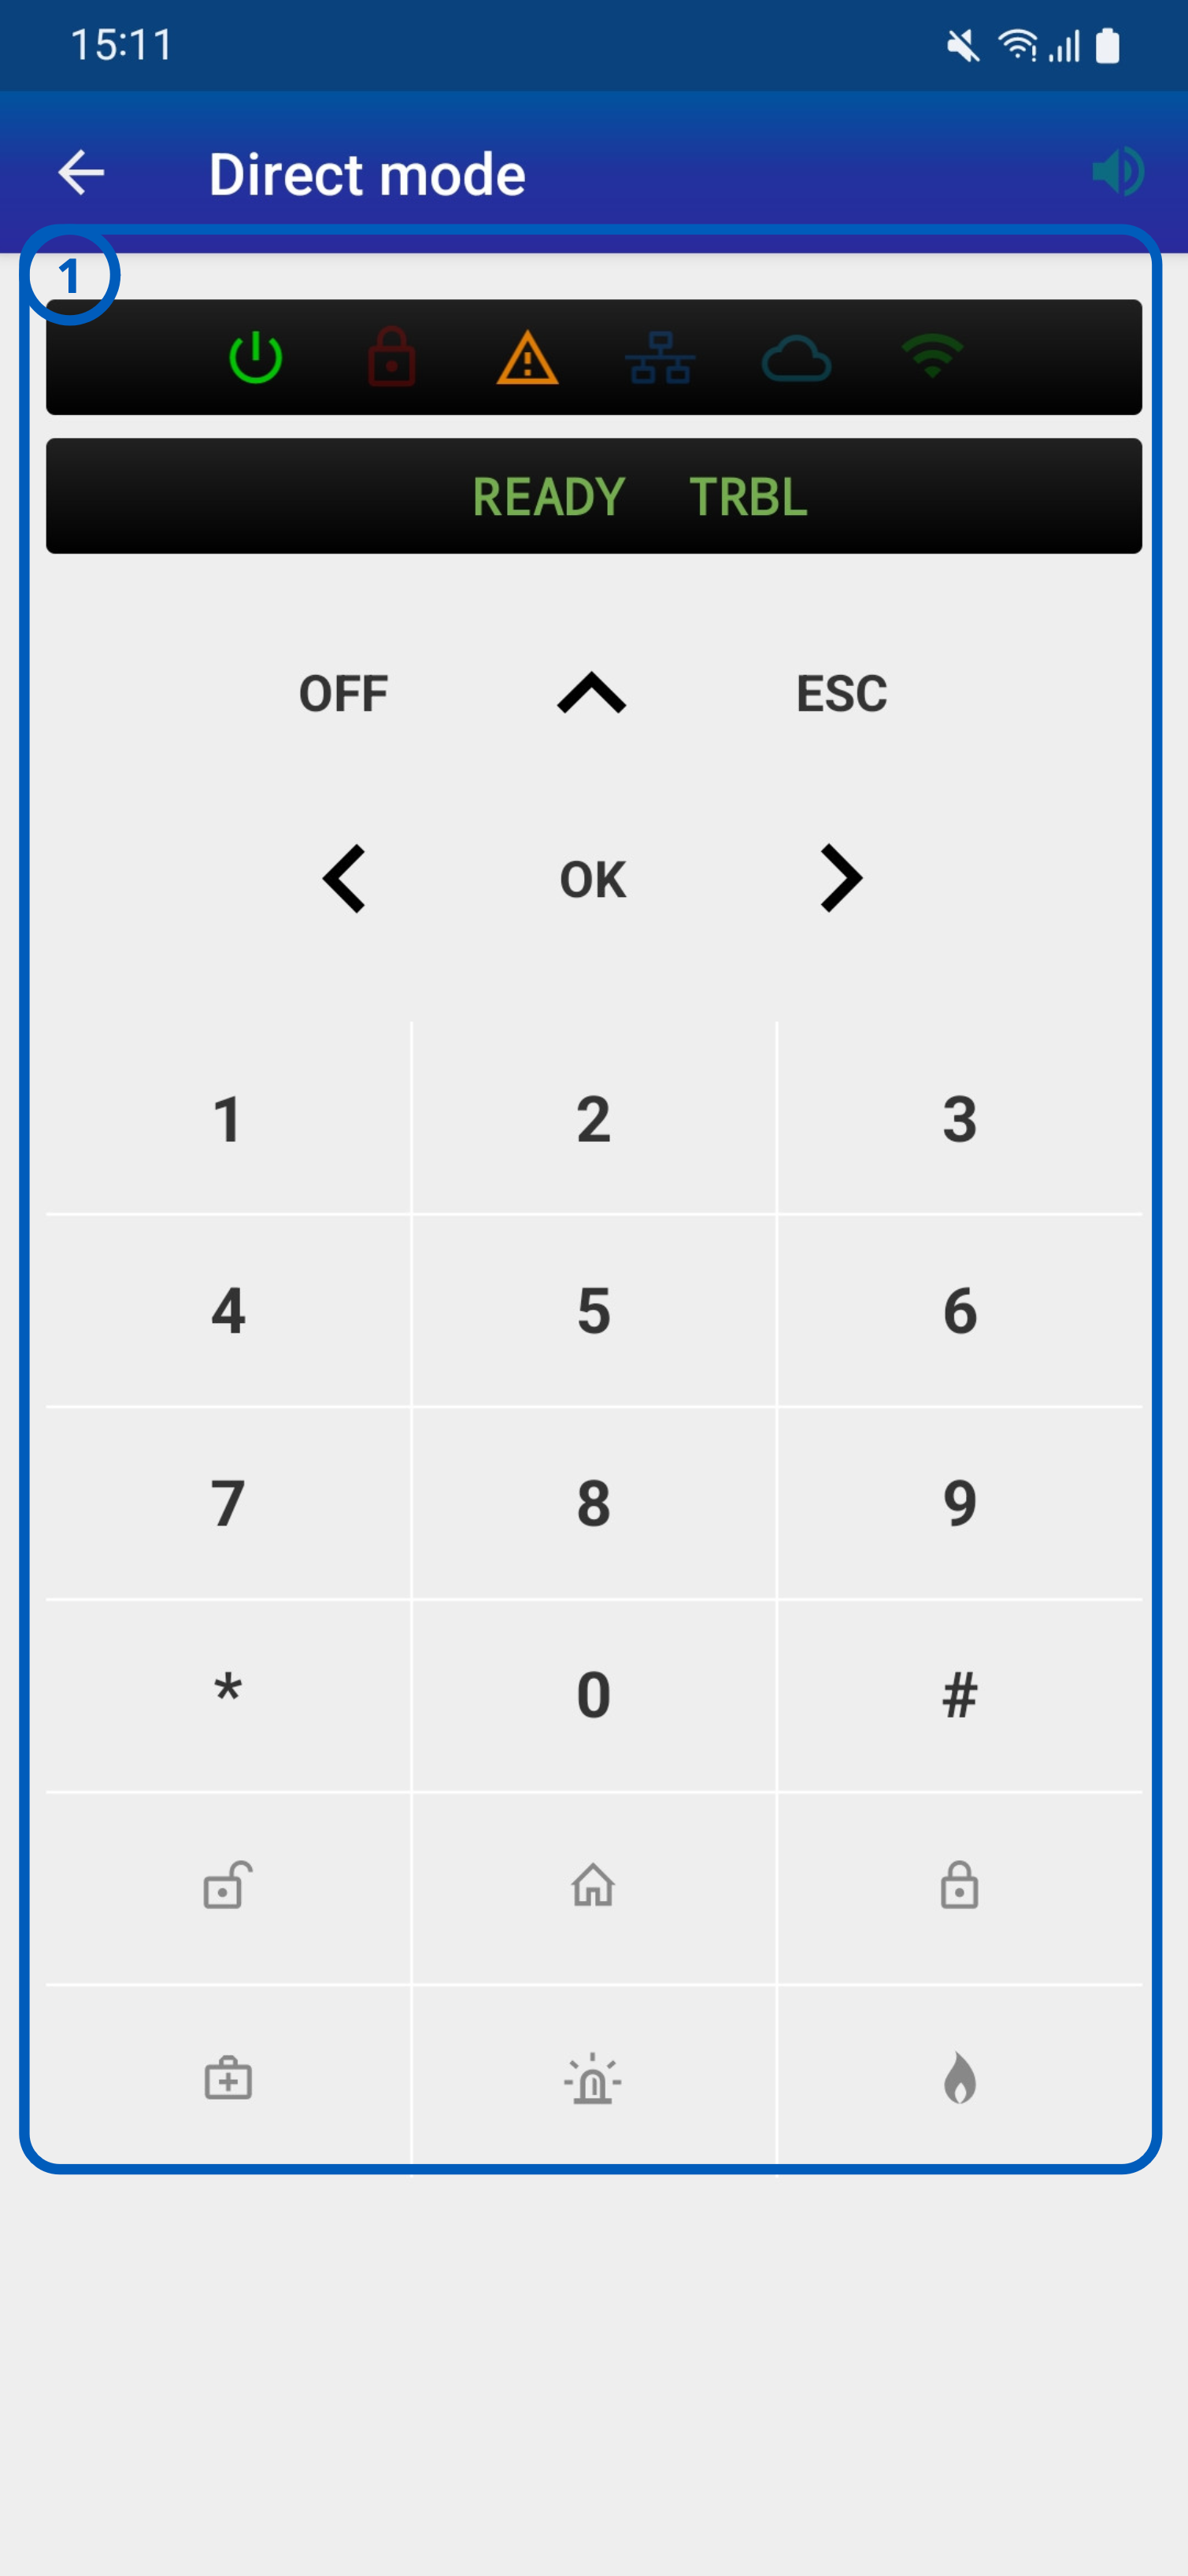
- Panel status and numeric keypadShows panel status indicators and system messages. Use the keypad to enter codes and navigate panel menus.
Common scenarios
Connect to a panel in Local mode
- Open the Visonic virtual keypad.
- Select Open Wi-Fi Settings.
- Connect your device to the panel access point.
- Enter the panel access code.
- Select Confirm.
USB connection
To use a supported USB connection instead, connect the mobile device to the panel before you enter the panel access code.
Configure the PowerManage connection to connect.tycomonitor.com
Broadband connection
- Set Central Station Reporting to
All *all. - Set 1st Method to
broadband first. - Set Receiver 1 IP to
52.59.171.55. - Set RCVR 1 DNS to
connect.tycomonitor.com.
Cellular connection
- Set GPRS Report to
On. - Set GPRS APN to the access point name (APN) supplied by the cellular provider.
- Set Network Roaming to
modem roam enable. - Set Cell Keep Alive to
On. - Set Central Station Reporting to
All *all. - Set Receiver 1 IP to
52.59.171.55. - Set RCVR 1 DNS to
connect.tycomonitor.com. - Set My SIM tel# to the phone number of the subscriber identity module (SIM).
Tips
tip
- Check the panel connection before entering codes or issuing commands.
- Keep your device connected to the panel access point while using Local mode.
- If a command does not respond, check whether the panel reports a fault or communication issue.
Troubleshooting
Cannot connect to the panel
Possible causes:
- The mobile device is not connected to the panel access point.
- The USB connection is disconnected.
- The panel is powered off.
What to try:
- Check that the panel is powered on.
- Check the Wi-Fi or USB connection.
- Reconnect to the panel access point.
- Connect to the panel again.
Panel does not appear on PowerManage after configuration
Possible causes:
- A communication setting is incorrect.
- The panel is not connected to the internet.
What to try:
- Check that the panel has an internet connection.
- Check the communication settings against the values in Configure the PowerManage connection.
- If the panel still does not appear, contact your administrator or service provider.
Installer code is rejected
Possible causes:
- The installer code was entered incorrectly.
- The code does not have sufficient privileges.
- Installer access is not enabled in ConnectAlarm.
What to try:
- Check that you selected the correct panel.
- Re-enter the code carefully.
- Check that the code has sufficient privileges.
- Check that installer access is enabled in ConnectAlarm.
- If the code is still rejected, contact your administrator or service provider.
Related pages
See also
Was this page helpful?