Groups
Overview
The Groups page lets installers assign a panel to an available group.
Use this page when you need to:
- Organize panels into operational groups.
- Move a panel from one group to another.
- Review the current group assignment.
- Verify which groups are available for assignment.
A panel can belong to only one group at a time. Assigning a panel to a new group automatically replaces the current group assignment.
Before you begin
Preconditions
- The panel must already exist in the system.
- At least one group must be configured.
- The mobile app must be connected to the server.
Important limitations
warning
- Only one group can be assigned to the panel.
- Central station links cannot be modified in the app. You must modify them in PowerManage.
Dependencies
- The group assigned to your panel can affect:
- Supervision periods
- Temperature and light statistics
- Z-Wave region automatic selection
- Upgrade over cellular for DSC panels
- Panel time synchronization
- Central station assignments and links
- Events displayed in the app
Page layout
The page displays a list of available groups and the current assignment state for the selected panel.
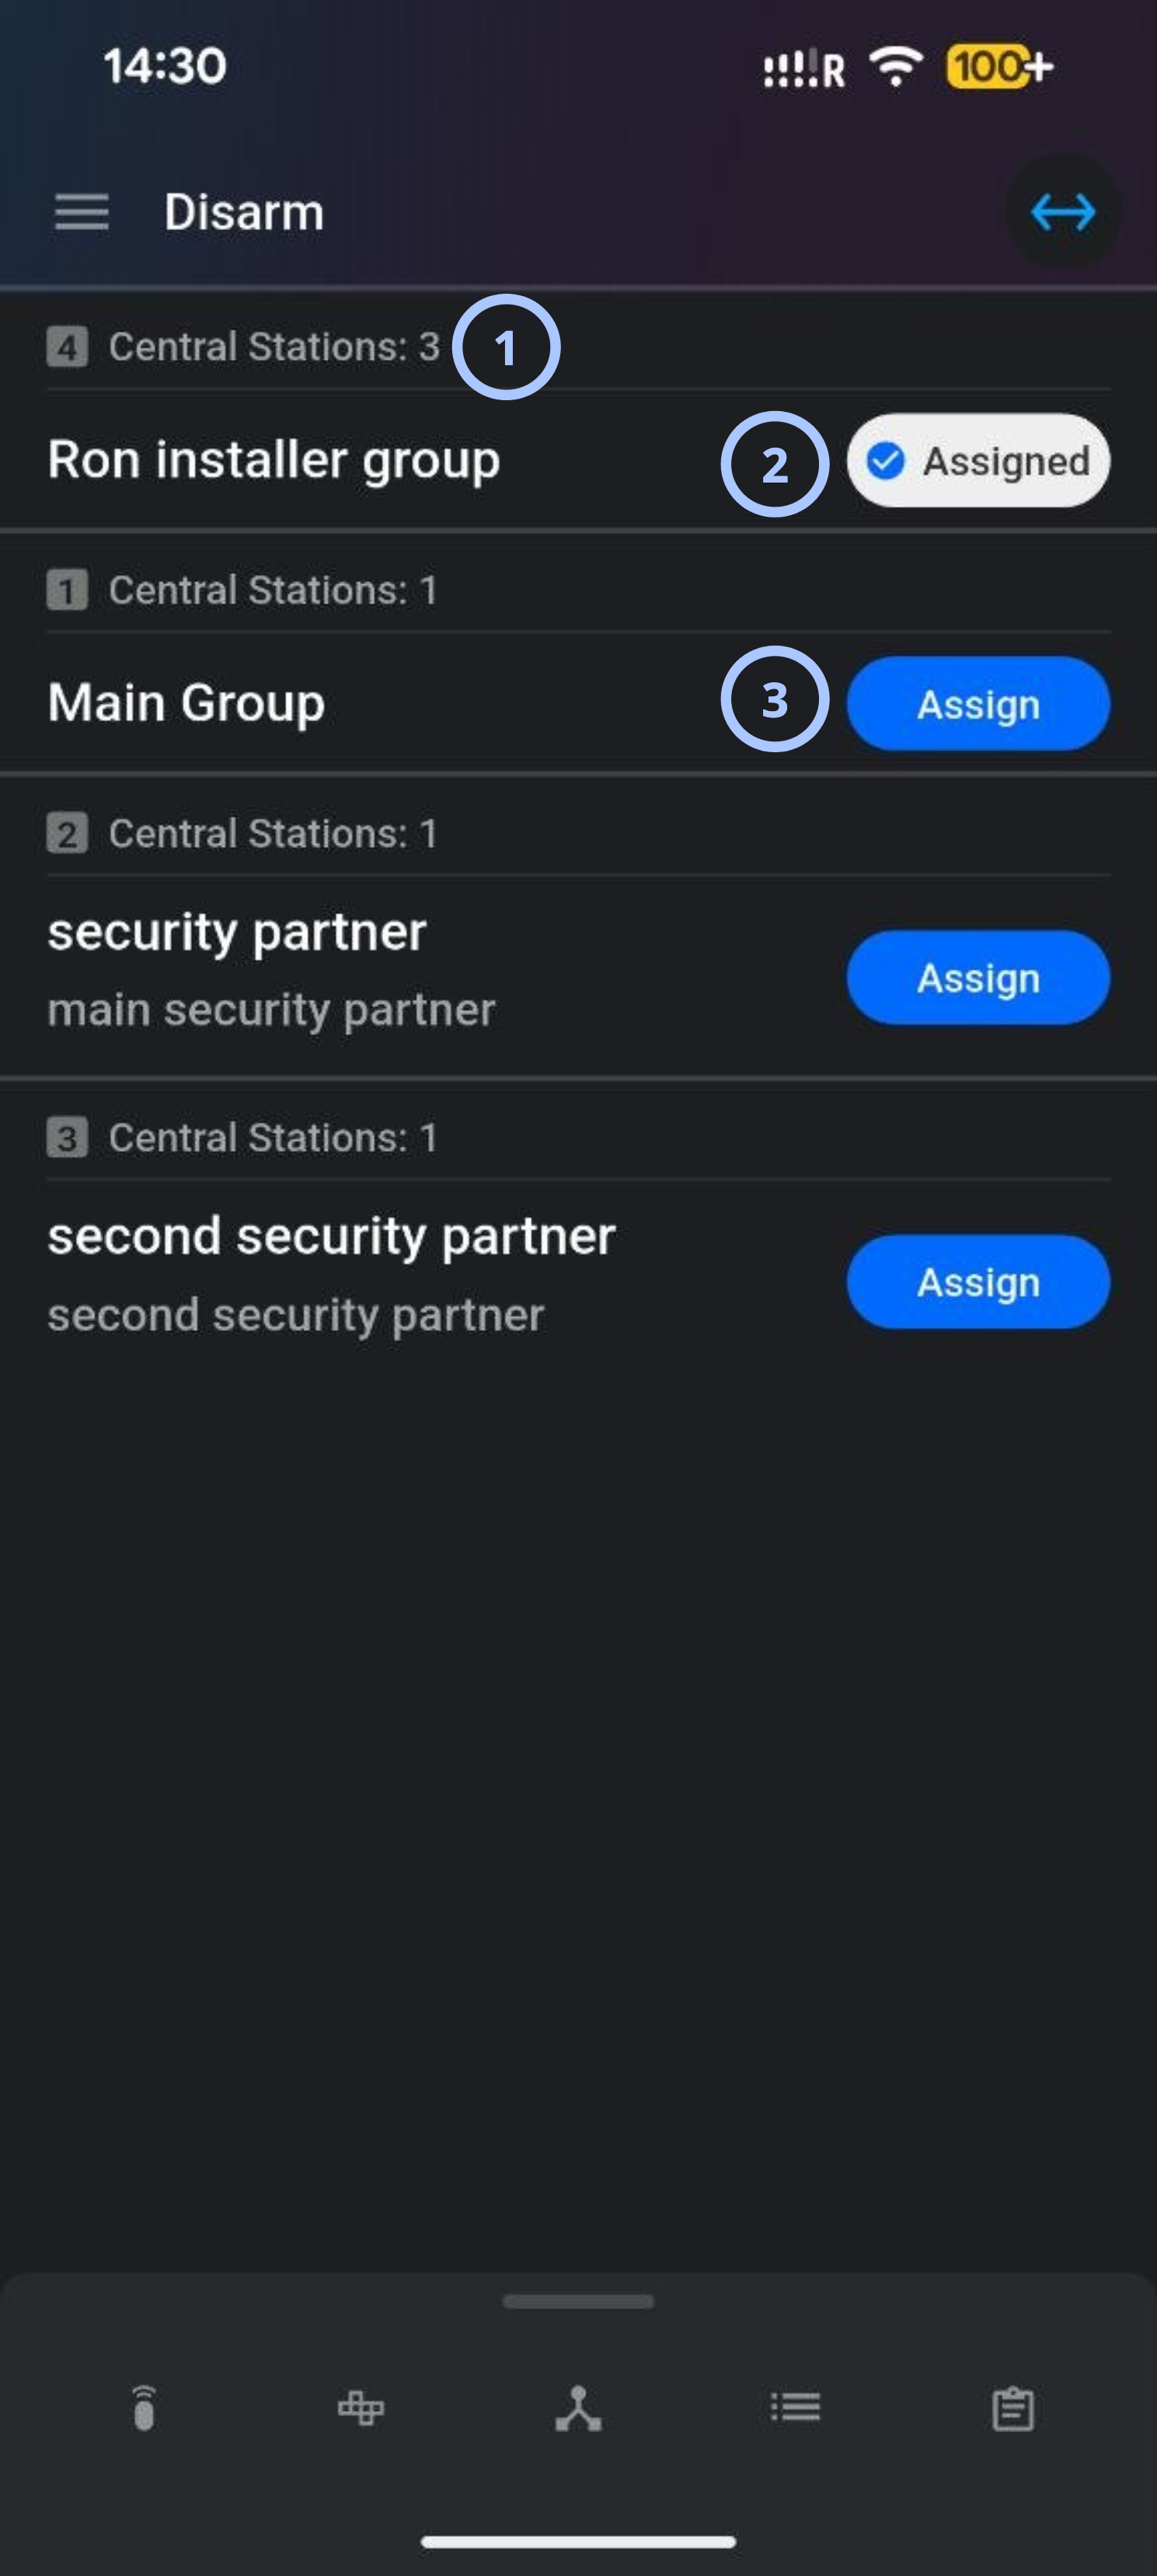
| Callout | UI element | Description | When to use |
|---|---|---|---|
| 1 | Group list | Displays all available groups that the selected panel can join, including the Group ID, group name, and number of central stations. | Use this to review available group assignments and the number of central stations assigned to each group. |
| 2 | Assign button | Assigns the selected panel to the selected group. | Use this to assign the panel to a group or change the current assignment. |
| 3 | Assigned indicator | Shows the group currently assigned to the panel. | Use this to verify the active group assignment. |
info
CS assignment enables event forwarding from PowerManage to the Central Station. A single group can have multiple Central Stations assigned, each handling different event types.
How to use this page
Assign a panel to a group
Goal:
- Assign a panel to a specific group.
Steps:
- Open the Groups page for the required panel.
- Review the available groups in the list.
- Locate the target group.
- Select Assign next to the required group.
- Wait for the assignment status to update.
Expected result:
- The selected group displays the Assigned indicator.
- The previous assignment, if any, is removed automatically.
warning
Assigning a panel to a new group replaces the current assignment immediately.
Verify the current group assignment
Goal:
- Confirm which group is currently assigned to the panel.
Steps:
- Open the Groups page.
- Review the group list.
- Locate the entry marked with the Assigned indicator.
Expected result:
- Only one group displays the Assigned state.
Change the assigned group
Goal:
- Move a panel from one group to another.
Steps:
- Open the Groups page.
- Find the new target group.
- Select Assign next to the new group.
- Confirm the status update.
Expected result:
- The new group becomes assigned.
- The previous group no longer shows the Assigned status.
Tips
tip
- Use group descriptions to identify the correct operational environment before assigning a panel.
- Verify the current assignment before changing groups in production environments.
- Review the central station count when troubleshooting communication routing.
Troubleshooting
Unable to assign a group
Possible causes
- Network connectivity issue.
What to do
- Confirm that the app is connected to the server.
- Reopen the page and try again.
Wrong group assigned
Possible causes
- Incorrect group selected.
- Similar group names.
What to do
- Review the Group ID and description carefully.
- Select Assign for the correct group.
- Confirm that the correct group now shows the Assigned indicator.
Related pages
See also
Was this page helpful?