Manage panel users
Overview
Use the  Users screen in ConnectAlarm to manage panel users for the selected panel. You can review user cards, apply filters, add a user, edit user details, and remove a user when removal is available.
Before you begin
- Sign in to ConnectAlarm.
- Open the required panel.
- Confirm that the app shows CONNECTED after you save user changes.
- Confirm that at least one panel user exists before you edit or remove a user.
User and filter data depend on the selected panel configuration. Saving changes requires communication between ConnectAlarm, the PowerManage server, and the panel.
Removing a user or changing a PIN can affect access to panel actions. Follow your site procedures before you save user changes.
Only Master users, and to a limited extent Dweller Master users, can manage panel users in ConnectAlarm. If the Users screen is empty or unavailable, your role might not have user management permissions.
User roles affect what you can do:
- Master: Full user management access.
- Dweller Master: Limited user management access.
- User and Guest: Can arm and disarm but cannot manage users.
- Duress: Can trigger a silent duress alarm when the duress code is used.
User data format and limits:
- User code must contain digits only (
0-9) and use the panel-configured length (4,6, or8digits). - User code must be unique. The panel rejects duplicate codes.
- User ID is the panel slot number. Each slot can store one user.
- Slot
1is reserved for the Master user, and some higher slots can be reserved for system roles. - Panel user capacity is limited. If all slots are full, remove a user before adding a new one.
Screen layout
The user workflow includes Users screen and filters and Add User and User Details.
Users screen and filters
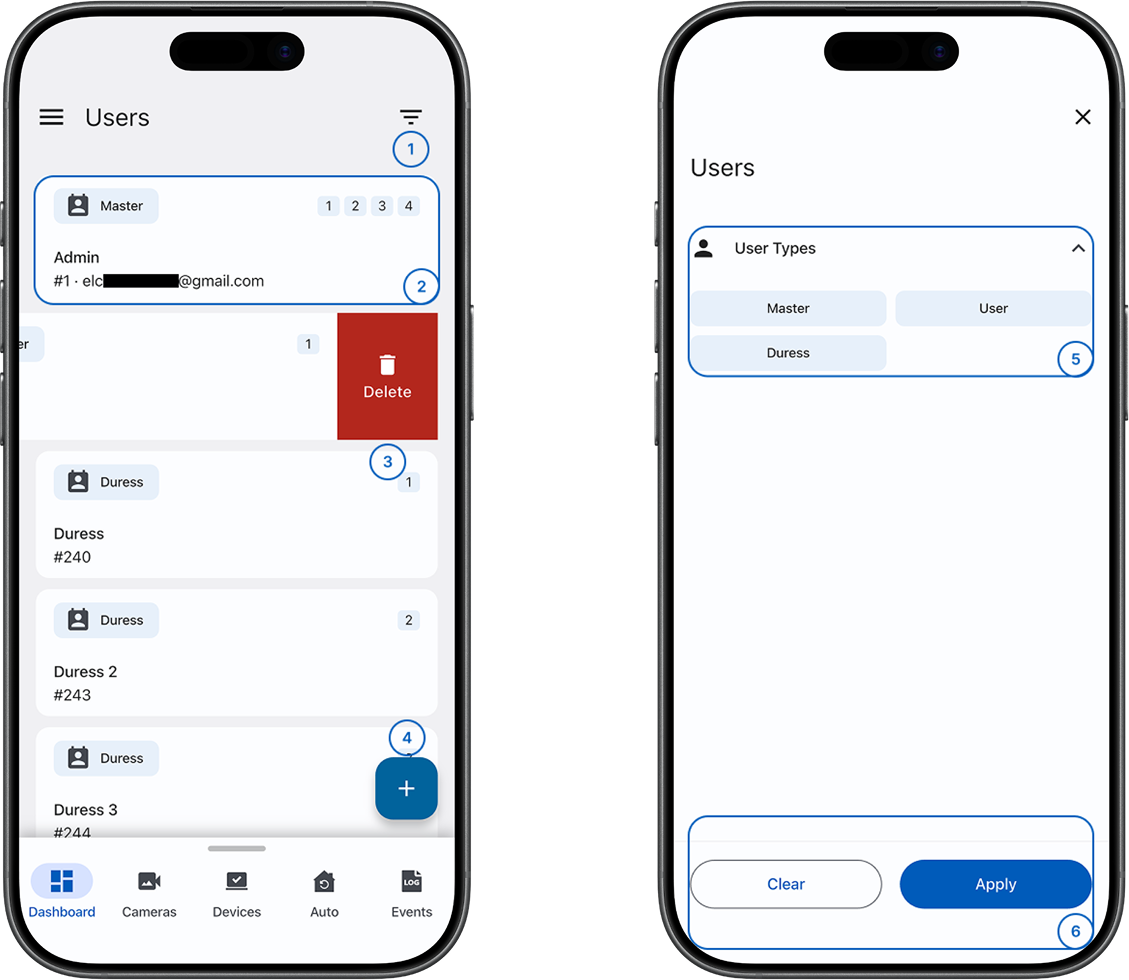
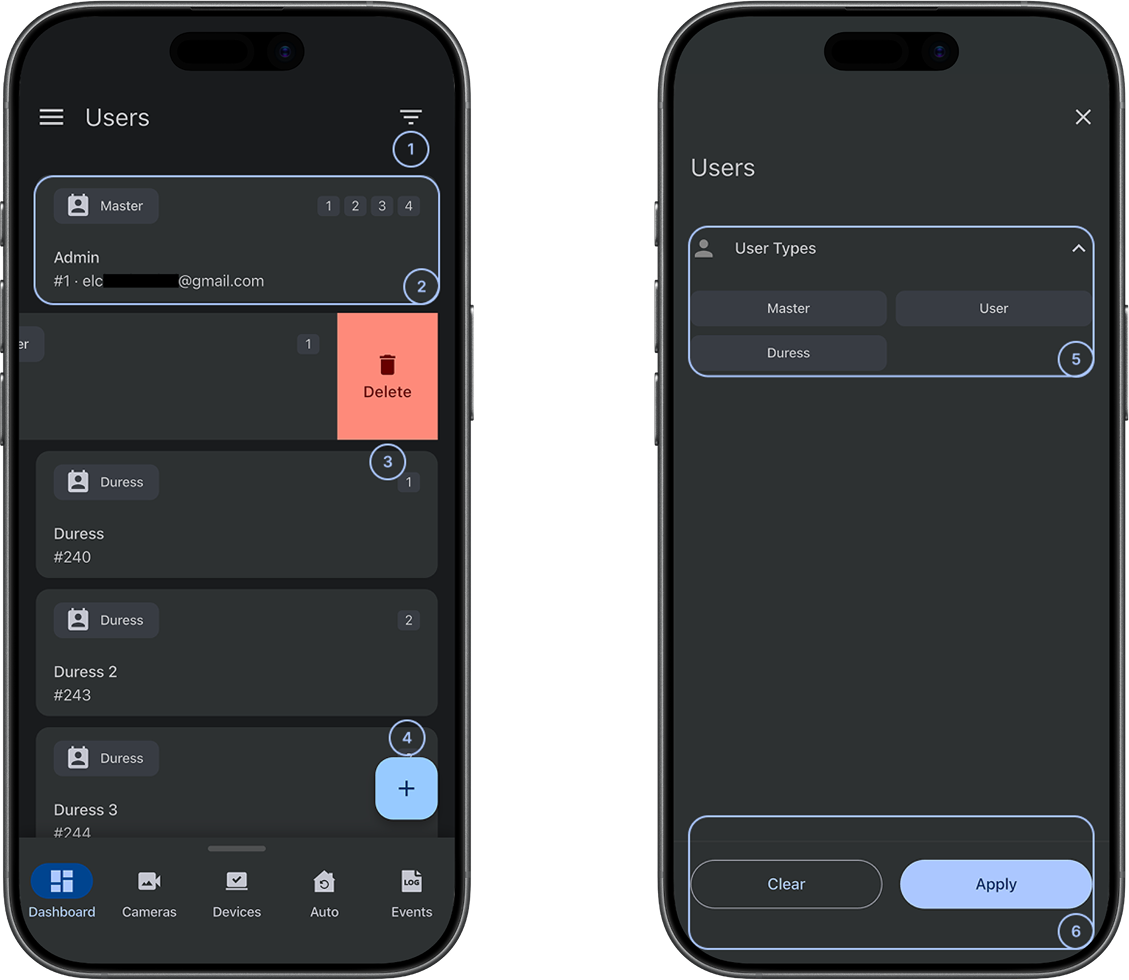
 Users filtersOpens the users filter screen and filters the user list.
 User cardShows user information, including Name, Role, Partitions, and the user number. If a customer account is assigned, the card also shows the email address.
 DeleteAppears when you swipe left on a user card and removes the selected user after confirmation.
 Add userOpens the Add user screen.
- FiltersShows the available user filters.
- Clear and ApplyClear removes the selected filters, and Apply applies the selected filters to the user list.
Add User
User info
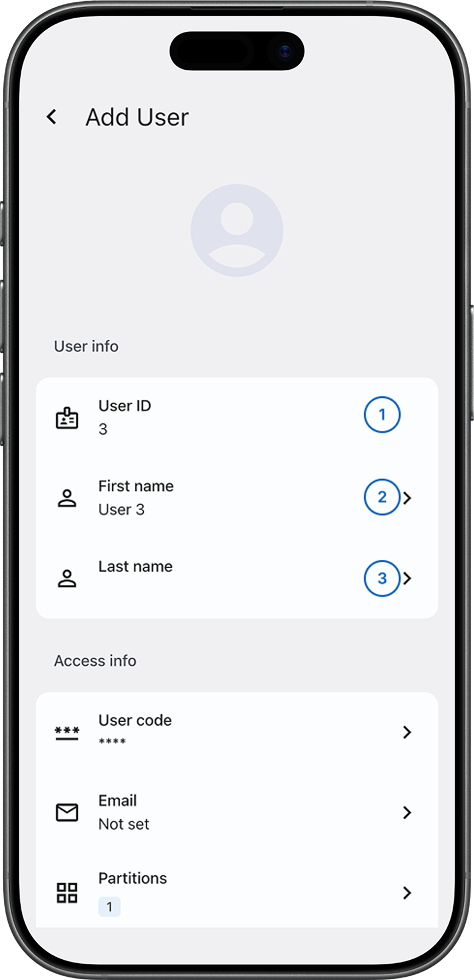
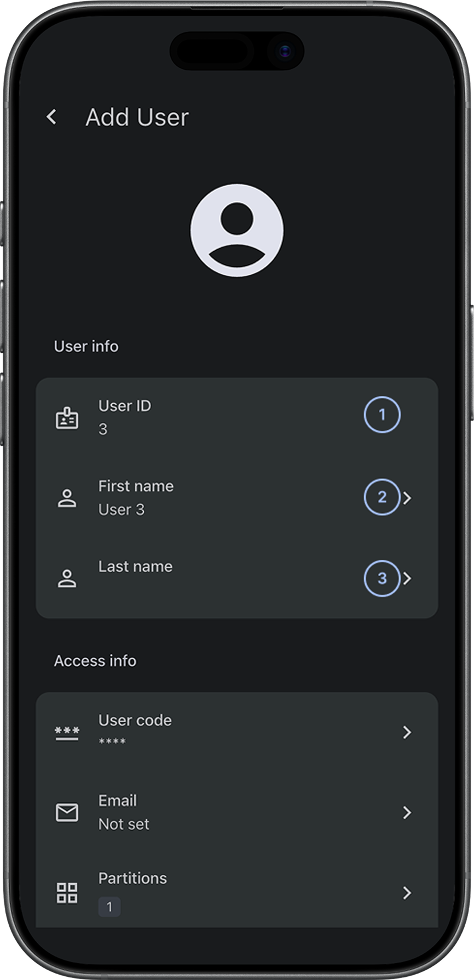
 User IDShows the panel user's slot number assigned by the panel. For example, slot 1 is always assigned to the Master user. This value is read-only and cannot be changed.
 First nameDefines the user's first name. Enter up to 50 alphanumeric characters. Only a Master user can set or change this field from ConnectAlarm.
 Last nameDefines the user's last name. This field is optional and can be left empty.
Access info
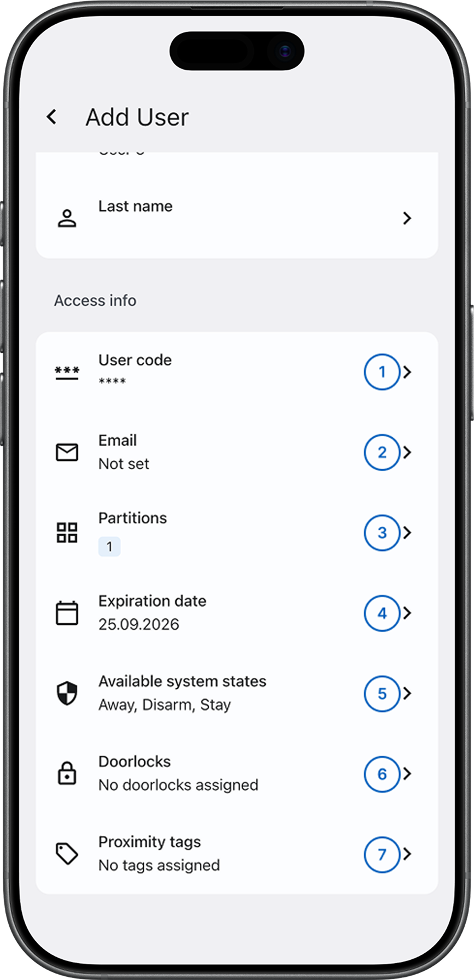
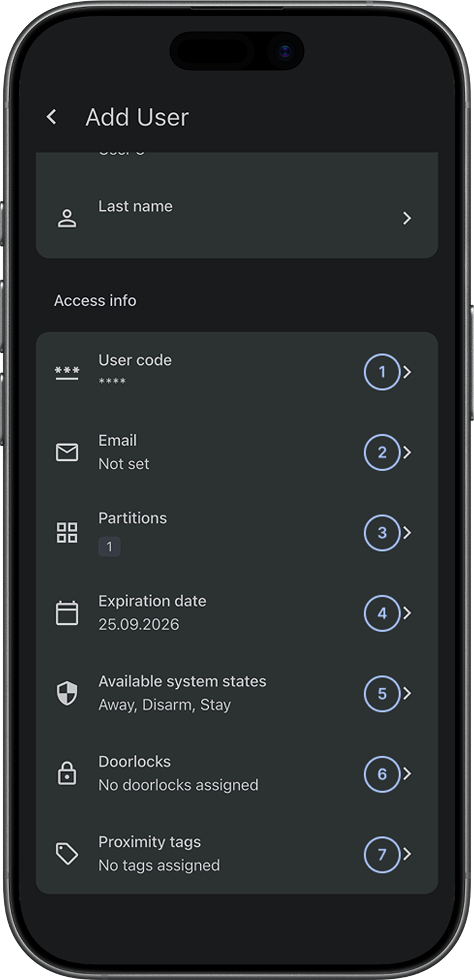
 User codeDefines the numeric PIN code used for arming, disarming, and authentication on the panel. The code length must match the panel configuration: 4 or 6 digits.
 EmailDefines the email address associated with the user's ConnectAlarm account. This field is optional and can be left empty.
 PartitionsDefines the panel partitions that the user can access and control. You can select multiple partitions. The maximum number depends on the panel model.
 Expiration dateDefines when the user's panel access expires. Select Unlimited for permanent access, or select a date for temporary access, such as guest access.
 Available system statesDefines the arming actions that the user can perform: Arm, Disarm, Night, and Stay. A Master user can configure these actions for each user and partition. The app shows and allows only actions that match the assigned configuration.
 DoorlocksDefines the door locks assigned to the user. This option is available when door lock devices are enrolled in the panel. The user can operate only assigned locks.
 Proximity tagsDefines the contactless authentication tokens associated with the user: a Security Prox Tag for keypad access and a Door Lock Prox Tag for door lock access. Each user can have one tag of each type.
User Details
To open User Details, select a user card on the Users screen.
User info
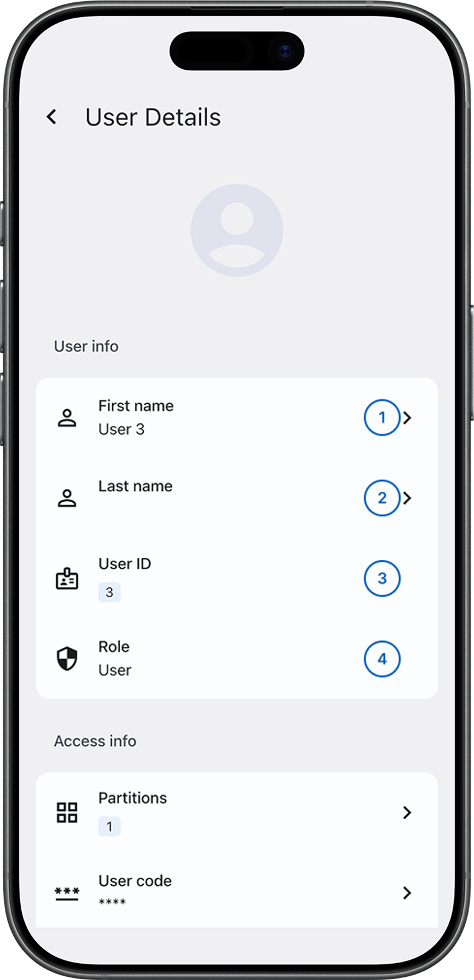
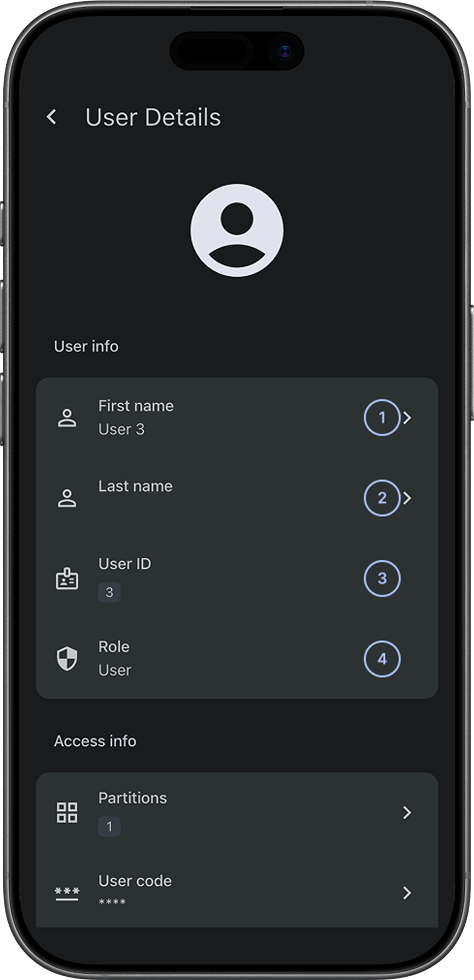
- User IDShows the panel user's slot number assigned by the panel. For example, slot 1 is always assigned to the Master user. This value is read-only and cannot be changed.
- First nameShows the user's first name. The value can contain up to 50 alphanumeric characters. Only a Master user can set or change this field from ConnectAlarm.
- Last nameShows the user's last name. This field is optional and can be left empty.
 RoleShows the user type assigned during creation: Master, User, or Guest. The role determines the user's permissions, including whether the user can add, edit, or delete other users.
Access info
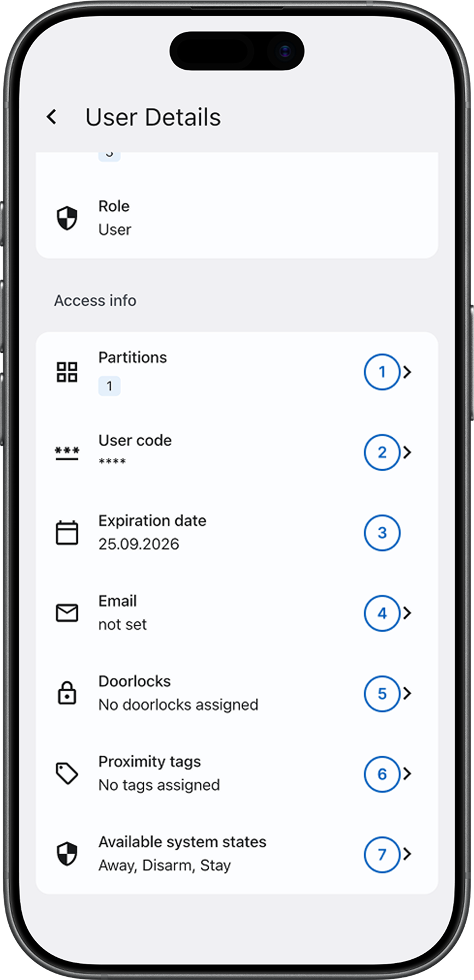
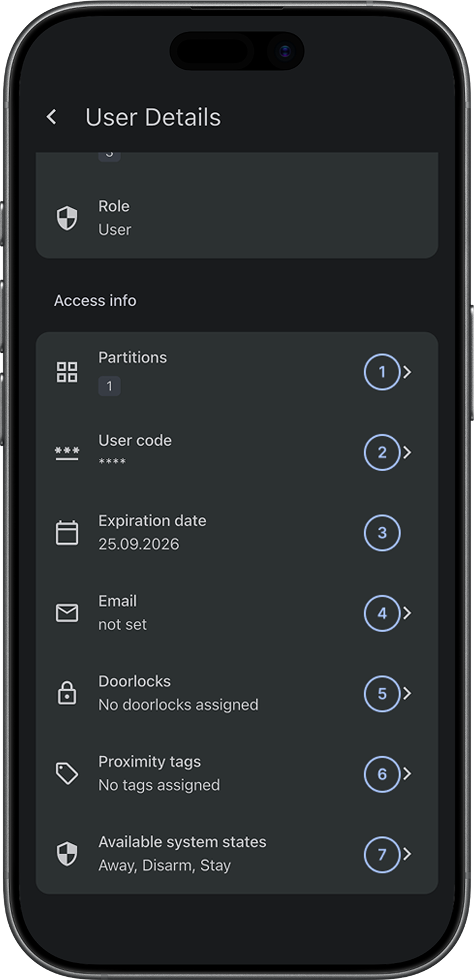
- PartitionsShows the panel partitions that the user can access and control. You can select multiple partitions. The maximum number depends on the panel model.
- User codeShows the numeric PIN code used for arming, disarming, and authentication on the panel. The code length must match the panel configuration: 4 or 6 digits.
- Expiration dateShows when the user's panel access expires. Unlimited provides permanent access, while a specific date provides temporary access. This value is read-only after user creation.
- EmailShows the email address associated with the user's ConnectAlarm account. This field is optional and can be left empty.
- DoorlocksShows the door locks assigned to the user. This option is available when door lock devices are enrolled in the panel. The user can operate only assigned locks.
- Proximity tagsShows the contactless authentication tokens associated with the user: a Security Prox Tag for keypad access and a Door Lock Prox Tag for door lock access. Each user can have one tag of each type.
- Available system statesShows the arming actions that the user can perform: Arm, Disarm, Night, and Stay. A Master user can configure these actions for each user and partition. The app shows and allows only actions that match the assigned configuration.
Common scenarios
Open the Users screen
- Open ConnectAlarm.
- Sign in to your account.
- Open the required panel.
- Select
 Menu.
Menu. - Select Users.
The Users screen shows the panel users available for the selected panel.
Add a panel user
- Go to Users.
- Select Add user.
- In Access info, enter User code using the panel-configured length.
- In User info, review the read-only User ID.
- Enter First name.
- Enter Last name, when required.
- Enter Email, when required.
- Select Partitions.
- Set Expiration date to Unlimited or select a specific date.
- Configure Available system states.
- Assign Doorlocks, when available.
- Assign Proximity tags, when required.
Review user details
- Go to Users.
- Select the required user card.
- In User info, review User ID, First name, Last name, and Role.
- In Access info, review the user's partitions, user code, expiration date, email, door locks, proximity tags, and available system states.
Edit a panel user
- Go to Users.
- Select the user card that you want to edit.
- In User info, update First name or Last name, when required.
- Review the read-only User ID.
- Review Role.
- In Access info, update the available access settings.
- Review the read-only Expiration date.
Filter panel users
- Go to Users.
- Select Users filters.
- Select the filters that you want to apply.
- Select Apply.
- Review the filtered user list.
Clear user filters
- Go to Users.
- Select Users filters.
- Select Clear.
- Select Apply.
The Users screen shows the user list without the cleared filters.
Remove a panel user
- Go to Users.
- Find the required user card.
- Swipe left on the user card.
- Select Delete.
- Confirm the removal.
Confirm the user's name and User ID before you select Delete.
Tips
- Use clear names so you can identify the correct user card quickly.
- Review the user number before you edit or remove a user.
- Use filters when the user list is long.
- Review Role and Partitions after each change to confirm access is correct.
- Share and store user codes according to your site security policy.
Troubleshooting
Saving a new user fails
Possible causes:
- A required field is missing.
- User code does not match the panel requirements or duplicates an existing code.
- No user slot is available.
- The app is disconnected from the panel.
What to try:
- Review User info and Access info.
- Complete all required fields.
- Confirm that User code contains only digits and uses the panel-configured length.
- Enter a unique User code.
- Confirm that at least one user slot is available.
- Confirm that the app shows CONNECTED.
- If adding still fails, contact your administrator or installer.
A user field cannot be changed
Possible causes:
- User ID is read-only.
- Expiration date is read-only after user creation.
- Only a Master user can set or change First name from ConnectAlarm.
- Your role does not allow the change.
What to try:
- Confirm which field you are trying to change.
- Review the field behavior in Add User or User Details.
- Ask a Master user to make changes that require Master permissions.
- Contact your administrator or installer if an editable field remains unavailable.
A door lock or proximity tag is not available
Possible causes:
- No supported door lock is enrolled in the panel.
- The door lock is not assigned to the user.
- The required proximity tag is not associated with the user.
What to try:
- Confirm that the required door lock is enrolled in the panel.
- Open User Details and review Doorlocks.
- Review Proximity tags.
- Save any required changes.
- If the device or tag remains unavailable, contact your administrator or installer.
The user cannot perform an expected arming action
Possible causes:
- The user does not have access to the required partition.
- The action is not included in the user's Available system states configuration.
What to try:
- Open User Details.
- Review Partitions.
- Review Available system states.
- Ask a Master user to update the user's assigned configuration when required.
Delete does not appear
Possible causes:
- The user card was not swiped left.
- The selected user cannot be removed.
- Your role does not allow user removal.
What to try:
- Swipe left on the user card again.
- Try another user card to confirm whether deletion is available.
- Ask a Master user to confirm your user-management permissions.
- If Delete remains unavailable, contact your administrator or installer.
A user was removed by mistake
What to try:
- Stop making additional user changes.
- Recreate the removed user if the panel allows it.
- Restore the required User info and Access info settings.
- Contact your administrator or installer if the user cannot be restored.