View connected cameras
Overview
Use the  Cameras screen in ConnectAlarm to request and review video from connected cameras. Depending on your system configuration, the screen can include PIR, RTSP, and ONVIF cameras.
You can:
- Request video from all available cameras.
- Open a camera and request a new video on demand (VOD).
- Review the selected camera's video preview, information, and request history.
- Share a frame, all frames, or the full video when the corresponding option is available.
- Open Preview mode for RTSP or ONVIF cameras.
- Choose a 4-camera or 6-camera grid and change the camera order in Preview mode.
Before you begin
- Sign in to ConnectAlarm.
- Open the required panel.
- Confirm that the app shows CONNECTED before you request new camera media.
- Confirm that at least one compatible camera is configured.
- Confirm that the mobile device has network connectivity.
Screen layout
The camera workflow includes the Cameras list, Camera media detail, and Preview mode for RTSP and ONVIF cameras.
Cameras list
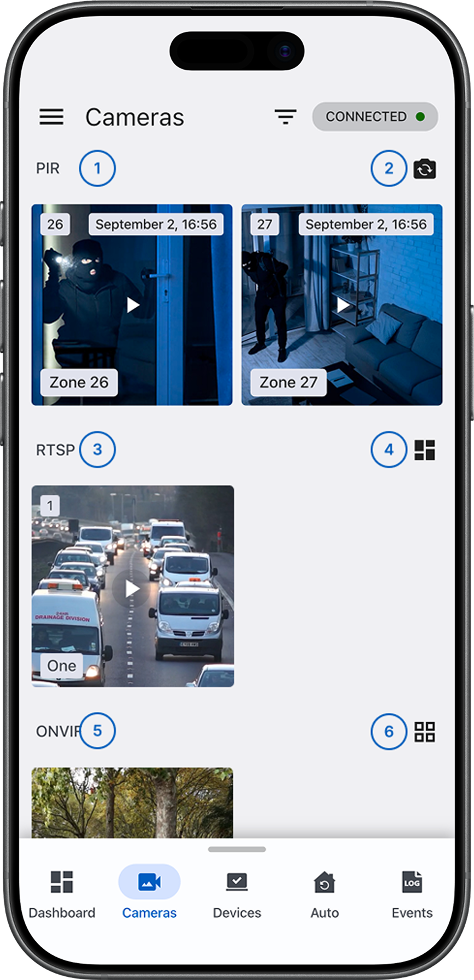
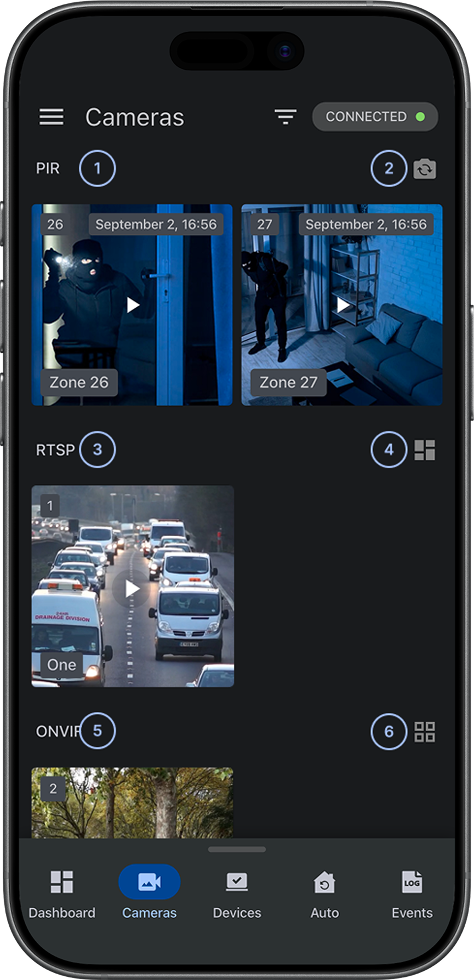
- PIR sectionShows available PIR camera devices and their preview tiles.
 Request all camerasStarts a media request for all available cameras.
- RTSP sectionShows available RTSP camera devices and their preview tiles.
 Preview modeOpens the Preview mode screen for RTSP cameras.
- ONVIF sectionShows available ONVIF camera devices and their preview tiles.
 Preview modeOpens the Preview mode screen for ONVIF cameras.
Available camera sections vary by system configuration.
Camera media detail
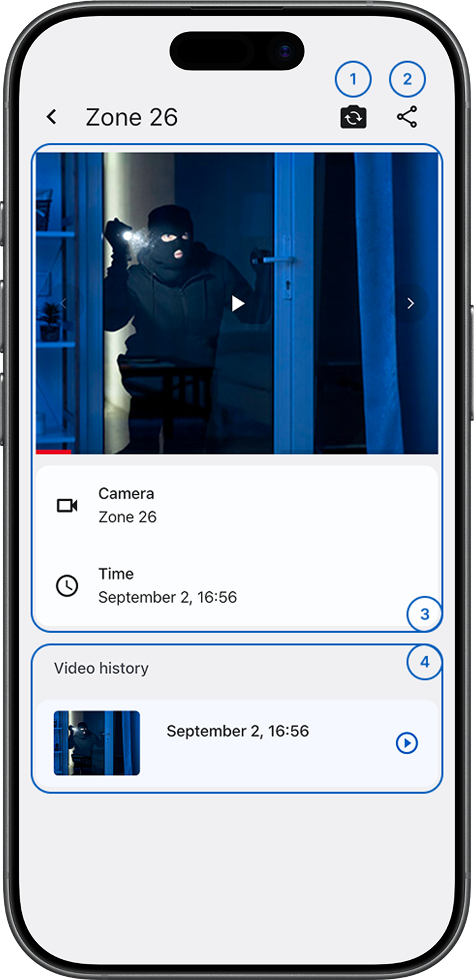
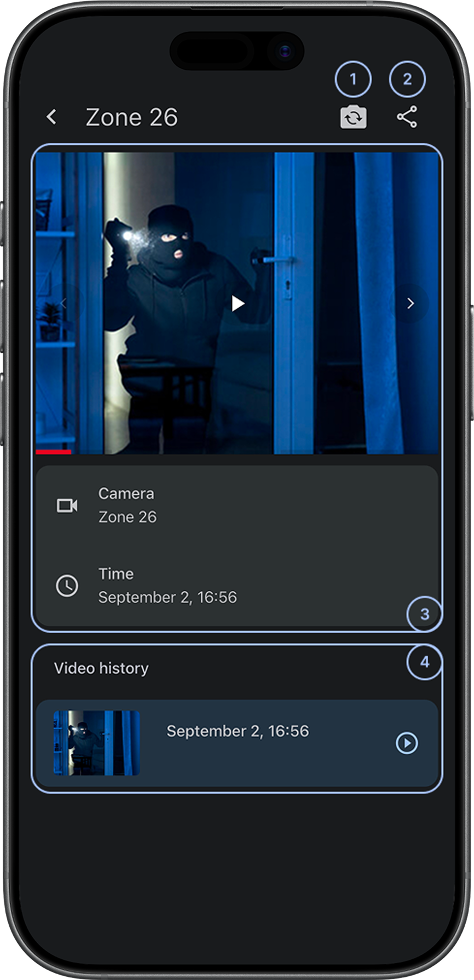
- Request new videoRequests a new VOD from the selected camera.
 ShareProvides available sharing options, such as Share frame, Share All Frames, and Share full video.
- Video preview and informationShows the selected media entry with a timestamp, placeholder or thumbnail, and a play control when available.
- Video historyShows videos previously requested from the selected camera.
RTSP and ONVIF preview mode
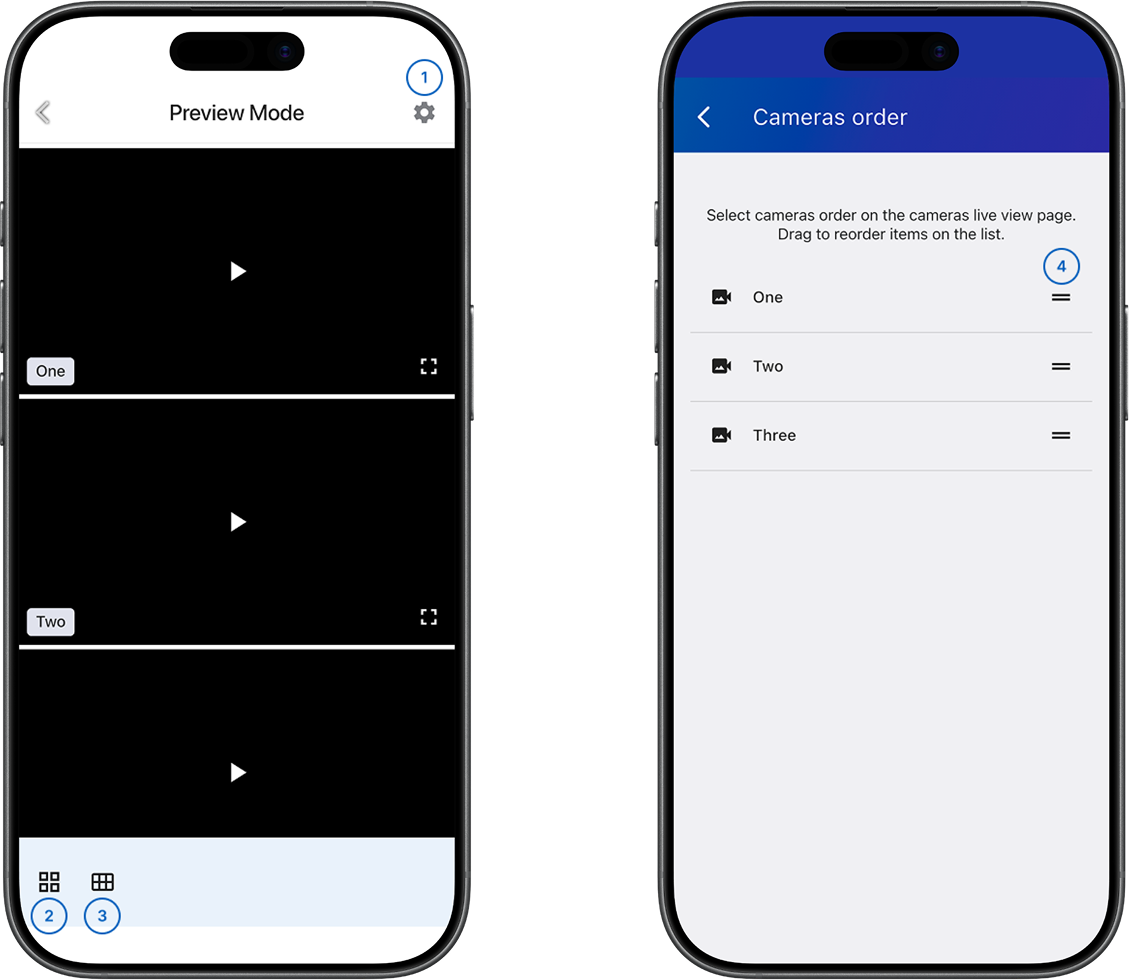
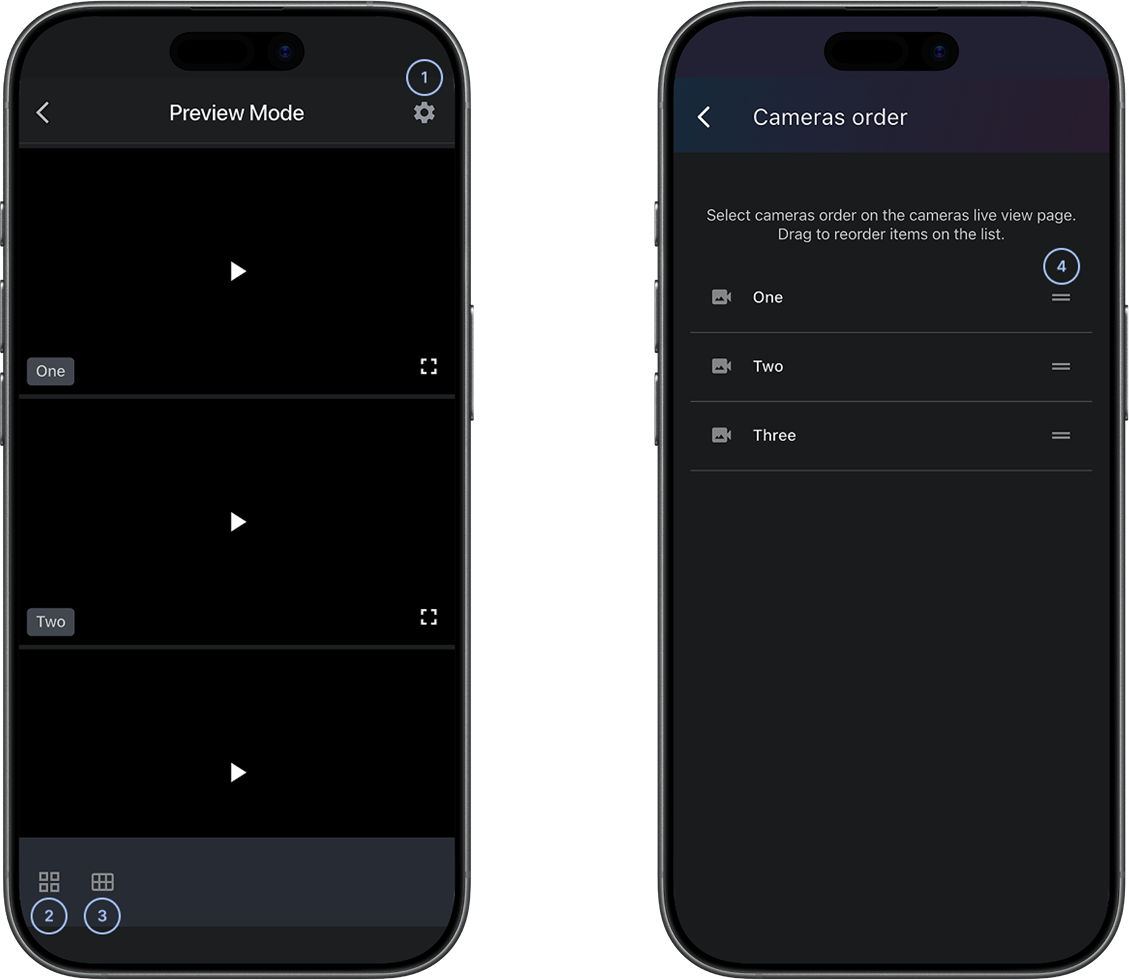
 Cameras orderOpens the Cameras order screen, where you can change the camera order in Preview mode.
- 4-camera gridTurns on the 4-camera grid in landscape orientation.
 6-camera gridTurns on the 6-camera grid in landscape orientation.
 Camera positionSelect and hold the drag handle to move a camera up or down. This changes the camera order in Preview mode.
Common scenarios
Open the Cameras screen
- Open ConnectAlarm.
- Sign in to your account.
- Open the required panel.
- Select Cameras in the bottom navigation bar.
The Cameras screen shows the camera sections available for the selected panel.
Request video from all cameras
- Go to Cameras.
- Confirm that the app shows CONNECTED.
- Select Request all cameras.
- Wait for the camera preview tiles to update.
The app starts a media request for all available cameras. Some cameras can take longer than others to return media.
Request and review video from one camera
- Go to Cameras.
- Select the required camera preview tile.
- Select Request new video.
- Wait for the request to complete.
- Review Video preview and information.
- Review Video history for previously requested videos.
The new video appears when the request completes and media is available.
Share camera media
- Go to Cameras.
- Open the required camera.
- Select the media that you want to share.
- Select Share.
- Select an available option:
- Share frame
- Share All Frames
- Share full video
- Complete the mobile operating system's sharing flow.
The available options depend on the selected media and device sharing capabilities.
Follow your site's privacy and security policies when you share camera media.
Open Preview mode and change the grid
- Go to Cameras.
- In the RTSP or ONVIF section, select Preview mode.
- Select one of the following grid controls:
- 4-camera grid
- 6-camera grid
Preview mode shows the selected camera grid in landscape orientation.
Change the camera order in Preview mode
- Open Preview mode for RTSP or ONVIF cameras.
- Select Cameras order.
- Select and hold the Camera position drag handle.
- Move the camera up or down.
- Repeat the previous steps for any other cameras that you want to move.
The updated order is used in Preview mode.
Tips
- Check the connection status before you request camera media.
- Use Request all cameras for a broad review. Use Request new video when you need updated media from one camera.
- If a video request is in progress, wait for the previous request to finish before you send another request.
- Use the 4-camera grid when you need larger previews. Use the 6-camera grid when you need to view more cameras at the same time.
Troubleshooting
A camera tile shows no video
Possible causes:
- No media has been requested from the camera.
- The video request is still processing.
- Communication with the panel or PowerManage server is delayed.
What to try:
- Wait for the request to complete.
- Confirm that the app shows CONNECTED.
- If the request fails or times out, request the video again.
- If the video remains unavailable, contact your administrator or installer.
Sharing is not available or does not work
Possible causes:
- The selected media is not available.
- The selected media does not support the required sharing option.
- The operating system blocked the sharing action.
What to try:
- Confirm that the media has loaded and is selected.
- Reopen the media item and select Share again.
- Check the mobile device's sharing permissions and available apps.
The expected camera is not listed
Possible causes:
- The camera is not configured for the selected panel.
What to try:
- Confirm the camera configuration on the Devices screen.
- Confirm that you opened the correct panel.
- If the camera remains missing, contact your administrator or installer.
Preview mode does not show the expected camera order
What to try:
- Open Preview mode for the required RTSP or ONVIF section.
- Select Cameras order.
- Review the camera list.
- Use the Camera position drag handles to move the cameras into the required order.
- Return to Preview mode and review the grid.