Manage panel date and time
Overview
Use the  Date and time screen in ConnectAlarm to adjust the panel's current date, time, and time zone settings. This is useful when the panel clock is inaccurate or when you need to update the time zone due to a location change or daylight saving time.
The date and time screen appears in the side menu only if the Panel time synchronization option is disabled in the panel's group settings in PowerManage. For PowerSeries Neo 5 panels, go to Panel settings in the side menu to access the date and time settings. This screen is visible only to master users.
DSC panels support a smaller number of time zones compared to IQ panels.
Before you begin
- Sign in to ConnectAlarm.
- Open the required panel.
- Confirm that you are the master user for the panel.
- Verify that the Panel time synchronization option is disabled in the panel's group settings in PowerManage.
- Confirm that the security panel is connected to PowerManage before you save date and time changes.
Screen layout
The date and time workflow includes the Date and time screen and separate screens for date, time, and time zone selection.
Date and time screen
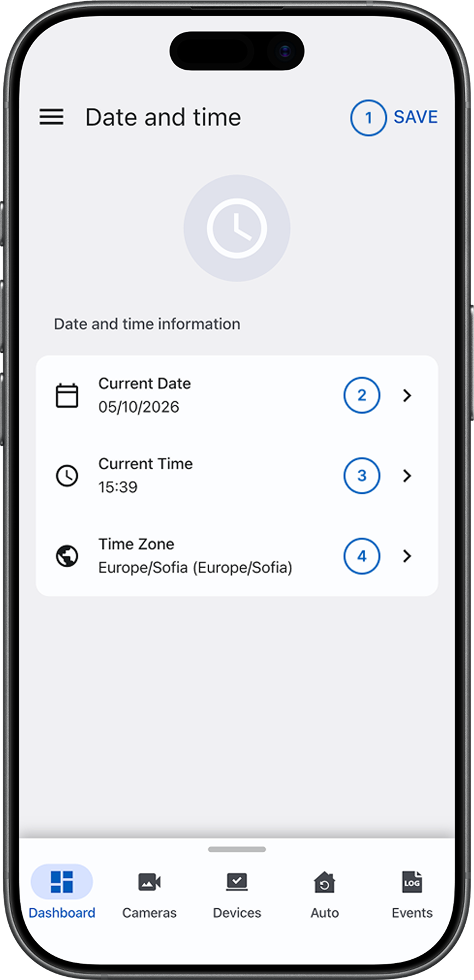
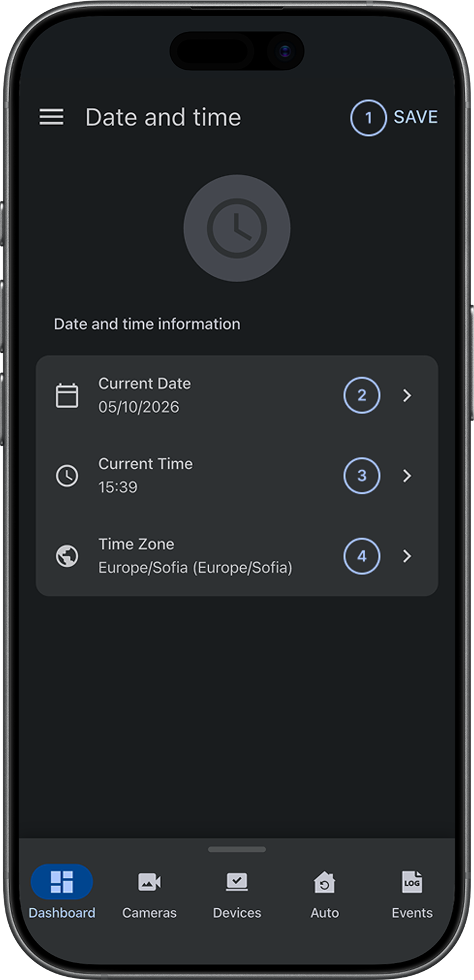
- SaveSaves the changes made to the panel date, time, and time zone settings.
 Current DateDisplays the current date set on the panel. Select to open the date selection screen.
- Current TimeDisplays the current time set on the panel. Select to open the time selection screen.
 Time ZoneDisplays the current time zone set on the panel. Select to open the time zone selection screen.
Current date screen
You can select the date using a calendar interface or enter it manually in text mode.
- Calendar selection
- Text selection
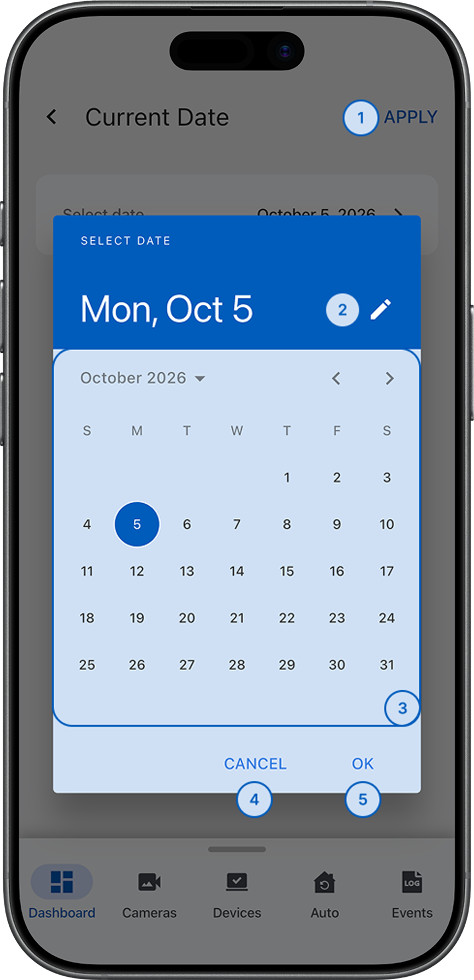
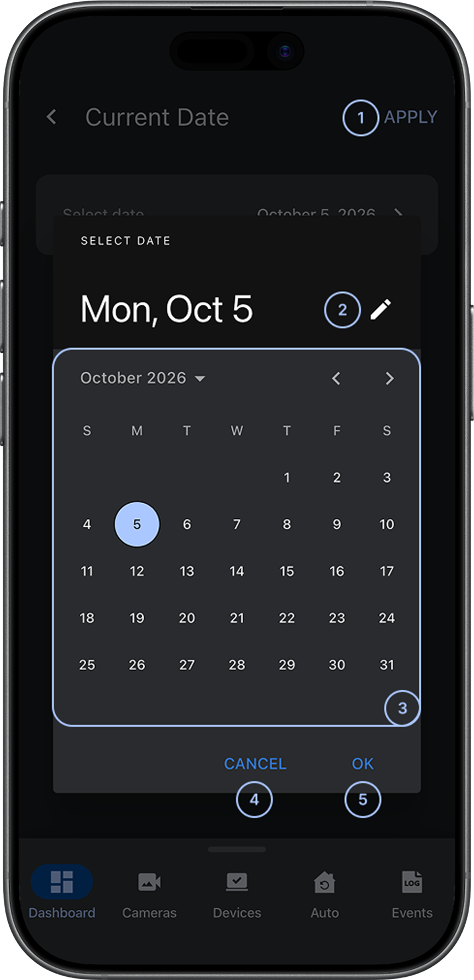
- ApplySaves the selected date to the panel.
 Text modeSwitches to the text entry mode for date input.
- CalendarAllows you to select the date by navigating through months, years, and individual days.
- CancelCloses the calendar without saving the selection.
- OKConfirms the selected date in the calendar.
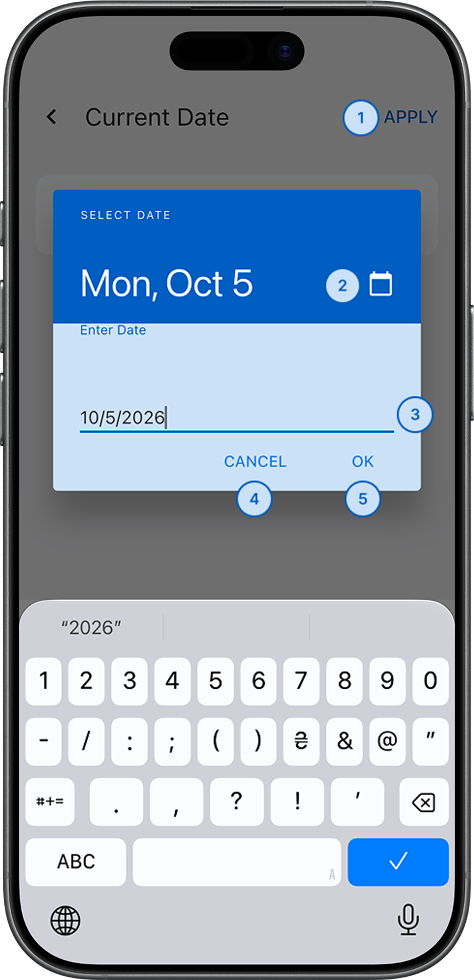
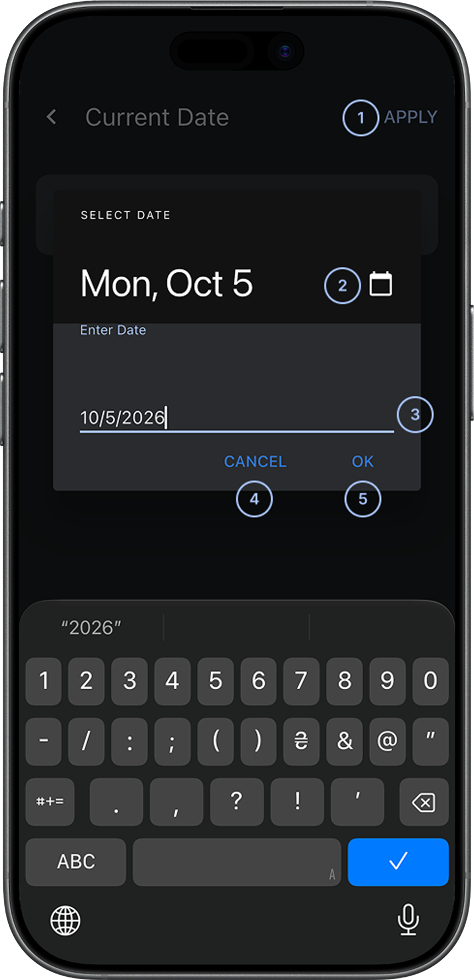
- ApplySaves the entered date to the panel.
- Calendar modeSwitches to the calendar selection mode for date input.
- Date fieldAllows you to enter the date in the format
DD/MM/YYYY. - CancelCloses the date entry without saving.
- OKConfirms the entered date and applies it to the panel.
Current time screen
You can select the time using a clock interface or enter it manually in text mode.
- Clock selection
- Text selection
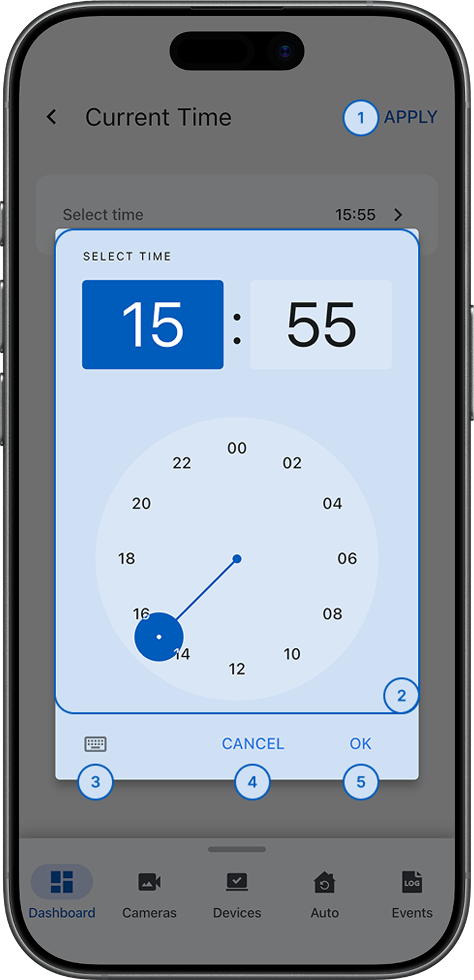
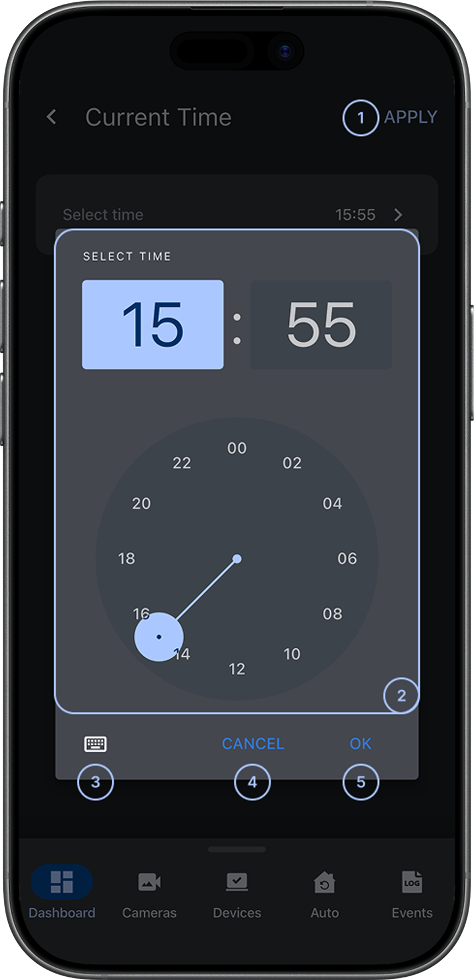
- ApplySaves the selected time to the panel.
 Text modeSwitches to the text entry mode for time input.
- ClockAllows you to select the time by adjusting hours and minutes.
- CancelCloses the clock without saving the selection.
- OKConfirms the selected time in the clock.
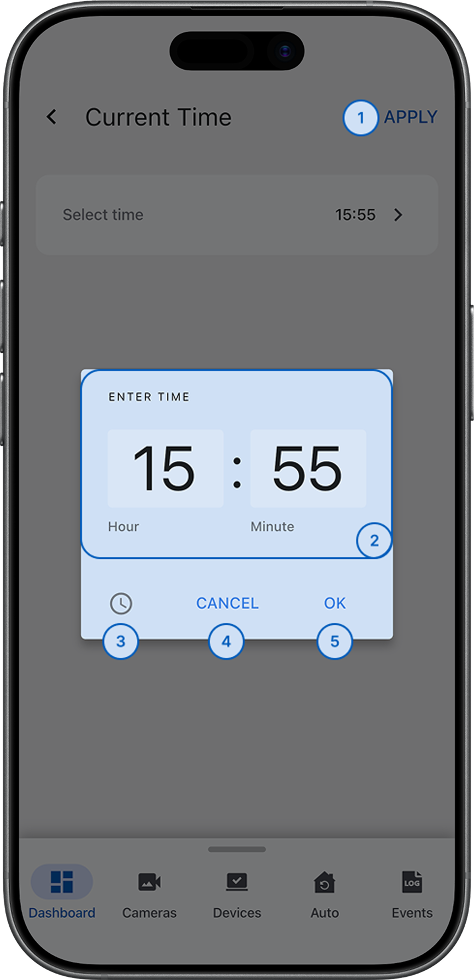
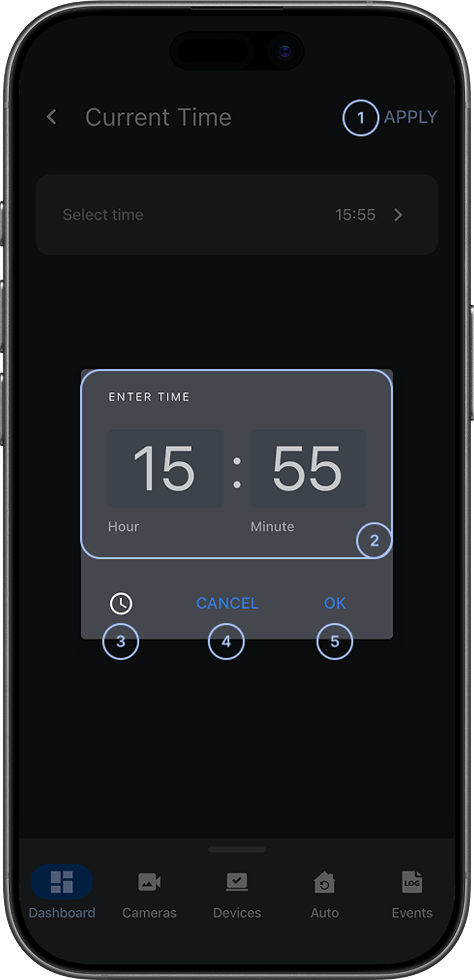
- ApplySaves the entered time to the panel.
- Clock modeSwitches to the clock selection mode for time input.
- Time fieldAllows you to enter the time in the format
HH:MM. - CancelCloses the time entry without saving.
- OKConfirms the entered time and applies it to the panel.
Time zone screen
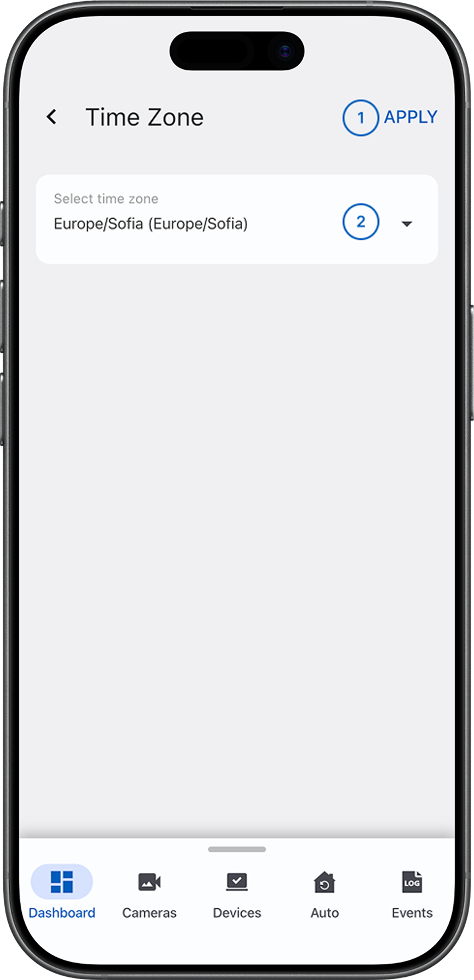
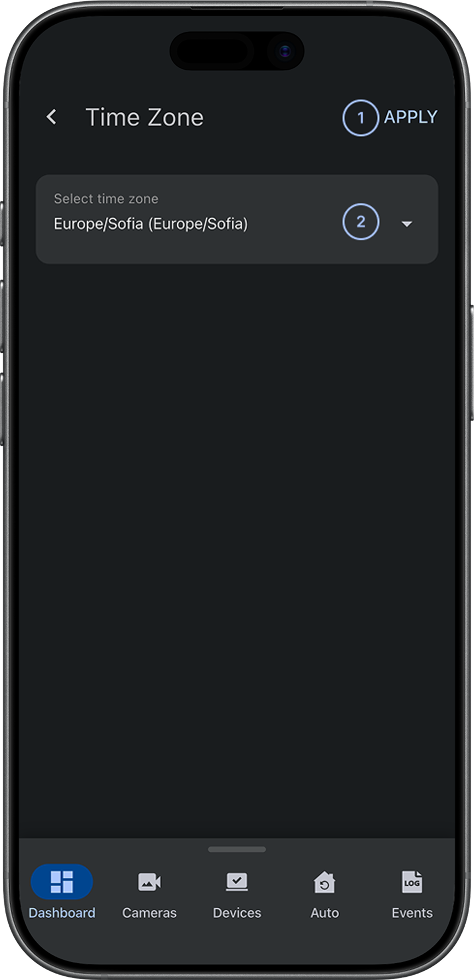
- ApplySaves the selected time zone to the panel.
- Time zone selectionA dropdown menu that displays available time zones from the panel's supported list. Time zones appear as full names or abbreviations (for example, EST, CST, PST).
Common scenarios
View panel date and time
- Open the ConnectAlarm app.
- Sign in to your account.
- Open your panel.
- From the side menu, select Date and time.
- Review the current date, time, and time zone displayed on the screen.
Update the panel date
- Using calendar selection
- Using text entry
- Open the ConnectAlarm app.
- Sign in to your account.
- Open your panel.
- From the side menu, select Date and time.
- Select the Current Date field.
- Navigate through the calendar to select the desired date by choosing the month, year, and day.
- Select OK to confirm the selection.
- Select Apply to save the date to the panel.
- Open the ConnectAlarm app.
- Sign in to your account.
- Open your panel.
- From the side menu, select Date and time.
- Select the Current Date field.
- Select Text mode to switch to manual entry.
- Enter the date in the format
DD/MM/YYYY. - Select OK to confirm the entry.
- Select Apply to save the date to the panel.
Update the panel time
- Using clock selection
- Using text entry
- Open the ConnectAlarm app.
- Sign in to your account.
- Open your panel.
- From the side menu, select Date and time.
- Select the Current Time field.
- Adjust the hours and minutes using the clock interface.
- Select OK to confirm the selection.
- Select Apply to save the time to the panel.
- Open the ConnectAlarm app.
- Sign in to your account.
- Open your panel.
- From the side menu, select Date and time.
- Select the Current Time field.
- Select Text mode to switch to manual entry.
- Enter the time in the format
HH:MM. - Select OK to confirm the entry.
- Select Apply to save the time to the panel.
Change the panel time zone
- Open the ConnectAlarm app.
- Sign in to your account.
- Open your panel.
- From the side menu, select Date and time.
- Select the Time Zone field.
- Select the desired time zone from the dropdown list. The available time zones depend on your panel type (DSC panels have fewer supported time zones than IQ panels).
- Select Apply to save the time zone to the panel.
Save all date and time changes at once
- Open the ConnectAlarm app.
- Sign in to your account.
- Open your panel.
- From the side menu, select Date and time.
- Update the date, time, and time zone as needed using the individual screens.
- Return to the main date and time screen.
- Select Save to apply all changes to the panel at once.
Tips
- Use the calendar interface to quickly navigate through months and years when adjusting dates.
- Use Text mode if you prefer typing the exact date or time instead of using the calendar or clock interfaces.
- Check the panel's current time zone before making changes, especially if the panel has been relocated or daylight saving time has changed.
- Available time zones depend on your panel type. Confirm that your panel type supports the time zone you need.
Troubleshooting
Manage panel date and time is not available
Possible causes:
- You are not the master user for the panel.
- The Panel time synchronization option is enabled in the panel's group settings in PowerManage.
- For PowerSeries Neo 5 panels, the date and time settings are in a different menu.
What to try:
- Confirm that you are signed in as the master user.
- Check with your administrator to confirm that the Panel time synchronization option is disabled in PowerManage.
- For PowerSeries Neo 5 panels, access date and time settings from Panel settings in the side menu instead.
- If the option is still unavailable, contact your administrator or installer for assistance.
Save is not available
Possible causes:
- The panel is not connected to PowerManage.
- One or more fields contain invalid information.
What to try:
- Check the panel connection status.
- Verify that the date is in the format
DD/MM/YYYY. - Verify that the time is in the format
HH:MM. - Confirm that the selected time zone is available for your panel type.
- Select Save again.
- If Save is still unavailable, contact your administrator or installer.
Date and time changes are not saved
Possible causes:
- The panel is not connected to PowerManage.
- One or more field values are not valid.
- The connection was lost during the save process.
What to try:
- Check the panel connection status.
- Review the date, time, and time zone fields for missing or invalid information.
- Verify that you selected Save or Apply to confirm the changes.
- Try making the changes again.
- If changes still are not saved, contact your administrator or installer and provide the panel type and the step that failed.
The date or time format is incorrect
Possible causes:
- The date or time was entered in an incorrect format.
- Text mode requires a specific format.
What to try:
- In Text mode, verify that the date is entered in the format
DD/MM/YYYY. - Verify that the time is entered in the format
HH:MM. - Clear the field and re-enter the value in the correct format.
- Use the calendar or clock interface instead of Text mode if you are unsure about the format.
- Select OK to confirm the entry.
The required time zone is not available
Possible causes:
- DSC panels support fewer time zones than IQ panels.
- The desired time zone is not listed in the panel's supported time zones.
What to try:
- Confirm the panel type.
- Review the available time zones in the dropdown list.
- Select the closest available time zone to your location.
- Contact your administrator or installer to confirm which time zones are supported for your panel.