Manage panel settings
Overview
Use the Panel settings screen in ConnectAlarm to access functions and configuration options for your PowerSeries Neo 5 panel. The screen has two tabs: Functions and Configuration. The Functions tab provides panel operations, including setting the date and time, activating WPS, enabling DLS, and running Walk Test and System Test. Use the Configuration tab to review and update panel settings.
Panel settings are available only for PowerSeries Neo 5 panels.
Before you begin
- Sign in to ConnectAlarm.
- Open the PowerSeries Neo 5 panel.
- Verify that the security panel is connected to PowerManage before making changes to panel configuration or functions.
Screen layout
The Panel settings screen has the Functions and Configuration tabs, with a separate screen for each function.
Functions tab
General screen
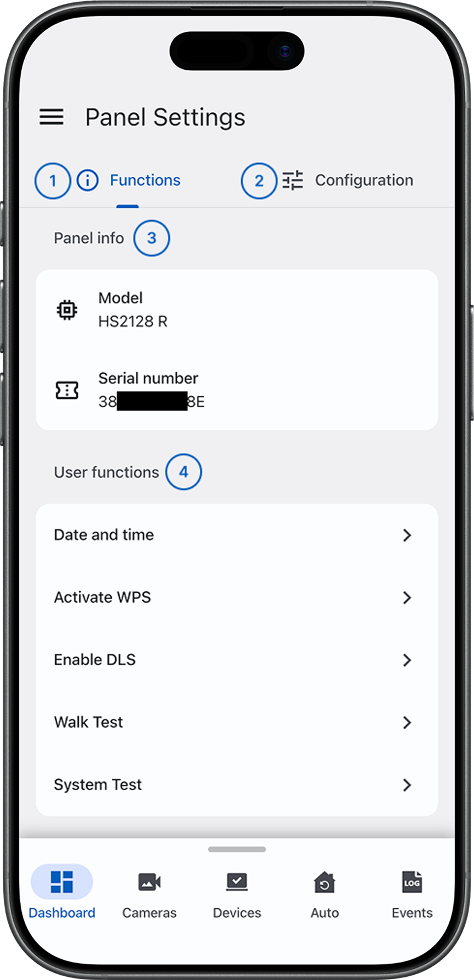
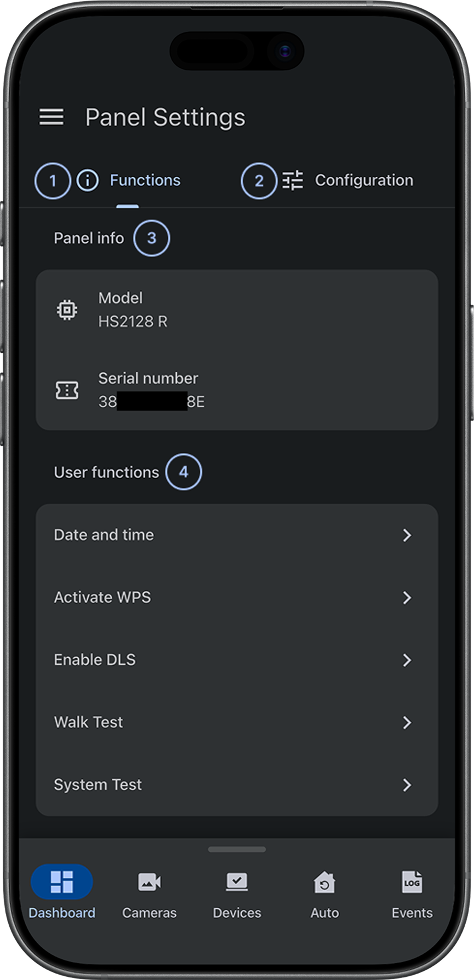
 Functions tabDisplays panel operations and management functions.
 Configuration tabSwitches to the Configuration tab to review and modify panel configuration settings.
- Panel infoDisplays panel information, including the model, serial number, and other details.
- User functions listLists the available panel functions, including Date and Time, Activate WPS, Enable DLS, Walk Test, and System Test. Select a function to open its screen.
Date and time screen
Use this screen to adjust the panel's date, time, and time zone. For details, see Manage panel date and time.
Activate WPS screen
Activate WPS on your PowerSeries Neo 5 panel.
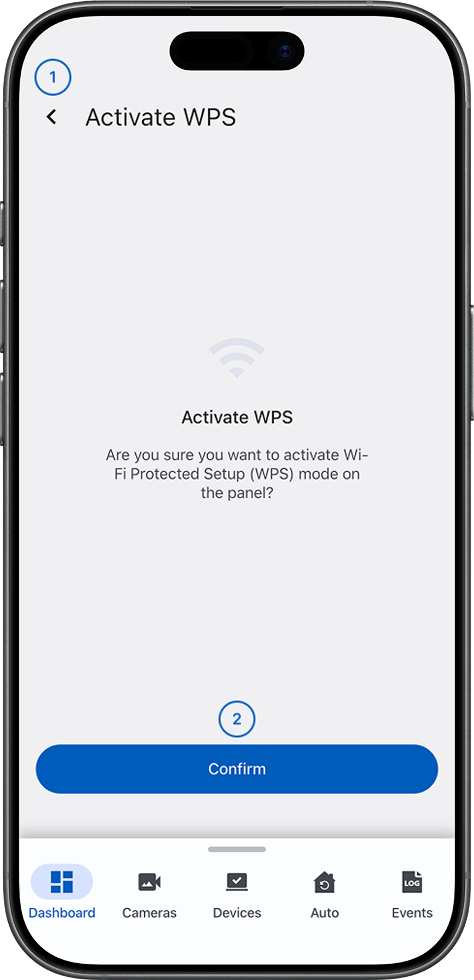
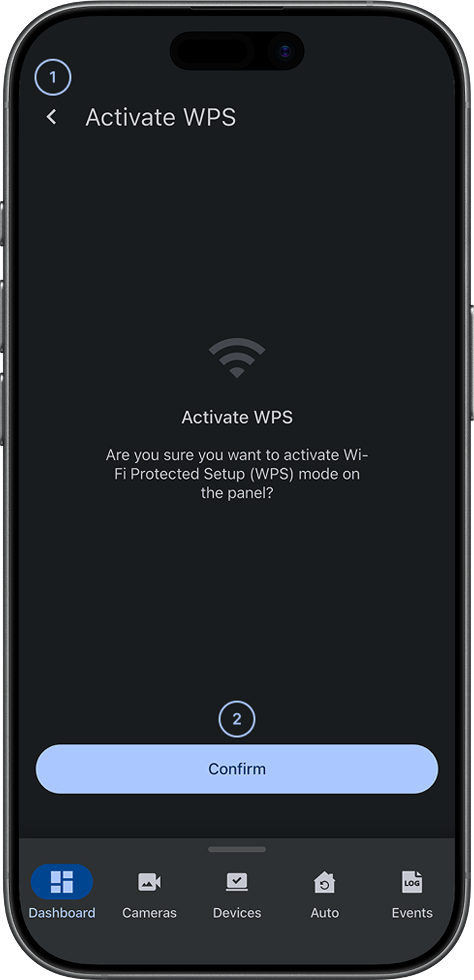
 BackReturns to the Panel Settings general screen.
- ConfirmActivates WPS on the panel.
Enable DLS screen
Enable DLS on your PowerSeries Neo 5 panel.
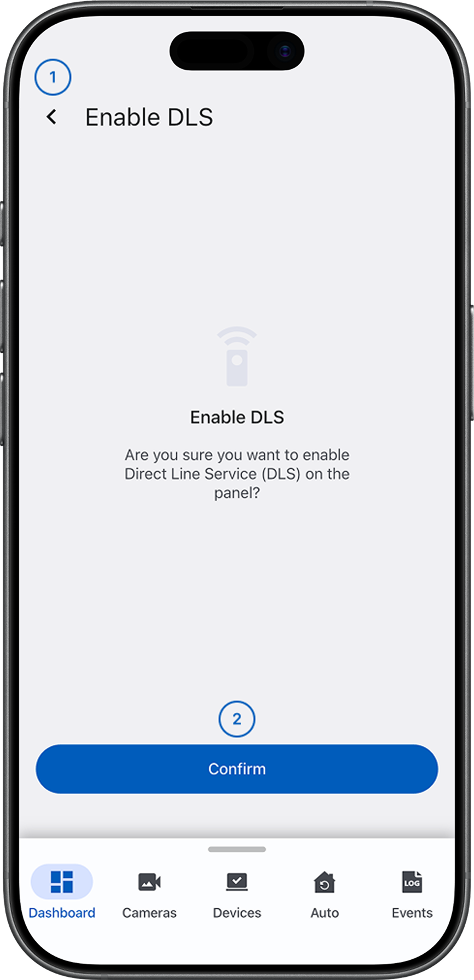
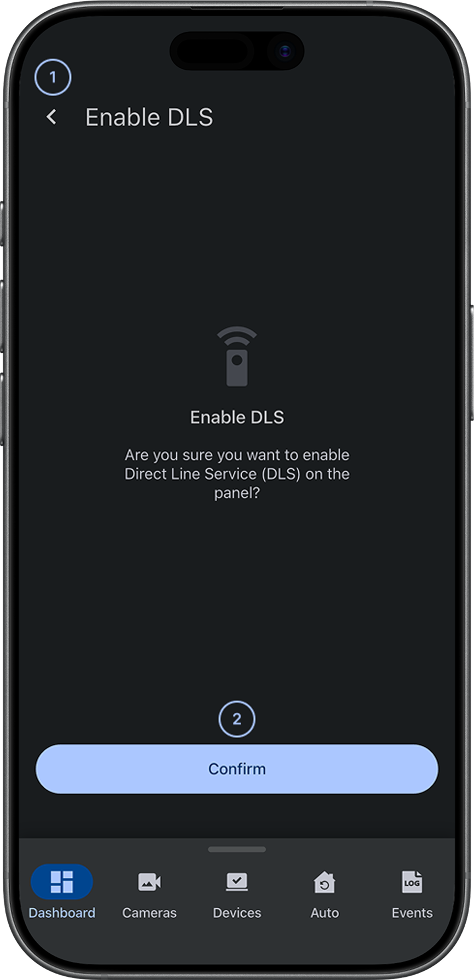
- BackReturns to the Panel Settings general screen.
- ConfirmEnables DLS on the panel.
Walk Test screen
Use Walk Test to verify that wireless devices communicate with the panel.
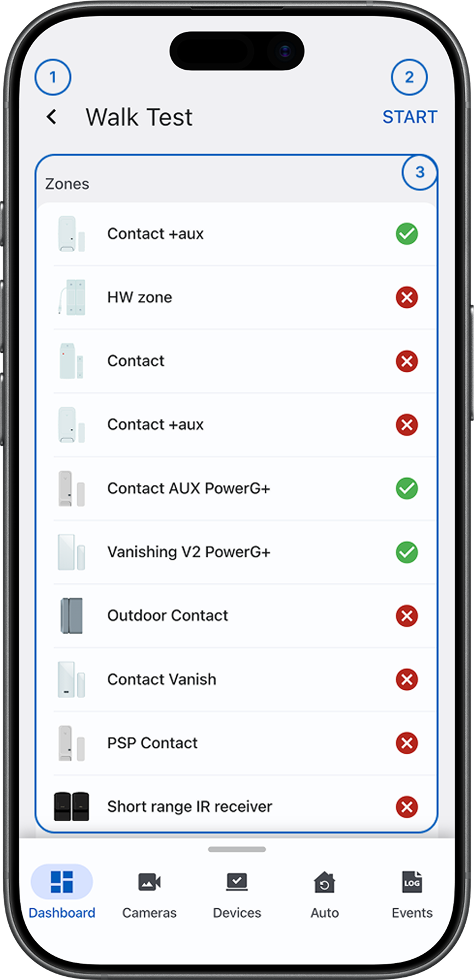
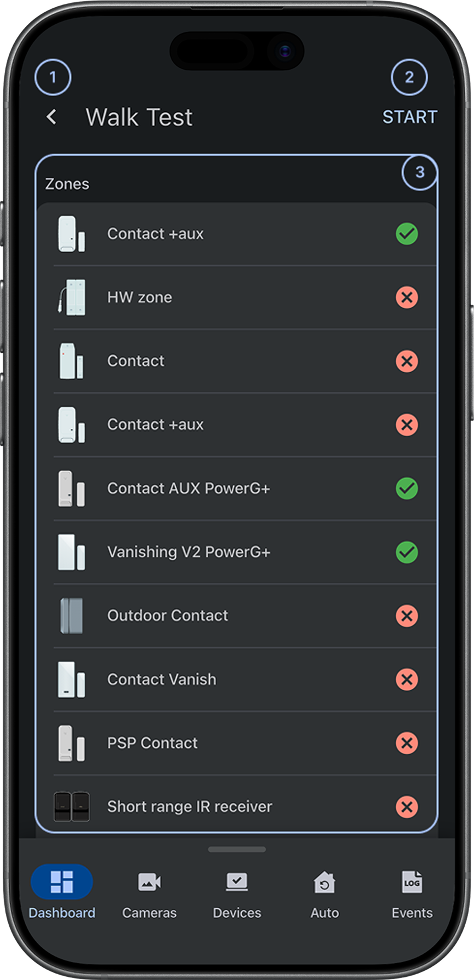
- BackReturns to the Panel Settings general screen.
- StartStarts Walk Test.
- ResultsDisplays a Success or Fail status for each device that supports Walk Test.
System Test screen
Use System Test to check the panel and its connected devices. You can run the test for specific partitions.
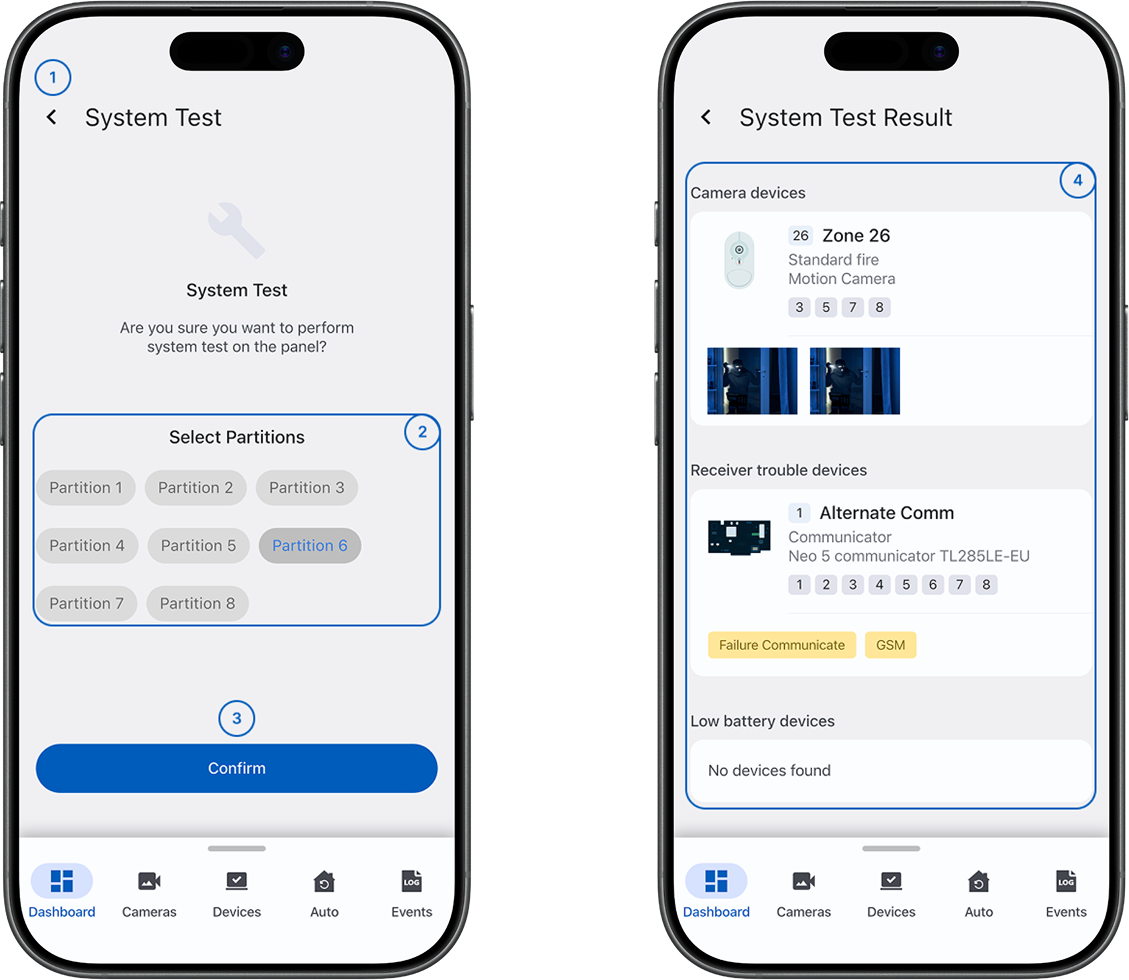
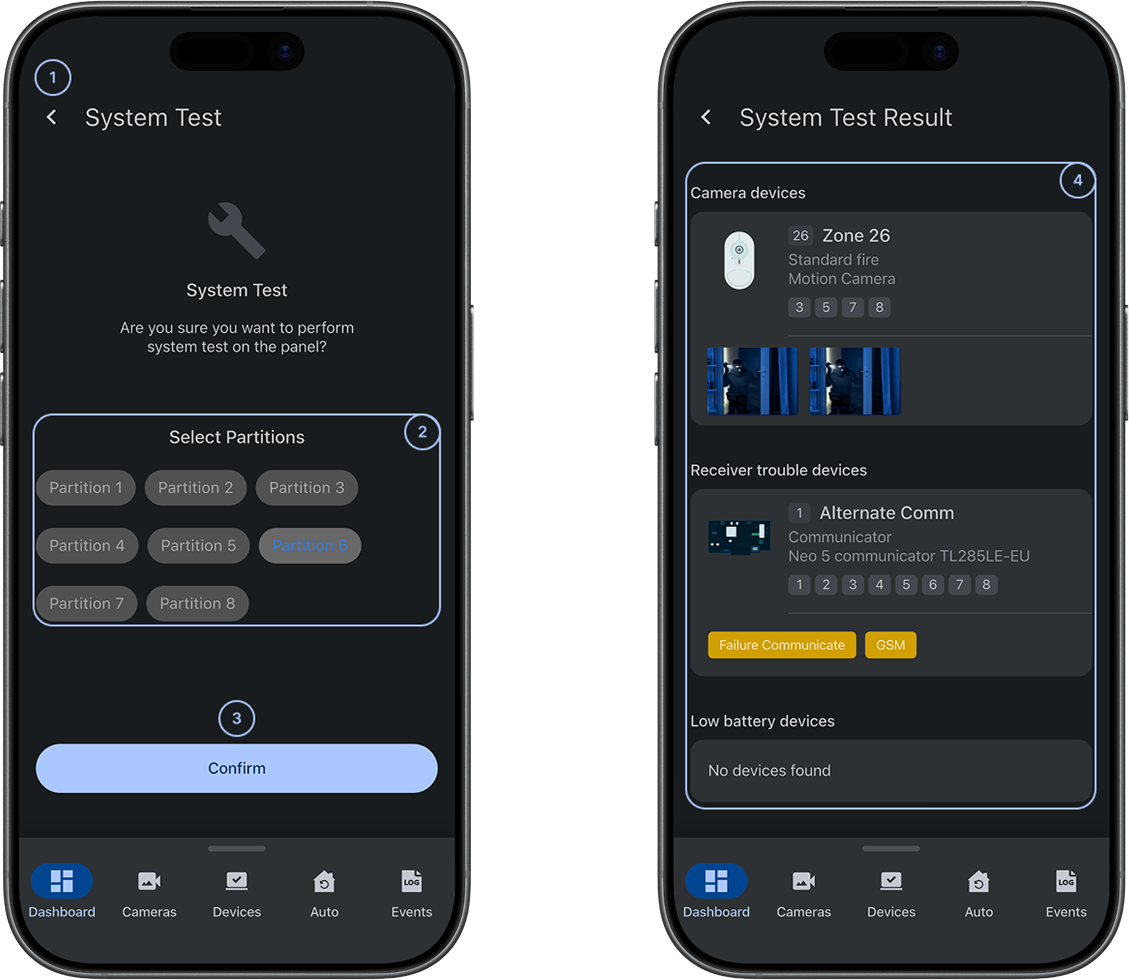
- BackReturns to the Panel Settings general screen.
- Select PartitionsLets you choose the partitions for the System Test.
- ConfirmStarts the System Test for the selected partitions.
- ResultsDisplays System Test results by device category, such as camera, trouble, or low-battery devices.
Configuration tab
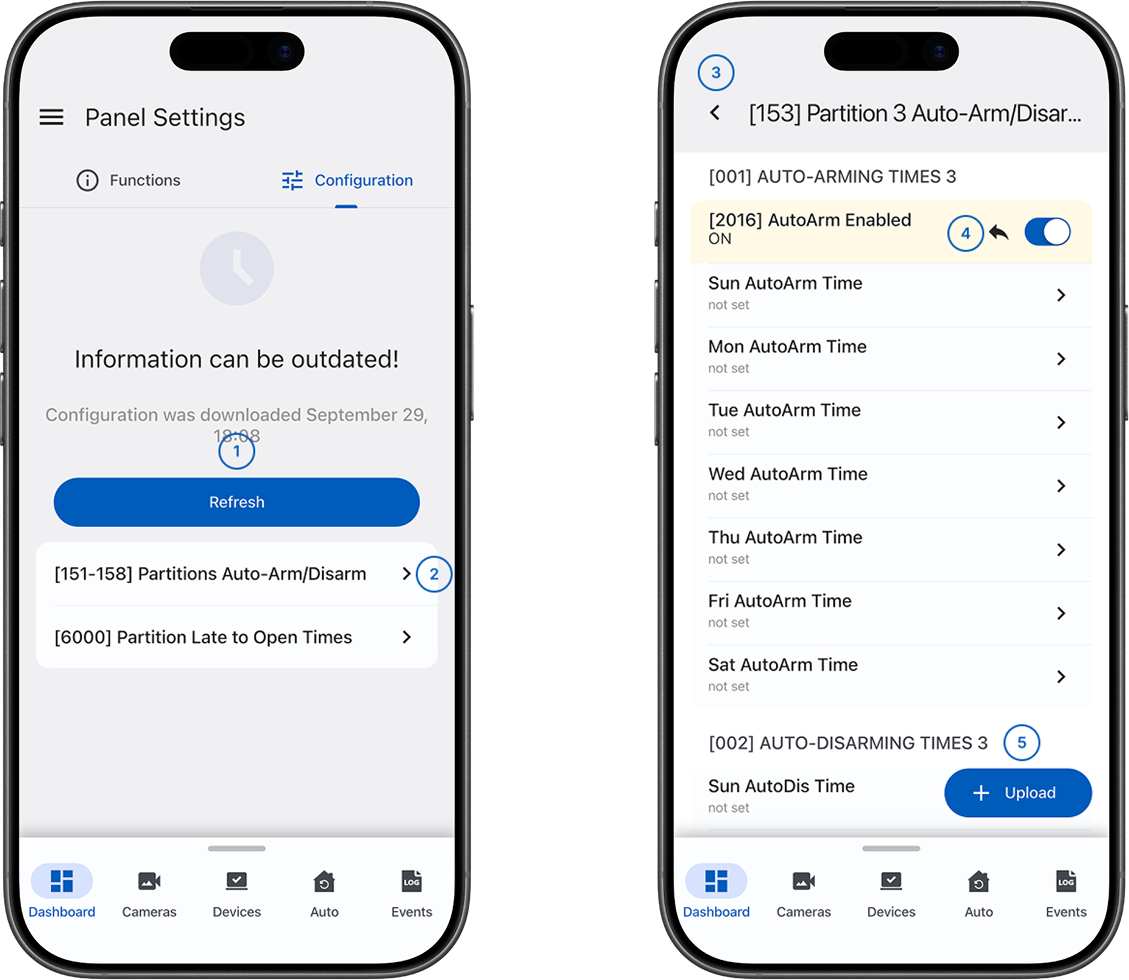
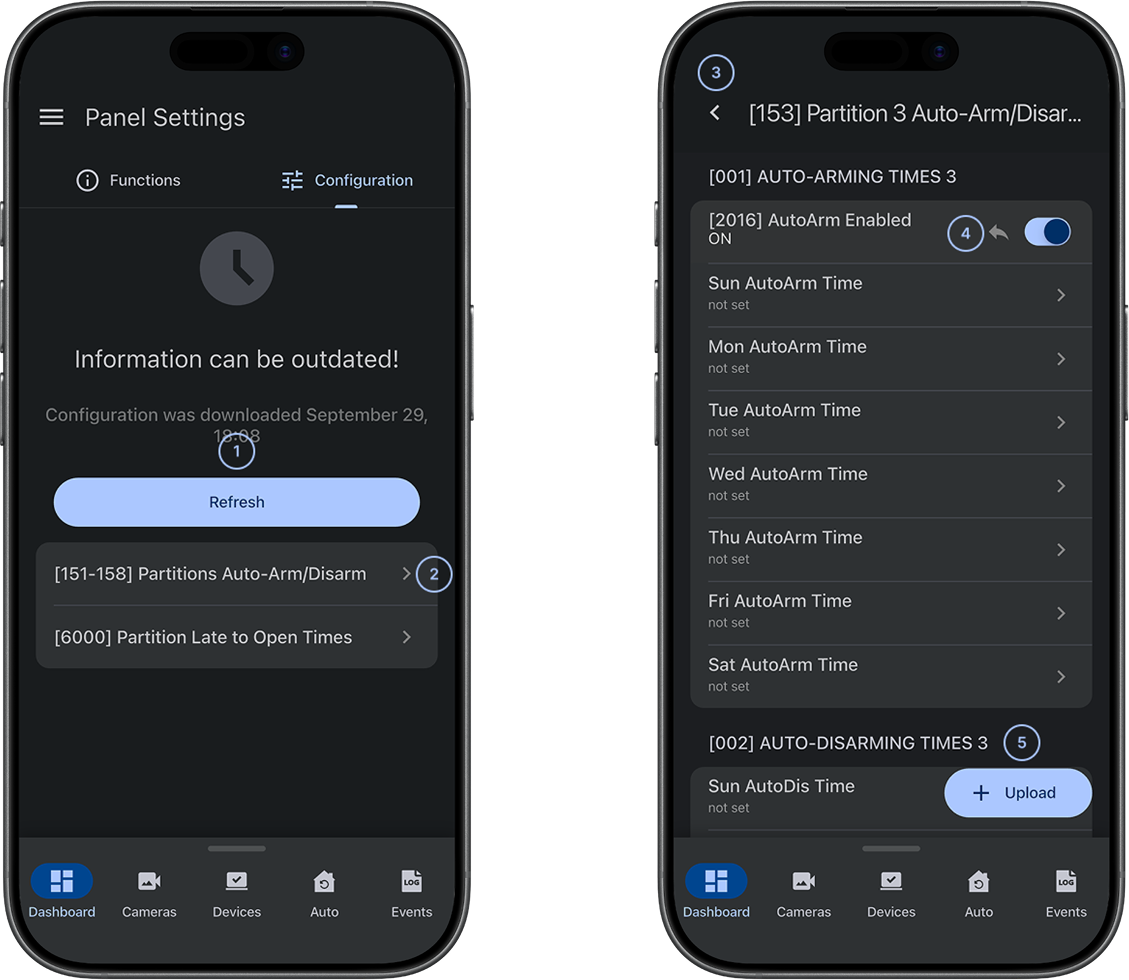
- RefreshDownloads the latest configuration from the panel.
 Configuration menuLists the available configuration options. Select an option to open its editing controls.
- BackReturns to the Panel Settings general screen.
 Changed optionHighlights modified panel options and includes a button to revert each change.
 UploadAppears when you change configuration options. Select it to upload the changes to the panel.
Common scenarios
Access the Functions tab
- Open the ConnectAlarm app.
- Sign in to your account.
- Open your PowerSeries Neo 5 panel.
- From the side menu, select Panel settings.
- Confirm that the Functions tab is selected. The available panel functions appear.
Activate the panel's WPS
- Open the ConnectAlarm app.
- Sign in to your account.
- Open your PowerSeries Neo 5 panel.
- From the side menu, select Panel settings.
- From the Functions tab, select Activate WPS from the user functions list.
- Review the WPS activation information.
- Select Confirm to activate WPS on the panel.
Enable DLS on the panel
- Open the ConnectAlarm app.
- Sign in to your account.
- Open your PowerSeries Neo 5 panel.
- From the side menu, select Panel settings.
- From the Functions tab, select Enable DLS from the user functions list.
- Review the DLS enablement information.
- Select Confirm to enable DLS on the panel.
Run a Walk Test
- Open the ConnectAlarm app.
- Sign in to your account.
- Open your PowerSeries Neo 5 panel.
- From the side menu, select Panel settings.
- From the Functions tab, select Walk Test from the user functions list.
- On the Walk Test screen, select Start to initiate the Walk Test.
- Activate each wireless device to test communication.
- Review the Walk Test results displayed on the same screen.
Run a System Test
- Open the ConnectAlarm app.
- Sign in to your account.
- Open your PowerSeries Neo 5 panel.
- From the side menu, select Panel settings.
- From the Functions tab, select System Test from the user functions list.
- Select the partition you want to test.
- Select Confirm to start the System Test.
- Review the System Test results displayed on the same screen.
Download the latest panel configuration
- Open the ConnectAlarm app.
- Sign in to your account.
- Open your PowerSeries Neo 5 panel.
- From the side menu, select Panel settings.
- Select the Configuration tab.
- Select Refresh to download the latest configuration from the panel.
Update panel configuration options
- Open the ConnectAlarm app.
- Sign in to your account.
- Open your PowerSeries Neo 5 panel.
- From the side menu, select Panel settings.
- Select the Configuration tab.
- Select Refresh to download the latest configuration from the panel.
- Select an option from the Configuration menu.
- Update the option.
- Review the highlighted changes.
- Select Upload to send the modified configuration to the panel.
Tips
- Select Refresh to download the latest panel configuration before you make changes.
- Use Walk Test before and after adding new wireless devices to verify communication.
- Run a System Test regularly to monitor panel health and identify any devices with low battery or trouble status.
Troubleshooting
Panel settings are not available
Possible causes:
- The panel is not a PowerSeries Neo 5 model.
- The panel is not connected to PowerManage.
What to try:
- Verify that you opened the correct PowerSeries Neo 5 panel.
- Check the panel connection status in PowerManage.
- If the panel is offline, wait for the connection to be re-established.
- If the settings are still unavailable, contact your administrator or installer.
Function cannot be executed
Possible causes:
- The panel is not connected to PowerManage.
- The function is not supported by your panel configuration.
- The panel is in a state that prevents the function from running.
What to try:
- Check the panel connection status.
- Verify that the panel is in a state that allows the function to run (for example, the system is not currently armed).
- Try running the function again.
- If the function still cannot be executed, contact your administrator or installer and provide the panel type and the function name.
Configuration changes are not uploaded
Possible causes:
- The panel is not connected to PowerManage.
- Invalid configuration values were entered.
- The connection was lost during the upload process.
What to try:
- Check the panel connection status.
- Review all modified configuration fields for invalid or missing values.
- Select Upload again.
- If the upload still fails, contact your administrator or installer and provide the panel type and the configuration options you were modifying.
Test results show failures
Possible causes:
- Device batteries are low or depleted.
- Devices are not properly enrolled on the panel.
What to try:
- Check the battery status of devices with test failures.
- Replace the batteries in devices with low battery status.
- Verify that the devices are enrolled and configured on the panel.
- Run the test again and review the results.
- If failures persist, contact your administrator or installer with the device names and test results.