Dealer Registration
Overview
The Dealer Registration flow lets you create an account in the Dealer Portal and submit a dealer application for approval. Use this page to know how to:
- Create a Dealer Portal account.
- Create a Okta account.
- Submit a dealer application for approval.
This page helps Dealer Plus, Dealer, and Sub-dealer applicants complete the registration process and understand what happens after an application is submitted.
Before you begin
Required access
- You must have access to the Dealer Portal.
- You must have access to a valid email address that you can use to receive account verification messages.
Preconditions
- Dealer Plus applicants must set up their own PowerManage server before starting the registration process.
- You must have an authenticator application available to complete the 2FA setup.
- You must have your company, support contact, and billing information available.
- If you select Self-hosted, your PowerManage server must be online and available for verification.
Dependencies
- Account activation depends on email delivery from Okta.
- Dealer registration depends on Customer Service approval.
- Self-hosted registration depends on communication between PowerManage and the repository.
Important limitations
- A submitted dealer account remains pending until the application is approved.
- For self-hosted registration, billing must be enabled in the PowerManage license.
- The required ports must be open for a self-hosted PowerManage server to synchronize with the repository.
How to use this page
Dealer registration
Dealer Plus must set up his own PowerManage server before starting the registration process.
To become an IQ and Neo 5 panels Dealer Plus, Dealer, or Sub-dealer, you must submit your request to the Dealer Portal.
When the Customer Service approves the dealer’s request, it sends an email to him with the PowerManage credentials, username and one-time-password (OTP password). The dealer is asked to change the OTP password on his first logon.
- When the Customer Service approves a Sub-dealer request, it sends a notification email to the Dealer Plus of the Sub-dealer too.
- When the Dealer Portal suspends or unsuspends a dealer, it sends a notification email to the dealer.
Dealer, sub-dealer and new installer can view panels in the dealer group.
PowerManage uses the dealer ID to add IQ and Neo 5 panels to the relative dealer group.
To register a new account, please visit the Dealer Portal and follow the prompts.
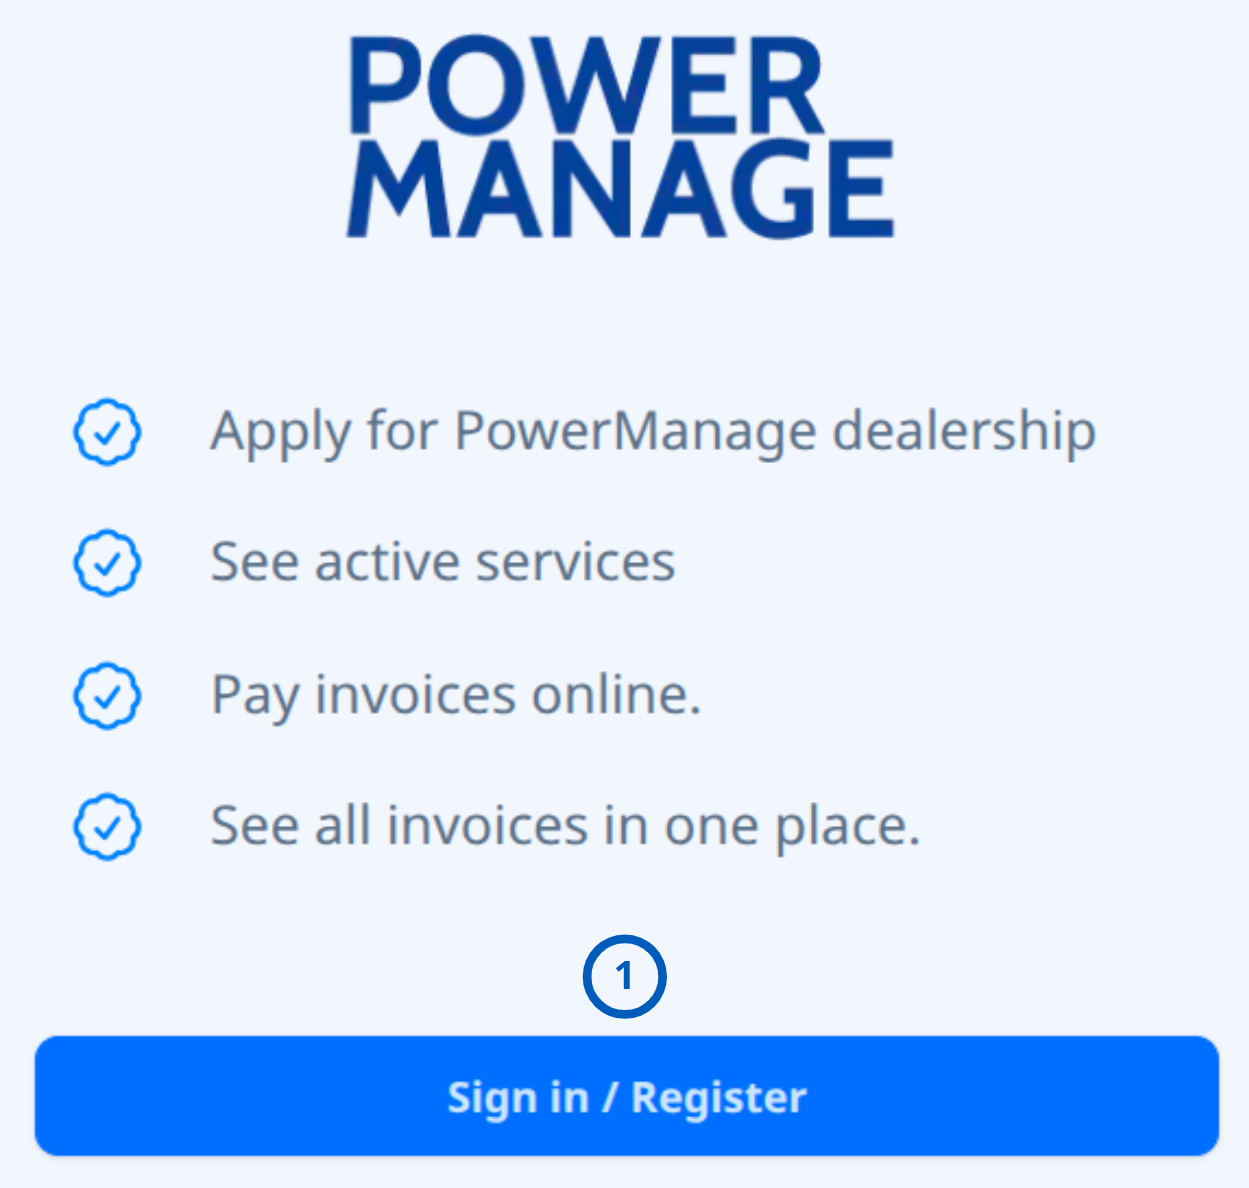
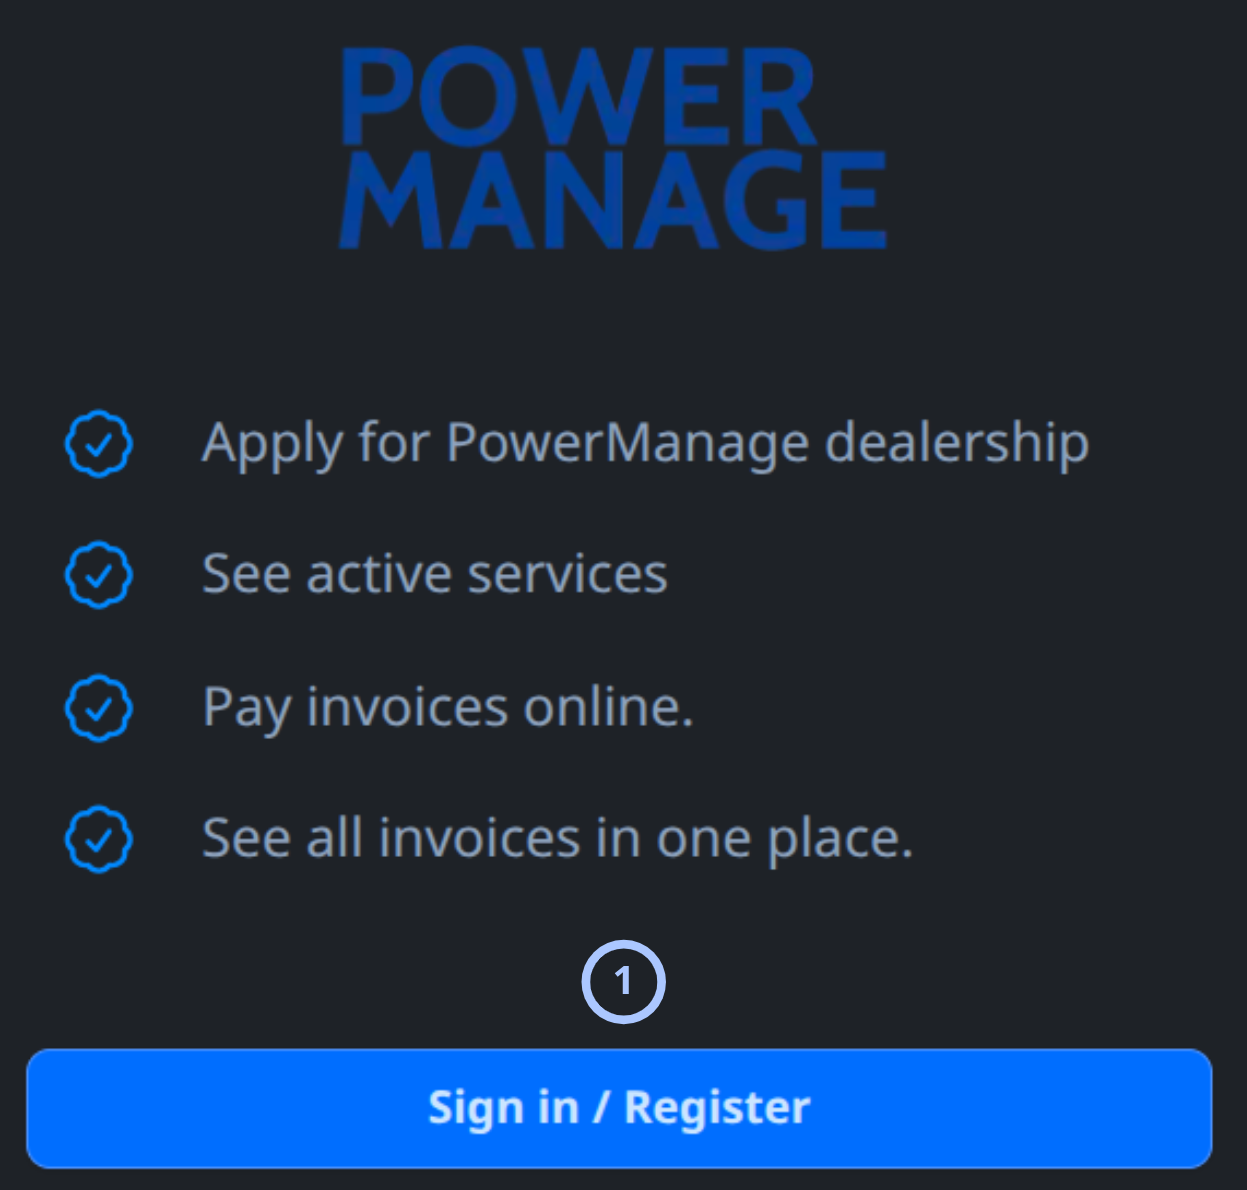
| Callout | Name | Description |
|---|---|---|
| 1 | Sign in / Register button | Opens the sign-in or registration flow for PowerManage users. |
- Sign up
- Enter account details
- Select an authenticator
- Scan the QR code
- Verify the code
- Verify your email
If you don't have an account and you want to create one, you should click on the link at the bottom of the page "Sign up".
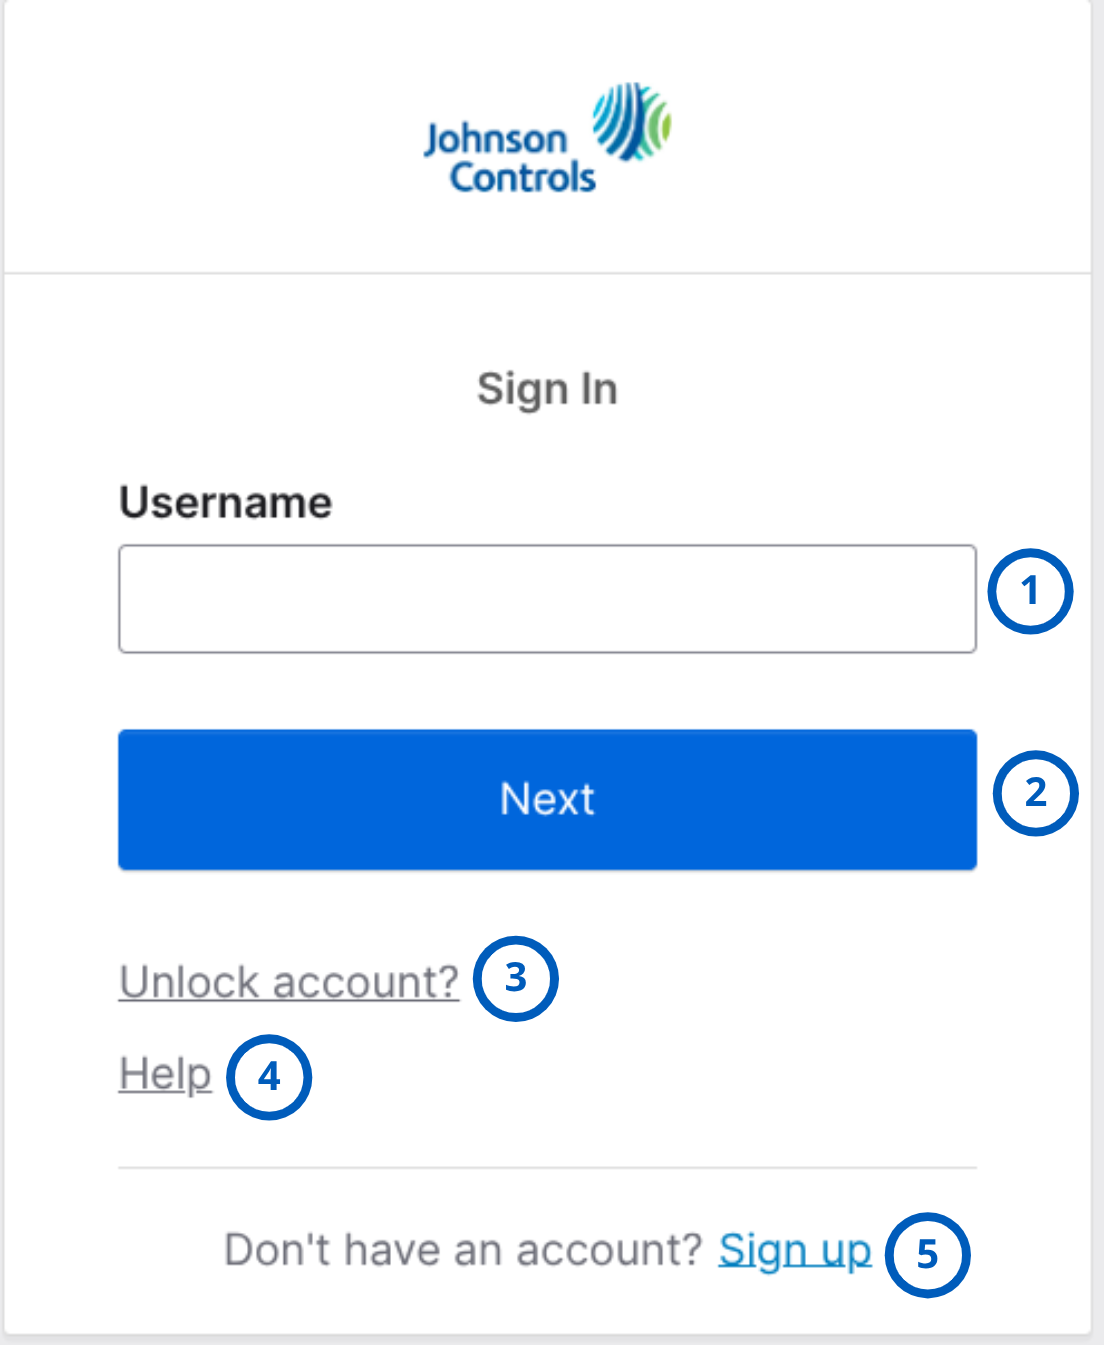
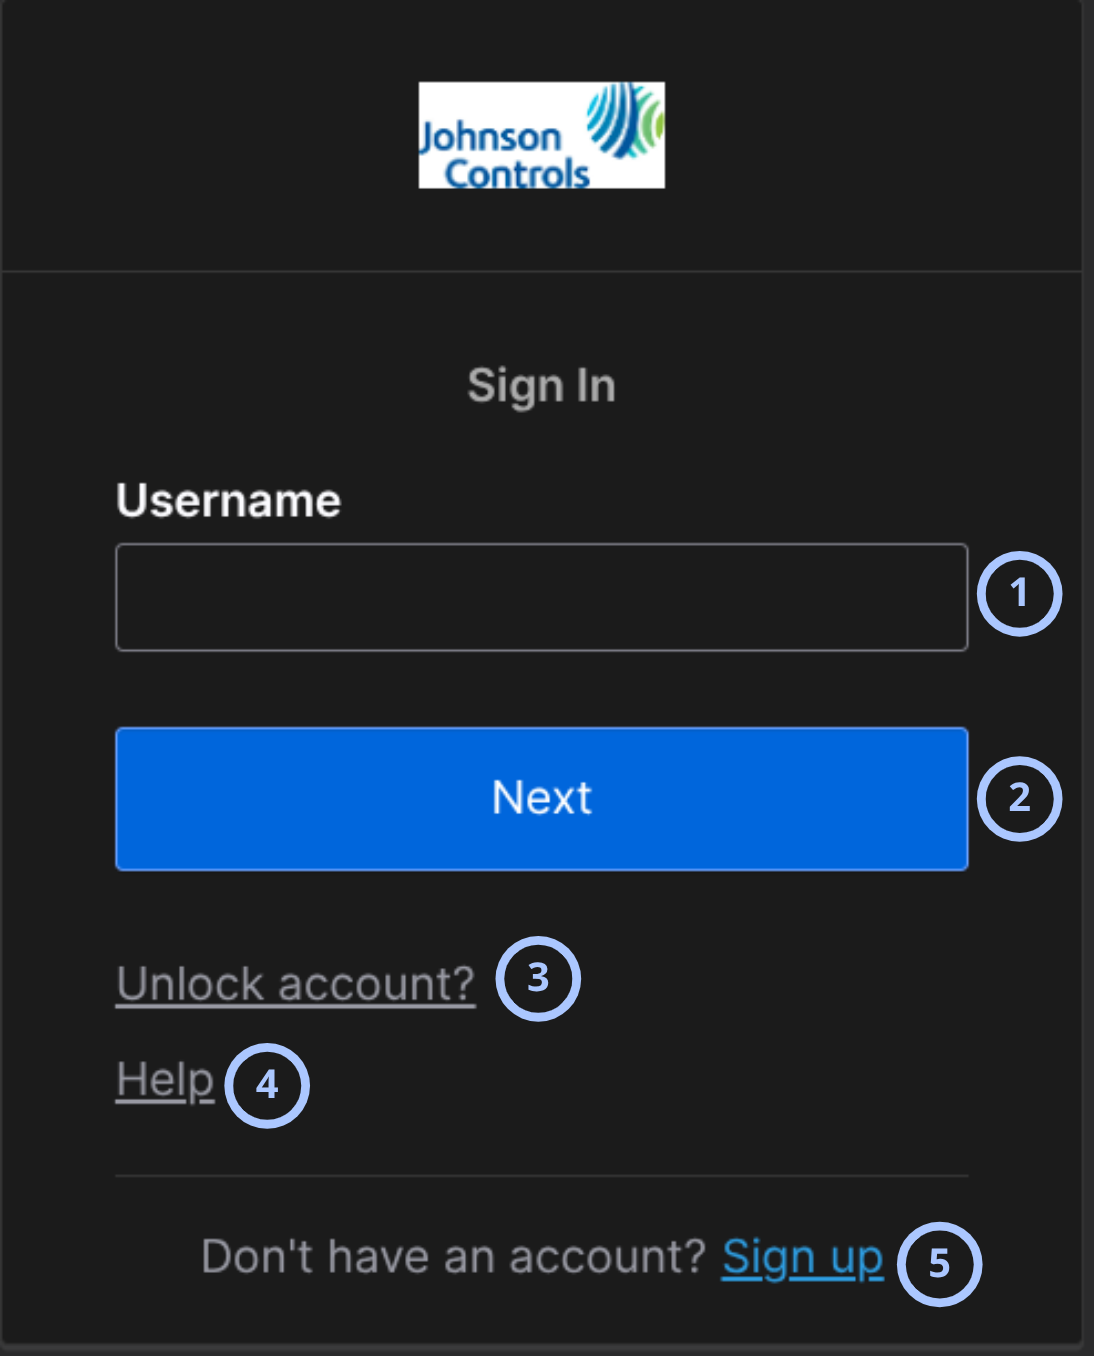
| Callout | Name | Description |
|---|---|---|
| 1 | Username field | Text input field for entering the username associated with the user account. |
| 2 | Next button | Continues the sign-in process after a username is entered. |
| 3 | Unlock account link | Starts the account unlock flow for users who cannot access the account because the account is locked. |
| 4 | Help link | Opens help or support information related to signing in. |
| 5 | Sign up link | Starts the account registration flow for users who do not have an account. Select Sign up to register a new dealer account. |
After clicking on the link, you will need to enter "First name", "Last name","Email" and "Password" that meets the requirements described to create a new account.
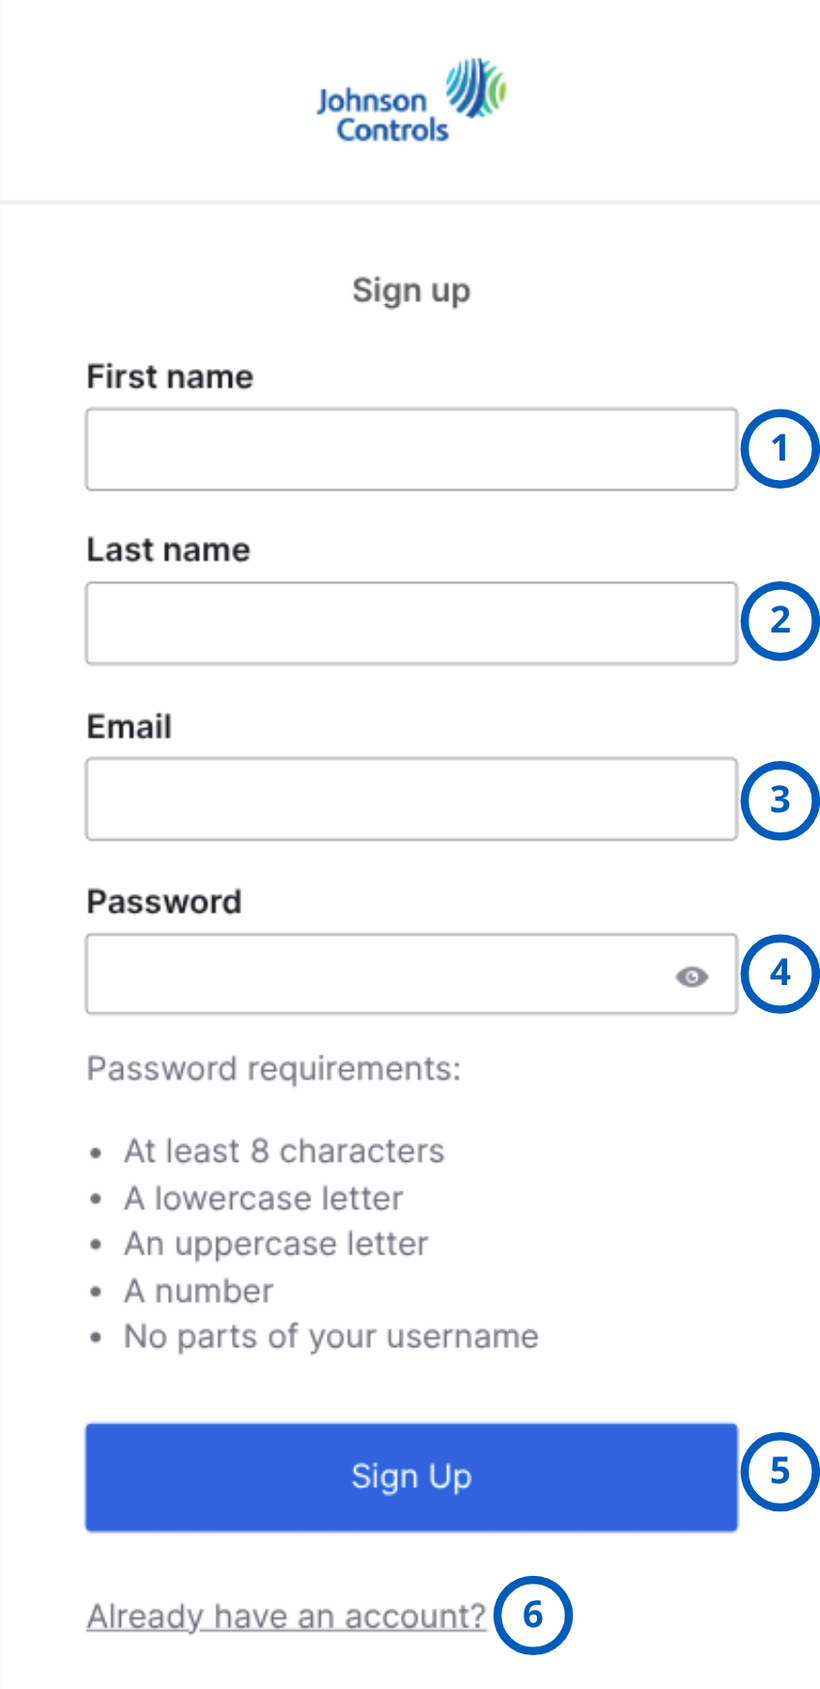
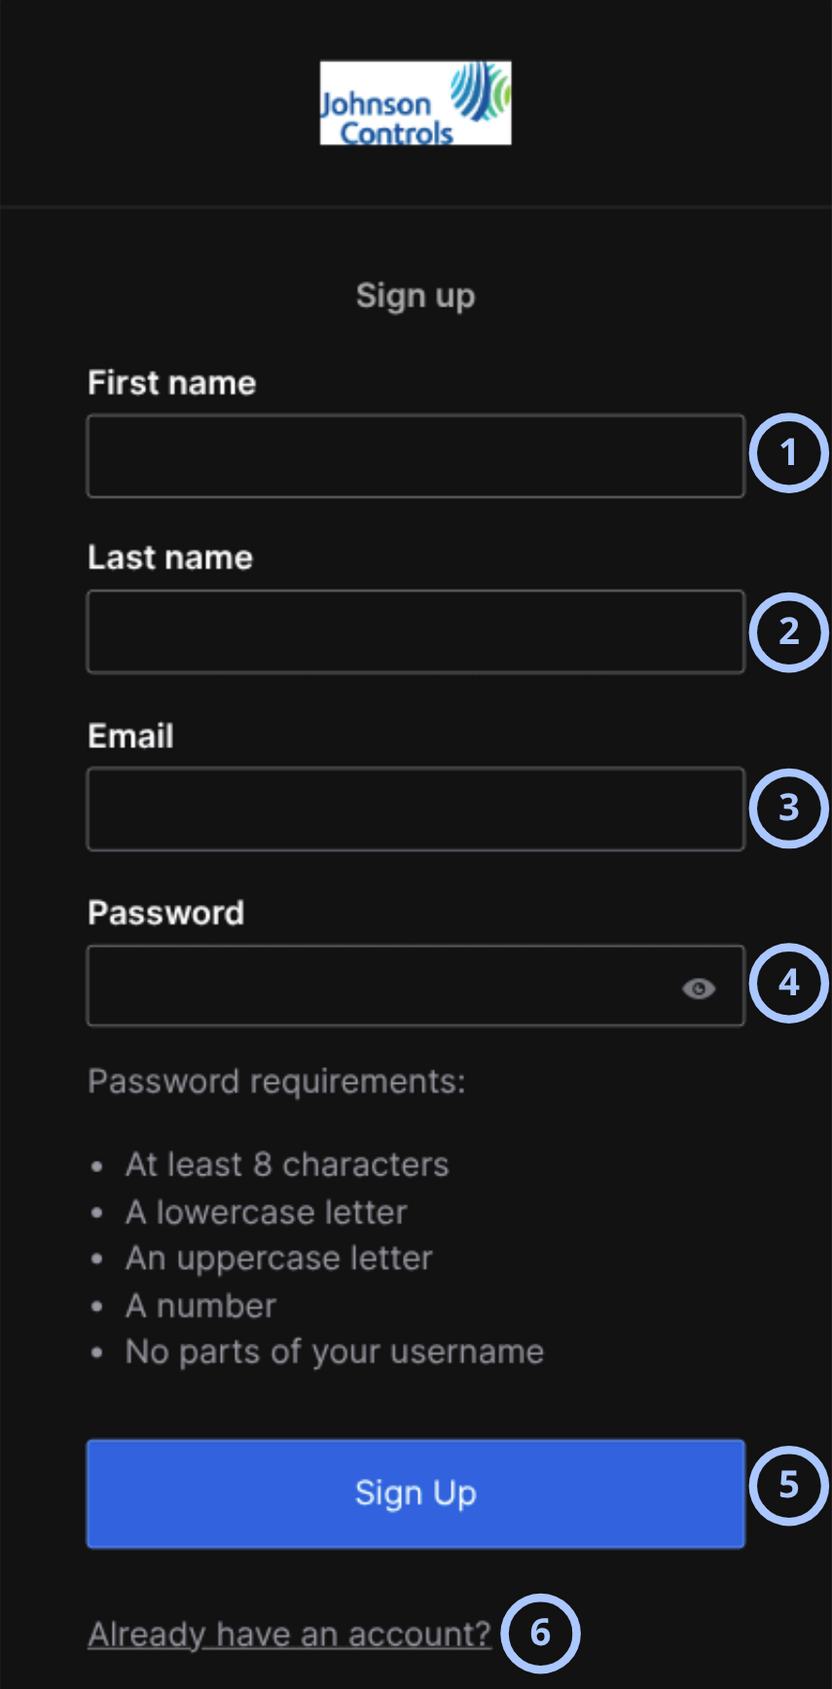
| Callout | Name | Description |
|---|---|---|
| 1 | First name field | Field for entering the user's first name during account registration. |
| 2 | Last name field | Field for entering the user's last name during account registration. |
| 3 | Email field | Field for entering the email address used for account registration. |
| 4 | Password field | Field for entering the new password for the account. |
| 5 | Sign Up button | Submits the registration form and starts the account creation process. |
| 6 | Already have an account? link | Opens the sign-in flow for users who already have an account. |
On the next page, you need to select the application you will use for 2FA authentication.
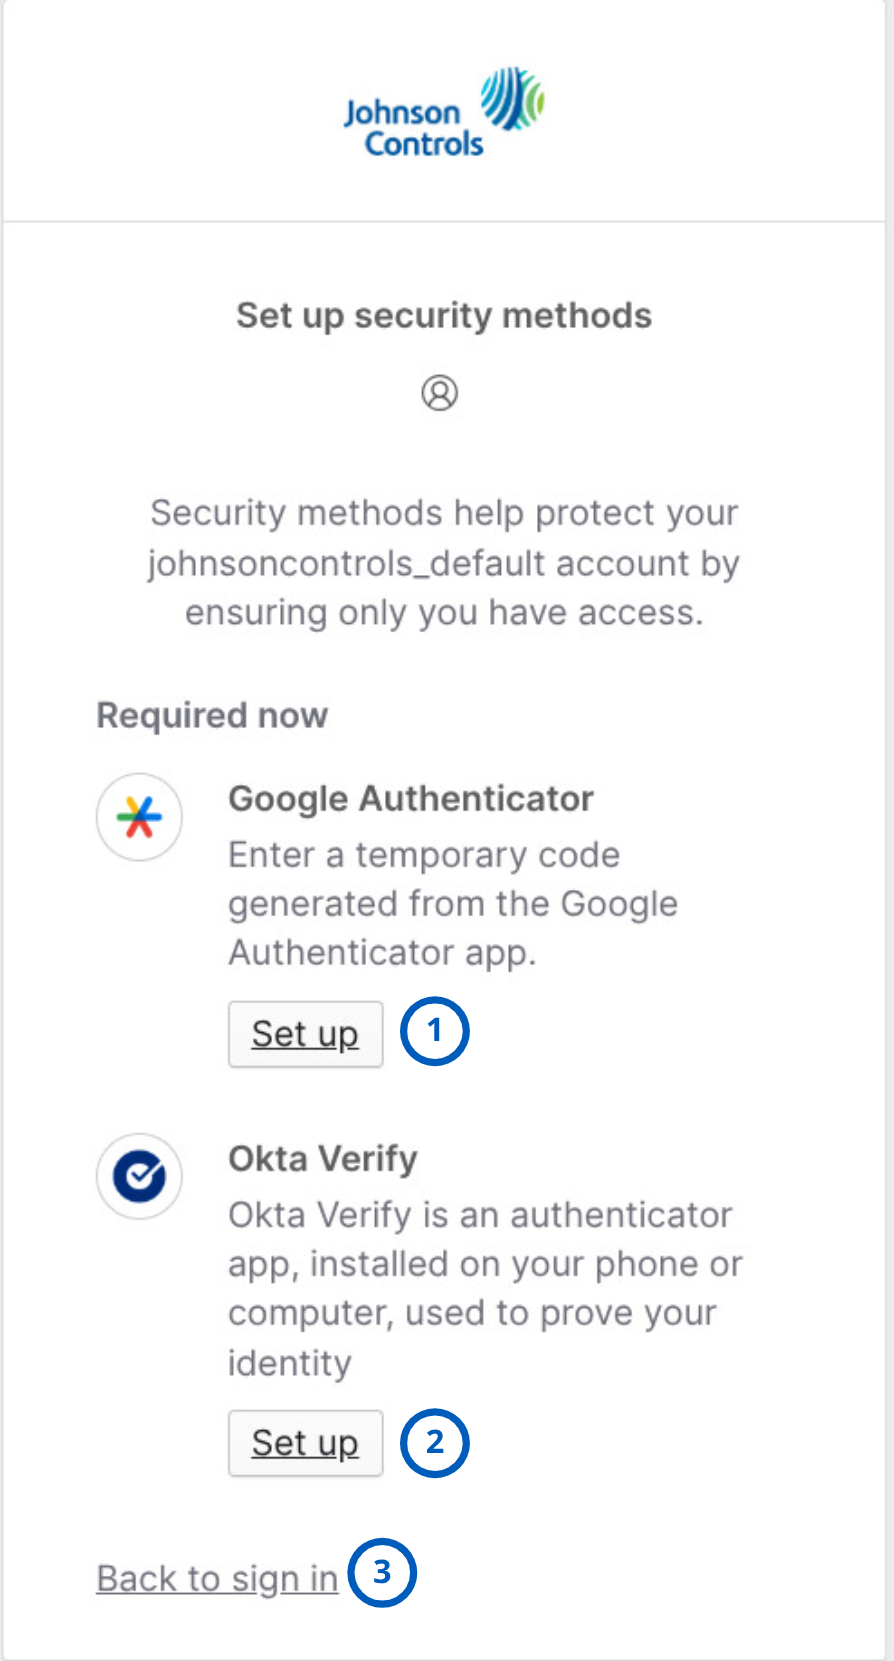
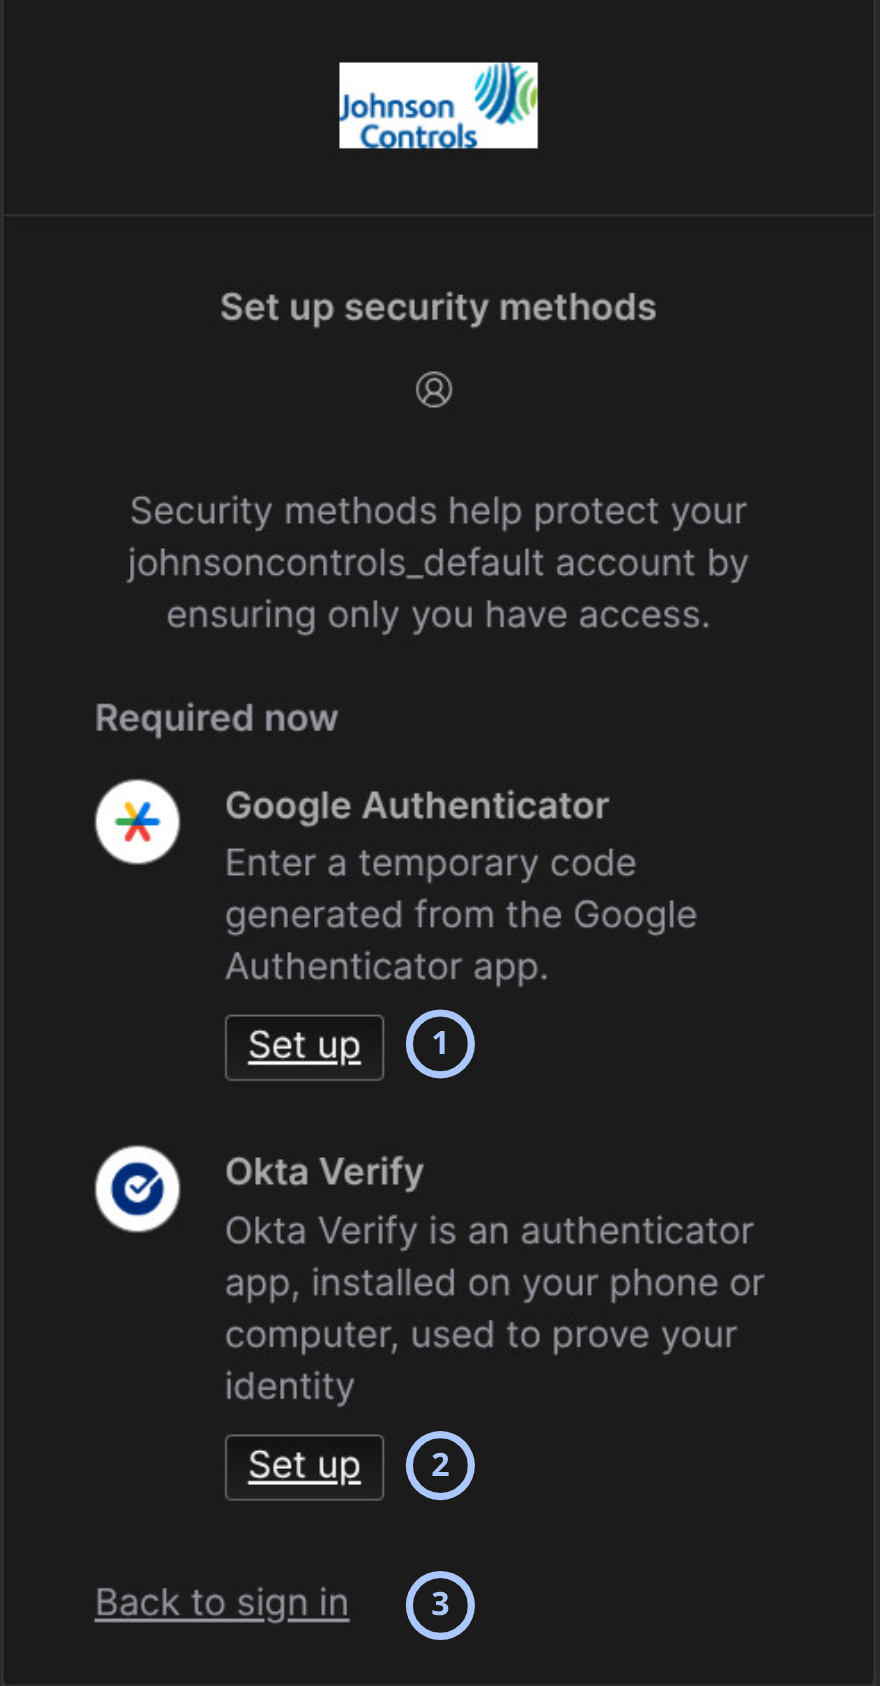
| Callout | Name | Description |
|---|---|---|
| 1 | Google Authenticator Set up button | Starts the setup process for Google Authenticator as a security method. |
| 2 | Okta Verify Set up button | Starts the setup process for Okta Verify as a security method. |
| 3 | Back to sign in link | Returns the user to the sign-in page. |
On the next page, you will need to scan a QR code to link your application to the created account.
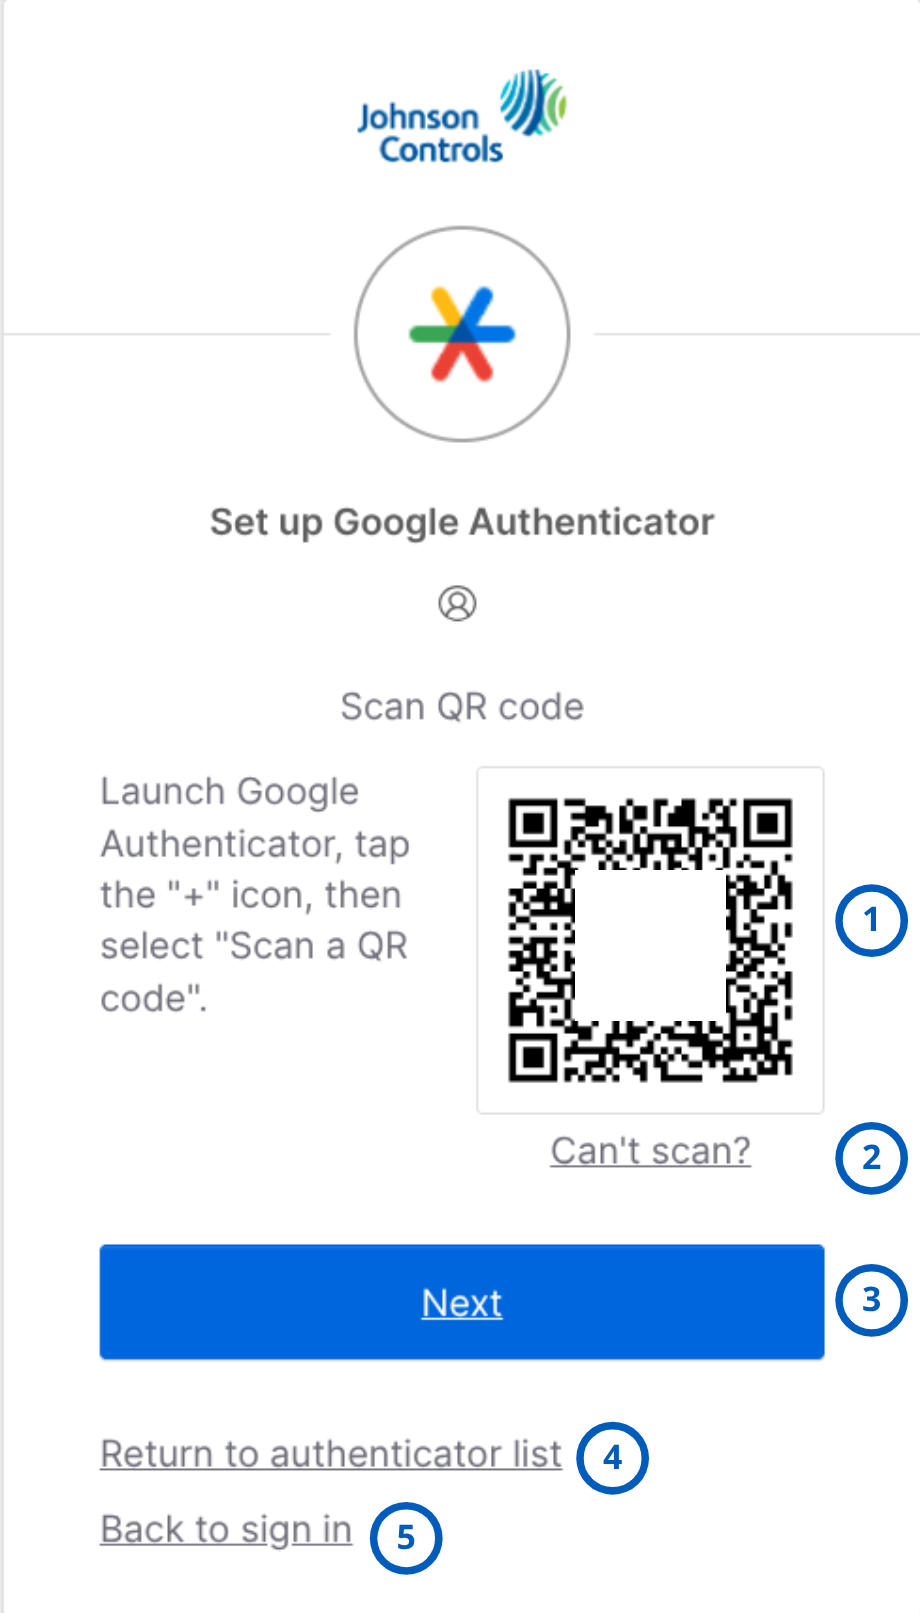
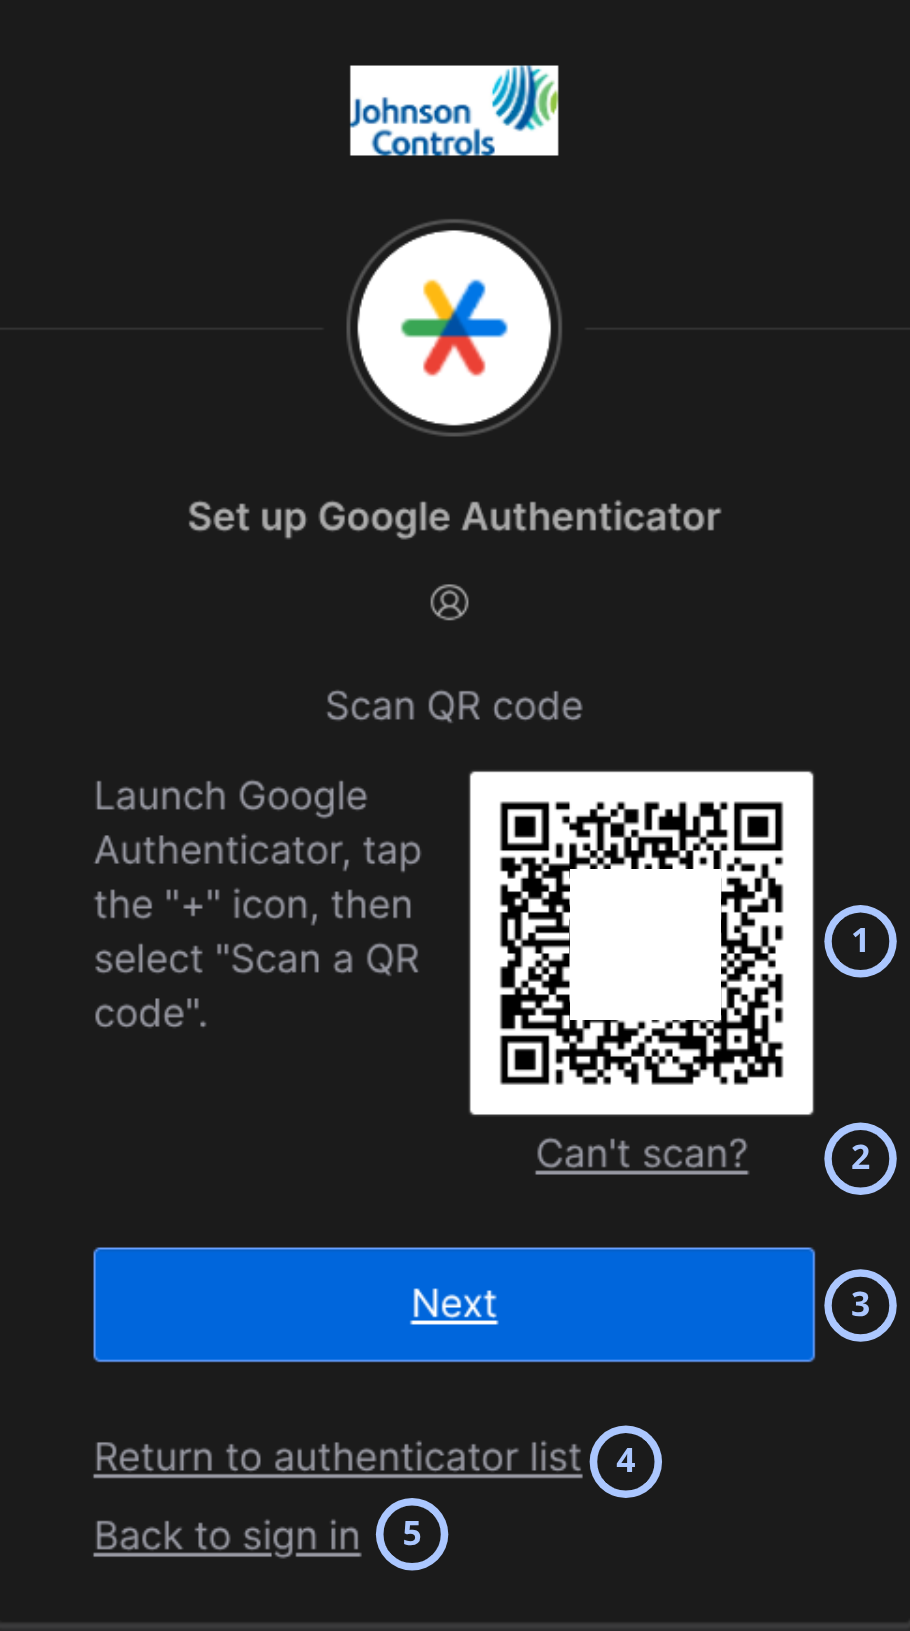
| Callout | Name | Description |
|---|---|---|
| 1 | QR code | QR code to scan with Google Authenticator during security method setup. |
| 2 | Can't scan? link | Opens an alternative setup option if the QR code cannot be scanned. |
| 3 | Next button | Continues the Google Authenticator setup process after the QR code is scanned. |
| 4 | Return to authenticator list link | Returns the user to the list of available security methods. |
| 5 | Back to sign in link | Returns the user to the sign-in page. |
On the next page, you will need to enter code from app to the "Enter code" input field and click on the "Verify button".
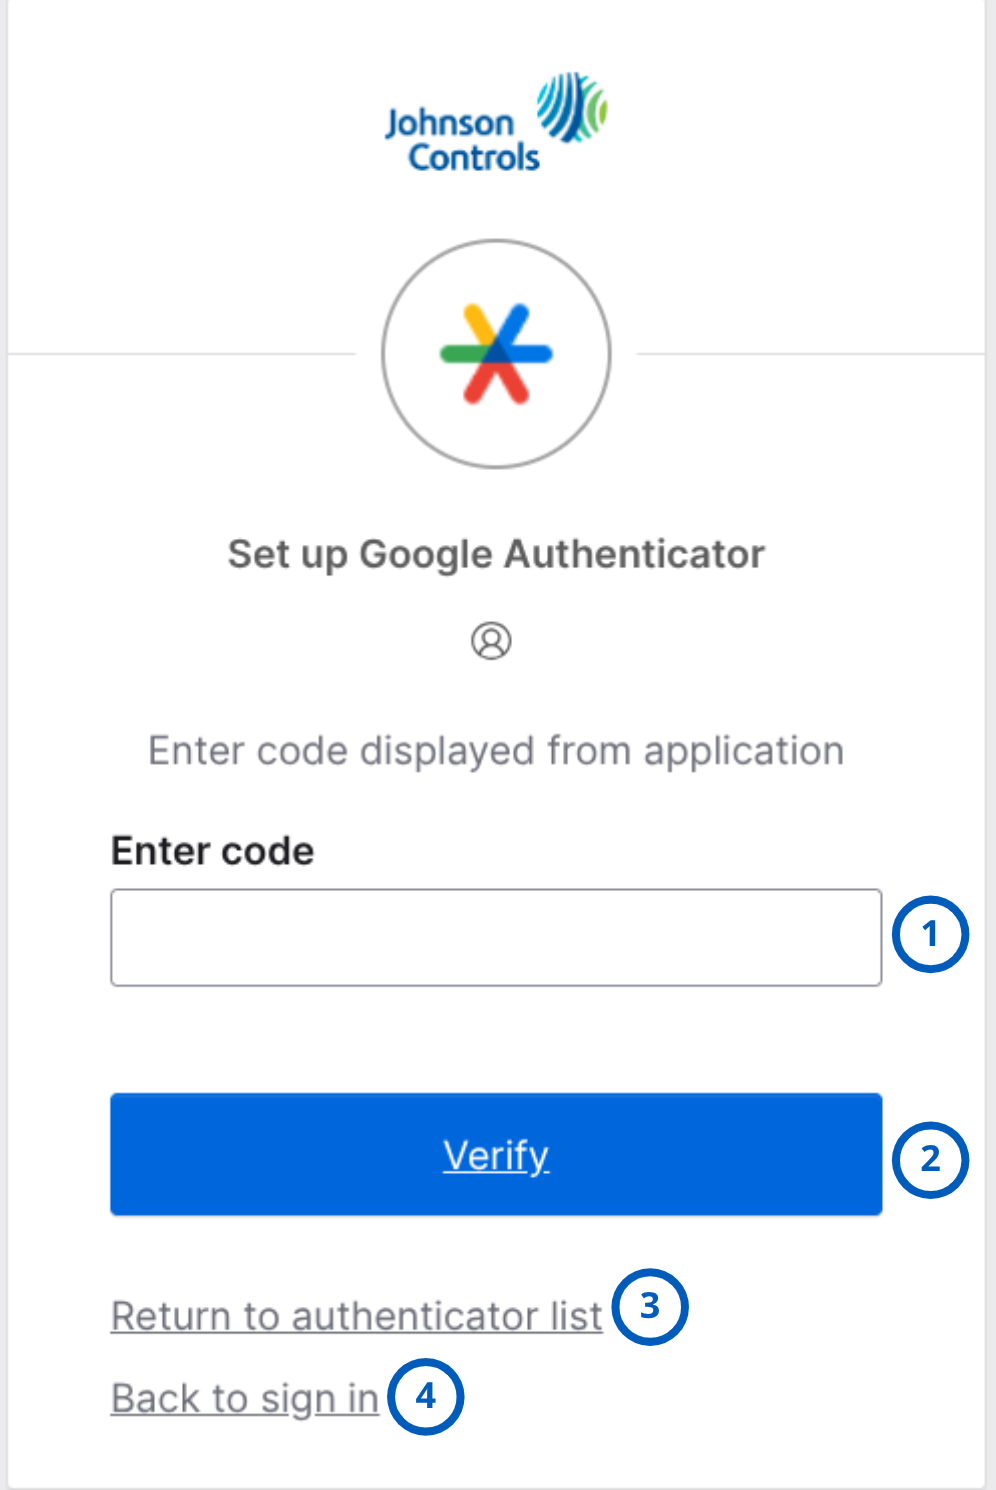
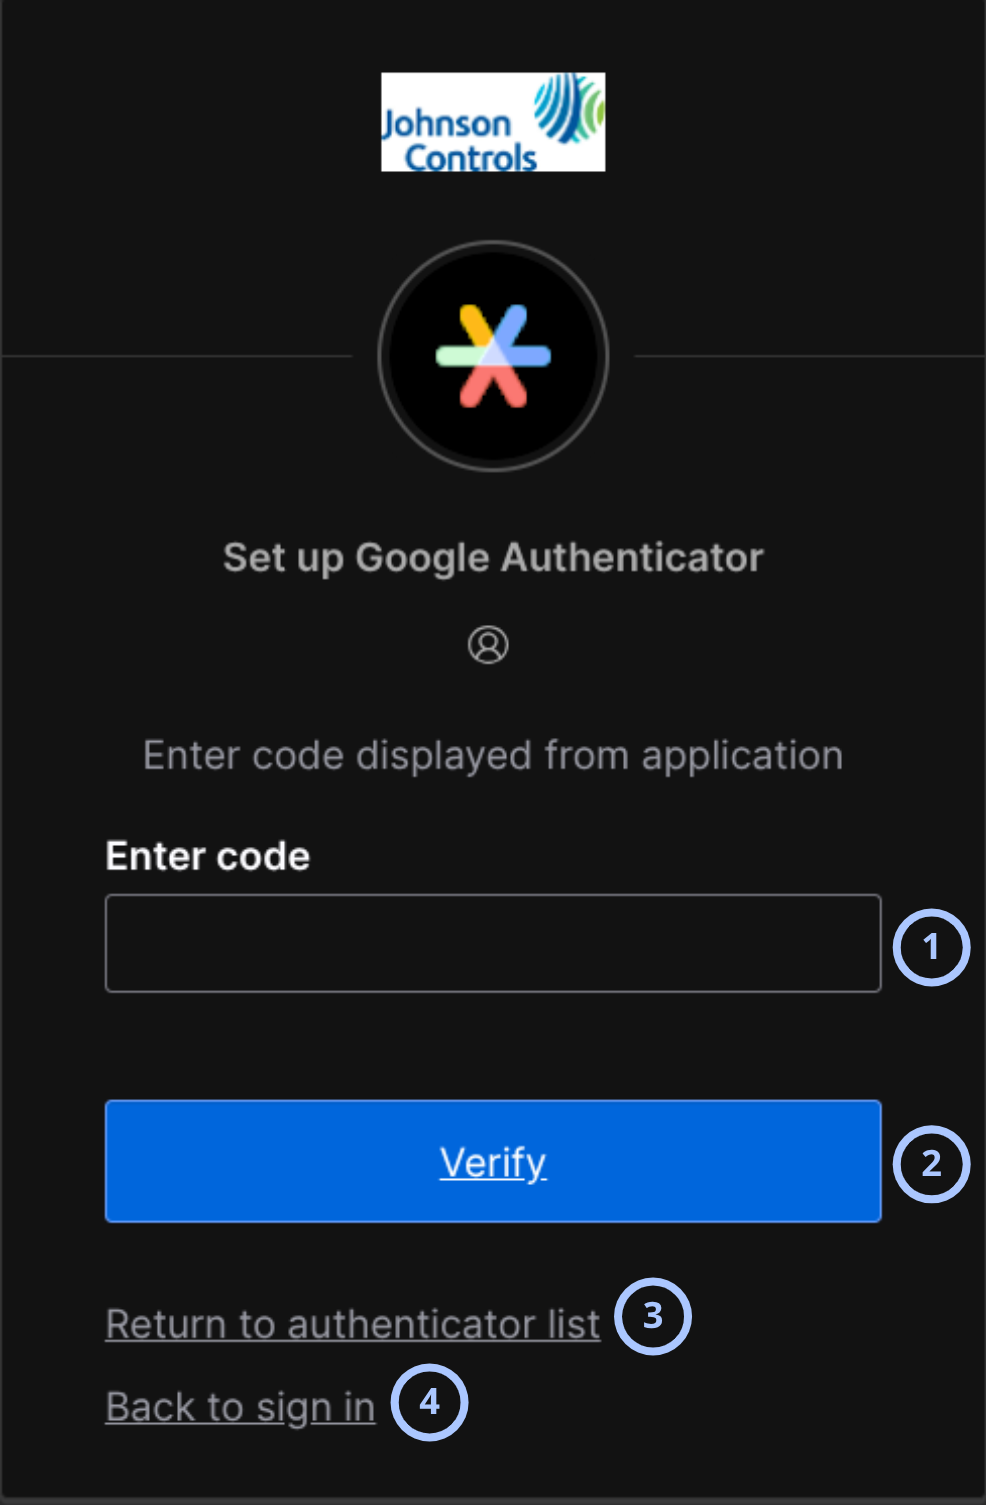
| Callout | Name | Description |
|---|---|---|
| 1 | Enter code field | Field for entering the verification code displayed in the Google Authenticator app. |
| 2 | Verify button | Submits the entered verification code to complete Google Authenticator setup. |
| 3 | Return to authenticator list link | Returns the user to the list of available security methods. |
| 4 | Back to sign in link | Returns the user to the sign-in page. |
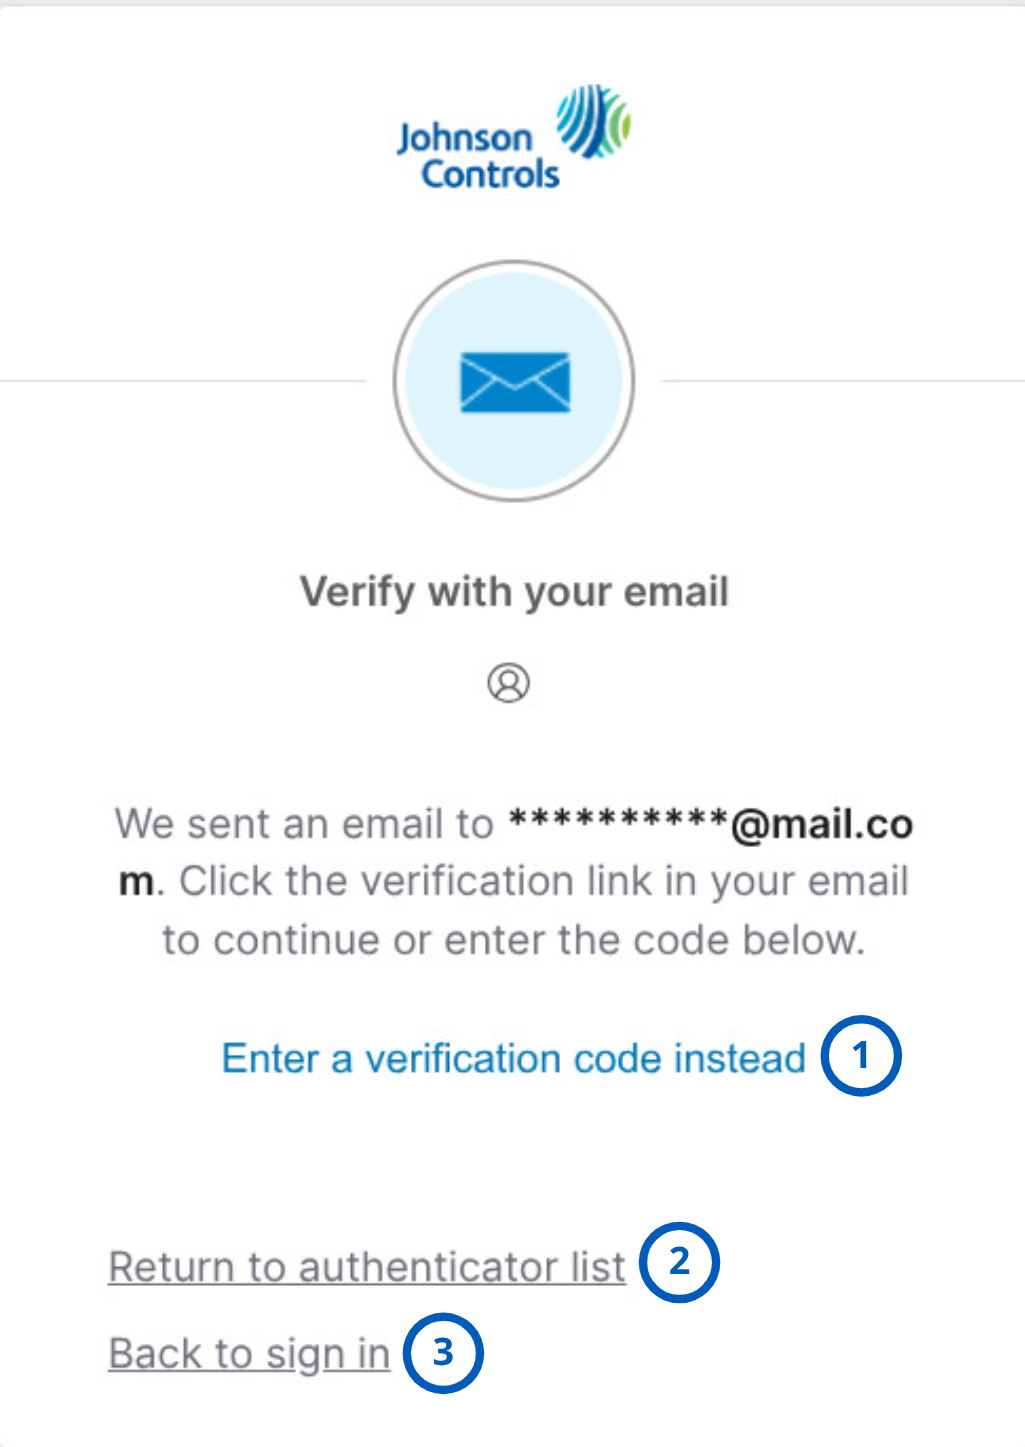
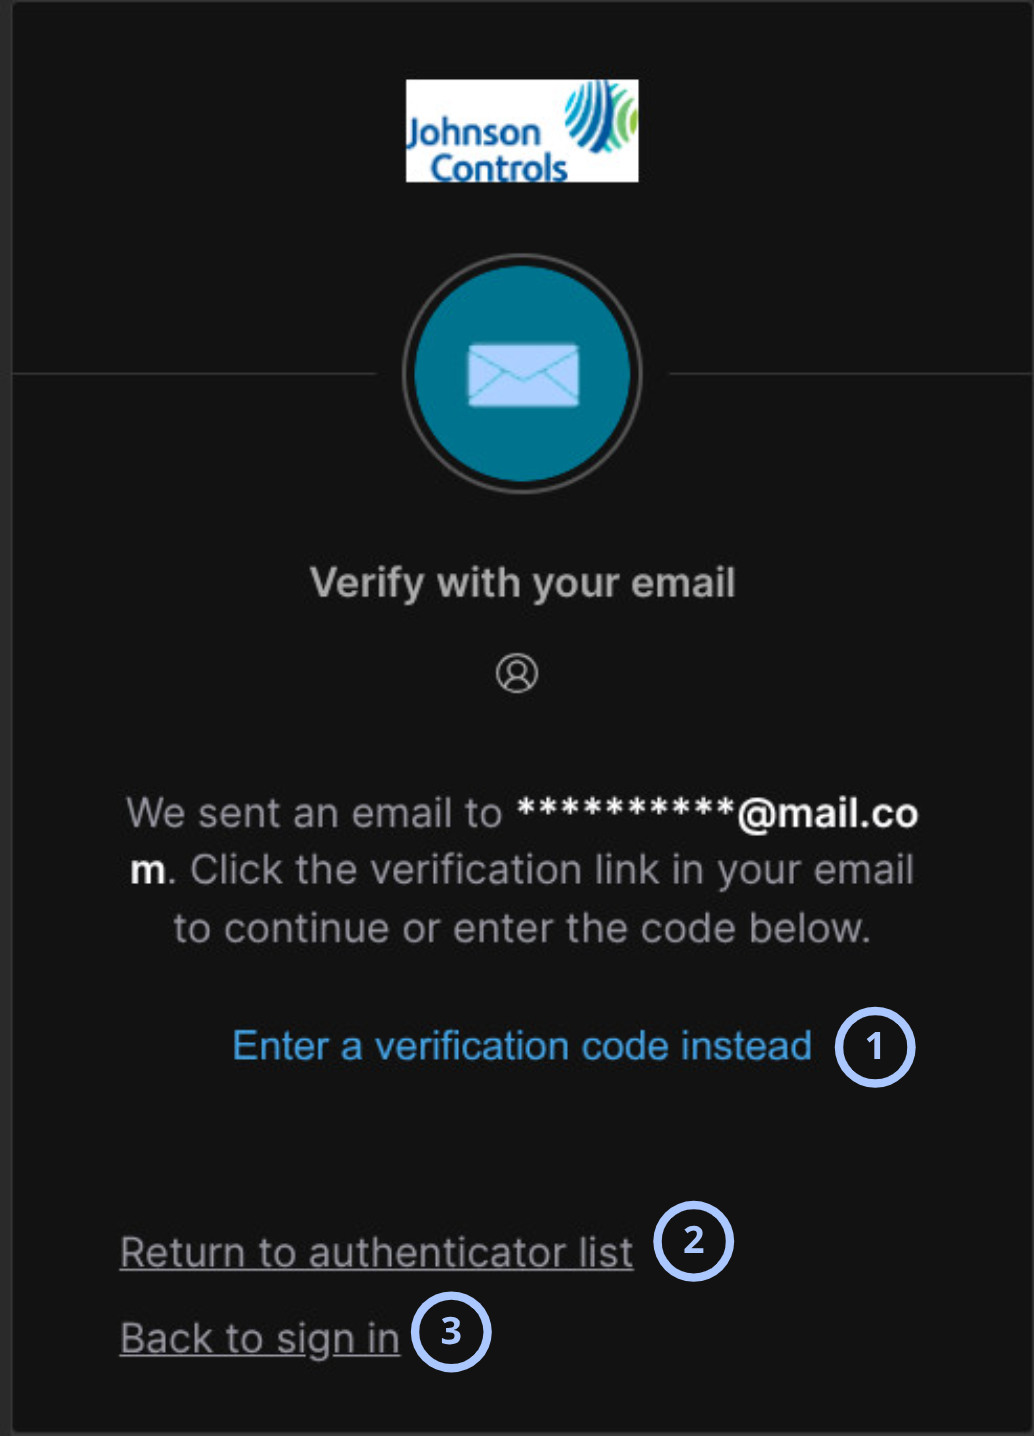
On the next page, you need to go to your email and follow the link sent to you from the sender "Okta" with the subject "Welcome to PowerManage".
| Callout | Name | Description |
|---|---|---|
| 1 | Enter a verification code instead link | Opens the option to verify the account by entering a verification code instead of using the email verification link. |
| 2 | Return to authenticator list link | Returns the user to the list of available security methods. |
| 3 | Back to sign in link | Returns the user to the sign-in page. |
- Company details
- Billing details
- JCI Managed Cloud
- Self-hosted
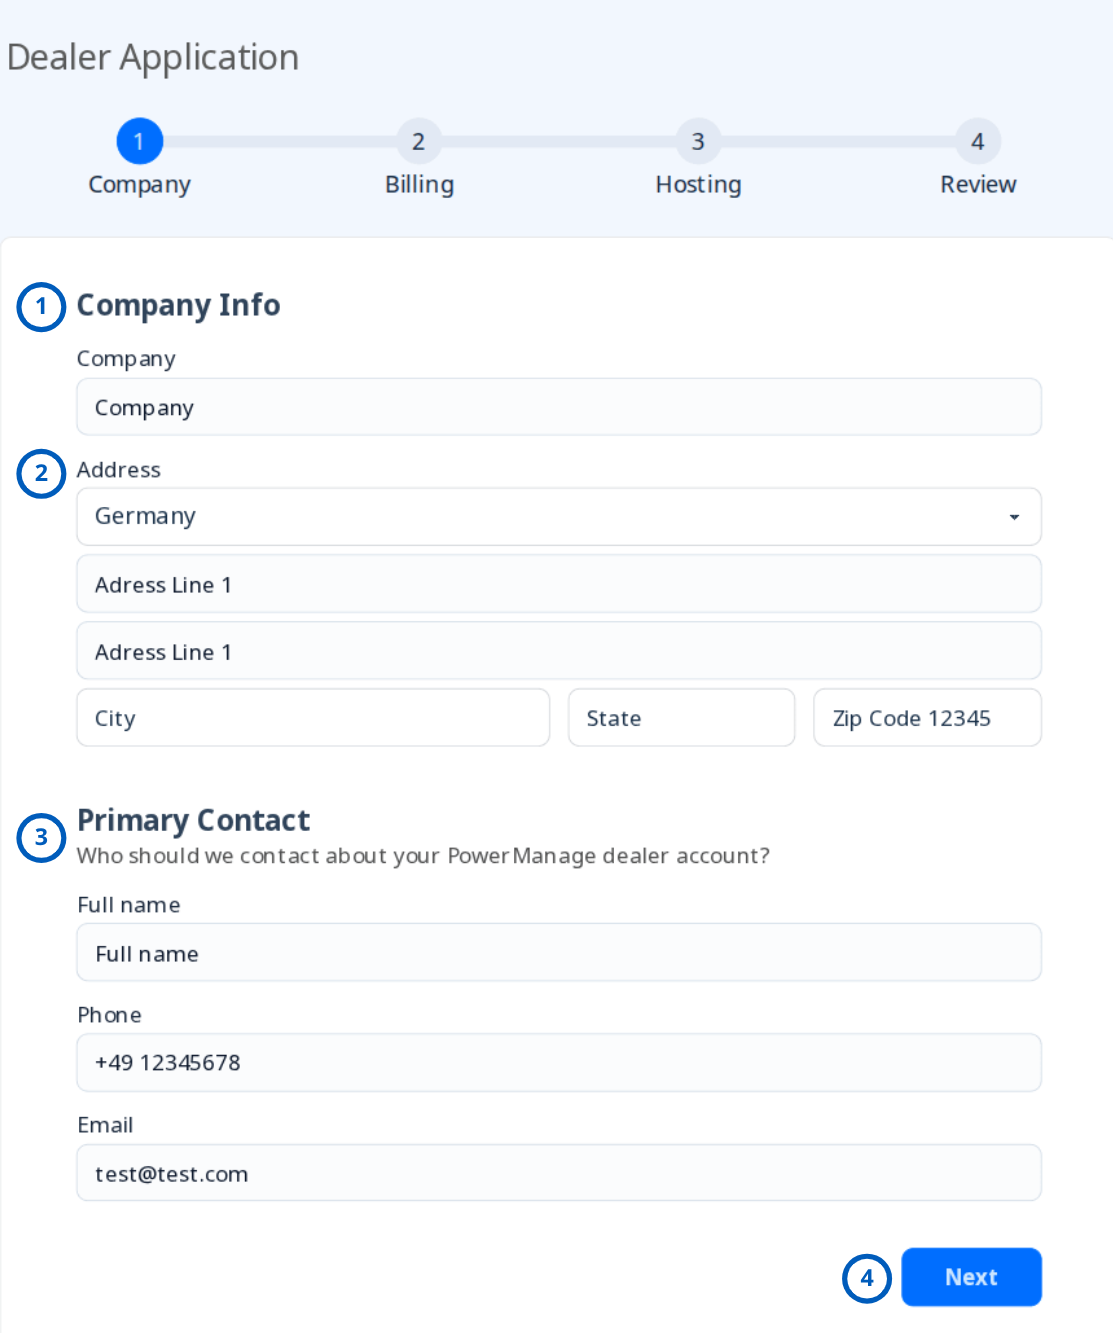
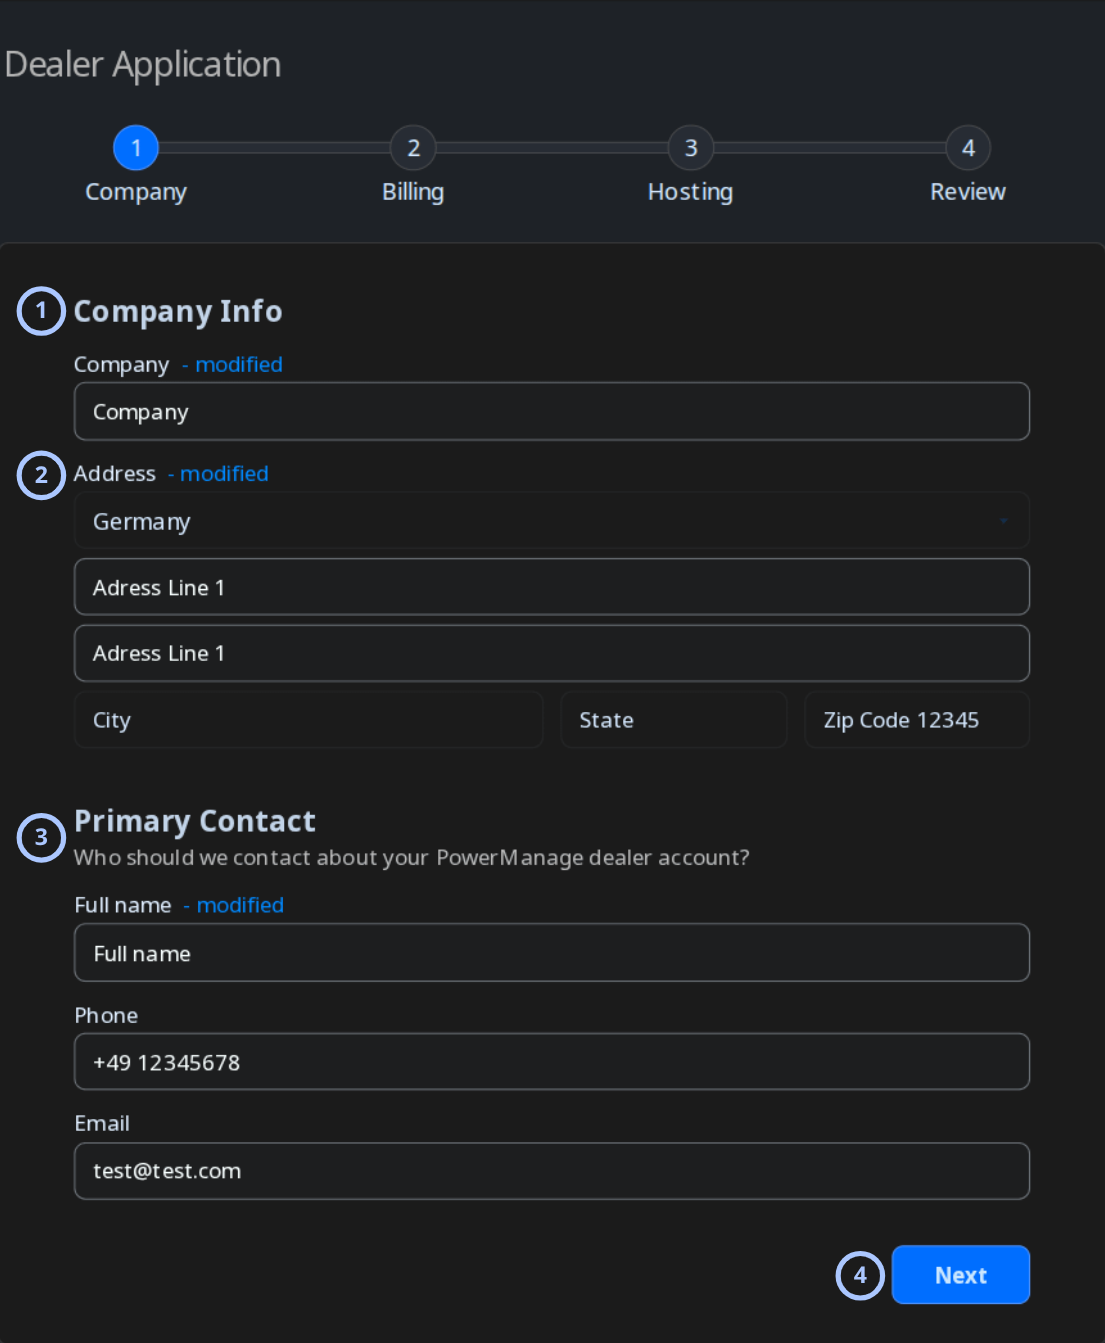
Now, after clicking the link, you'll be redirected to form of new Dealer create. Here you will need to fill in your Company Name, address and support info.
Company Name will be used for role names and company description for group and role names.
| Callout | Name | Description |
|---|---|---|
| 1 | Company Name field | Field for entering the company name for the dealer application. |
| 2 | Company Address section | Section for entering the company address, including country, address lines, city, state or province, and postal code. |
| 3 | Support Info section | Section for entering support contact details, including support contact name, phone number, and email address. |
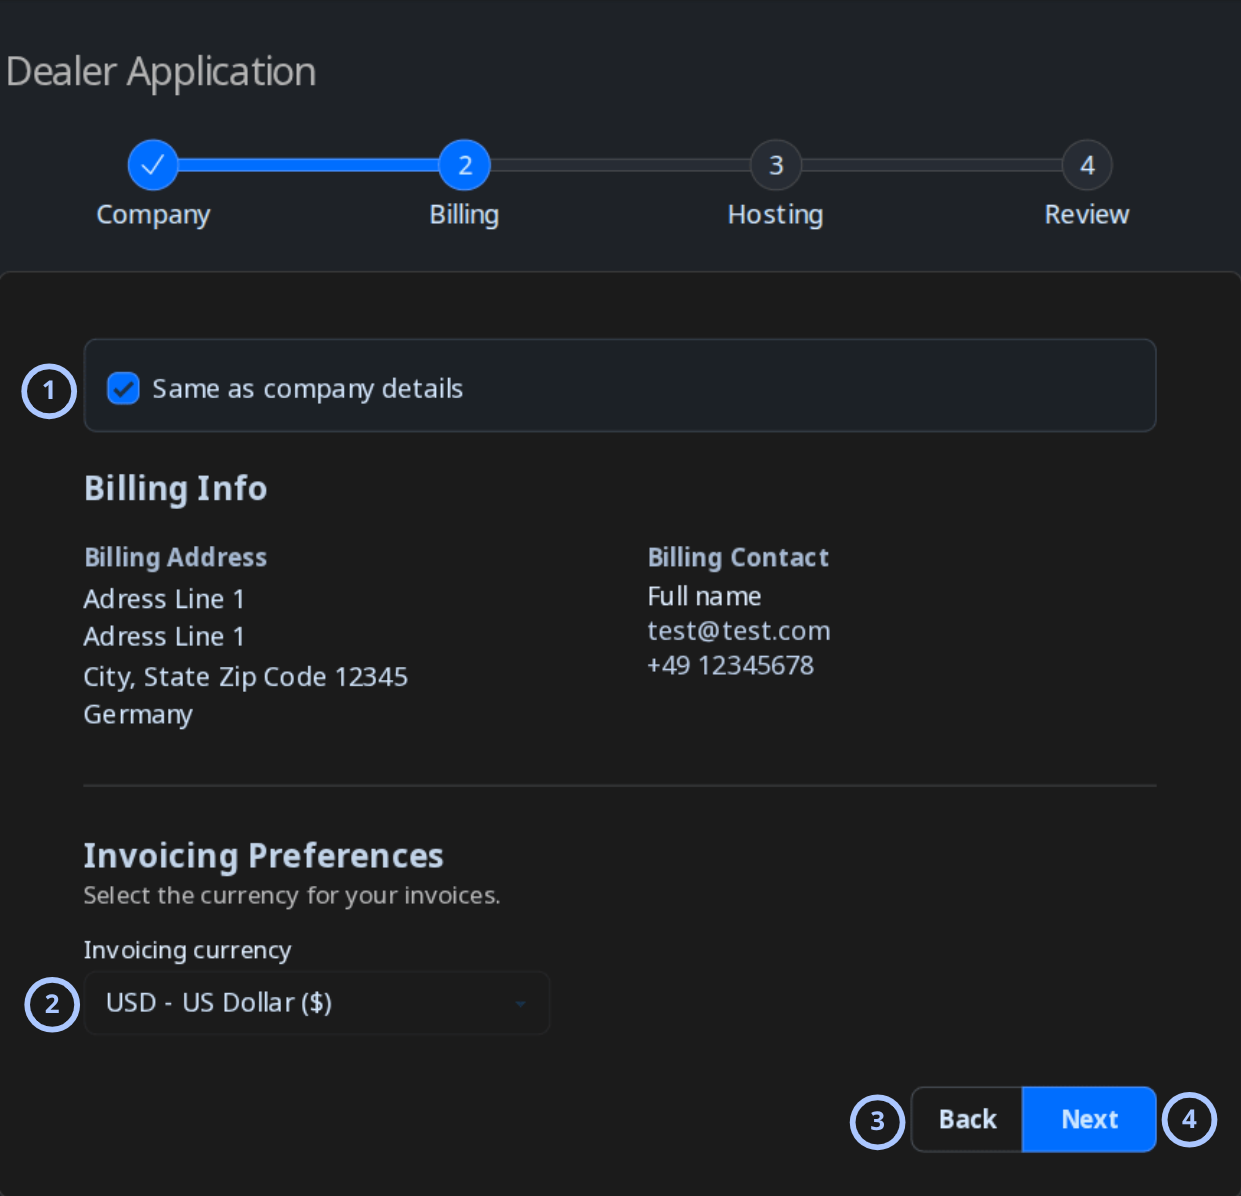
Complete the billing information for the dealer application. Select Same as company details to use the company address and primary contact as the billing address and billing contact, or clear the option to enter different billing details. Then, select the currency to use for invoices and click Next.
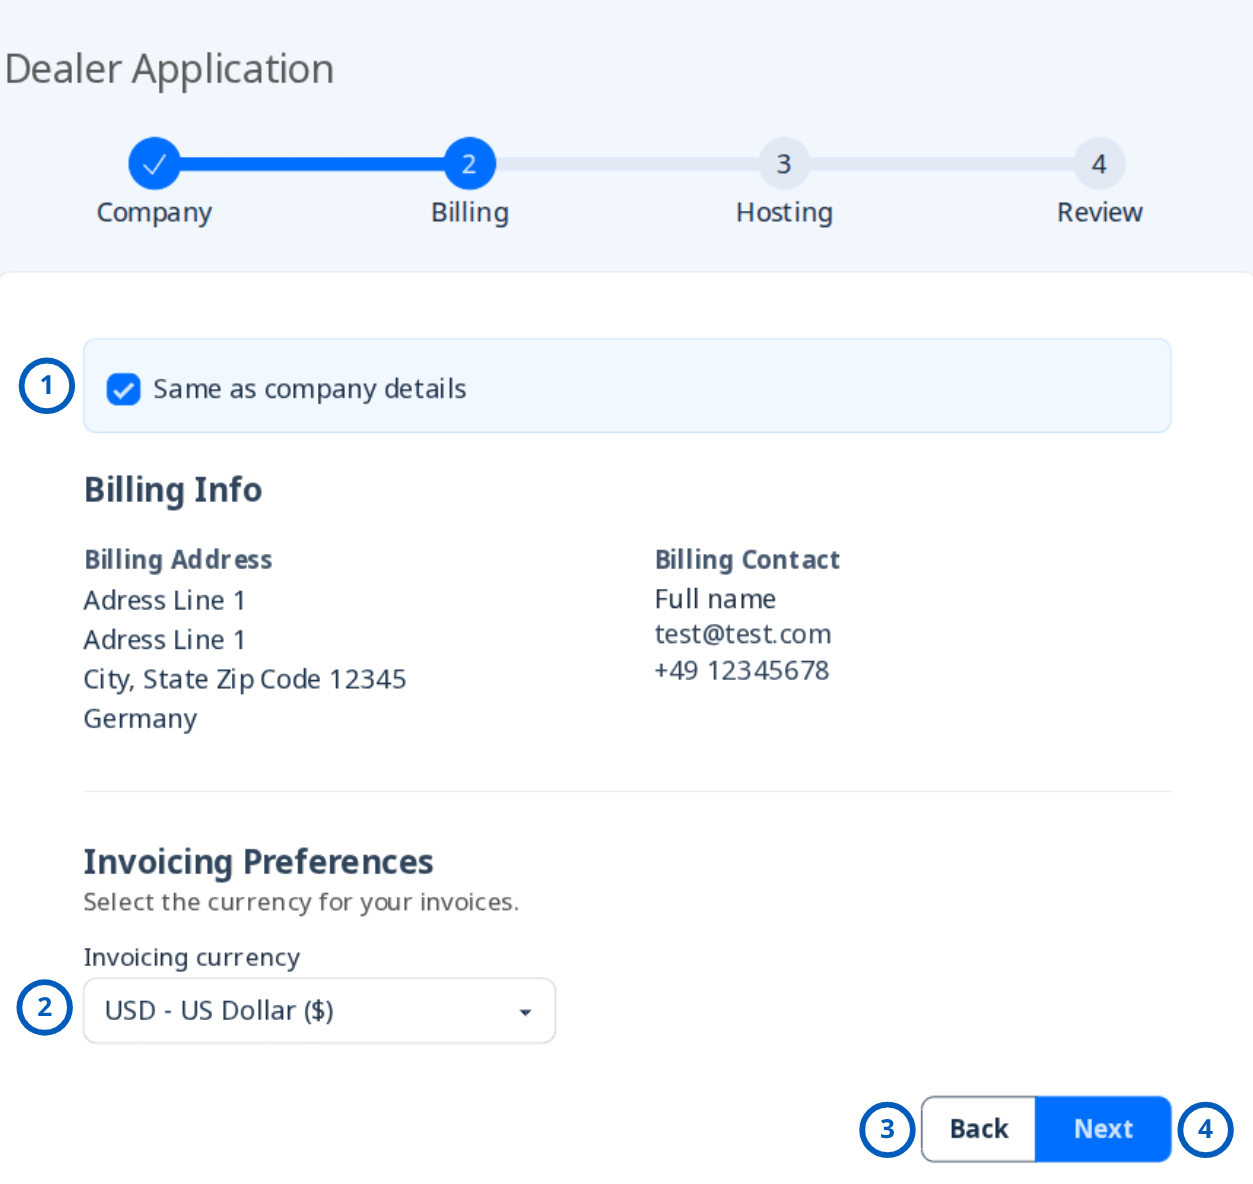
| Callout | Name | Description |
|---|---|---|
| 1 | Same as company details option | Uses the company address and primary contact as the billing address and billing contact. |
| 2 | Invoicing currency field | Selects the currency used for invoices. |
| 3 | Back button | Returns to the Company step. |
| 4 | Next button | Continues to the Hosting step. |
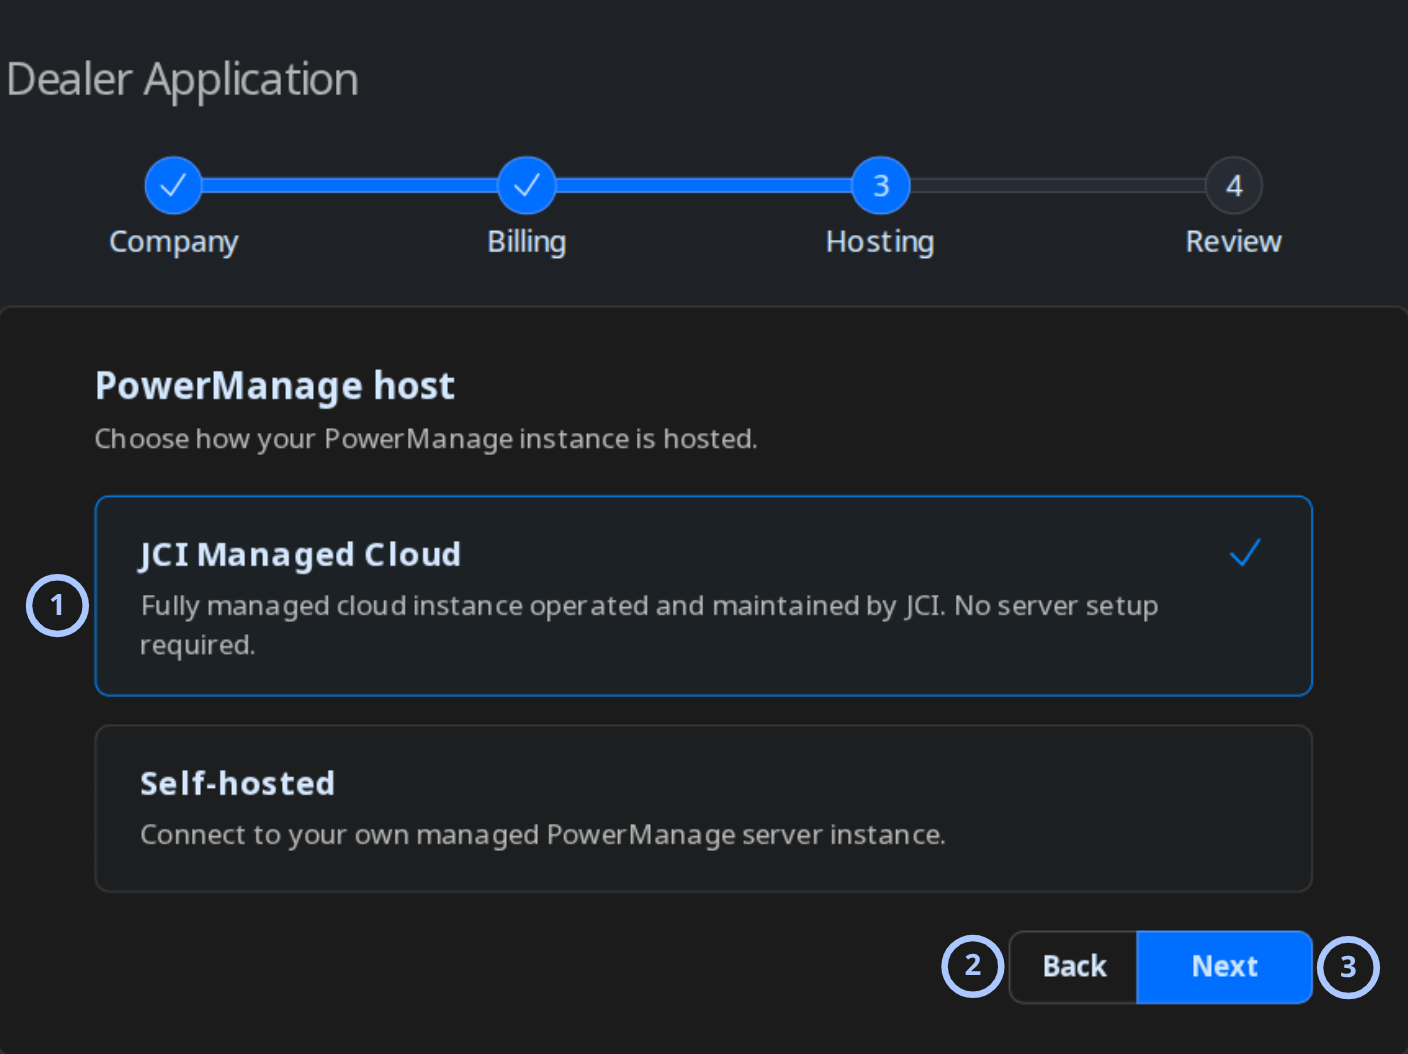
In the PowerManage host section, select JCI Managed Cloud to use a fully managed cloud instance operated and maintained by JCI. No server setup is required. Click Next to continue.
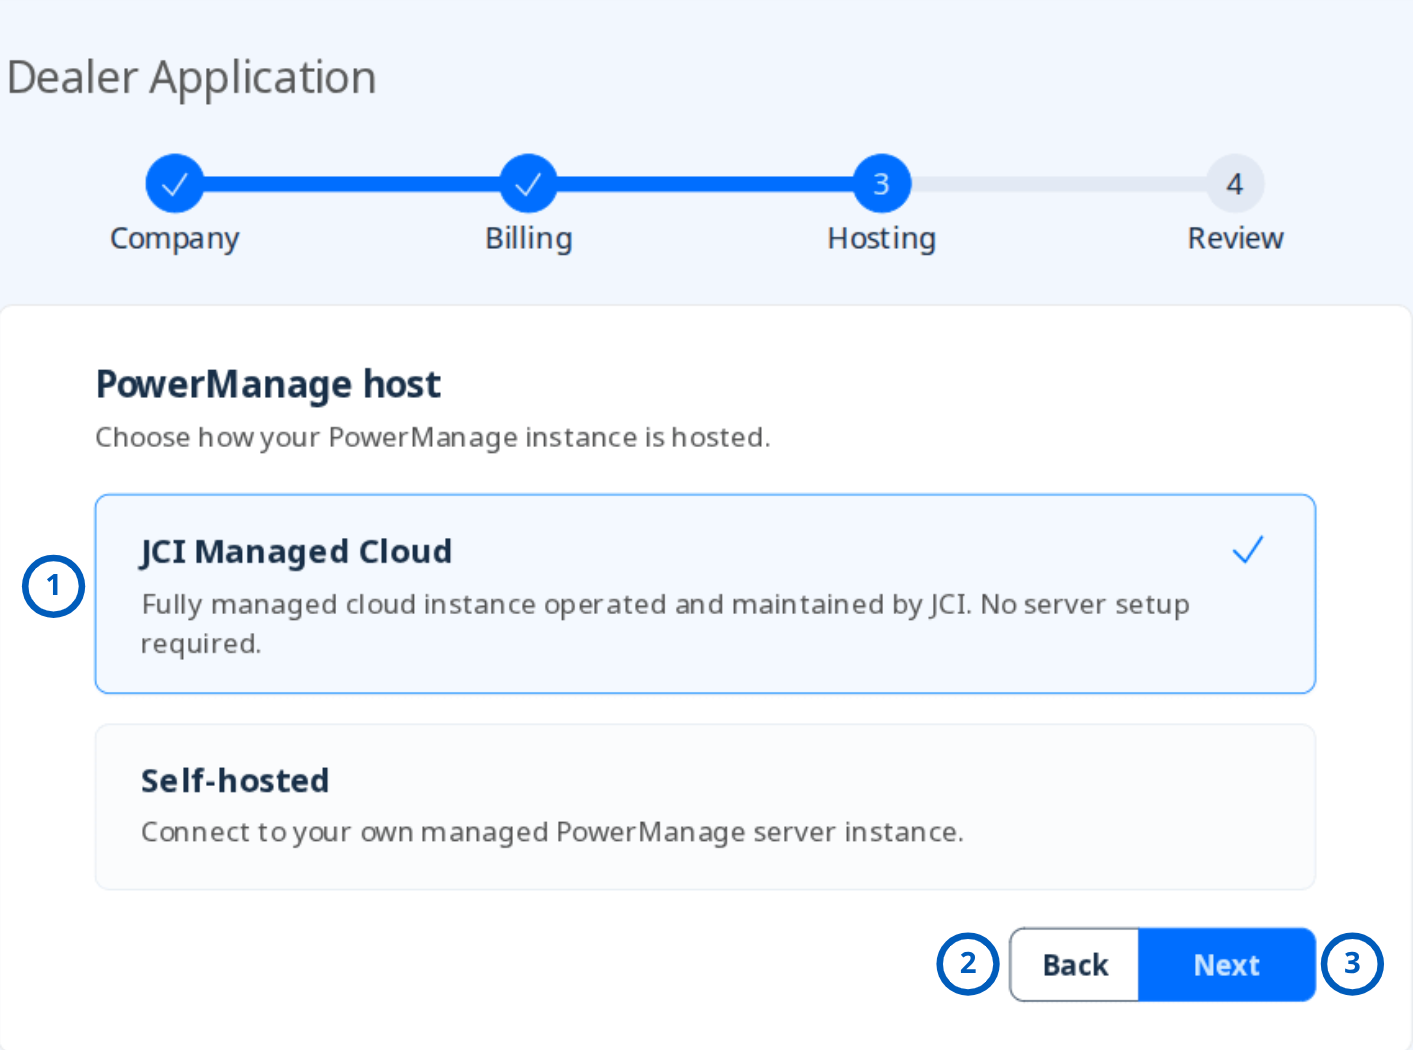
| Callout | Name | Description |
|---|---|---|
| 1 | JCI Managed Cloud option | Selects a fully managed PowerManage cloud instance operated and maintained by JCI. |
| 2 | Back button | Returns to the Billing step. |
| 3 | Next button | Continues to the Review step. |
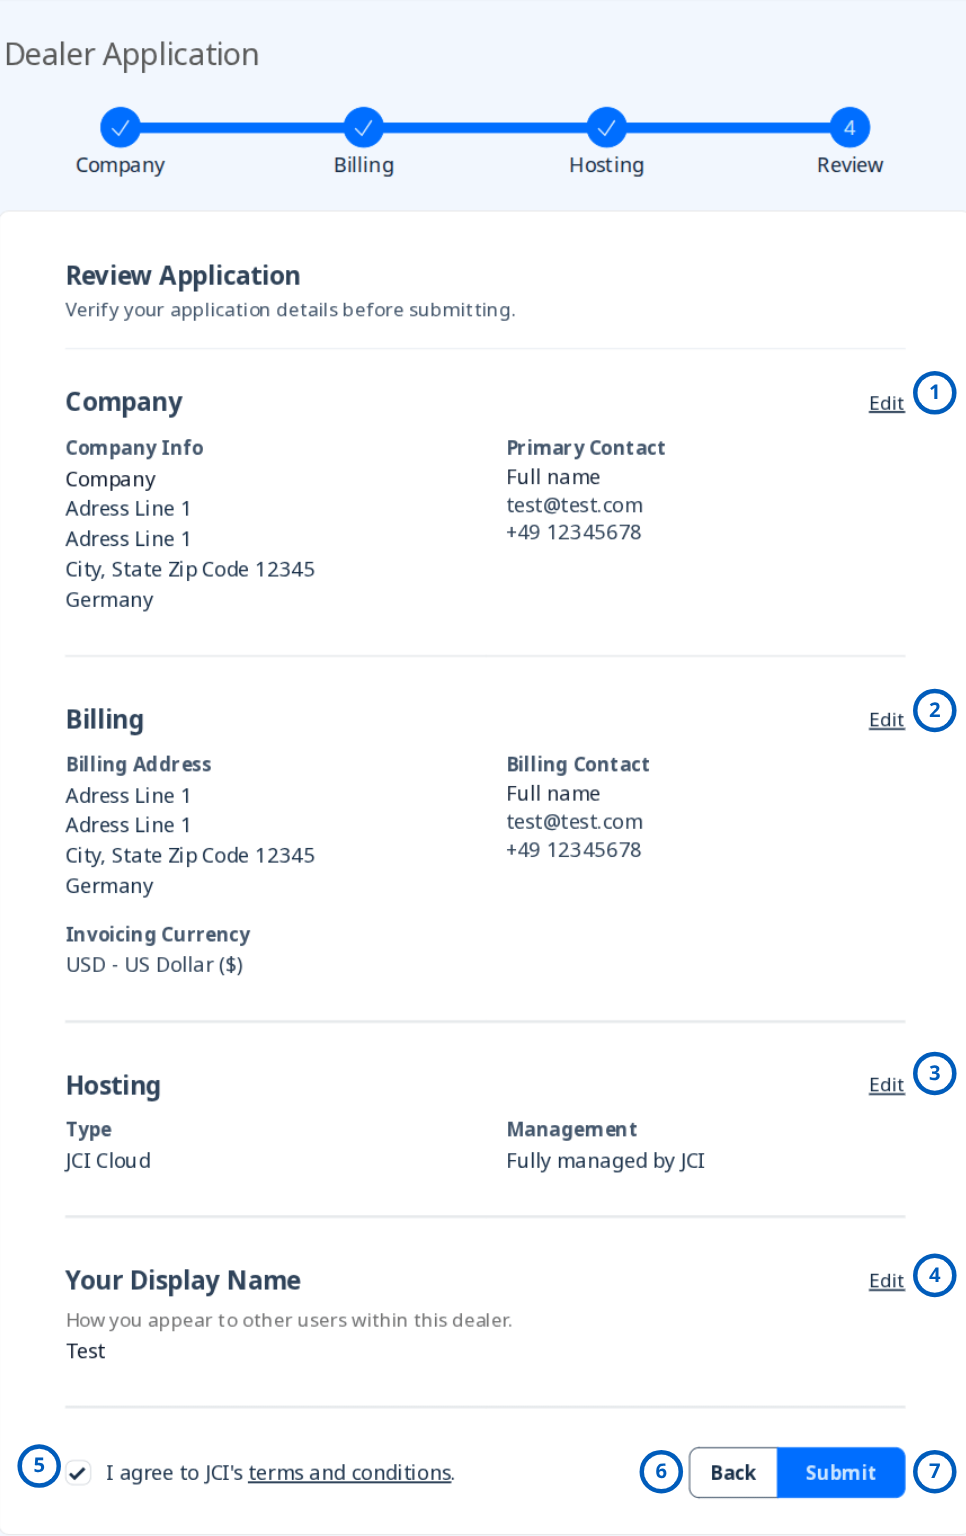
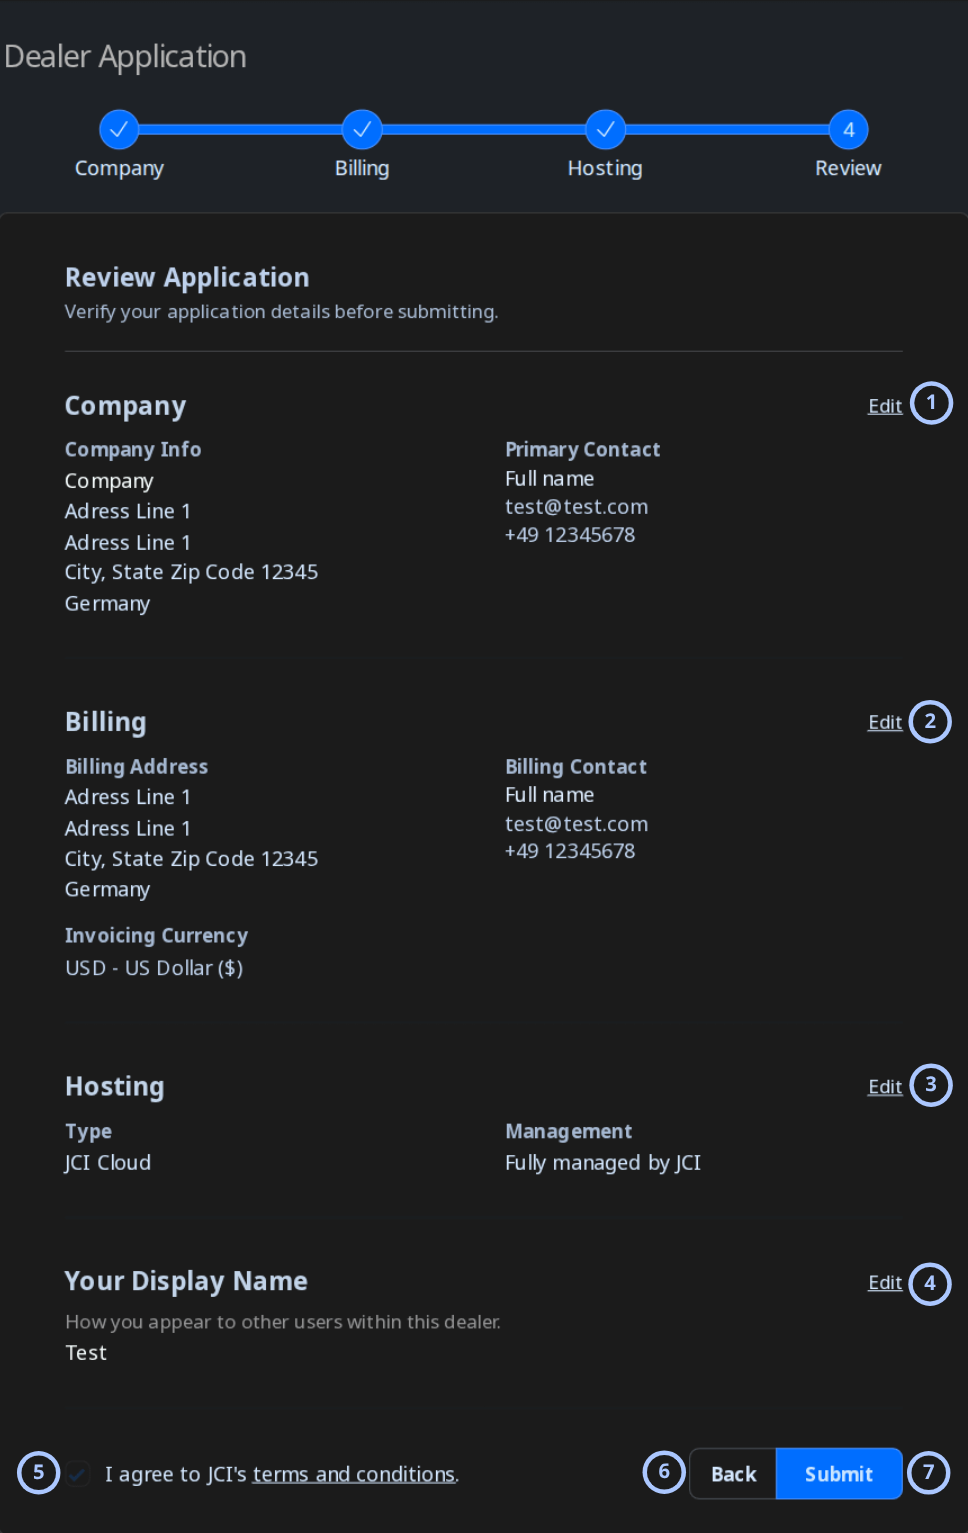
Review the company, billing, hosting, and display name information before submitting the dealer application. To change information in a section, click the corresponding Edit link. Accept JCI's terms and conditions, and then click Submit.
| Callout | Name | Description |
|---|---|---|
| 1 | Company Edit link | Returns to the Company step to update company information or the primary contact. |
| 2 | Billing Edit link | Returns to the Billing step to update billing information or the invoicing currency. |
| 3 | Hosting Edit link | Returns to the Hosting step to update the hosting option. |
| 4 | Display name Edit link | Allows you to update the display name shown to other users within the dealer. |
| 5 | Terms and conditions option | Confirms agreement with JCI's terms and conditions. |
| 6 | Back button | Returns to the Hosting step. |
| 7 | Submit button | Submits the dealer application for approval. |
After you submit the application, the dealer account is created and remains pending until it is approved. The registration process is complete after approval.


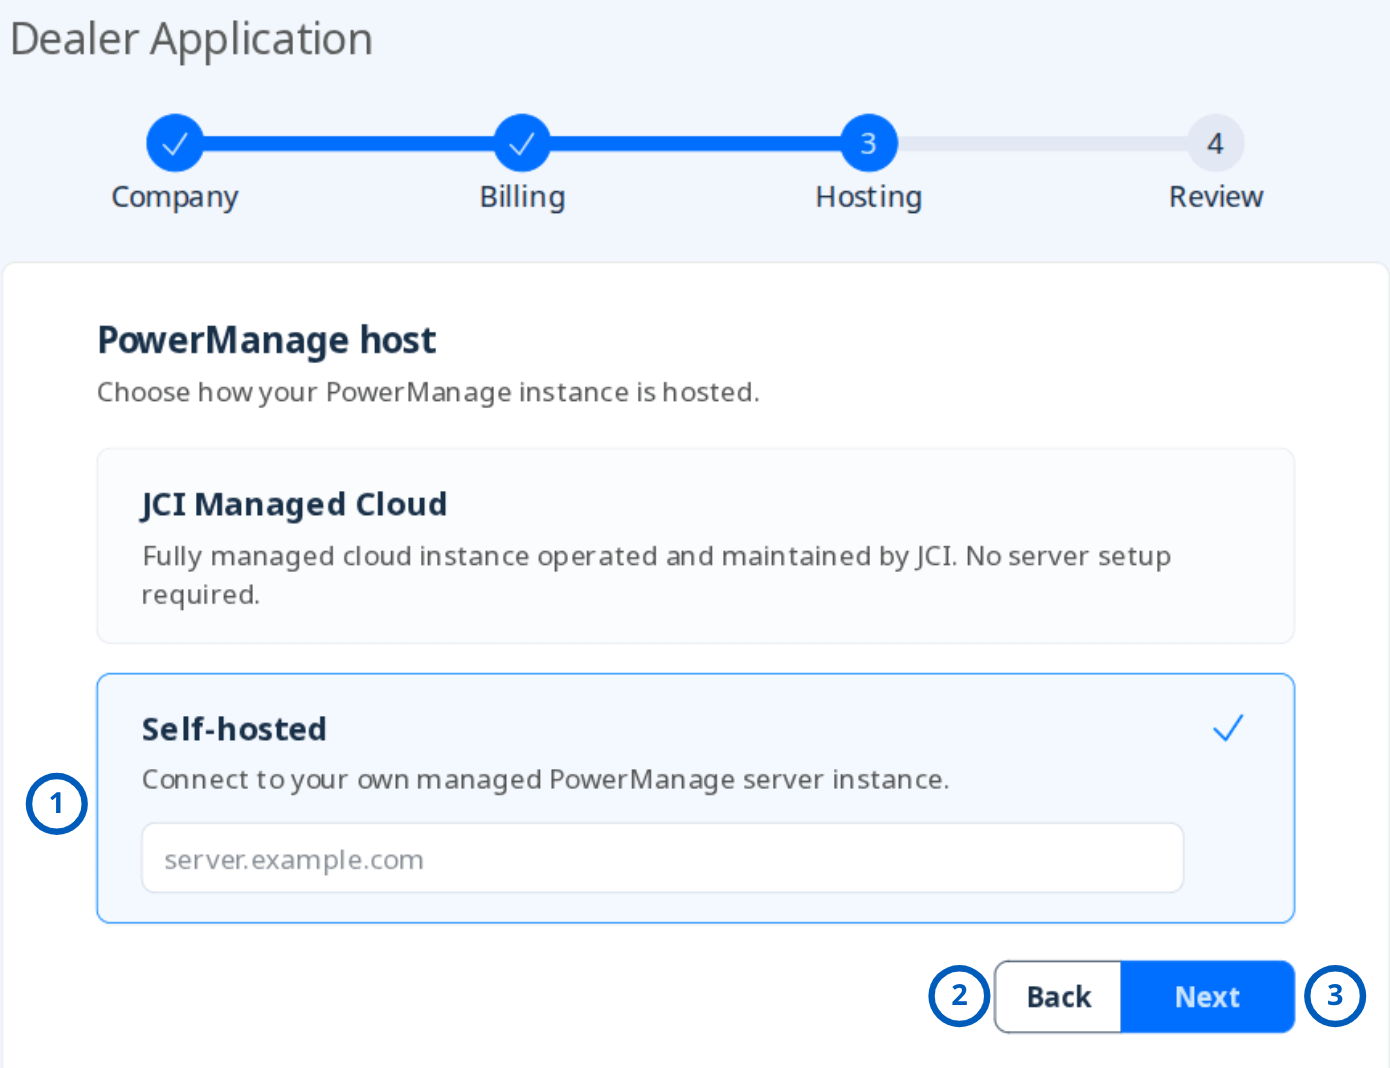
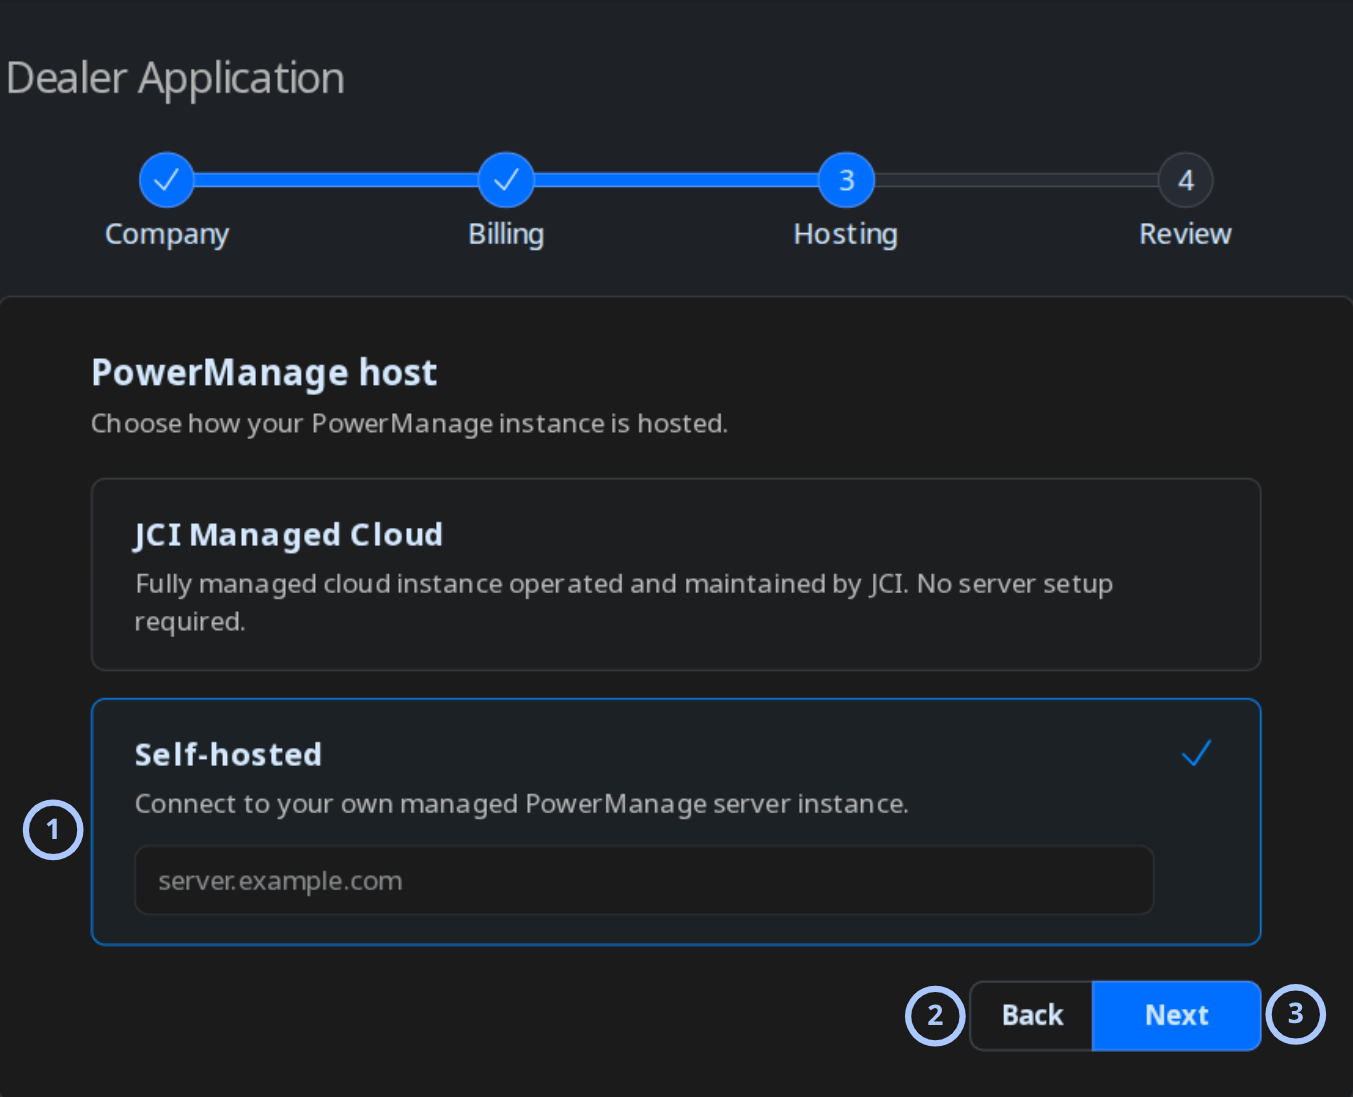
In the PowerManage host section, select Self-hosted to connect to your own managed PowerManage server instance. Enter the server address, and then click Next to continue.
| Callout | Name | Description |
|---|---|---|
| 1 | Self-hosted option | Selects a self-hosted PowerManage environment and enables the server address field. |
| 2 | Back button | Returns to the Billing step. |
| 3 | Next button | Continues to the Review step. |
For the process to be successful, your PowerManage server must synchronize with the repository, billing must be enabled in your license, the server must be online, the firewall must be configured correctly, and the required ports must be open.
Contact support if you encounter issues.
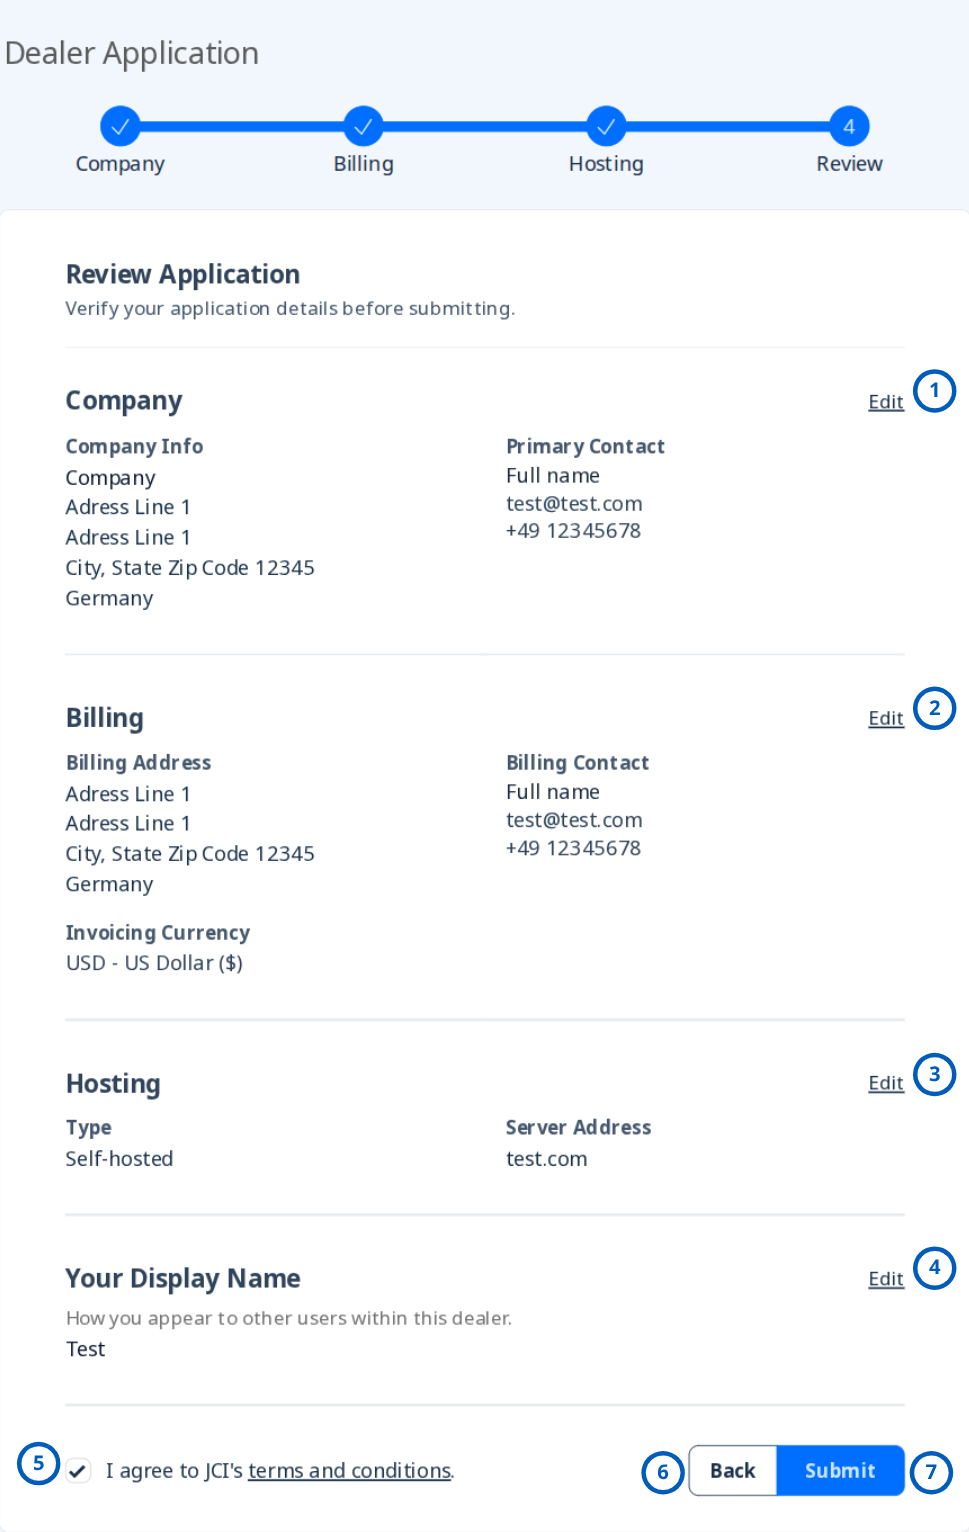
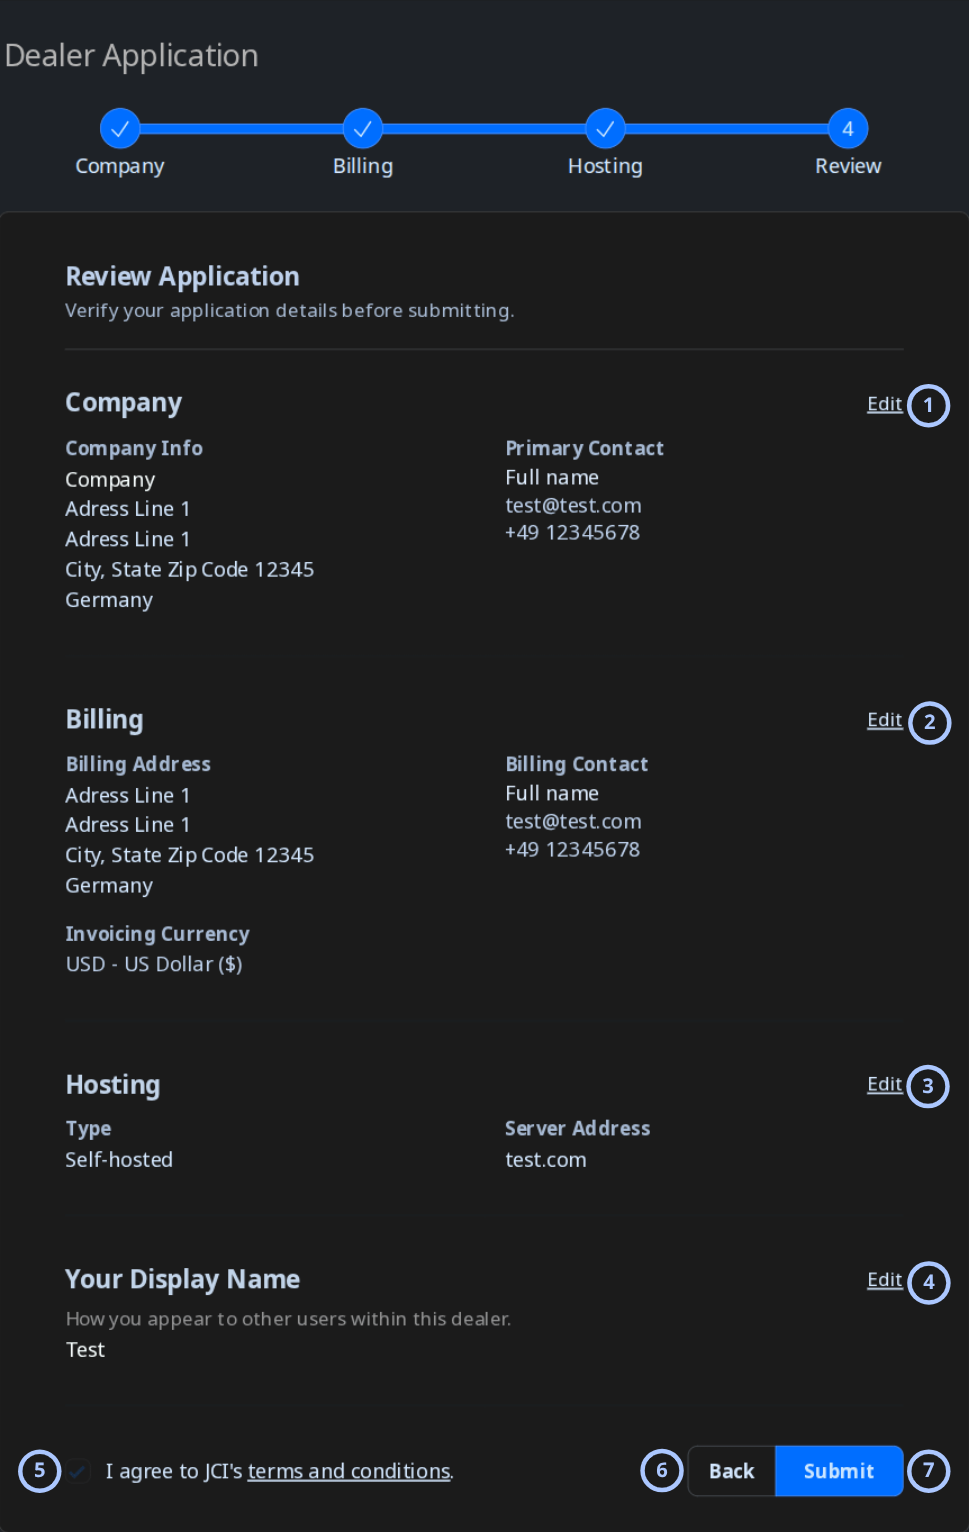
Review the company, billing, hosting, and display name information before submitting the dealer application. To change information in a section, click the corresponding Edit link. Accept JCI's terms and conditions, and then click Submit.
| Callout | Name | Description |
|---|---|---|
| 1 | Company Edit link | Returns to the Company step to update company information or the primary contact. |
| 2 | Billing Edit link | Returns to the Billing step to update billing information or the invoicing currency. |
| 3 | Hosting Edit link | Returns to the Hosting step to update the hosting option or server address. |
| 4 | Display name Edit link | Allows you to update the display name shown to other users within the dealer. |
| 5 | Terms and conditions option | Confirms agreement with JCI's terms and conditions. |
| 6 | Back button | Returns to the Hosting step. |
| 7 | Submit button | Submits the dealer application for approval. |
After you submit the application, the dealer account is created and remains pending until it is approved. The registration process is complete after approval.
- How Dealer Portal registration affects your PowerManage login see in Dealers
Tips
- Prepare all company, support, and billing information before starting the dealer application.
- Use a valid email address and keep the Okta verification message available until account setup is complete.
- Verify the selected hosting option before submitting the application.
- If you select Self-hosted, confirm that the server is online, synchronized with the repository, and accessible through the required ports.
- Review all application information and the display name before selecting Submit.
Troubleshooting
Verification email is not received
Possible causes
- The registration email address is incorrect.
- Email delivery is delayed.
- The message was filtered to the spam or junk folder.
What to do
- Verify the email address entered during registration.
- Check the spam or junk folder for a message from Okta with the subject Welcome to PowerManage.
- Use the option to enter a verification code if it is available.
- Contact support if the verification email is not delivered.
Authenticator setup cannot be completed
Possible causes
- The QR code was not scanned correctly.
- The verification code expired.
- The code from the authenticator application was entered incorrectly.
What to do
- Scan the QR code again.
- Enter the latest code displayed in the authenticator application.
- Use Can't scan? to open an alternative setup option.
- Return to the authenticator list and select another available security method if necessary.
Self-hosted PowerManage instance is offline during host verification
Possible causes
- Required ports between PowerManage and the repository are closed.
- PowerManage cannot synchronize with the repository.
- Billing is disabled in the PowerManage license.
- The PowerManage server is offline.
What to do
- Confirm that the required ports are open on the PowerManage side.
- Confirm that PowerManage can successfully synchronize with the repository.
- Confirm that billing is enabled in the PowerManage license.
- Confirm that PowerManage is online.
- Contact support if the issue continues.
Dealer application remains pending
Possible causes
- Customer Service has not approved the application yet.
- Additional application review is required.
- A notification email was not delivered.
What to do
- Check the application status in the Dealer Portal.
- Verify the registration email inbox and spam or junk folder.
- Contact Customer Service or the Dealer Portal administrator for the application status.