Calendar
Overview
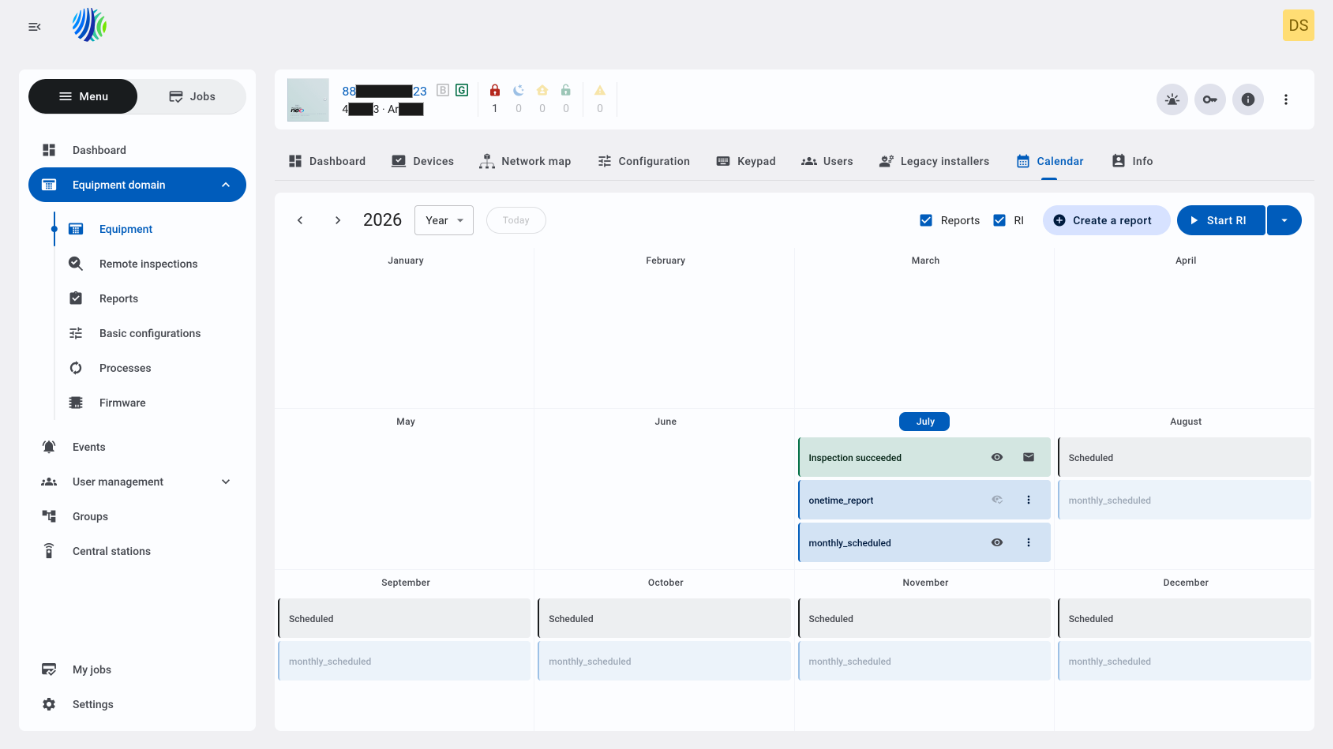
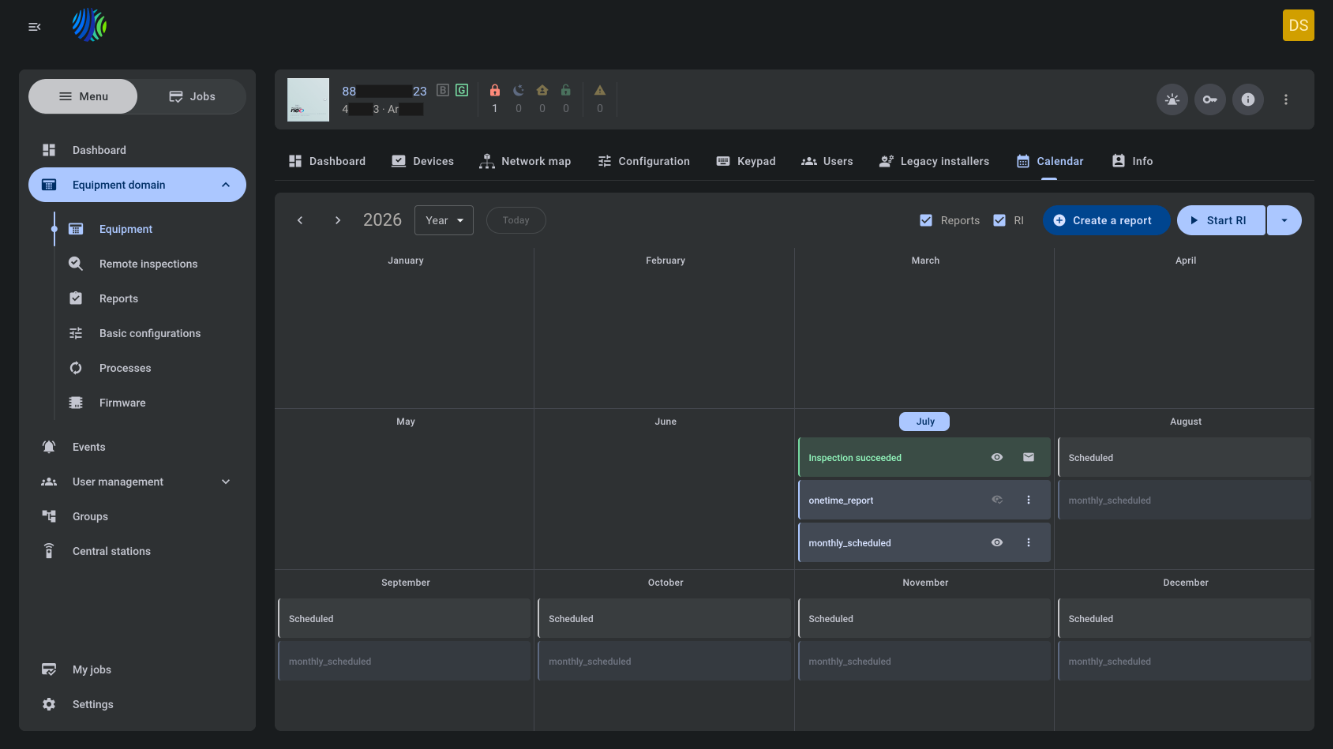
The Calendar tab in Equipment hub shows reports and remote inspections for the selected panel. Use this tab to:
- Review completed and scheduled reports.
- Review completed and scheduled remote inspections.
- Switch between year and month views.
- Filter the calendar by reports or remote inspections.
- Create a report or start a remote inspection.
- Review, email, or export available results.
Before you begin
Required permissions
Required permissions depend on the action that you want to complete.
- You must have permission to open Equipment hub for the selected panel.
- You must have permission to view the selected panel.
- You must have the required report permissions to create, review, or export reports.
- You must have the required remote inspection permissions to start, schedule, cancel, review, or email remote inspections.
Access to the Equipment hub page and Calendar tab is controlled by the role permission group named Unit.
Preconditions
- Open Equipment hub by selecting a panel on the Equipment page.
- The selected panel must exist on the PowerManage server.
- Reports or remote inspections must exist before they can appear in the calendar.
Dependencies
- The Calendar tab is available for Visonic, DSC, IQ (Qolsys), Neo 5, and Dual Path panels.
- Calendar entries depend on report and remote inspection schedules and results for the selected panel.
- Email delivery depends on the server email configuration and a valid recipient email address.
- Exported files are downloaded through the web browser.
Important limitations
- Fibro Transmitter panels do not have the Calendar tab.
- A grey calendar entry represents a scheduled report or remote inspection that has not completed.
- Available actions depend on the entry type, entry status, and your permissions.
Page layout
Page header


The page header provides date navigation, display filters, and actions for reports and remote inspections.
| Callout | UI element | Description | When to use |
|---|---|---|---|
| 1 | Navigation arrows | Move backward or forward through years or months, depending on the selected calendar view. | Use to review entries outside the currently displayed period. |
| 2 | Date navigation | Shows the current year or month label and provides a dropdown for selecting Year or Month view. | Use to select the calendar period and level of detail that you want to review. |
| 3 | Today button | Returns the calendar to the current month or day after you navigate to another period. | Use to return to the current date. |
| 4 | Reports checkbox | Shows reports when selected and hides reports when cleared. | Use to include or exclude reports from the calendar. |
| 5 | RI checkbox | Shows remote inspections when selected and hides remote inspections when cleared. | Use to include or exclude remote inspections from the calendar. |
| 6 | Create report button | Opens the Add report form. | Use to create a report for the selected panel. See the Reports page for details. |
| 7 | Start RI button | Opens the Initiate inspection modal window. The adjacent dropdown provides actions to schedule a remote inspection or cancel a scheduled remote inspection. | Use to start, schedule, or cancel a remote inspection. See the Remote inspections page for details. |
Calendar
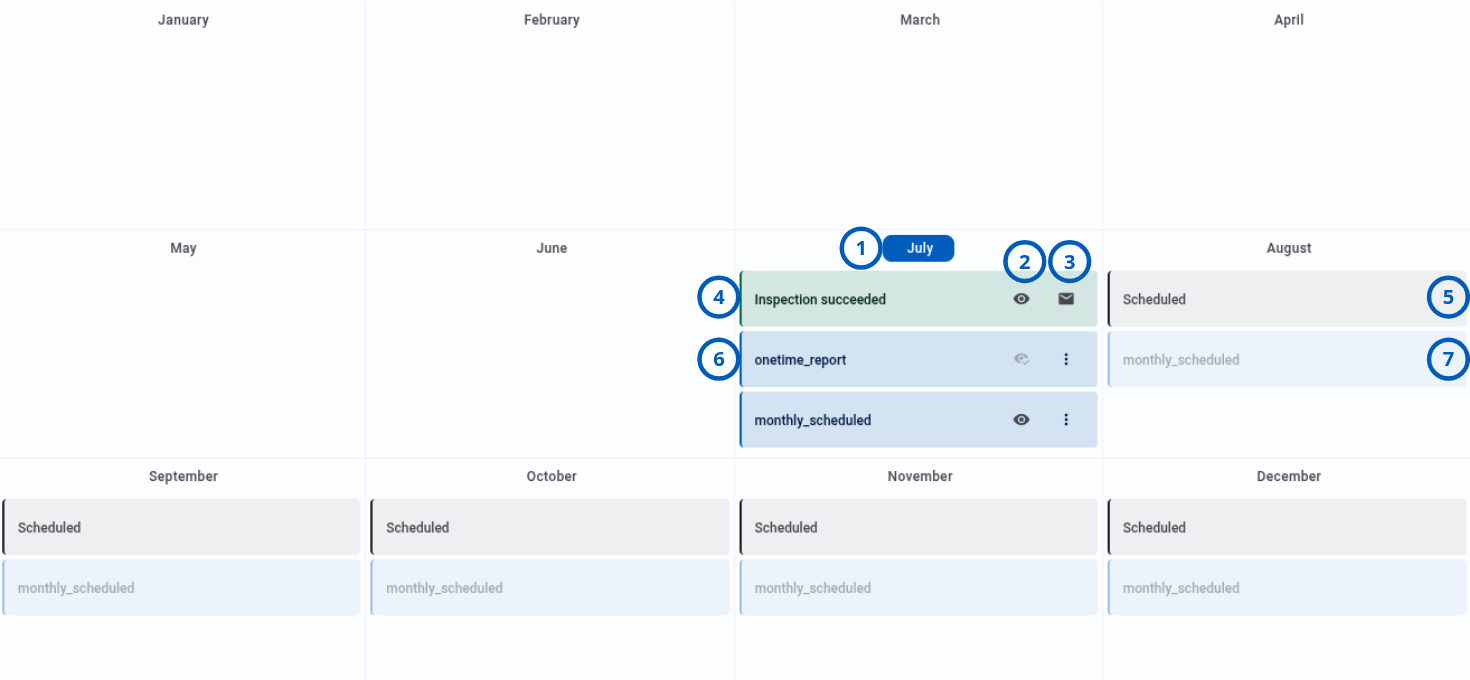
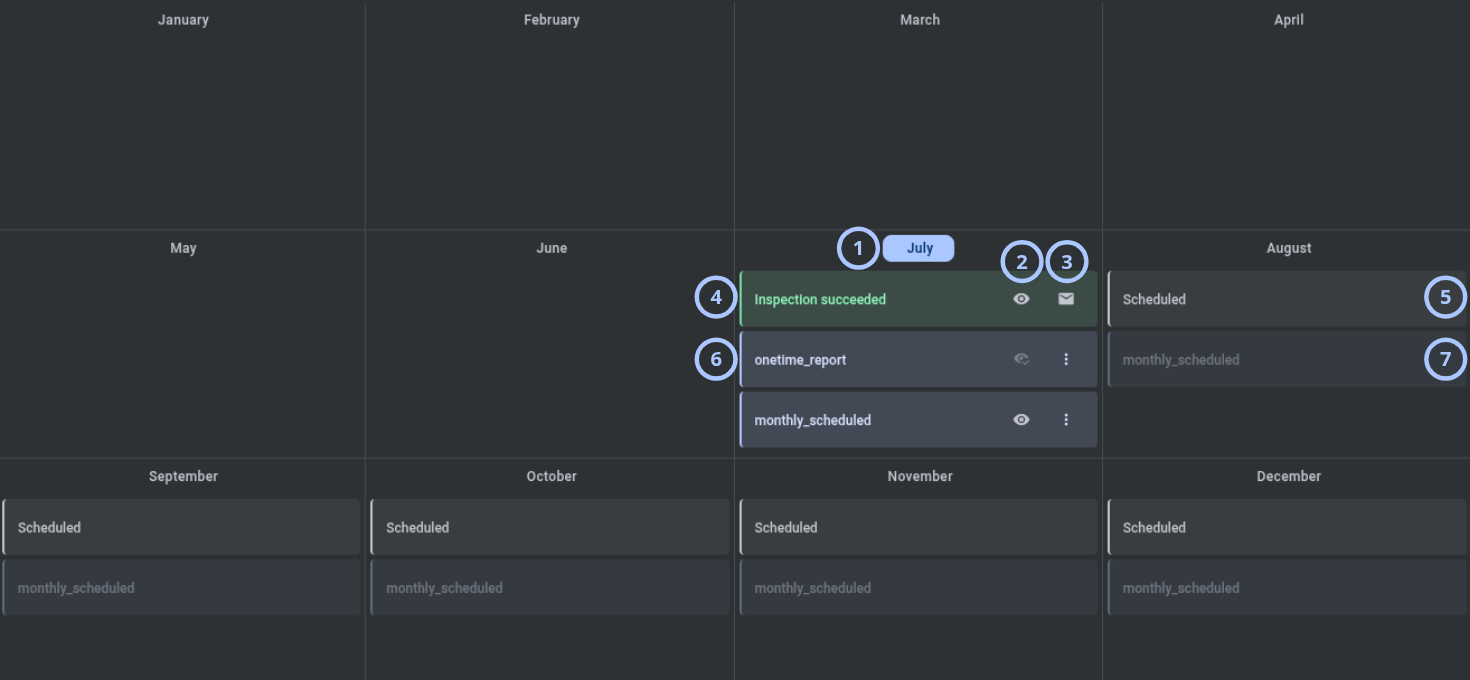
The calendar shows completed and scheduled reports and remote inspections for the selected panel.
| Callout | UI element | Description | When to use |
|---|---|---|---|
| 1 | Current month or day | Highlights the current month or day according to the selected Year or Month view. | Use to identify the current period. |
| 2 | Mark as viewed button | Marks a report or remote inspection as viewed and changes its reviewed status. | Use after reviewing an entry and its results. |
| 3 | Send email or More actions | For a remote inspection, Send email sends the results by email. For a report, the More actions button opens the report actions menu. | Use to distribute remote inspection results or manage a report. |
| 4 | Remote inspection | Shows a completed remote inspection and its result. Green indicates success. Red indicates failure. Selecting the entry opens the Remote inspection details modal window. | Use to review completed remote inspection results. |
| 5 | Scheduled remote inspection | Shows a pending remote inspection in grey. | Use to review upcoming remote inspections. |
| 6 | Report | Shows a completed report and its name. | Use to review a completed report. |
| 7 | Scheduled report | Shows a future report and its name in a greyed-out style. | Use to review upcoming reports. |
Green and red apply to completed remote inspection results. Grey entries represent scheduled items that have not completed.
More actions menu for reports
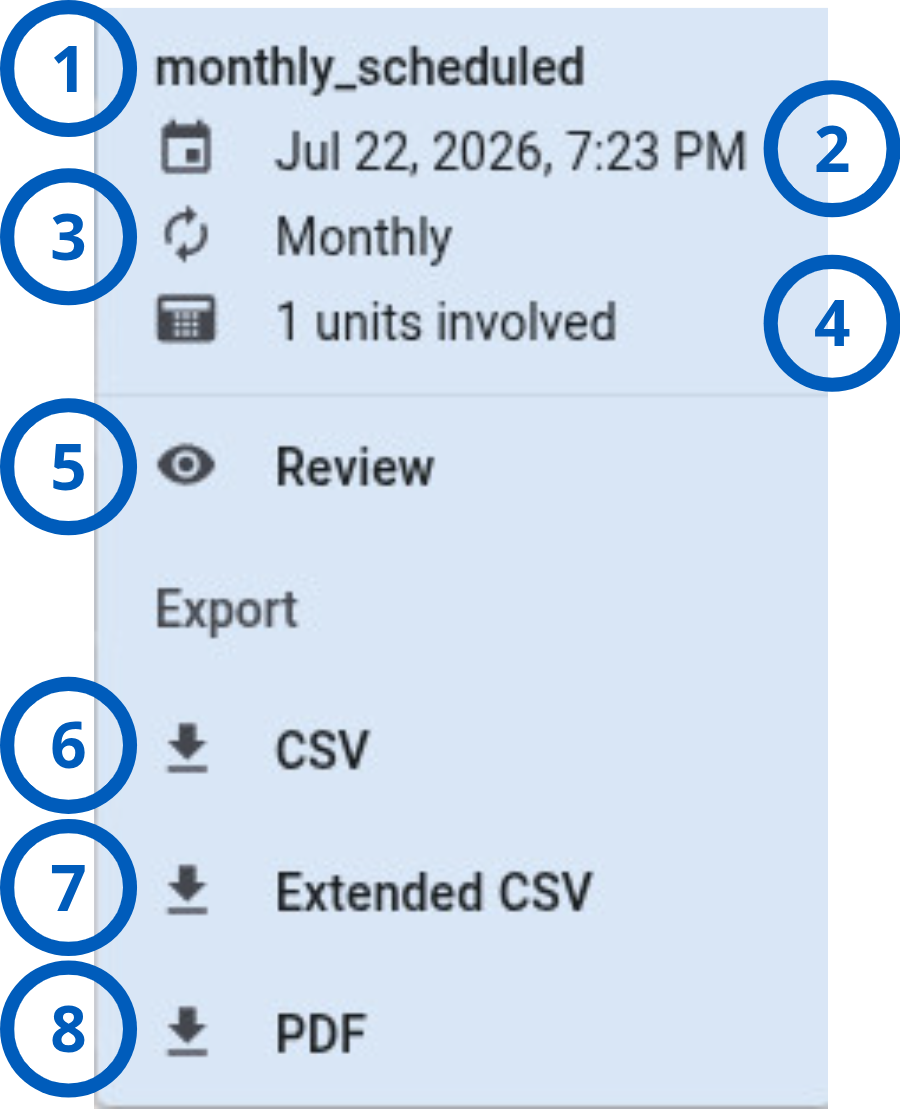
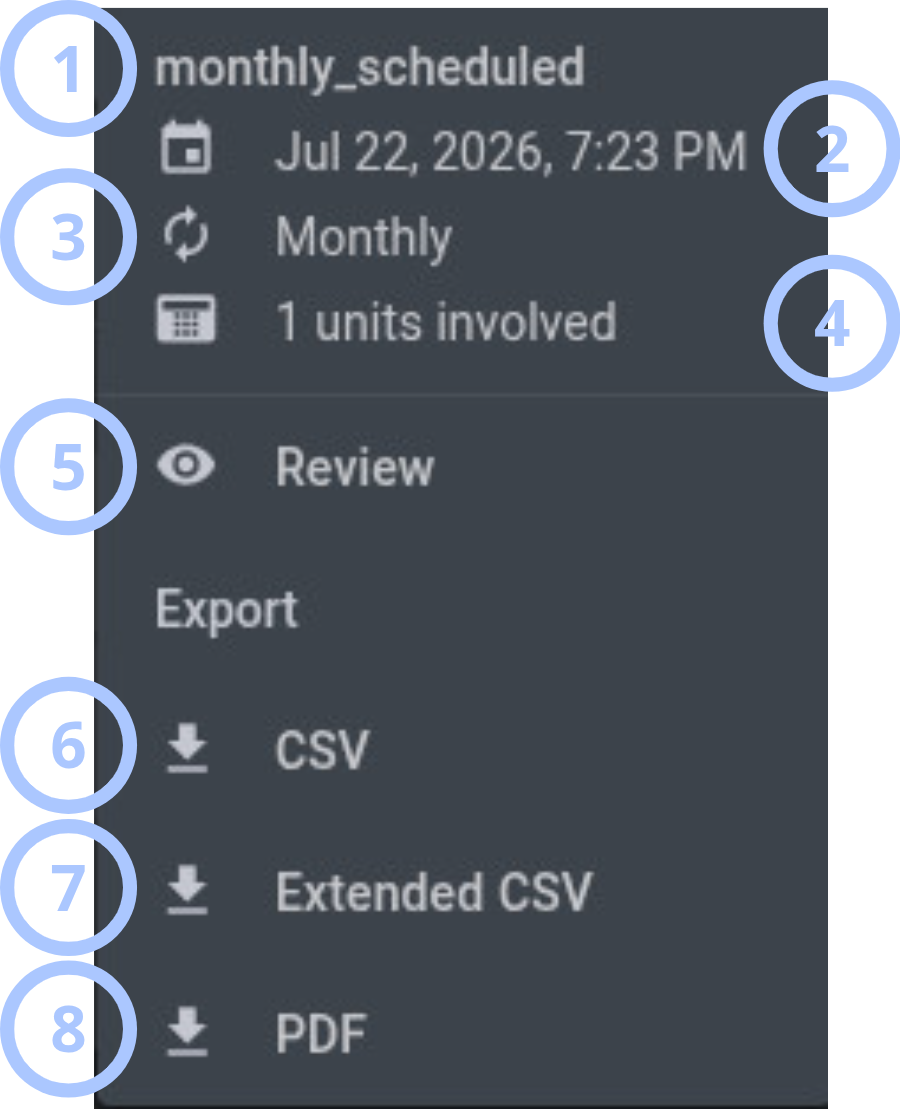
The report actions menu shows report details and provides review and export actions.
| Callout | UI element | Description | When to use |
|---|---|---|---|
| 1 | Report name | Shows the report name. | Use to identify the selected report. |
| 2 | Report timestamp | Shows the date and time when the report was created. | Use to confirm when the report was generated. |
| 3 | Report repetition | Shows the report schedule, such as Daily, Weekly, or Monthly. | Use to review how often the report runs. |
| 4 | Involved units | Shows the number of panels included in the report. | Use to confirm the report scope. |
| 5 | Review button | Marks the report as viewed. | Use after reviewing the report. |
| 6 | Export CSV | Downloads the report to the local computer in CSV format. | Use for standard tabular report data. |
| 7 | Export Extended CSV | Downloads the report to the local computer in extended CSV format. | Use when you need the extended report data set. |
| 8 | Export PDF | Downloads the report to the local computer in PDF format. | Use when you need a fixed-layout report for review or distribution. |
Remote inspection details modal window
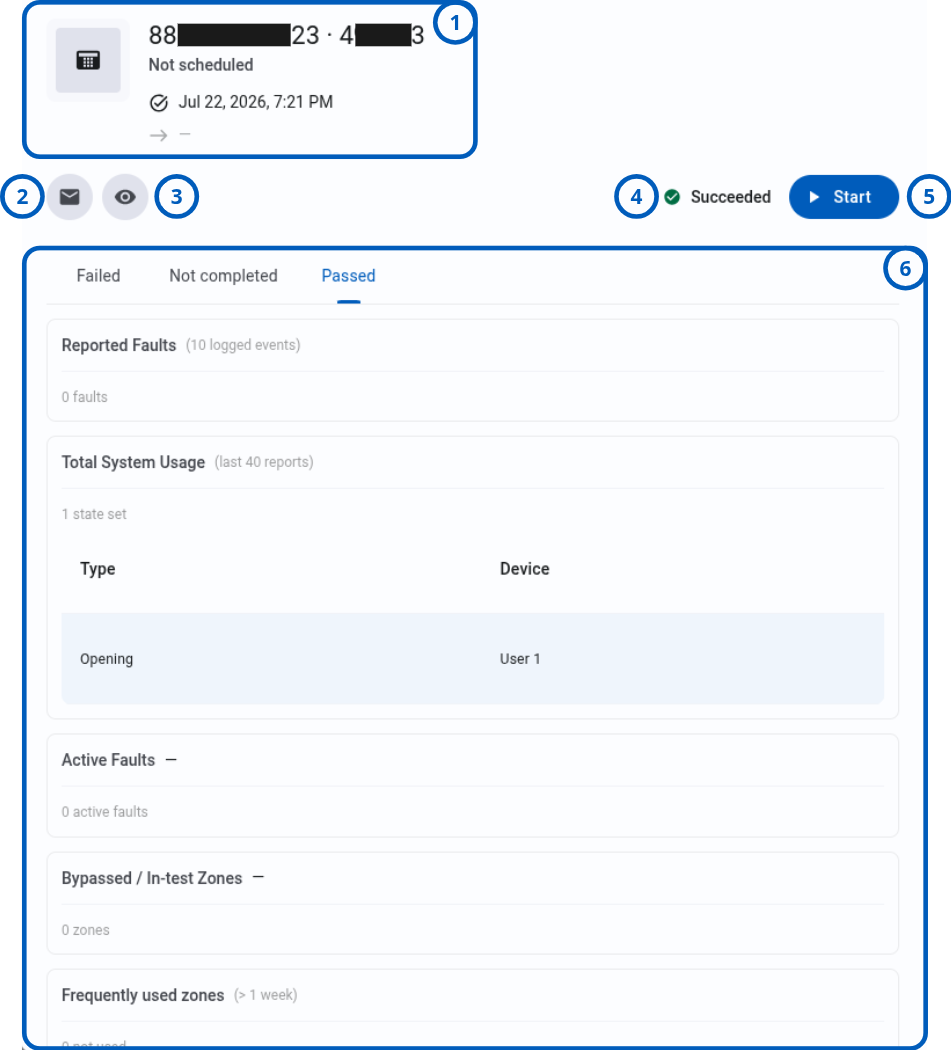
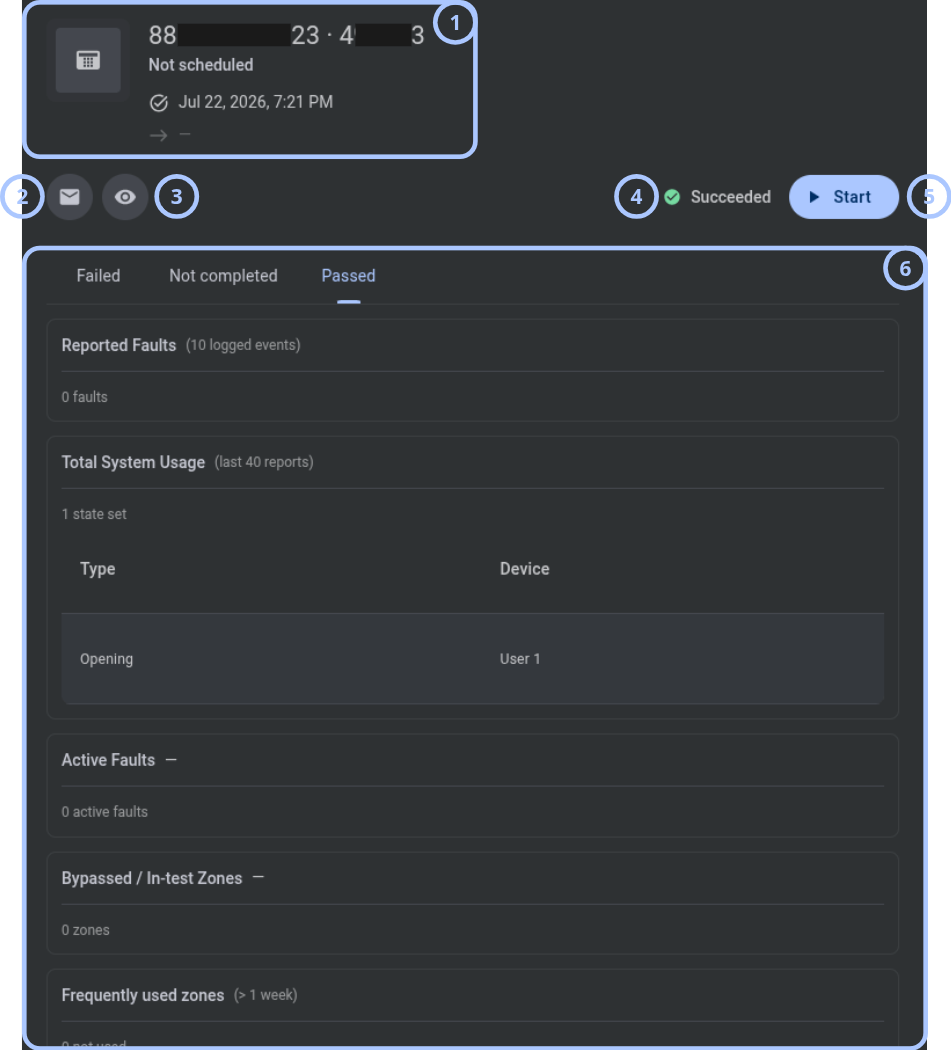
The Remote inspection details modal window shows inspection information, status, and detailed check results.
| Callout | UI element | Description | When to use |
|---|---|---|---|
| 1 | Remote inspection info | Shows the panel ID, panel account code, scheduled status, creation date, and email address. | Use to confirm the inspection identity and context. |
| 2 | Send email button | Sends the remote inspection results by email. | Use to distribute inspection results. |
| 3 | Mark as viewed button | Marks the remote inspection as viewed. | Use after reviewing the inspection results. |
| 4 | Remote inspection status | Shows whether the remote inspection Succeeded or Failed. | Use to identify the overall inspection result. |
| 5 | Start button | Opens the Initiate inspection modal window. | Use to start another remote inspection. See the Remote inspections page for details. |
| 6 | Detailed RRI info | Provides Failed, Not completed, and Passed tabs with detailed results for each check. | Use to review individual remote inspection checks. |
How to use this page
Open the Calendar tab
Goal:
- Review reports and remote inspections for a selected panel.
Steps:
- Open the Equipment page.
- Select the required panel.
- In Equipment hub, select the Calendar tab.
Expected result:
- The Calendar tab opens and shows entries available for the selected panel.
Change the calendar view
Goal:
- Switch between year and month views.
Steps:
- Open the calendar view dropdown.
- Select Year or Month.
- Use the navigation arrows to move to another period if needed.
Expected result:
- The calendar displays the selected view and period.
Filter calendar entries
Goal:
- Show only the entry types that you want to review.
Steps:
- Select or clear the Reports checkbox.
- Select or clear the RI checkbox.
Expected result:
- The calendar shows only the selected entry types.
Add a report
Goal:
- Create a report for the selected panel.
Steps:
- Select Create a report.
- Complete the steps described on the Reports page.
Expected result:
- The report is created for the selected panel.
- The report appears in the calendar according to its schedule and status.
Schedule a report
Goal:
- Create a scheduled report for the selected panel.
Steps:
- Select Create a report.
- Select the required report schedule.
- Complete the steps described on the Reports page.
Expected result:
- The report schedule is created for the selected panel.
- Scheduled report entries appear in the calendar in a greyed-out style until they complete.
Start a remote inspection
Goal:
- Start a remote inspection for the selected panel.
Steps:
- Select Start RI.
- Complete the steps described on the Remote inspections page.
Expected result:
- The remote inspection starts for the selected panel.
- The completed result appears in the calendar.
Schedule a remote inspection
Goal:
- Schedule a remote inspection for the selected panel.
Steps:
- Select the arrow next to Start RI.
- Select Schedule.
- Complete the steps described on the Remote inspections page.
Expected result:
- The remote inspection schedule is created.
- The scheduled remote inspection appears in the calendar in grey.
Cancel a scheduled remote inspection
Goal:
- Cancel the remote inspection schedule for the selected panel.
Steps:
- Select the arrow next to Start RI.
- Select Cancel schedule.
- Complete the steps described on the Remote inspections page.
Expected result:
- The remote inspection schedule is canceled.
- Future entries associated with the canceled schedule no longer appear as planned inspections.
Review a remote inspection
Goal:
- Review the result and detailed checks for a completed remote inspection.
Steps:
- Select a completed remote inspection in the calendar.
- Review the overall status.
- Select Failed, Not completed, or Passed to review detailed checks.
- Select Mark as viewed after reviewing the results.
Expected result:
- The remote inspection details are displayed.
- The reviewed status changes after you mark the inspection as viewed.
Export a report
Goal:
- Download a completed report.
Steps:
- Locate the report in the calendar.
- Open the More actions menu.
- Select Export CSV, Export Extended CSV, or Export PDF.
Expected result:
- The report is downloaded in the selected format.
Return to the current date
Goal:
- Return to the current calendar period.
Steps:
- Select Today.
Expected result:
- The calendar returns to the current month or day.
Field and option reference
Calendar filters and views
| Name | Description | Accepted values | Behavior | Restrictions | Default |
|---|---|---|---|---|---|
| Calendar view | Controls the calendar time scale. | Year, Month | Changes how entries and the current period are displayed. | None specified. | Not specified. |
| Reports | Controls report visibility. | Selected, cleared | Shows reports when selected and hides them when cleared. | Does not delete or modify reports. | Not specified. |
| RI | Controls remote inspection visibility. | Selected, cleared | Shows remote inspections when selected and hides them when cleared. | Does not cancel or modify remote inspections. | Not specified. |
Tips
- Use Month view when you need more detail for a specific period.
- Use Year view to review schedules across a longer period.
- Mark completed entries as viewed after reviewing their results.
- Use Extended CSV when the standard CSV does not contain the level of detail that you need.
Troubleshooting
Calendar tab is not available
Possible causes
- The selected panel is a Fibro Transmitter.
- Your role does not allow access to the tab.
What to do
- Confirm the panel type.
- Confirm that the panel is supported by the Calendar tab.
- Confirm that your role allows access to the selected panel and calendar information.
Expected entries are not displayed
Possible causes
- The relevant Reports or RI checkbox is cleared.
- The calendar is showing a different year or month.
- No report or remote inspection exists for the selected period.
What to do
- Select the required filter checkbox.
- Confirm the selected calendar view and period.
- Select Today to return to the current period.
- Confirm that the report or remote inspection exists for the selected panel.
Send email does not deliver remote inspection results
Possible causes
- The recipient email address is missing or invalid.
- Server email settings are not configured correctly.
- Your role does not allow the action.
What to do
- Confirm the email address shown in the remote inspection details.
- Confirm the server email configuration.
- Confirm that your role allows sending remote inspection results.
- Try the action again.
Report export does not start
Possible causes
- The browser blocked the download.
- The report is not complete.
- Your role does not allow report export.
What to do
- Confirm that the report is complete.
- Allow downloads from the PowerManage site in the browser.
- Confirm that your role allows report export.
- Try another supported export format.
Remote inspection details do not open
Possible causes
- The selected entry is scheduled and has no completed results.
- The entry is unavailable.
- Your role does not allow viewing remote inspection results.
What to do
- Confirm that the remote inspection is complete.
- Refresh the page.
- Confirm that your role allows viewing remote inspection results.