Devices
Overview
The Devices tab in Equipment hub shows the control panel, installed modules, enrolled security devices, and supported automation devices for the selected panel.
Use this tab to:
- Review device identity, type, status, partitions, troubles, warnings, and connection information.
- Enroll supported security devices, automation devices, RTSP cameras, and OnVIF cameras.
- Review and refresh device, cellular, and Wi-Fi signal strength.
- Start Walktest and review the result for each supported security device.
- Review panel, module, and device configuration.
- Rename or remove supported devices.
- Request and download video from supported camera-type security zones.
- Review temperature and brightness data from supported smart sensors.
- Control supported automation devices.
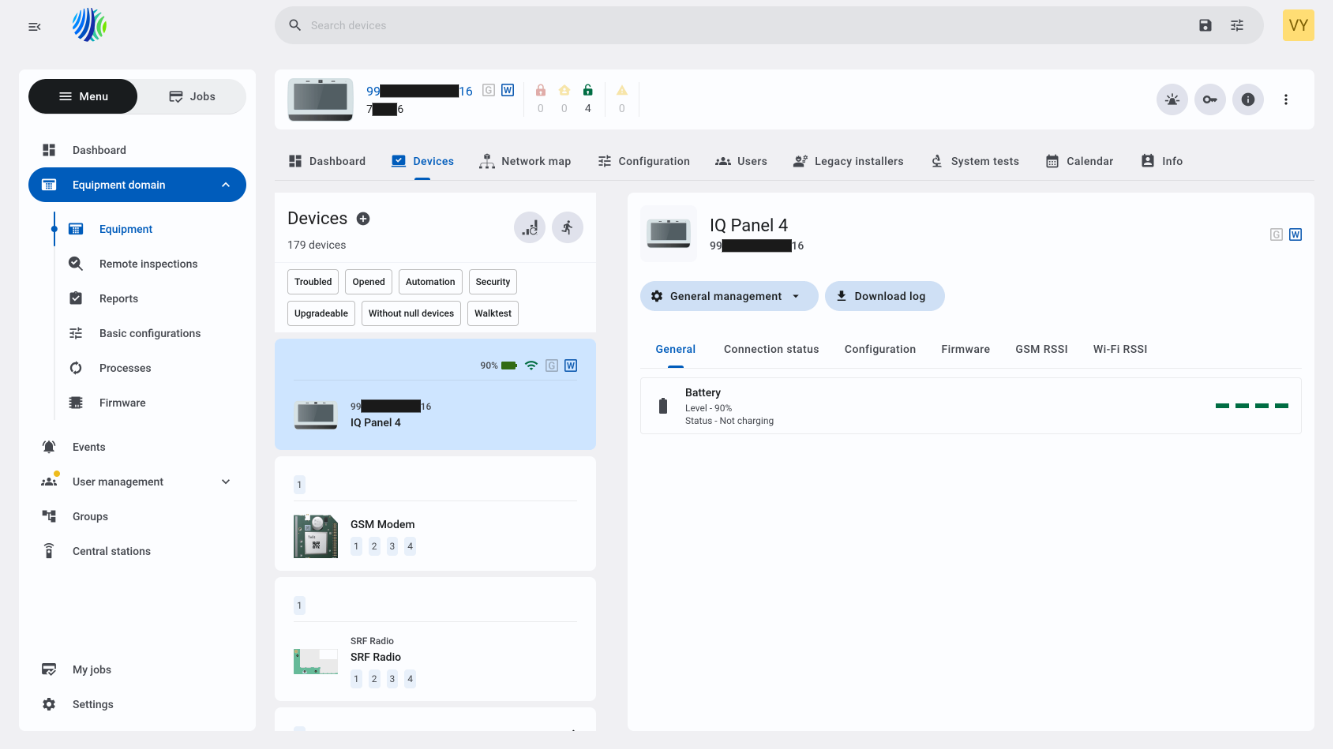
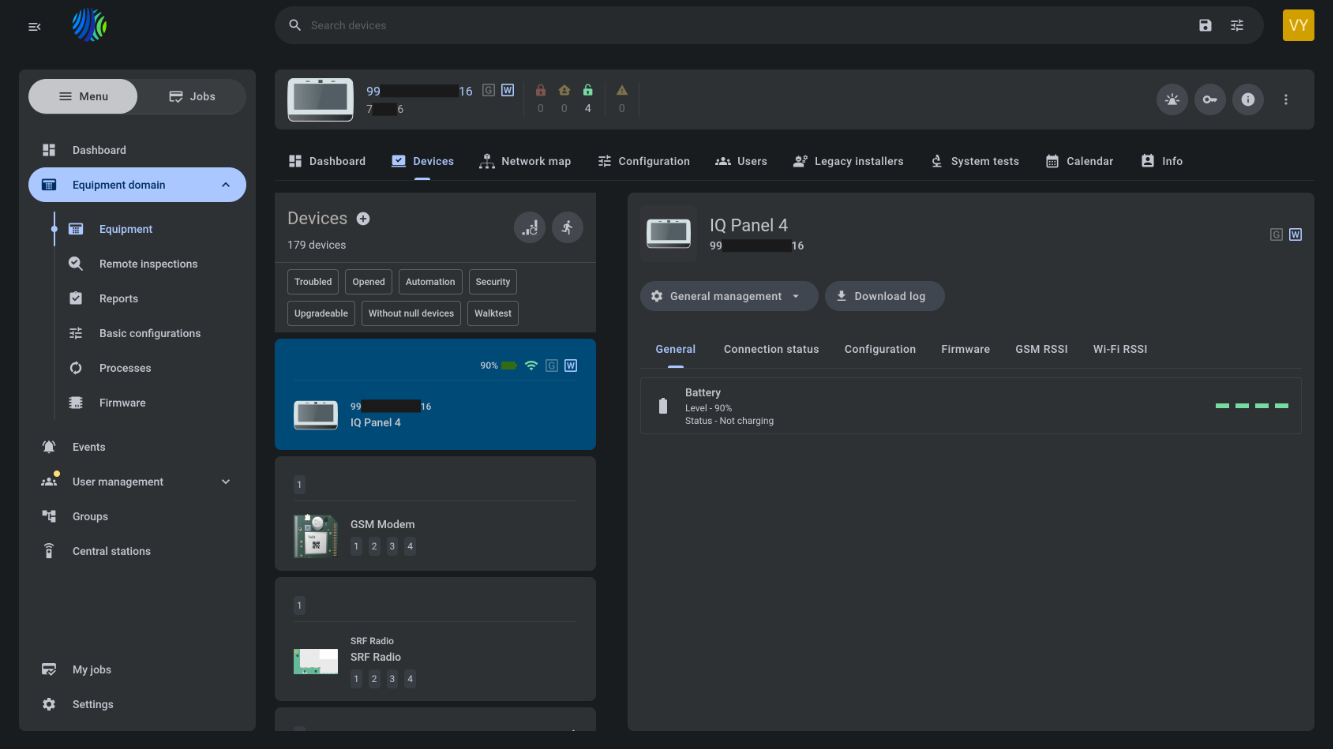
The available devices, tabs, fields, status information, and actions depend on the panel type, installed modules, enrolled devices, discovery results, group settings, server configuration, and permissions assigned to your role.
Before you begin
Required permissions
Required permissions depend on the information or action that you want to access.
- You must have permission to view the selected panel and its devices.
- You must have the required device-management permission to enroll, rename, remove, bypass, or configure a device.
- You must have permission to start processes such as discovery, configuration download, signal-strength refresh, firmware upgrade, and Walktest.
- You must have permission to control automation devices to use the Control tab.
Access to the Devices tab and device-management actions is controlled by permissions in the Unit permission group.
Preconditions
- Open Equipment hub by selecting a panel on the Equipment page.
- Open the Devices tab for the selected panel.
- The panel must be enrolled on the PowerManage server.
- The panel must complete discovery before PowerManage can show all installed modules, enrolled devices, supported protocols, and device-specific tabs.
- The panel must be connected when an action requires direct communication with the panel.
Dependencies
- Available device protocols and enrollment methods depend on the panel type and installed modules.
- Device information depends on the latest successful discovery and configuration download.
- Refresh RSSI requires supported wireless PowerG or PowerG+ devices. RSSI values appear on the device's General tab after the refresh completes.
- Refresh GSM requires a panel with a cellular bearer.
- Refresh WiFi and the Wi-Fi RSSI tab require a Neo 5 panel with a Wi-Fi-capable communicator.
- The GSM RSSI tab requires a panel connected through a cellular or GSM modem.
- The Patch Tag action requires a supported IQ panel and an applicable package in the IQMS repository.
- The Parent and Children tabs appear only when the selected device has the corresponding device relationship.
- The Video on demand tab requires a supported camera-type security zone. The video history size is configured in Group settings.
- The Meteo tab requires a supported smart sensor and the Temperature/light statistic option enabled in Group settings.
- The Control tab requires an automation device that supports remote control. Control availability also depends on Automation Activation Settings under Settings > Resolve.
Important limitations
- Available actions depend on the panel state, connection status, capabilities, active processes, and permissions assigned to your role.
- Displayed information can be outdated until discovery, configuration download, or the relevant refresh process completes.
- Device RSSI, GSM RSSI, and Wi-Fi RSSI use separate refresh processes. Starting one process does not update the other signal-strength results.
- You cannot start another Refresh RSSI process while one is already running.
- RSSI refresh does not apply to wired zones or reed-switch sub-zones.
- A cellular panel might require a wake-up before PowerManage can run a signal-strength or device-management process.
- Walktest cannot start when the panel is armed, in an alarm state, or disconnected from the server. Only supported security zones are included in the test.
- Peek-in without an alarm is available only for supported IQ panels through ConnectAlarm. It is not available in the PowerManage GUI.
- Brightness reporting is not supported for DSC panels.
- Automation controls can be unavailable when Automation Activation Settings are disabled or when the configured post-alarm activation period has ended.
- Removing a device can affect related parent, child, zone, configuration, and automation information.
- Hardware inputs of any complex PowerG device with external inputs have the subtype HW zone.
- PGM is a stateless device, so its actual state is unknown. You can send a request to turn the PGM output ON or OFF, but PowerManage cannot confirm the actual state.
Known issues
- Manually entering values in automation device control fields is not supported. Use the slider instead. A fix is planned for version 5.2.
Page layout
Page header
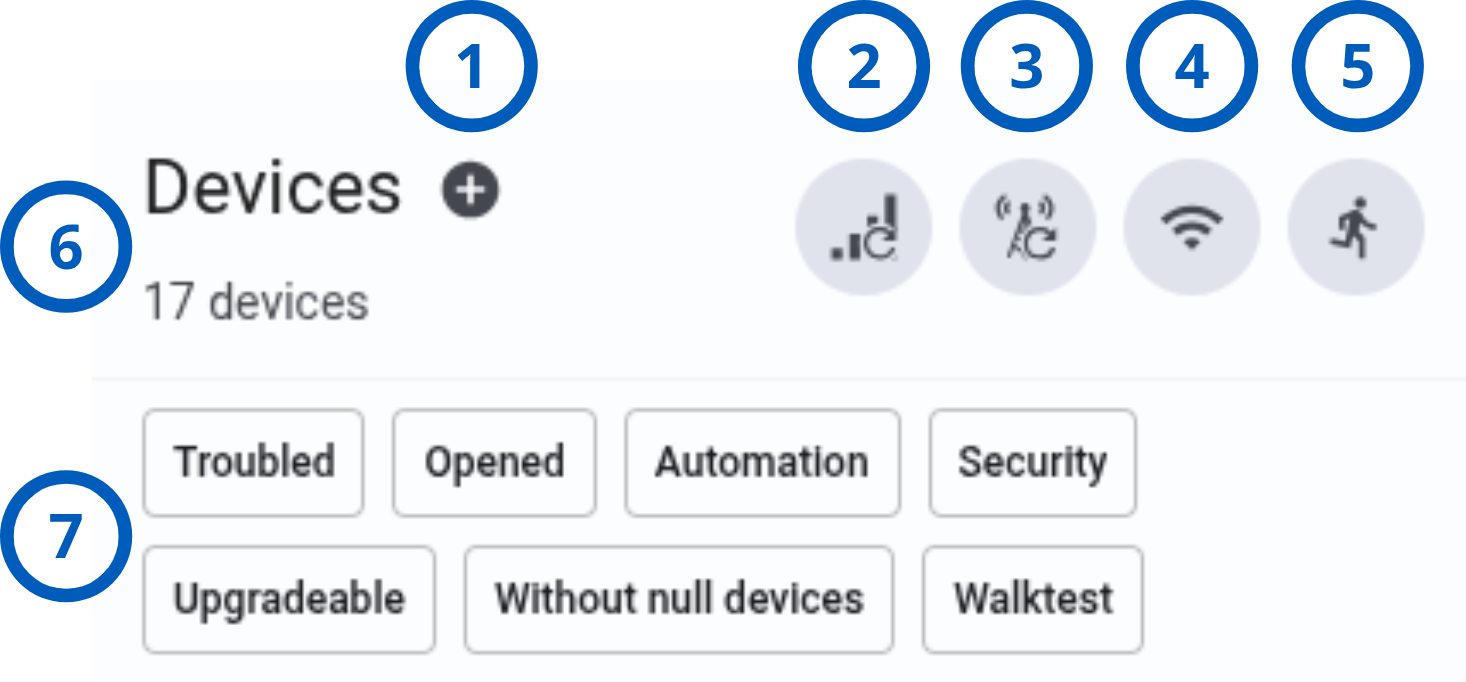
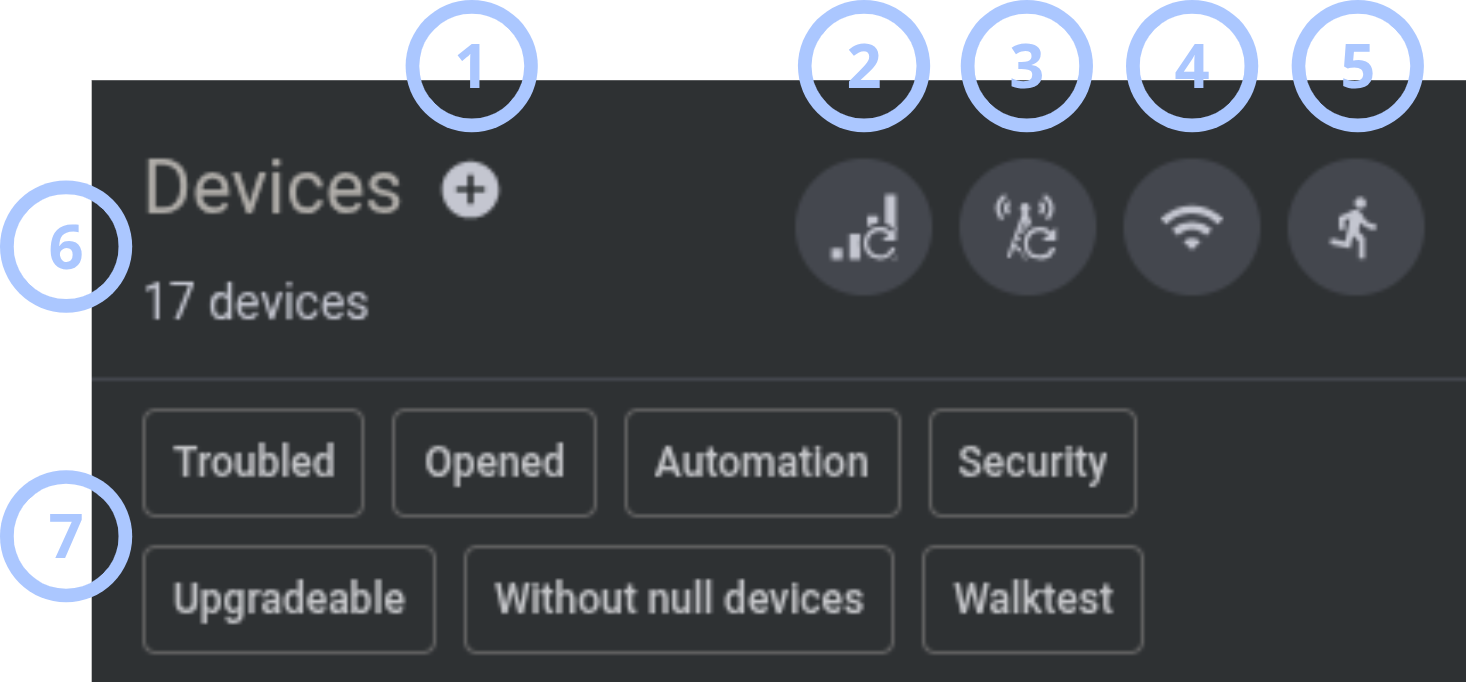
The page header provides actions for enrolling devices, refreshing signal-strength information, starting a walk test, and filtering the displayed devices. Available actions depend on the panel type, installed hardware, enrolled devices, process status, and role permissions.
| Callout | UI element | Description | When to use |
|---|---|---|---|
| 1 | Add Device button | Opens the Add Device modal window, where you can enroll a device on the panel. The button is available only when your role includes the required permission. The button is not available for panel types that do not support device enrollment from PowerManage, such as Fibro transmitter panels. | Use to enroll a supported security device, automation device, RTSP camera, or OnVIF camera. |
| 2 | Refresh RSSI button | Starts the Refresh RSSI process for all supported wireless PowerG and PowerG+ devices enrolled on the panel. The process retrieves the current radio signal strength for each device and updates the RSSI information on its device card. Possible results include Strong, Good, Ok, Poor, Bad, No connection, No test, Too early, Preenroll, No result, 1-Way, and Repeater. For Visonic panels, the process also retrieves channel, repeater, and last-used information. The device card shows the current and 24-hour signal strength and the date and time of the last update. | Use to review the radio signal strength of supported wireless devices. The action is not available when the panel has no supported wireless devices. It does not apply to wired zones or reed-switch sub-zones. You cannot start another Refresh RSSI process while one is running. A cellular panel might require a wake-up before the process can run. |
| 3 | Refresh GSM button | Starts the Refresh GSM RSSI process. The process retrieves the cellular signal strength and displays the result for each communicator module. Signal levels and thresholds depend on the cellular network type, such as GSM, WCDMA, LTE-FDD, LTE-TDD, or NB-IoT. | Use to review the cellular signal strength of a panel communicator. The button is not available when the panel has no cellular bearer. |
| 4 | Refresh WiFi button | Starts the Refresh Wi-Fi RSSI process and retrieves the signal strength of the Wi-Fi communicator. Possible results include Unknown, Strong, Good, Ok, Poor, and Bad. Wi-Fi RSSI operates independently from device RSSI and GSM RSSI. Starting one process does not update the results of the other processes. | Use to review Wi-Fi signal strength for a Neo 5 panel that has a Wi-Fi-capable communicator. The button is not available for Visonic, legacy Neo, PSP, IQ, or Dual Path panels. |
| 5 | Walktest button | Starts the Walktest process and switches the Devices tab to Walktest mode. When the test stops or completes, the page returns to the standard Devices view. Walktest is supported for Visonic, DSC Neo, PSP, Neo 5, and IQ panels. | Use to test supported devices and confirm that the panel receives their transmissions. |
| 6 | Page title and device count | Shows the page title Devices and the number of devices currently displayed, for example, 15 devices. The count can include the control panel, communicator modules, daughter cards, virtual keypads, security zones, automation devices, cameras, sirens, keyfobs, repeaters, and other supported devices. When you apply quick filters, the count updates to show the number of matching devices rather than the total number of panel devices. | Use to confirm that you are on the Devices tab and review how many devices match the current filters. |
| 7 | Quick filters | Filters the displayed devices by the selected criteria. You can select more than one filter. When filters are combined, the grid shows only devices that meet all selected criteria. For example, you can show troubled devices while hiding unused device slots. | Use to focus the device list on relevant devices and reduce the number of items you need to review. |
Button availability can depend on the panel type, installed modules, enrolled devices, active processes, and permissions assigned to your role.
The Refresh RSSI, Refresh GSM, and Refresh WiFi actions start separate processes. Running one signal-strength process does not update the results produced by the other processes.
Add device modal window
The Add device modal window provides separate enrollment flows for security and automation devices. Available protocols, fields, and enrollment options depend on the selected panel and supported devices.
The default enrollment mode is Manual. Select Autolearn to detect supported devices that are ready for enrollment.
- Security
- Automation
- RTSP
- OnVIF
- Manual
- Autolearn
Manual enrollment
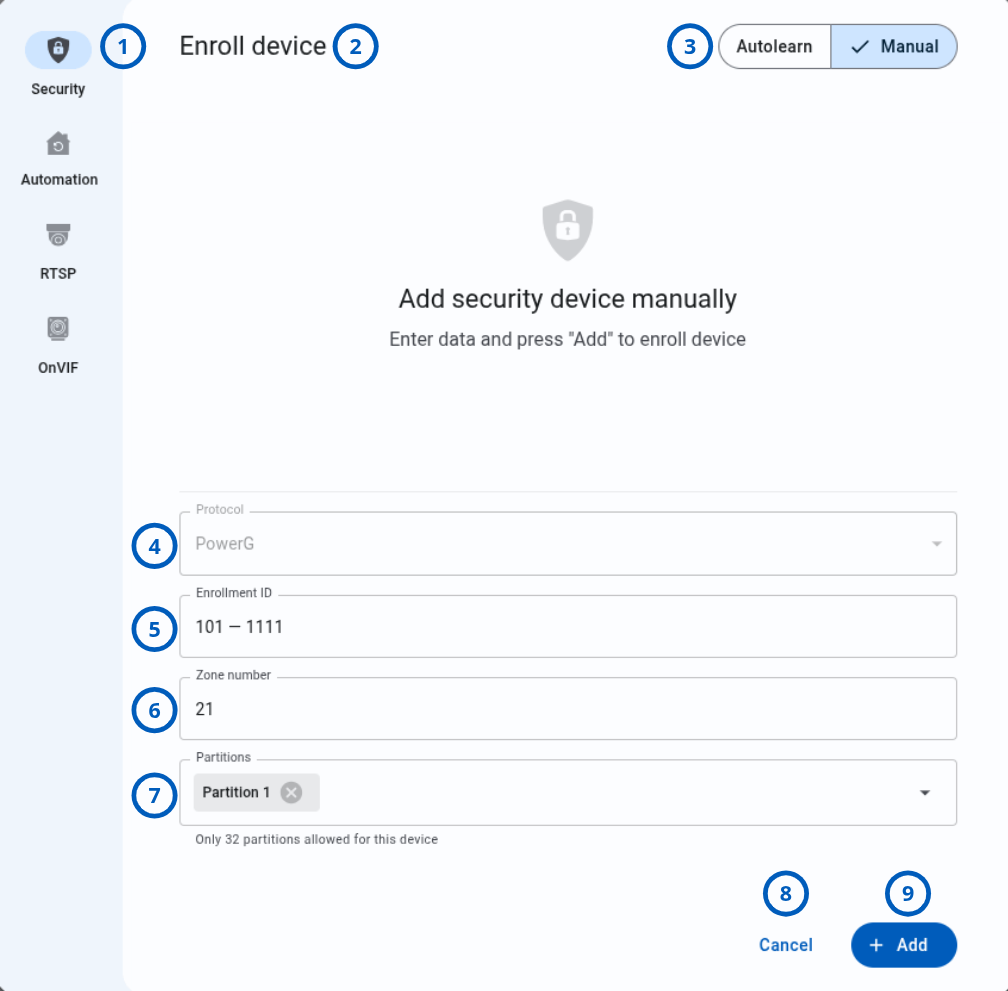
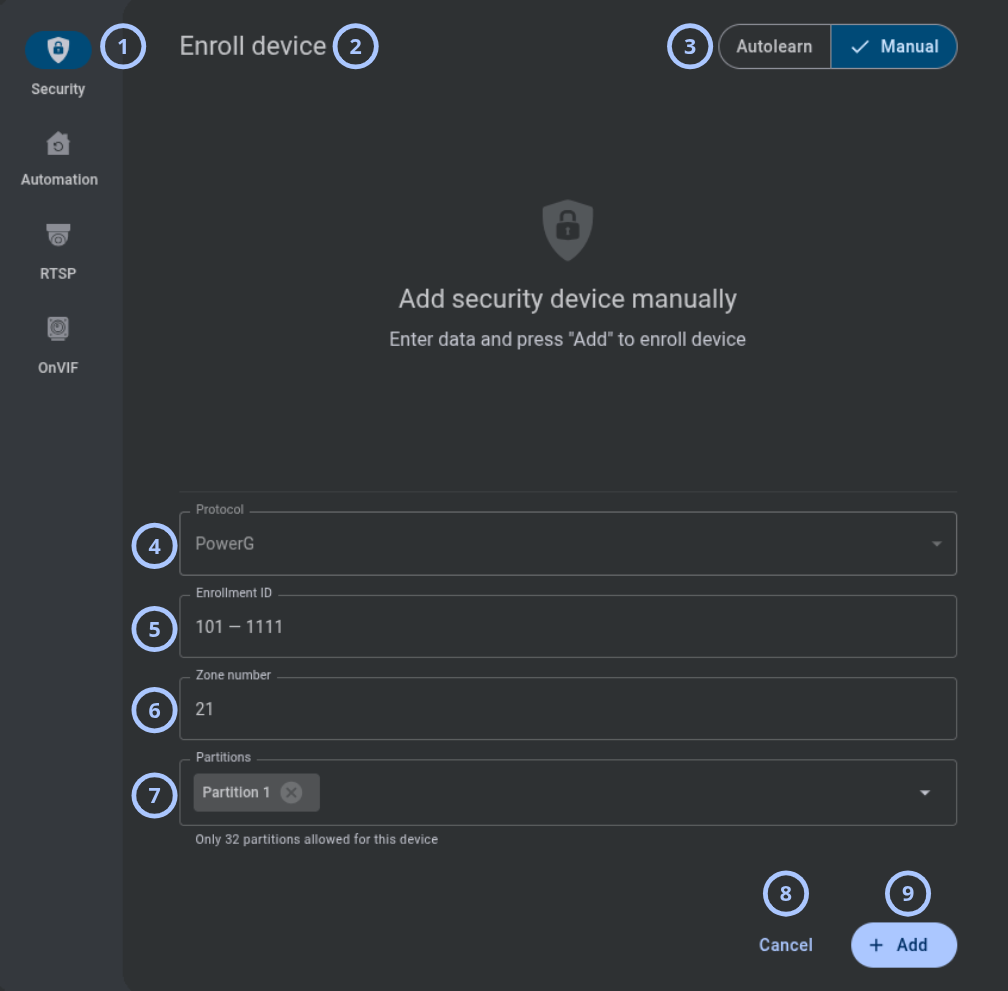
Use manual enrollment when you know the device protocol and enrollment ID.
| Callout | UI element | Description | When to use |
|---|---|---|---|
| 1 | Modal window tab | Shows the current modal window tab. | Use to confirm that the Security tab is selected. |
| 2 | Modal title | Shows Enroll device. | Use to confirm the current task. |
| 3 | Enroll mode | Selects Autolearn or Manual enrollment. The default mode is Manual. | Use to choose the enrollment method. |
| 4 | Protocol | Shows the device protocols supported by the panel. Available protocols depend on the panel. | Use to select the device protocol. |
| 5 | Enrollment ID | Accepts a PowerG device enrollment ID in the XXX-XXXX format. | Use to identify the PowerG device. |
| 6 | Zone number | Shows the zone number to assign to the device. This field is not displayed for every panel or device type. For IQ panels, the panel automatically selects a free zone slot. The field applies only to security sensors that occupy zone slots, such as contacts, PIRs, glass-break detectors, smoke and heat detectors, CO detectors, and shock detectors. Device types that use dedicated slot numbering, such as keypads, wireless keys, sirens, repeaters, door locks, lights, and W2W modules, usually do not show this field. If the field is available for a device with dedicated slot numbering, you can define the slot number for the added device. | Use to assign a zone number to the device when the field is available. |
| 7 | Partition | Shows the partitions available for the device. | Use to assign the device to a partition. |
| 8 | Cancel button | Closes the modal window without saving changes. | Use to stop device enrollment. |
| 9 | Add button | Adds the device to the panel when all required fields contain valid values. | Use after entering valid device information. |
Start Autolearn
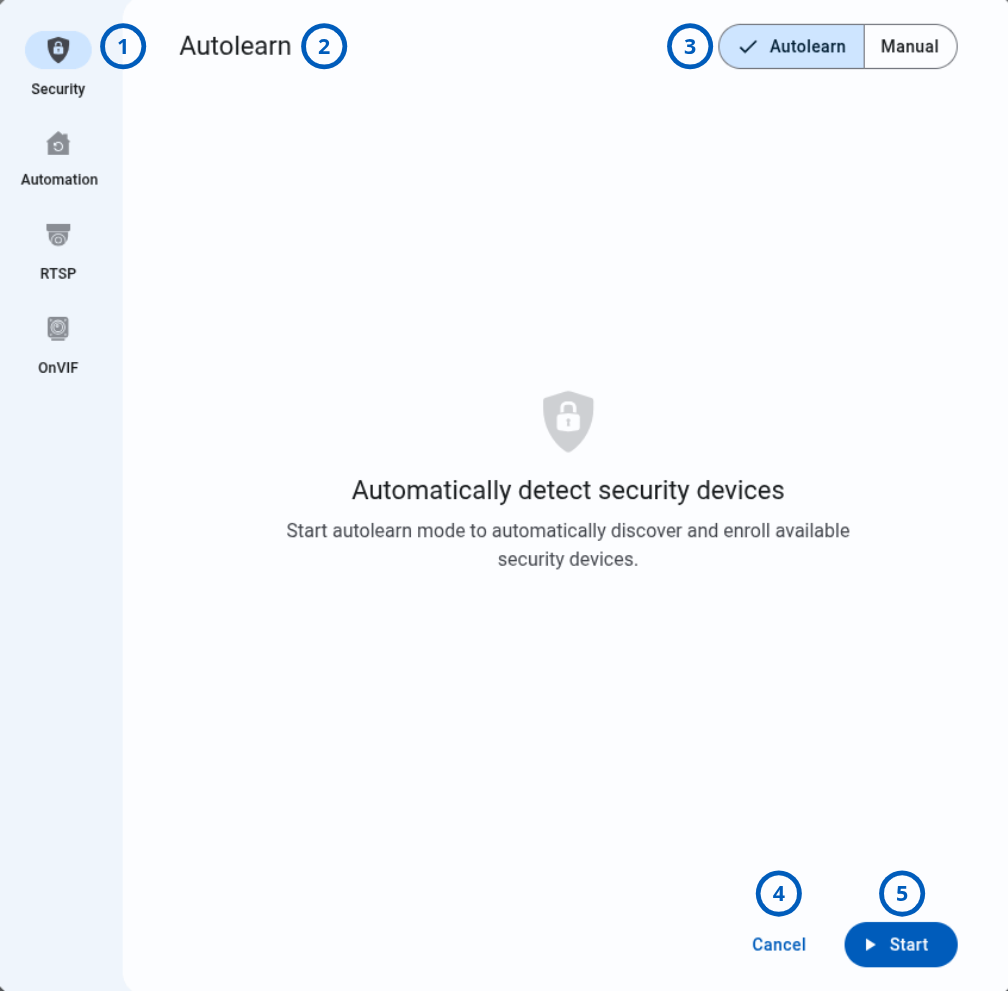
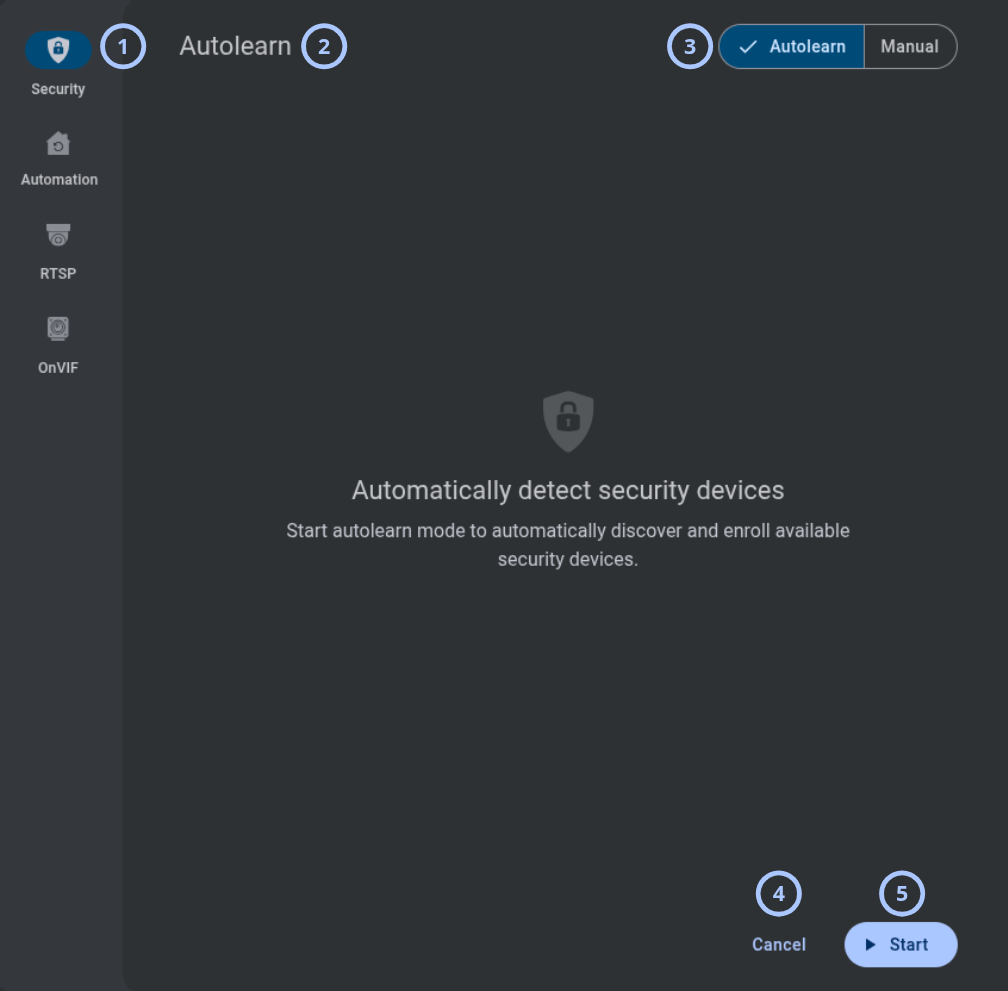
Start Autolearn when supported security devices are ready for detection.
| Callout | UI element | Description | When to use |
|---|---|---|---|
| 1 | Modal window tab | Shows the current modal window tab. | Use to confirm that the Security tab is selected. |
| 2 | Modal title | Shows Autolearn. | Use to confirm the current task. |
| 3 | Enroll mode | Selects Autolearn or Manual enrollment. The default mode is Manual. | Use to select Autolearn enrollment. |
| 4 | Cancel button | Closes the modal window without starting Autolearn. | Use to stop device enrollment. |
| 5 | Start button | Starts the Autolearn device process. | Use when supported security devices are ready for detection. |
Autolearn in progress
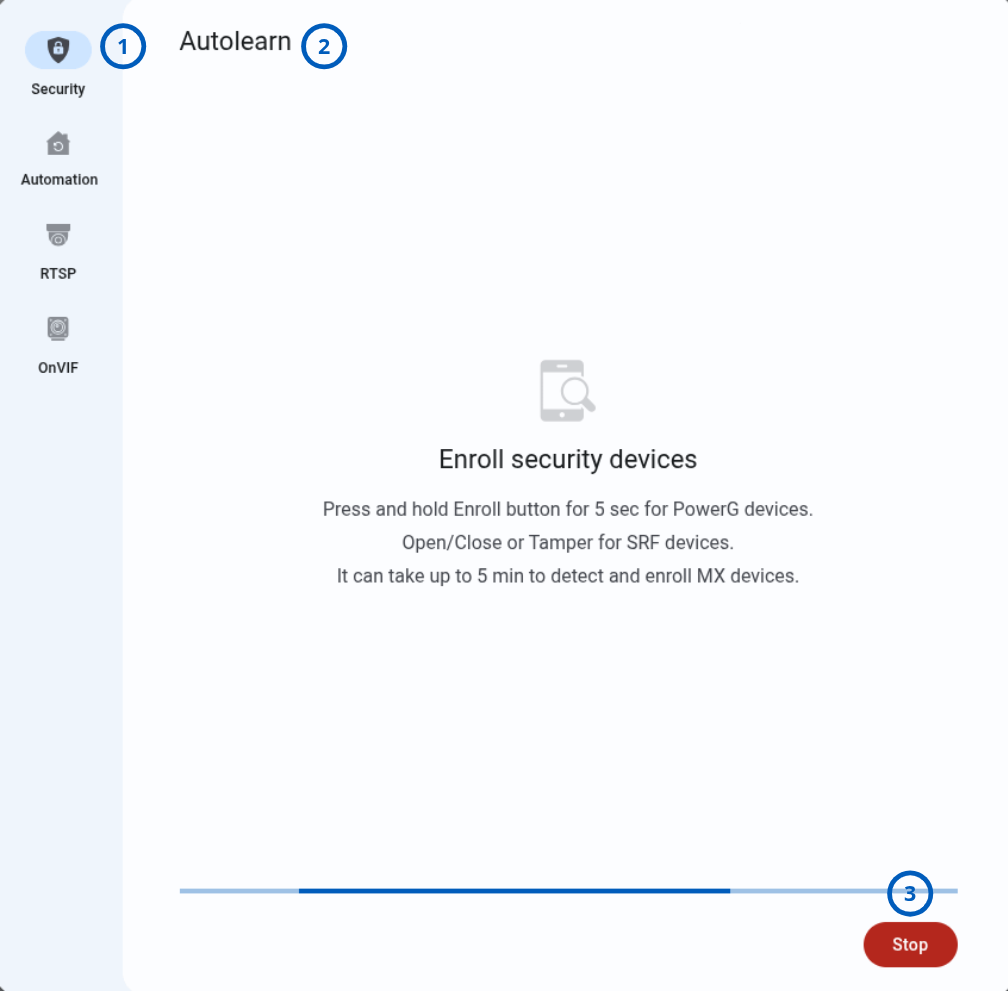
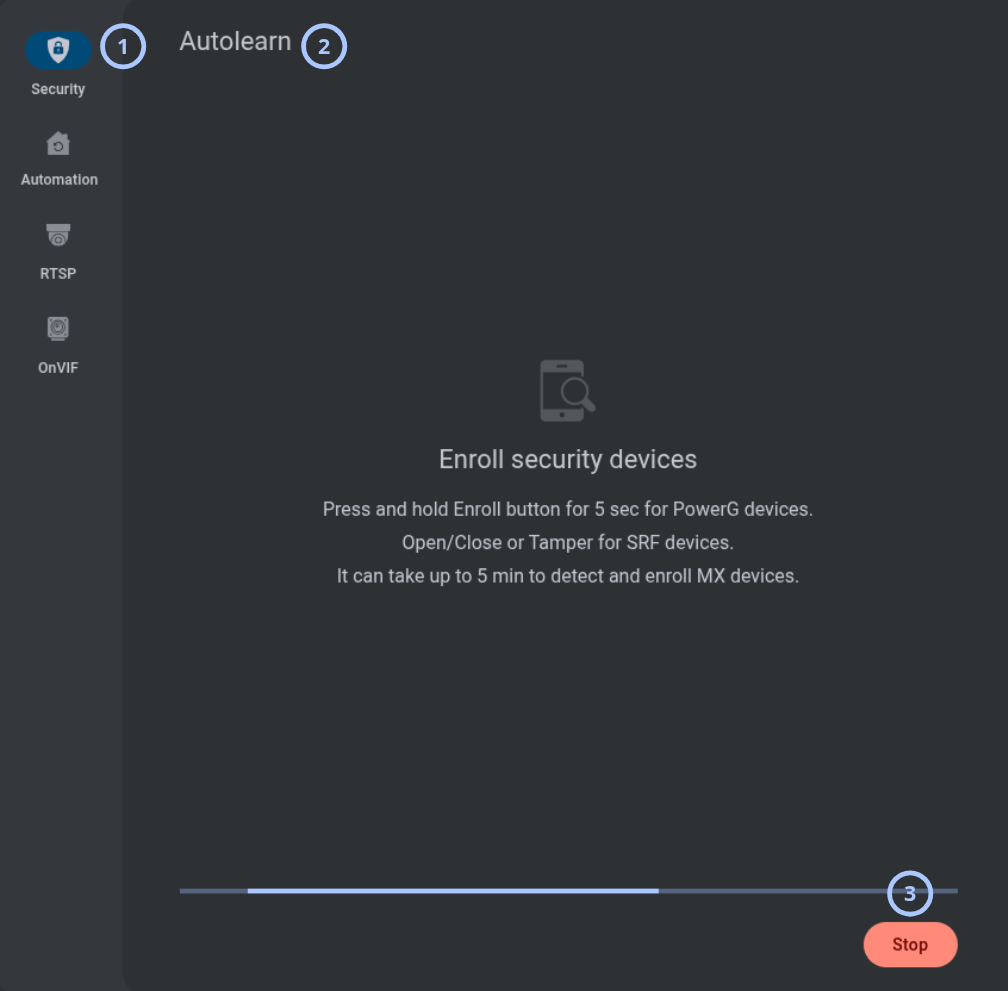
This view appears while Autolearn is detecting security devices.
| Callout | UI element | Description | When to use |
|---|---|---|---|
| 1 | Modal window tab | Shows the current modal window tab. | Use to confirm that the Security tab is selected. |
| 2 | Modal title | Shows Autolearn. | Use to confirm that Autolearn is running. |
| 3 | Stop button | Stops the Autolearn process. | Use to end device detection. |
Device detected
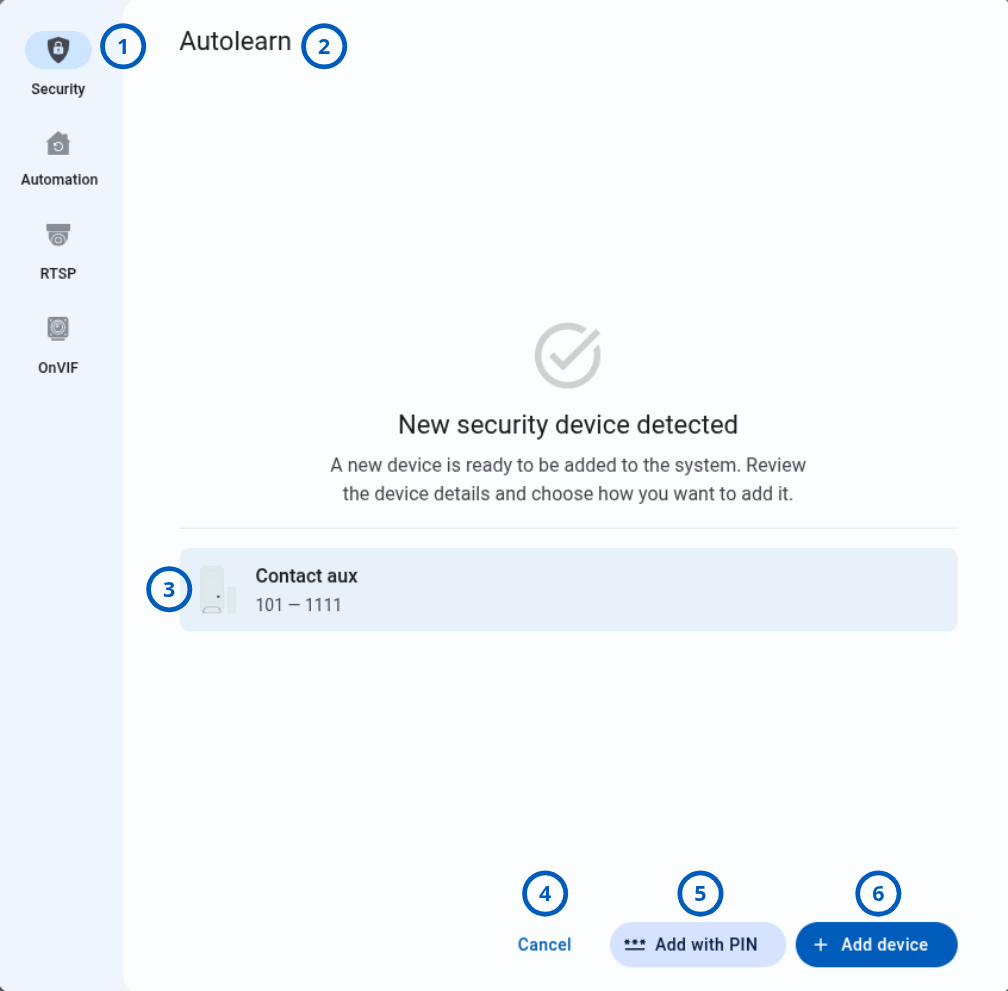
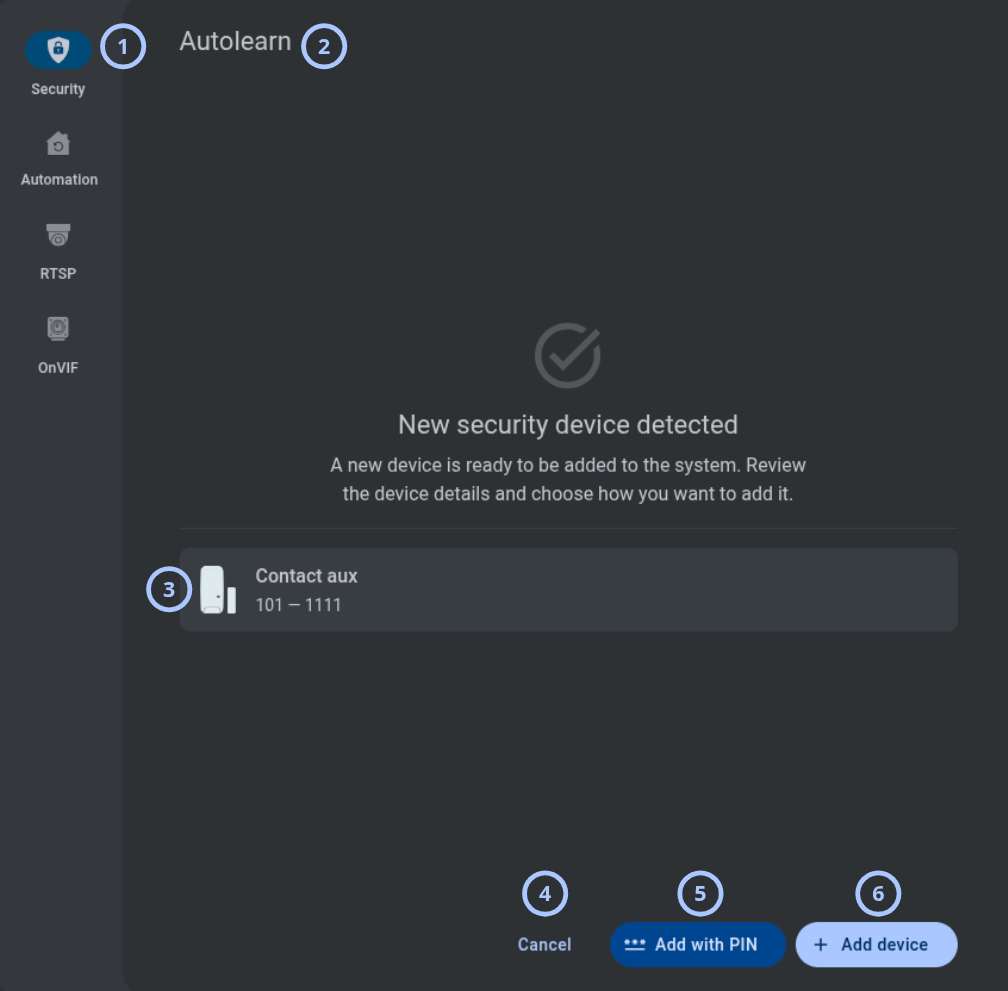
Review the detected device before adding or skipping it.
| Callout | UI element | Description | When to use |
|---|---|---|---|
| 1 | Modal window tab | Shows the current modal window tab. | Use to confirm that the Security tab is selected. |
| 2 | Modal title | Shows Autolearn. | Use to confirm the current task. |
| 3 | Detected device | Shows the detected device icon, model, and enrollment ID. | Use to verify the detected device. |
| 4 | Cancel button | Cancels enrollment of the detected device. Autolearn continues. | Use to skip the detected device. |
| 5 | Add with PIN button | Opens the PIN entry view. The button appears only when the device supports a PIN. | Use to enroll the device with a PIN. |
| 6 | Add device button | Adds the device to the panel. Autolearn continues. | Use to enroll the detected device without a PIN. |
Add with PIN
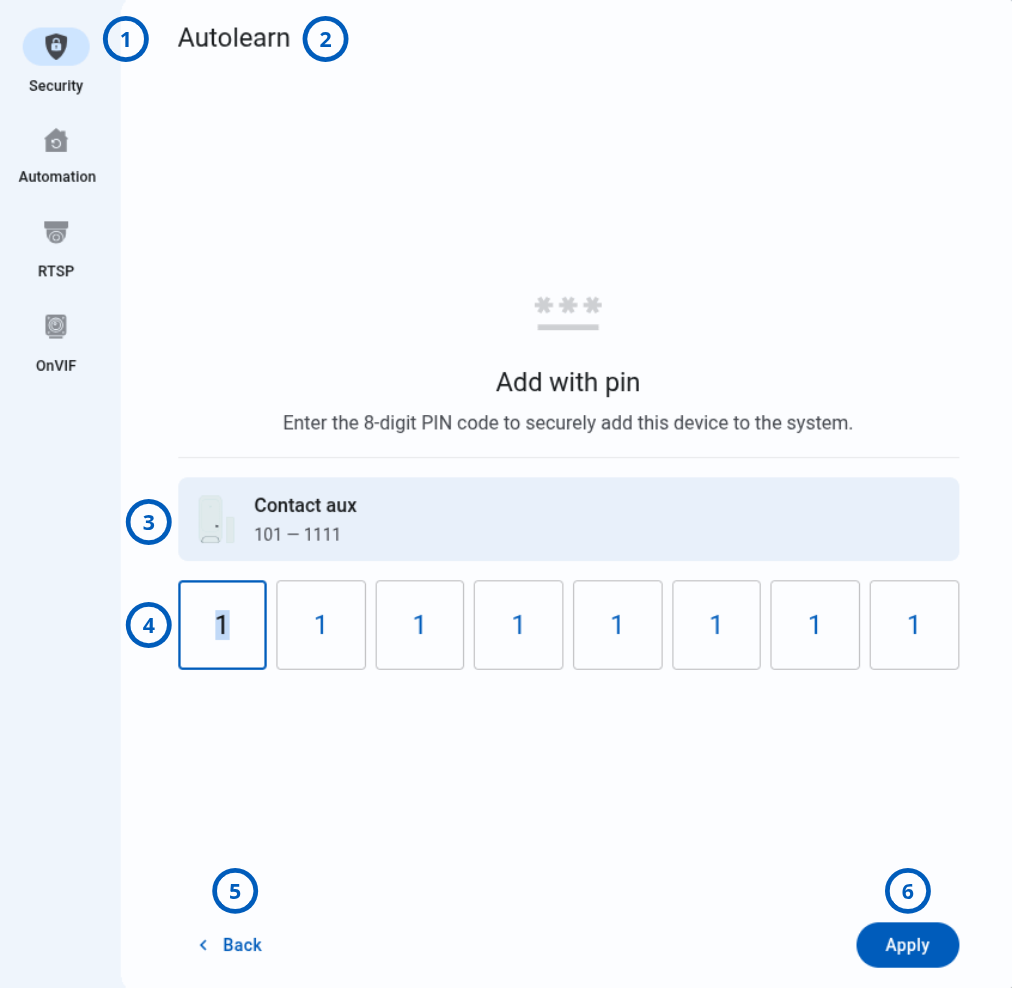
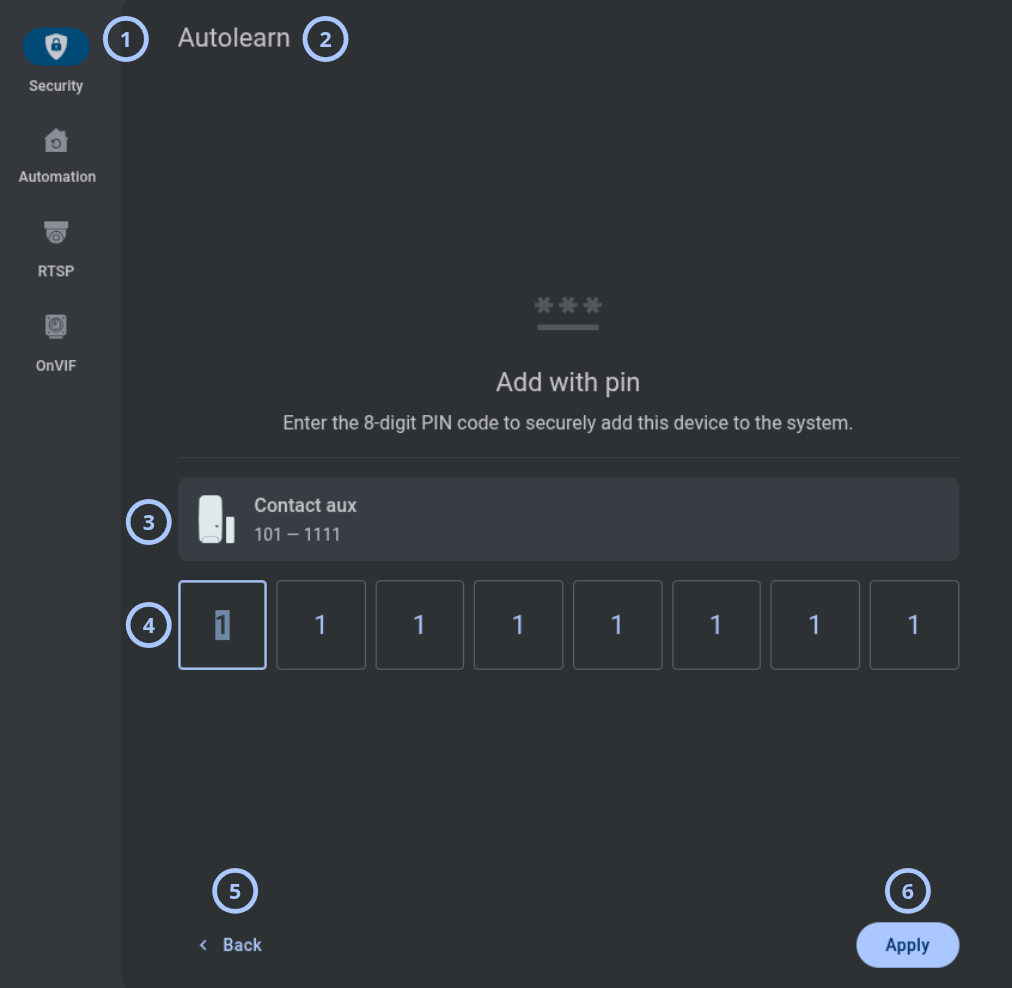
Enter the PIN for a detected device that supports PIN enrollment.
| Callout | UI element | Description | When to use |
|---|---|---|---|
| 1 | Modal window tab | Shows the current modal window tab. | Use to confirm that the Security tab is selected. |
| 2 | Modal title | Shows Autolearn. | Use to confirm the current task. |
| 3 | Detected device | Shows the detected device icon, model, and enrollment ID. | Use to verify the detected device. |
| 4 | PIN | Accepts the device PIN code. | Use to enter the PIN for the detected device. |
| 5 | Back button | Returns to the Device detected view. | Use to add the device without a PIN. |
| 6 | Apply button | Adds the device to the panel by using the entered PIN. Autolearn continues. | Use after entering the correct PIN. |
Autolearn status
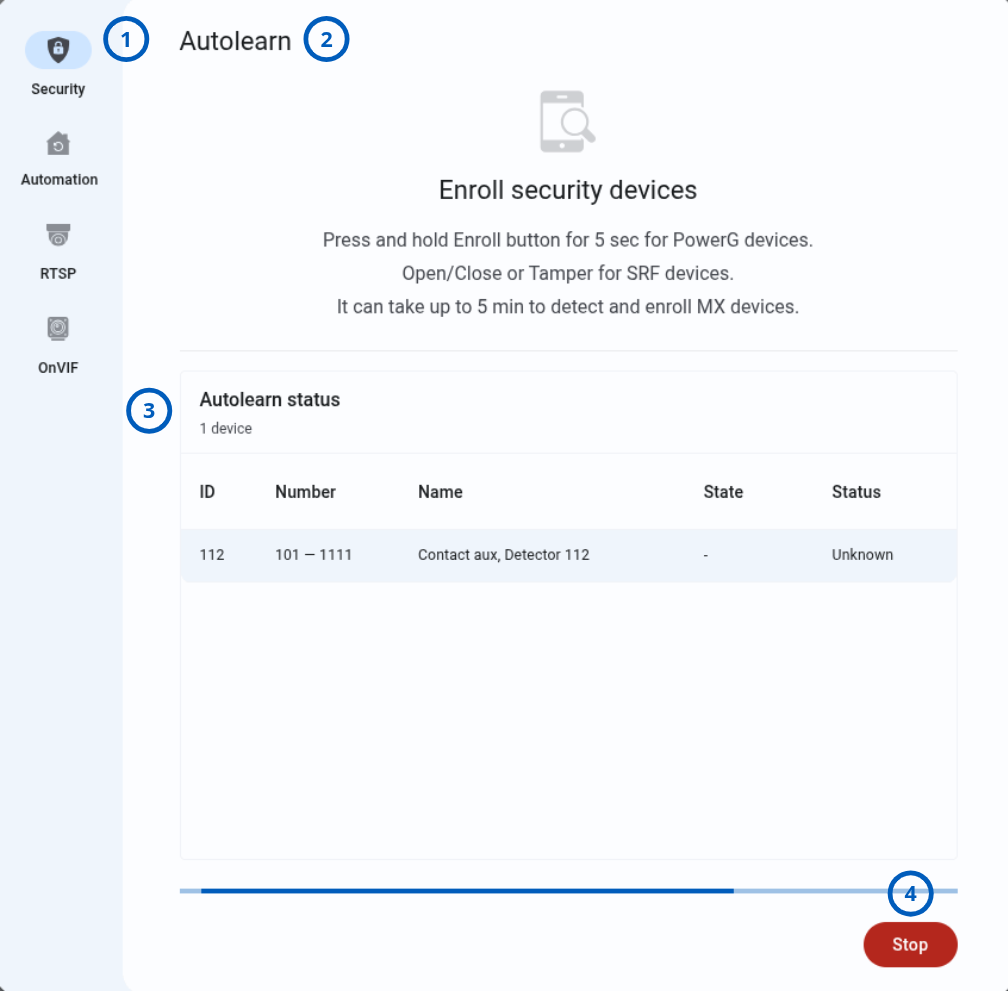
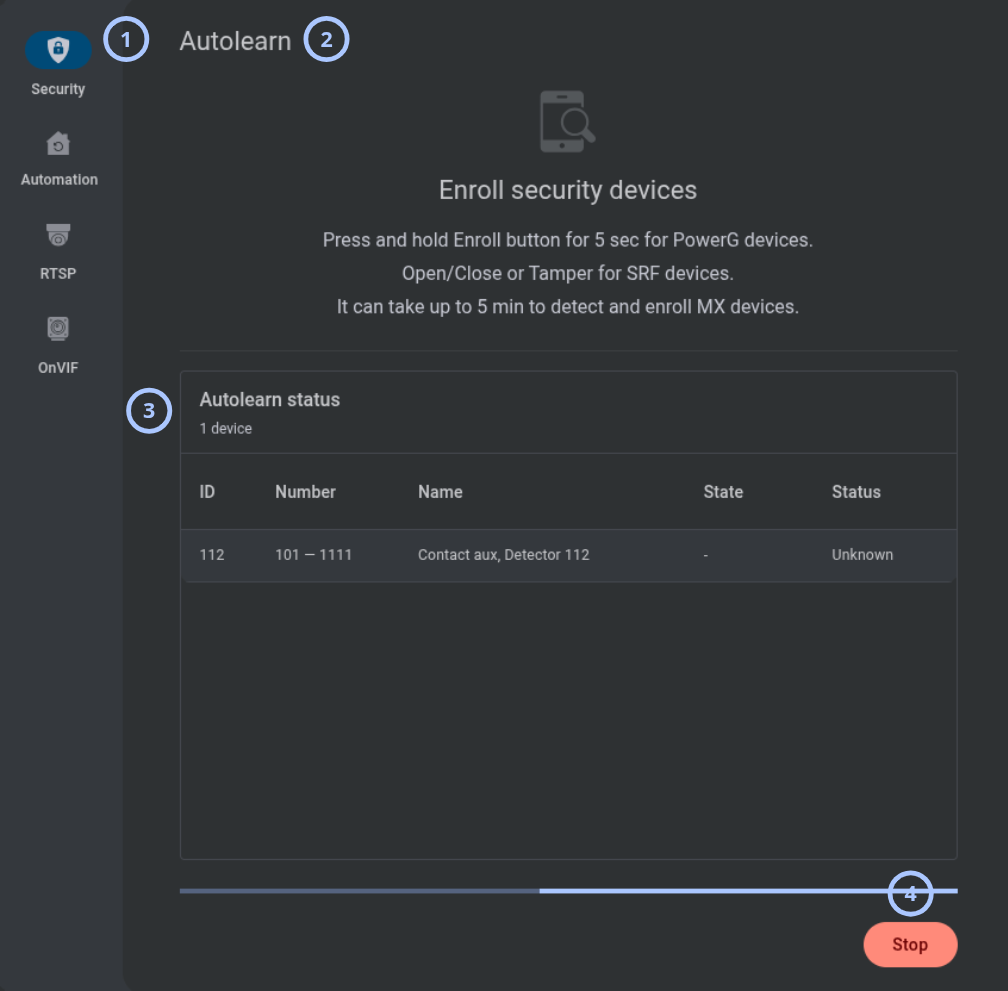
Review the security devices detected during the current Autolearn process.
| Callout | UI element | Description | When to use |
|---|---|---|---|
| 1 | Modal window tab | Shows the current modal window tab. | Use to confirm that the Security tab is selected. |
| 2 | Modal title | Shows Autolearn. | Use to confirm the current task. |
| 3 | Autolearn status | Shows the detected-device count and a grid with the ID, Number, Name, State, and Status of each device. | Use to monitor detected security devices. |
| 4 | Stop button | Stops the Autolearn process. | Use when device detection is complete. |
- Manual
- Autolearn
Manual enrollment
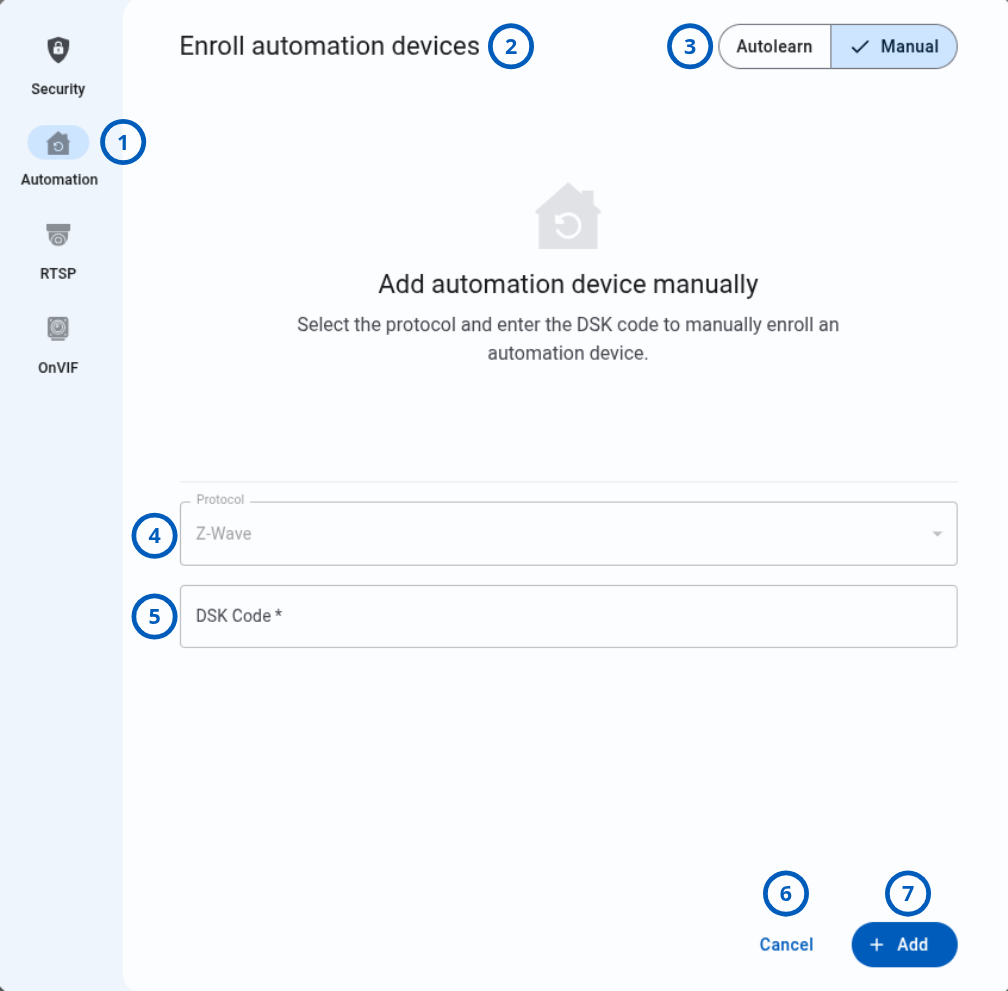
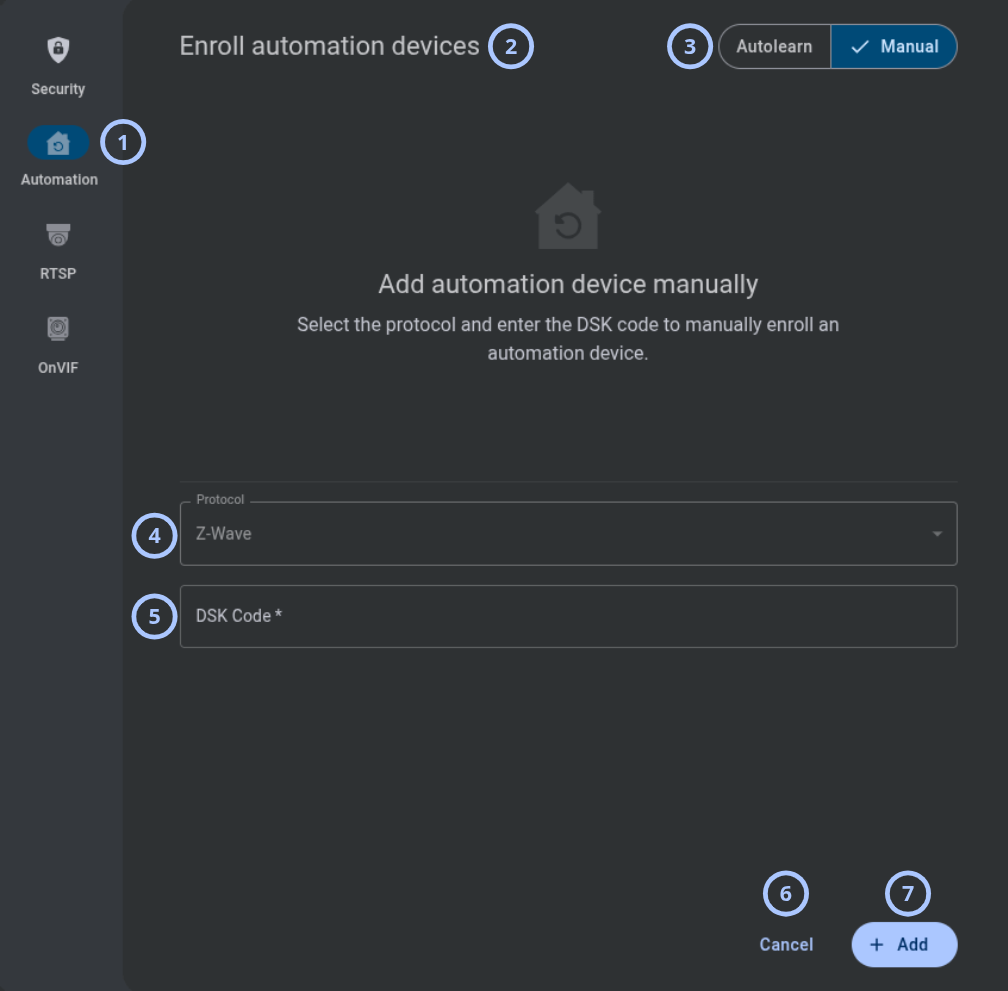
Use manual enrollment when you know the protocol and required device information.
| Callout | UI element | Description | When to use |
|---|---|---|---|
| 1 | Modal window tab | Shows the current modal window tab. | Use to confirm that the Automation tab is selected. |
| 2 | Modal title | Shows Enroll automation devices. | Use to confirm the current task. |
| 3 | Enroll mode | Selects Autolearn or Manual enrollment. The default mode is Manual. | Use to choose the enrollment method. |
| 4 | Protocol | Shows the device protocols supported by the panel. Available protocols depend on the panel. | Use to select the automation-device protocol. |
| 5 | DSK | Accepts the Device Specific Key for a Z-Wave device. | Use to enroll a Z-Wave device manually. |
| 6 | Cancel button | Closes the modal window without saving changes. | Use to stop device enrollment. |
| 7 | Add button | Adds the device to the panel when all required fields contain valid values. | Use after entering valid device information. |
Start Autolearn
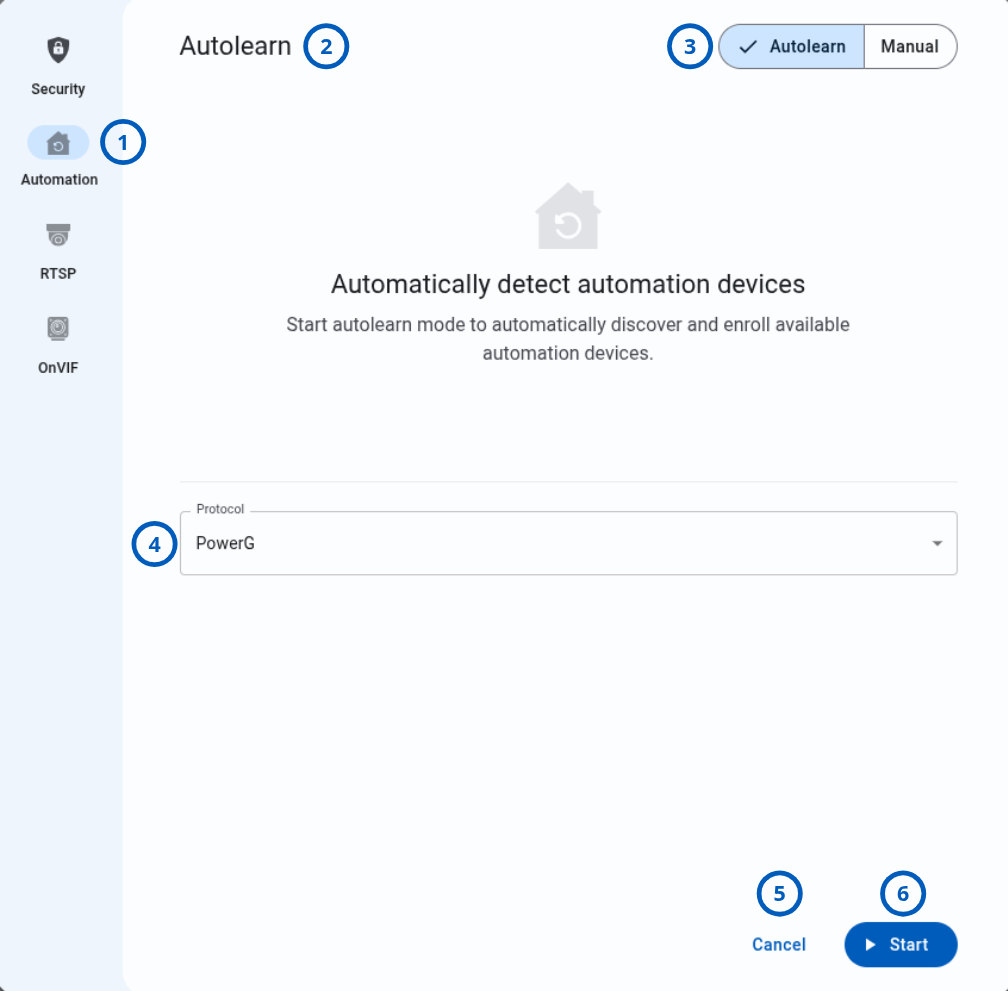
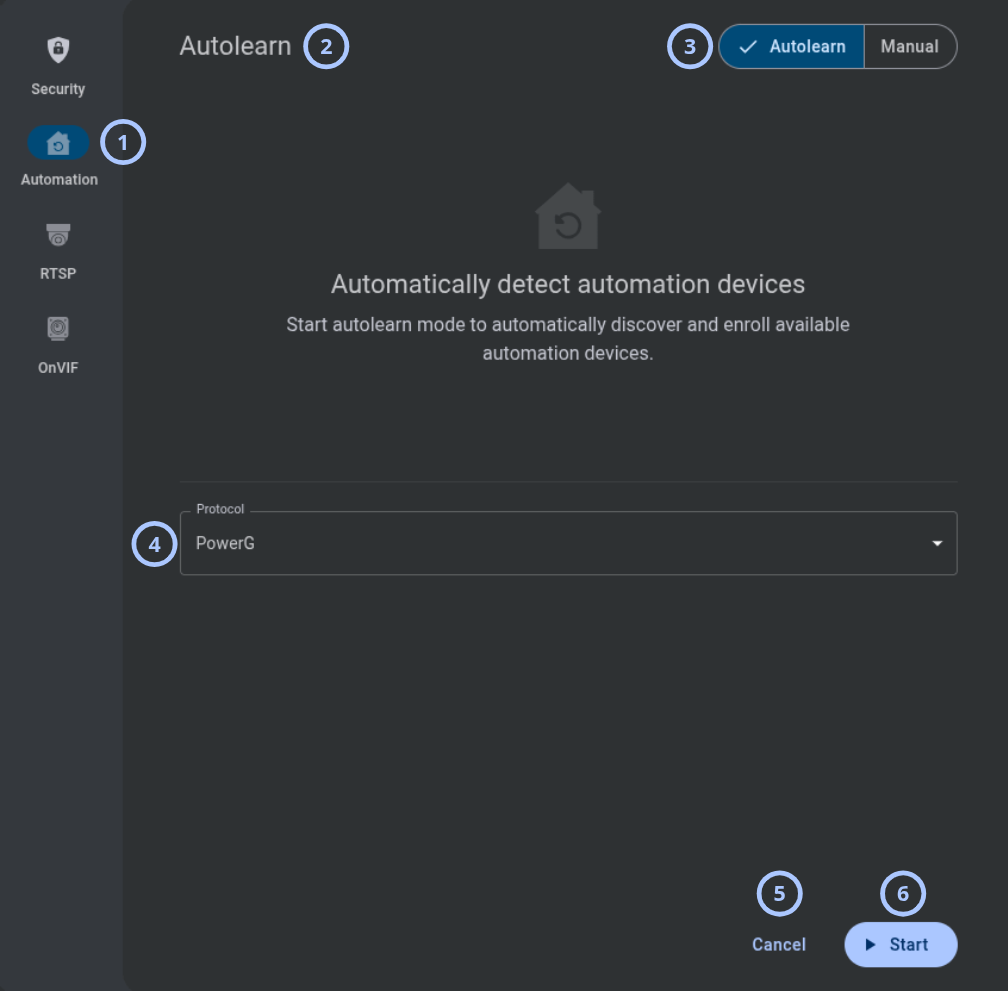
Select a protocol and start Autolearn when automation devices are ready for detection.
| Callout | UI element | Description | When to use |
|---|---|---|---|
| 1 | Modal window tab | Shows the current modal window tab. | Use to confirm that the Automation tab is selected. |
| 2 | Modal title | Shows Autolearn. | Use to confirm the current task. |
| 3 | Enroll mode | Selects Autolearn or Manual enrollment. The default mode is Manual. | Use to select Autolearn enrollment. |
| 4 | Protocol | Shows the device protocols supported by the panel. Available protocols depend on the panel. | Use to select the automation-device protocol. |
| 5 | Cancel button | Closes the modal window without starting Autolearn. | Use to stop device enrollment. |
| 6 | Start button | Starts the automation-device Autolearn process. | Use when supported automation devices are ready for detection. |
Autolearn in progress
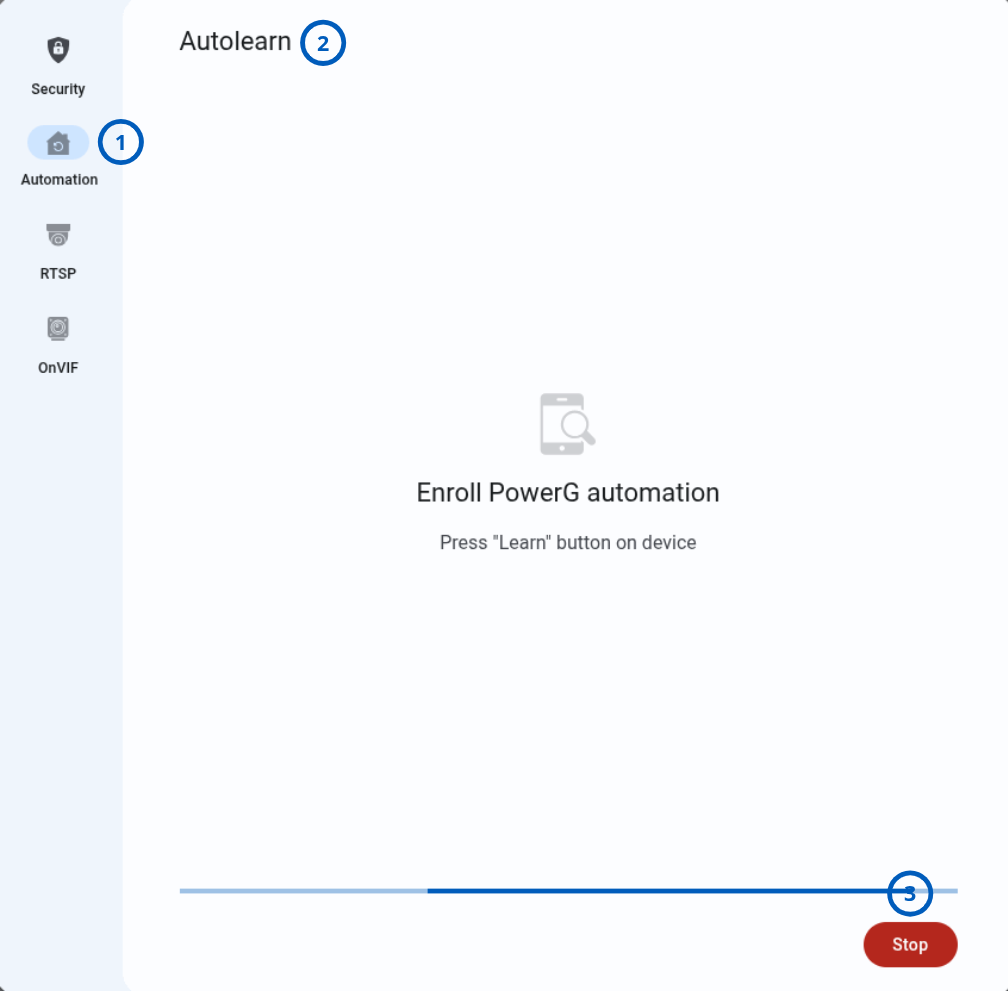
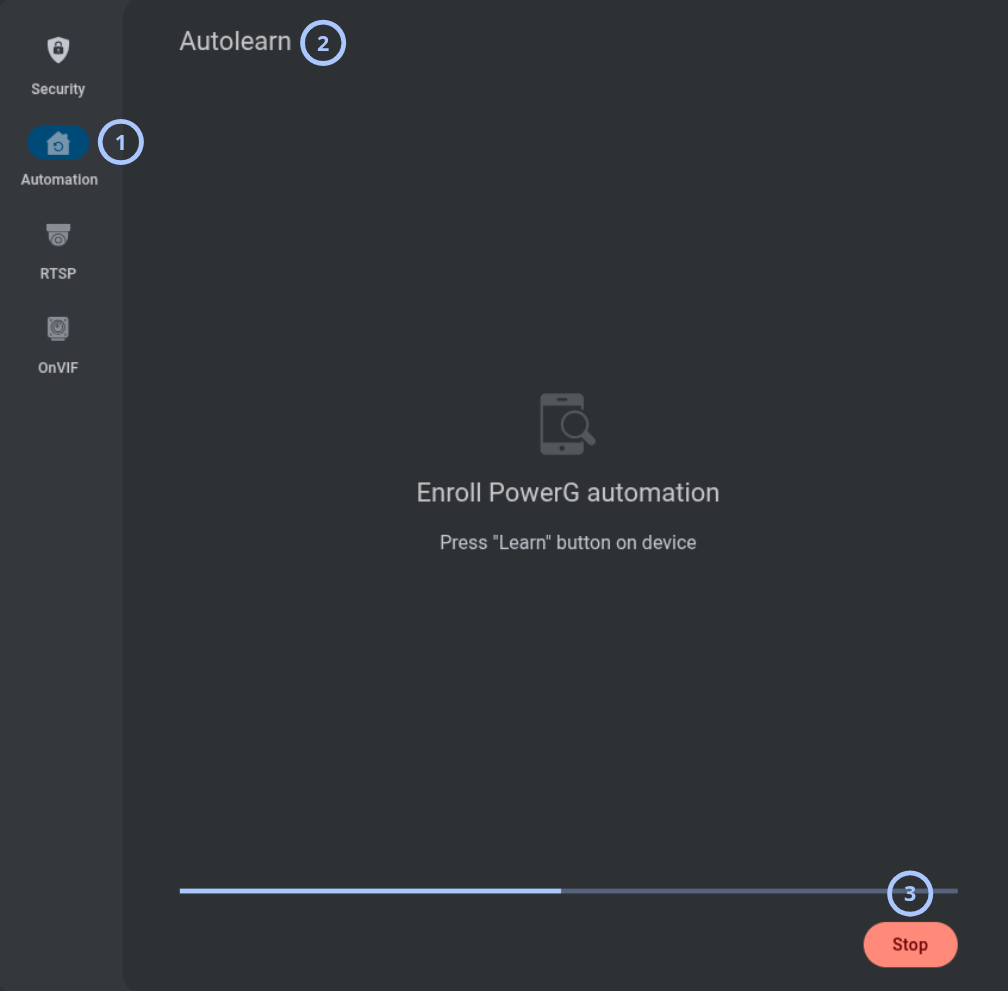
This view appears while Autolearn is detecting automation devices.
| Callout | UI element | Description | When to use |
|---|---|---|---|
| 1 | Modal window tab | Shows the current modal window tab. | Use to confirm that the Automation tab is selected. |
| 2 | Modal title | Shows Autolearn. | Use to confirm that Autolearn is running. |
| 3 | Stop button | Stops the Autolearn process. | Use to end device detection. |
Detected devices
The next steps depend on the protocol used by the detected automation device.
- PowerG
- Z-Wave
Device detected
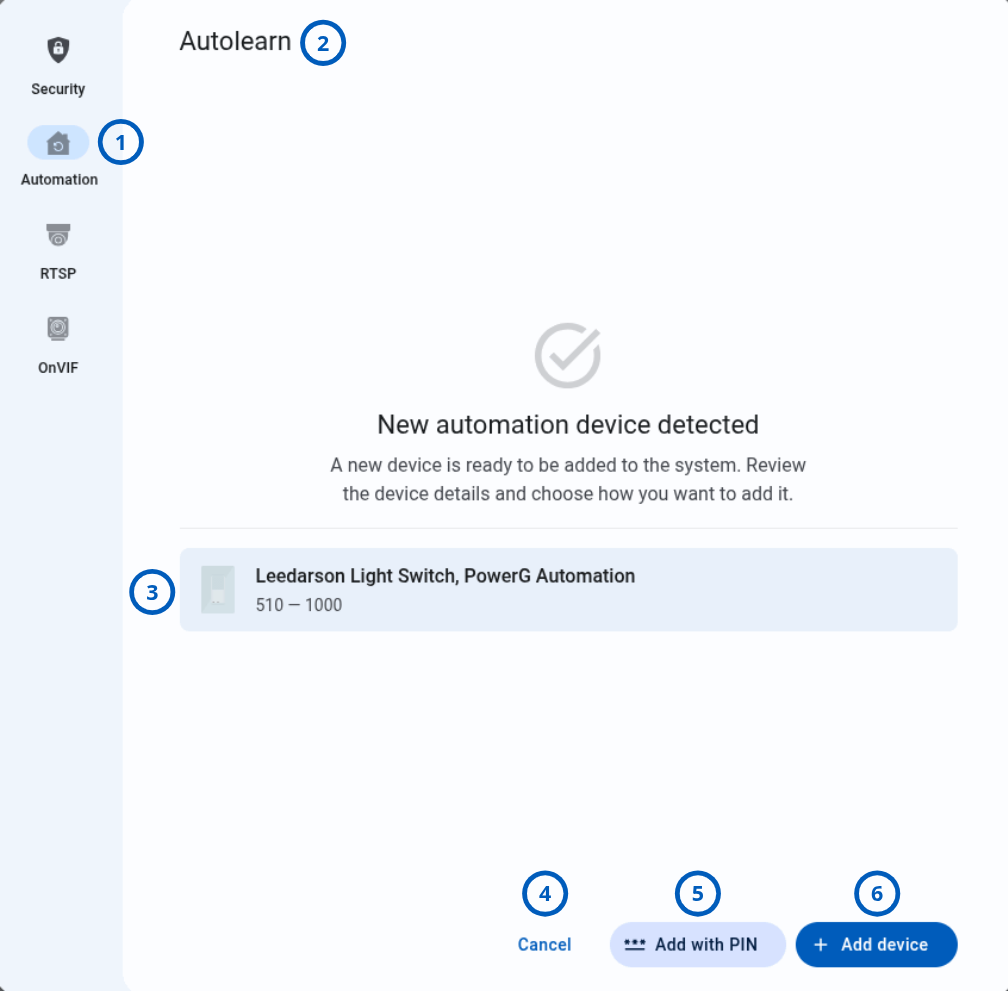
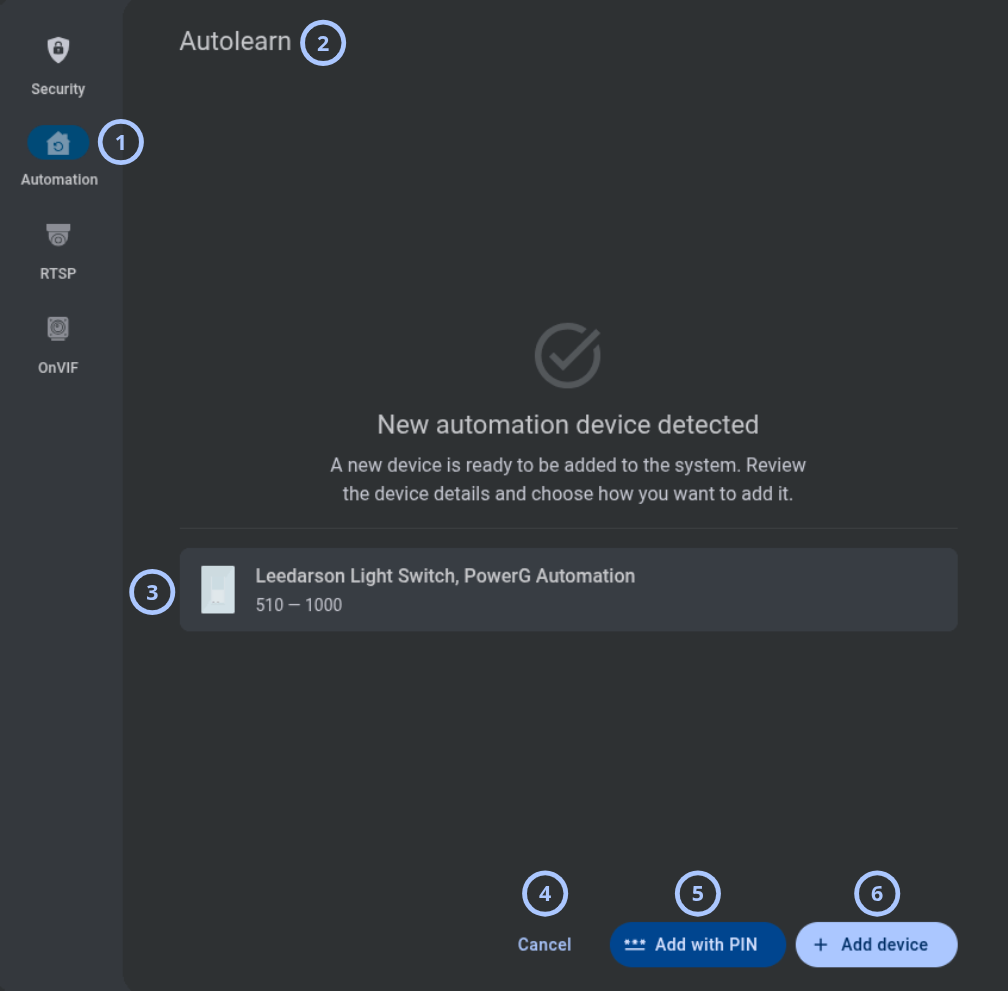
Review the detected PowerG device before adding or skipping it.
| Callout | UI element | Description | When to use |
|---|---|---|---|
| 1 | Modal window tab | Shows the current modal window tab. | Use to confirm that the Automation tab is selected. |
| 2 | Modal title | Shows Autolearn. | Use to confirm the current task. |
| 3 | Detected device | Shows the detected device icon, model, and enrollment ID. | Use to verify the detected PowerG device. |
| 4 | Cancel button | Cancels enrollment of the detected device. Autolearn continues. | Use to skip the detected device. |
| 5 | Add with PIN button | Opens the PIN entry view. The button appears only when the device supports a PIN. | Use to enroll the device with a PIN. |
| 6 | Add device button | Adds the device to the panel. Autolearn continues. | Use to enroll the detected PowerG device without a PIN. |
Add with PIN
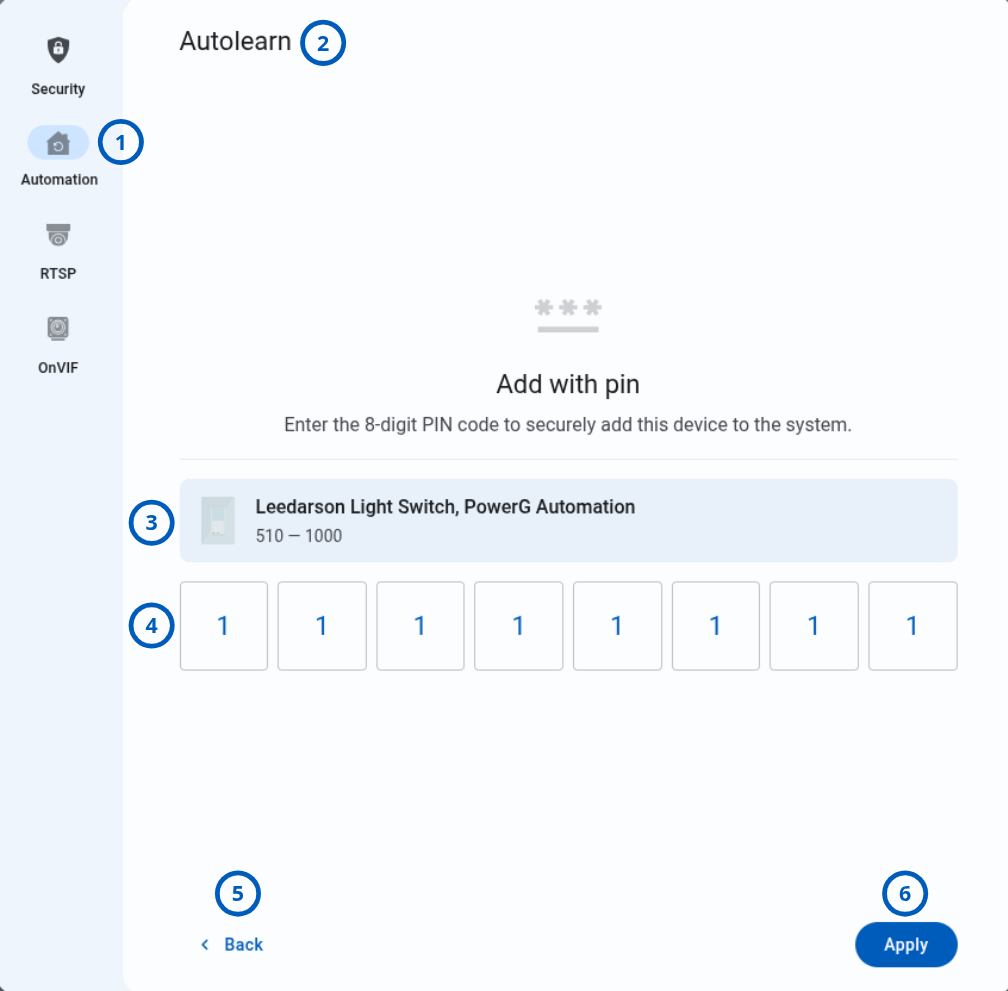
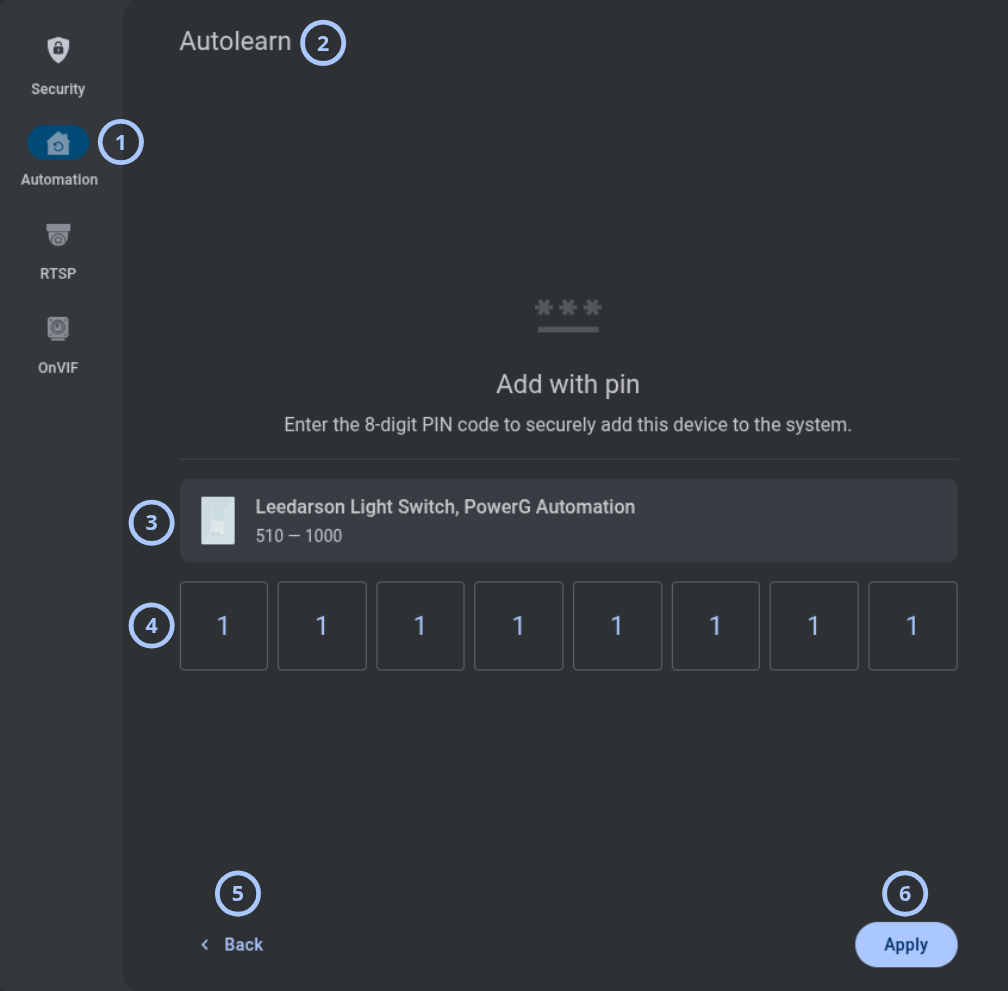
Enter the PIN for a detected PowerG device that supports PIN enrollment.
| Callout | UI element | Description | When to use |
|---|---|---|---|
| 1 | Modal window tab | Shows the current modal window tab. | Use to confirm that the Automation tab is selected. |
| 2 | Modal title | Shows Autolearn. | Use to confirm the current task. |
| 3 | Detected device | Shows the detected device icon, model, and enrollment ID. | Use to verify the detected PowerG device. |
| 4 | PIN | Accepts the device PIN code. | Use to enter the PIN for the detected device. |
| 5 | Back button | Returns to the Device detected view. | Use to add the device without a PIN. |
| 6 | Apply button | Adds the device to the panel by using the entered PIN. Autolearn continues. | Use after entering the correct PIN. |
Autolearn status
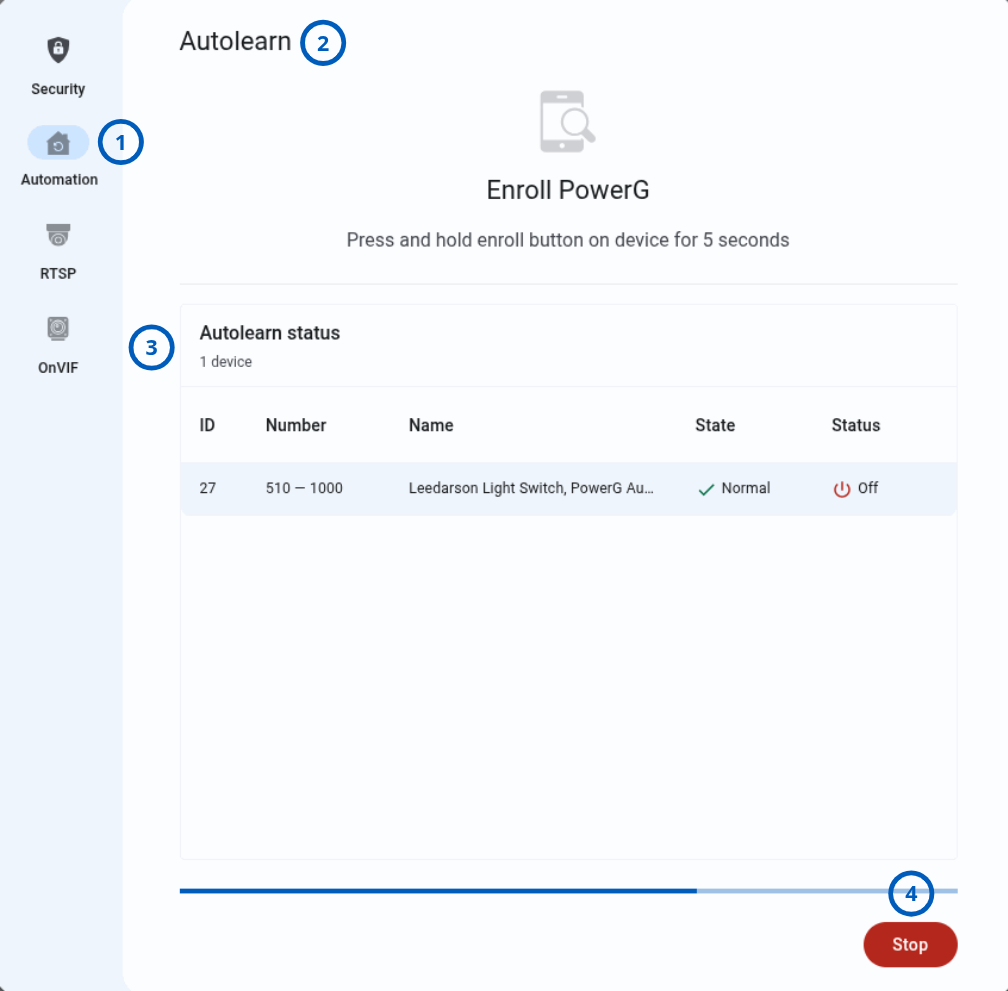
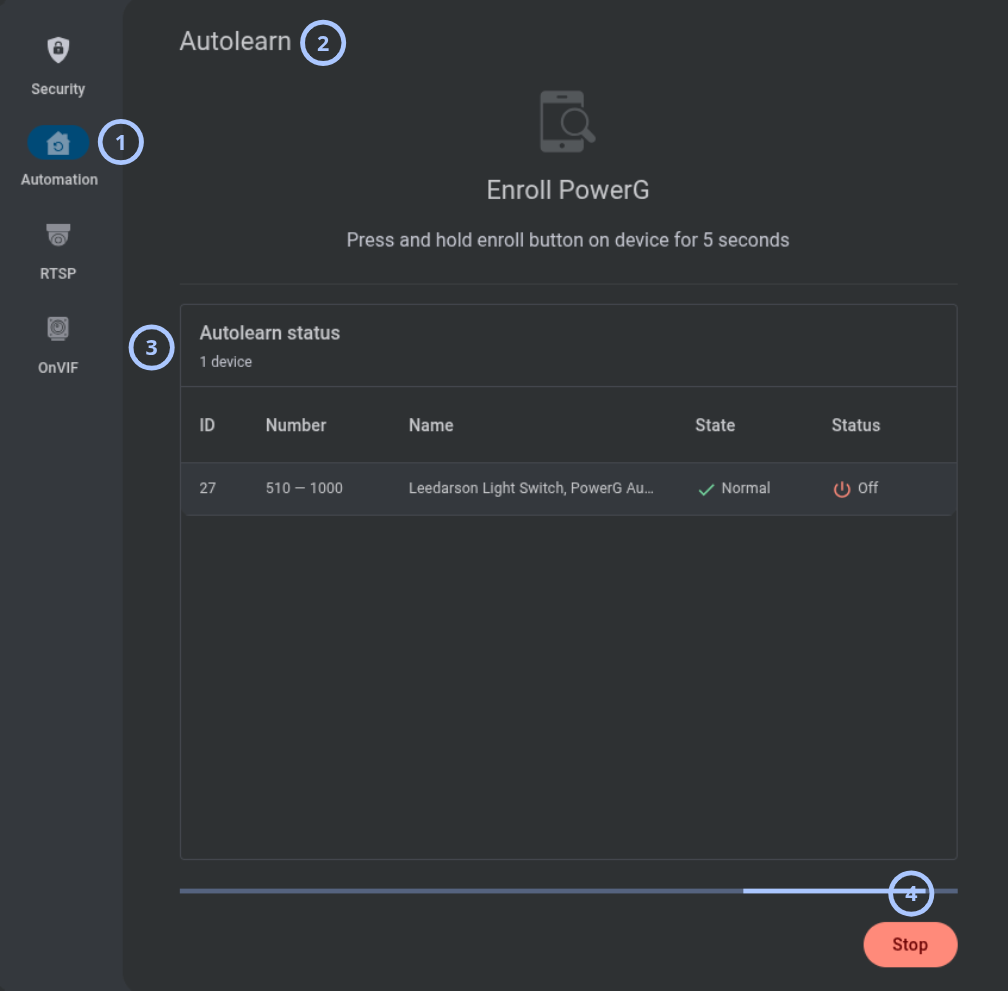
Review the PowerG devices detected during the current Autolearn process.
| Callout | UI element | Description | When to use |
|---|---|---|---|
| 1 | Modal window tab | Shows the current modal window tab. | Use to confirm that the Automation tab is selected. |
| 2 | Modal title | Shows Autolearn. | Use to confirm the current task. |
| 3 | Autolearn status | Shows the detected-device count and a grid with the ID, Number, Name, State, and Status of each device. | Use to monitor detected PowerG devices. |
| 4 | Stop button | Stops the Autolearn process. | Use when device detection is complete. |
Device detected
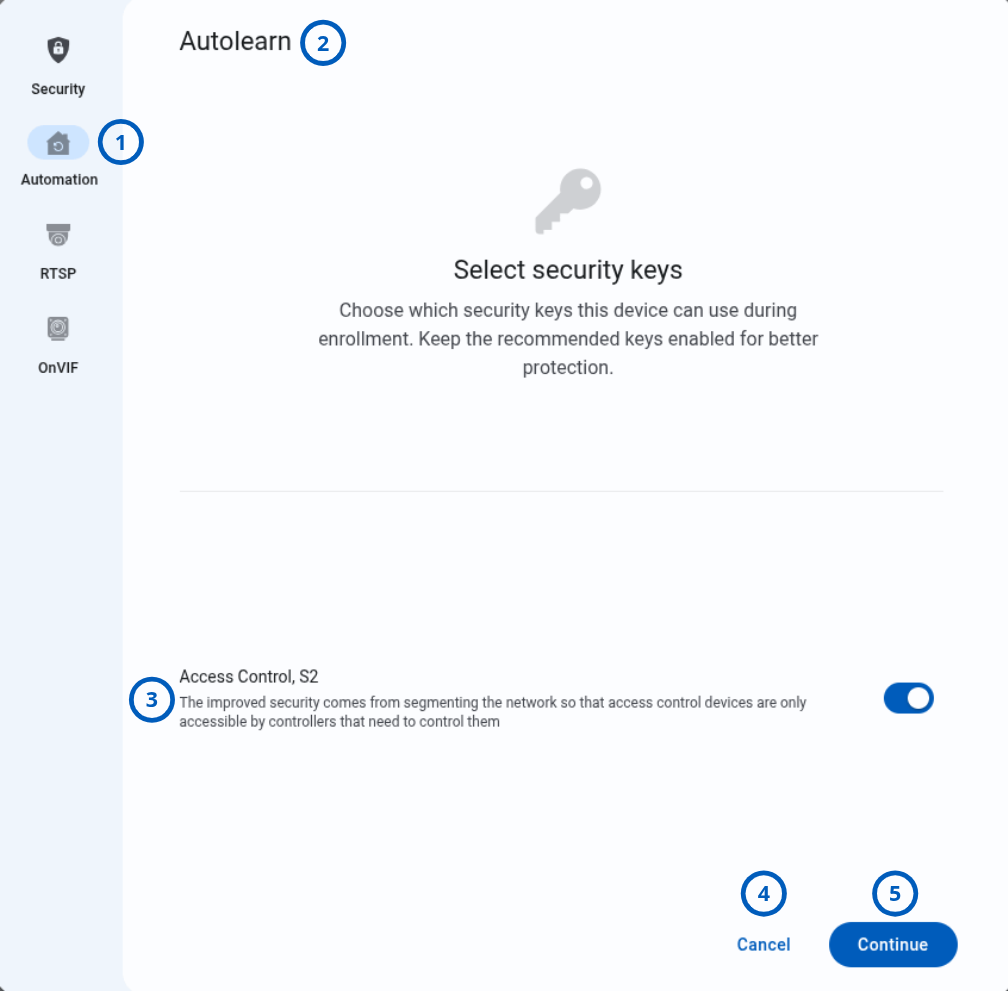
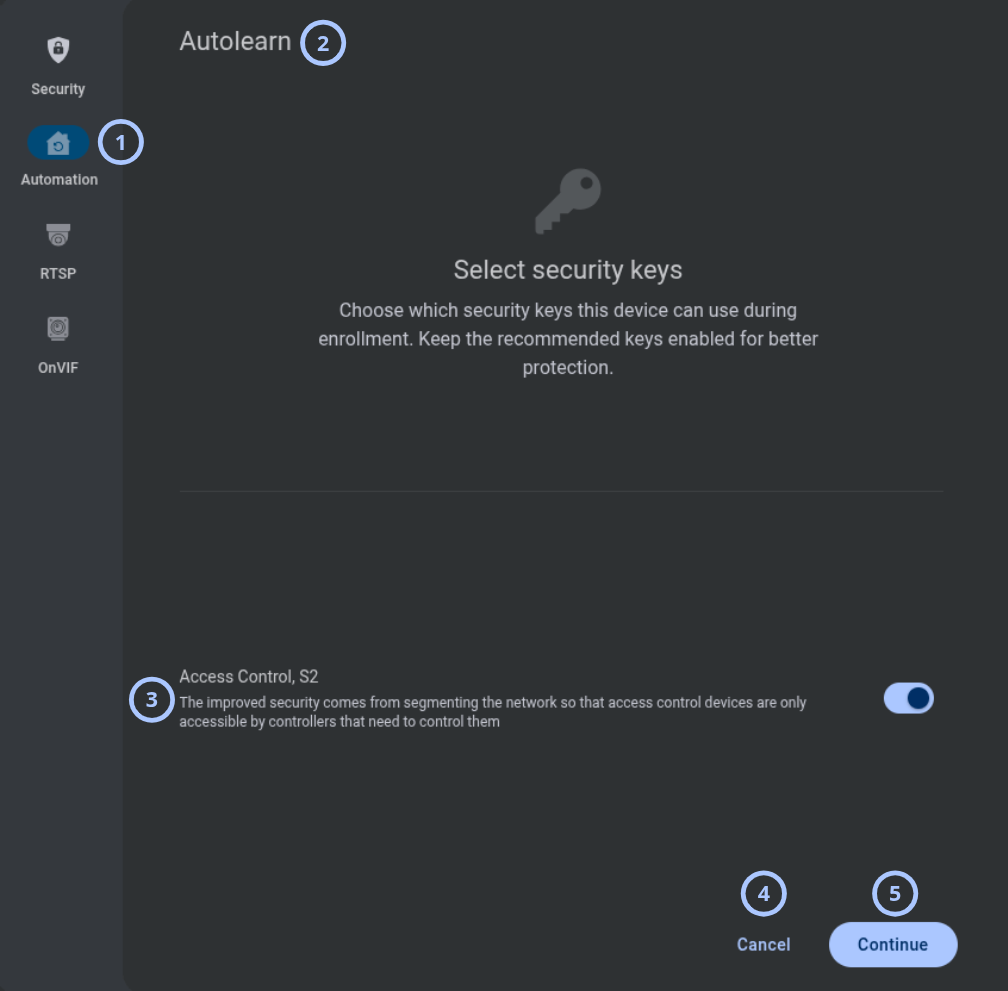
Review the detected Z-Wave device and select whether to use access-control enrollment.
| Callout | UI element | Description | When to use |
|---|---|---|---|
| 1 | Modal window tab | Shows the current modal window tab. | Use to confirm that the Automation tab is selected. |
| 2 | Modal title | Shows Autolearn. | Use to confirm the current task. |
| 3 | Access control toggle | Controls whether the detected Z-Wave device uses access-control enrollment. | Enable when security-code confirmation is required. |
| 4 | Cancel button | Cancels enrollment of the detected device. Autolearn continues. | Use to skip the detected device. |
| 5 | Continue button | Opens the security-code confirmation view when access control is enabled. | Use to continue secure Z-Wave enrollment. |
Confirm security code
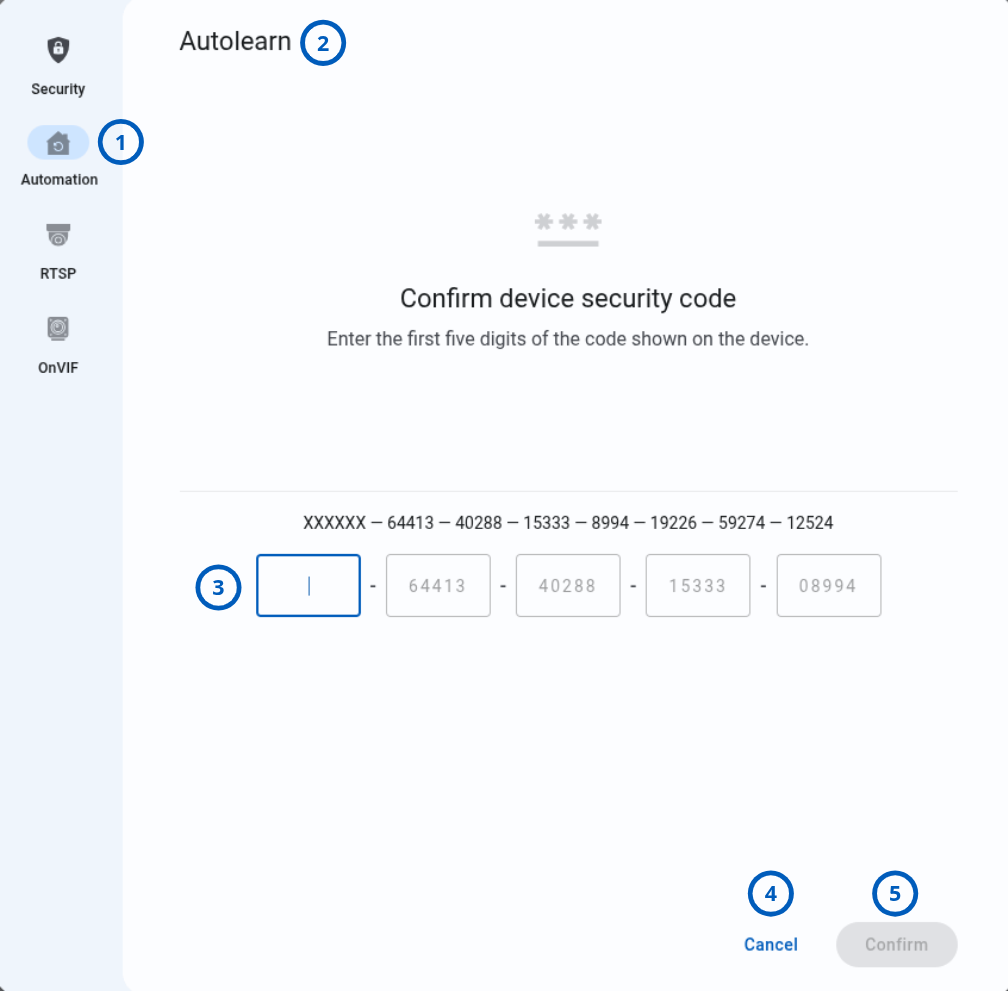
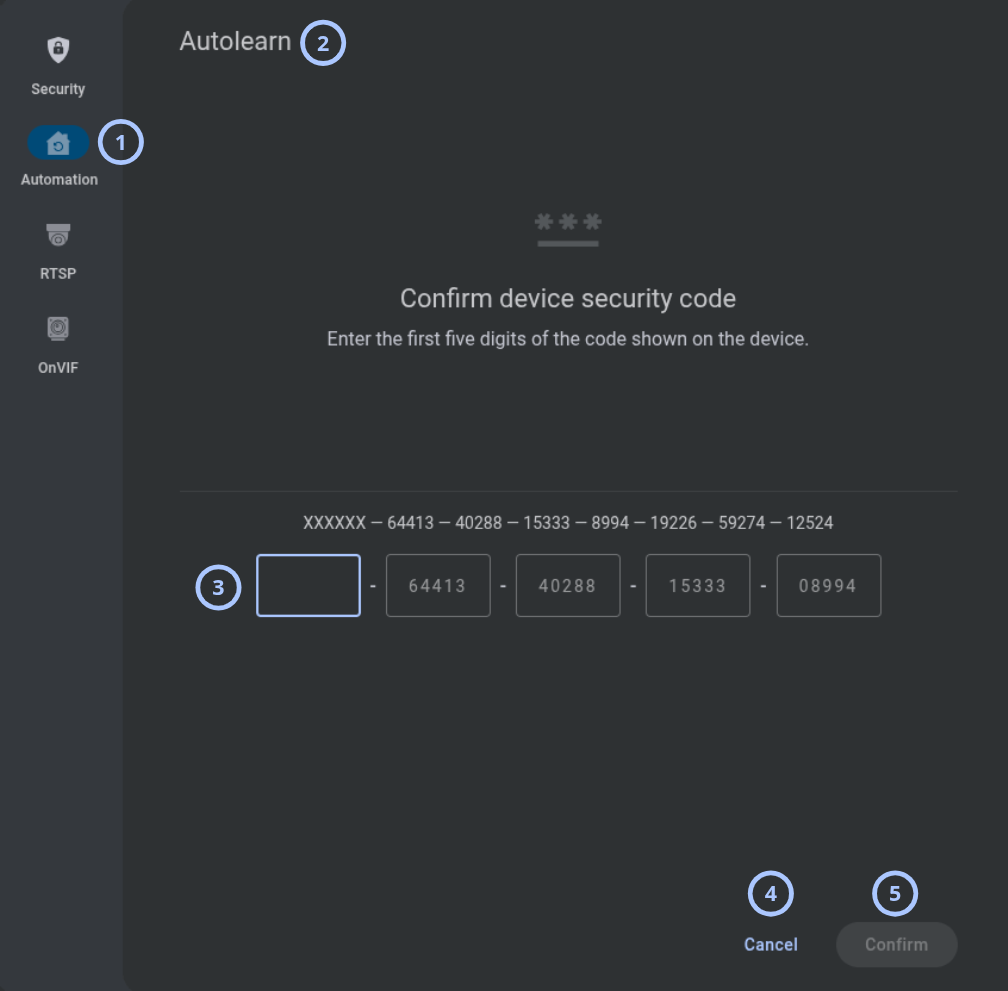
Enter the Device Specific Key to confirm secure enrollment.
| Callout | UI element | Description | When to use |
|---|---|---|---|
| 1 | Modal window tab | Shows the current modal window tab. | Use to confirm that the Automation tab is selected. |
| 2 | Modal title | Shows Autolearn. | Use to confirm the current task. |
| 3 | DSK | Accepts the Device Specific Key for the detected Z-Wave device. | Use to confirm secure enrollment. |
| 4 | Cancel button | Cancels enrollment of the detected device. | Use when you do not want to add the device. |
| 5 | Confirm button | Adds the device to the panel. Autolearn continues. | Use after entering the correct DSK. |
Autolearn status
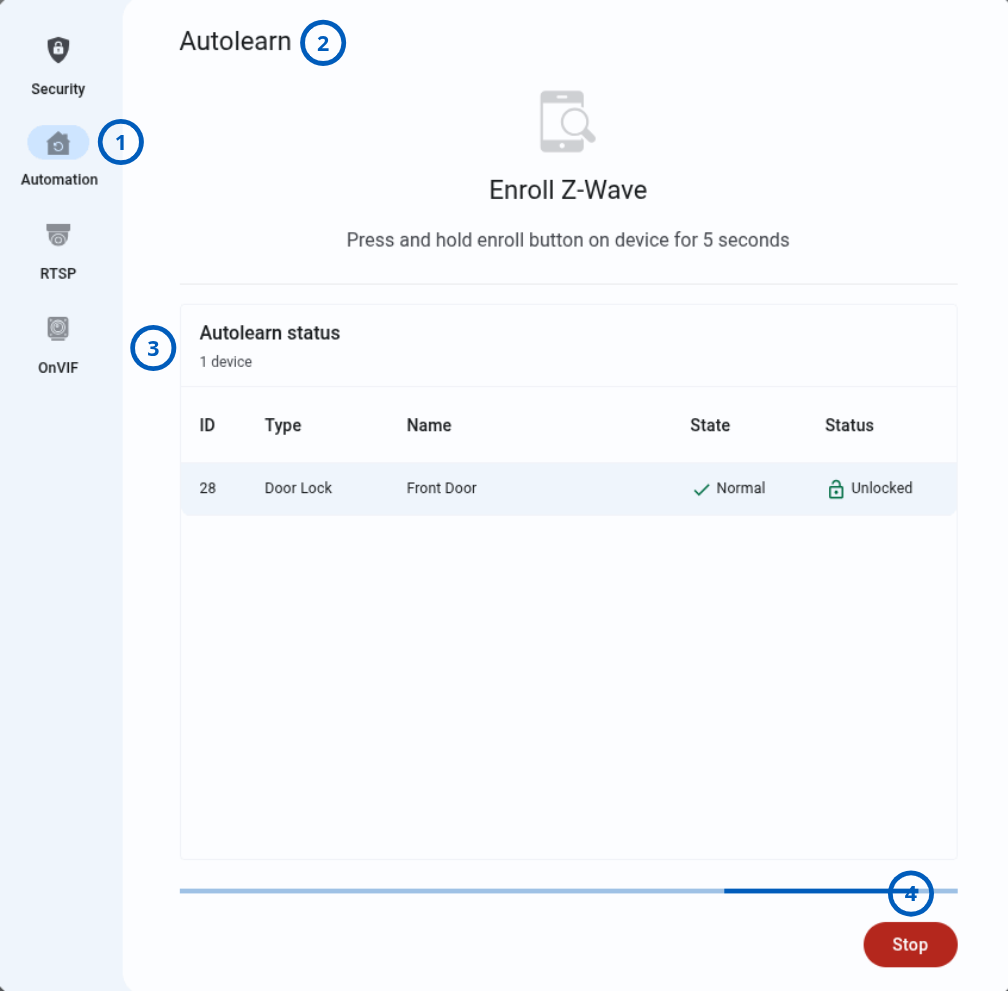
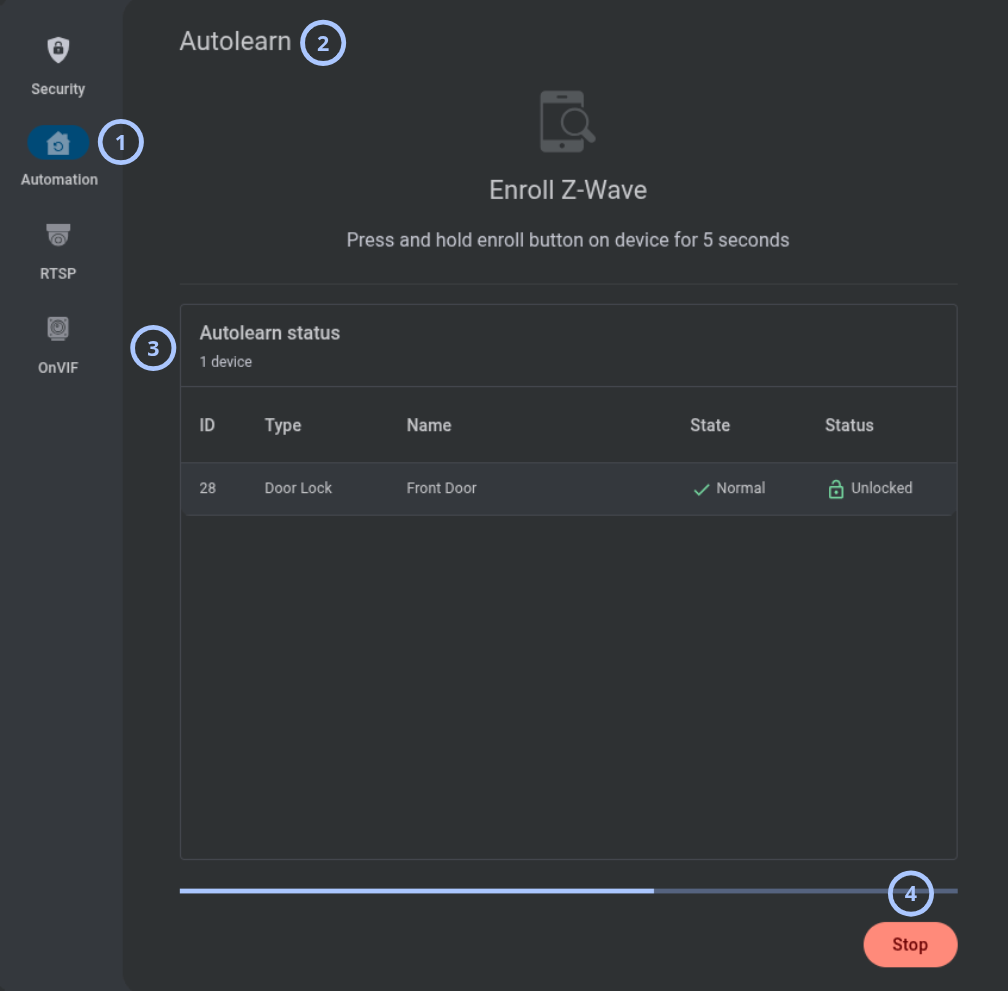
Review the Z-Wave devices detected during the current Autolearn process.
| Callout | UI element | Description | When to use |
|---|---|---|---|
| 1 | Modal window tab | Shows the current modal window tab. | Use to confirm that the Automation tab is selected. |
| 2 | Modal title | Shows Autolearn. | Use to confirm the current task. |
| 3 | Autolearn status | Shows the detected-device count and a grid with the ID, Type, Name, State, and Status of each device. | Use to monitor detected Z-Wave devices. |
| 4 | Stop button | Stops the Autolearn process. | Use when device detection is complete. |
Use this tab to add an RTSP camera to the panel.
- Overview
- Camera info
- General info
- Zone association
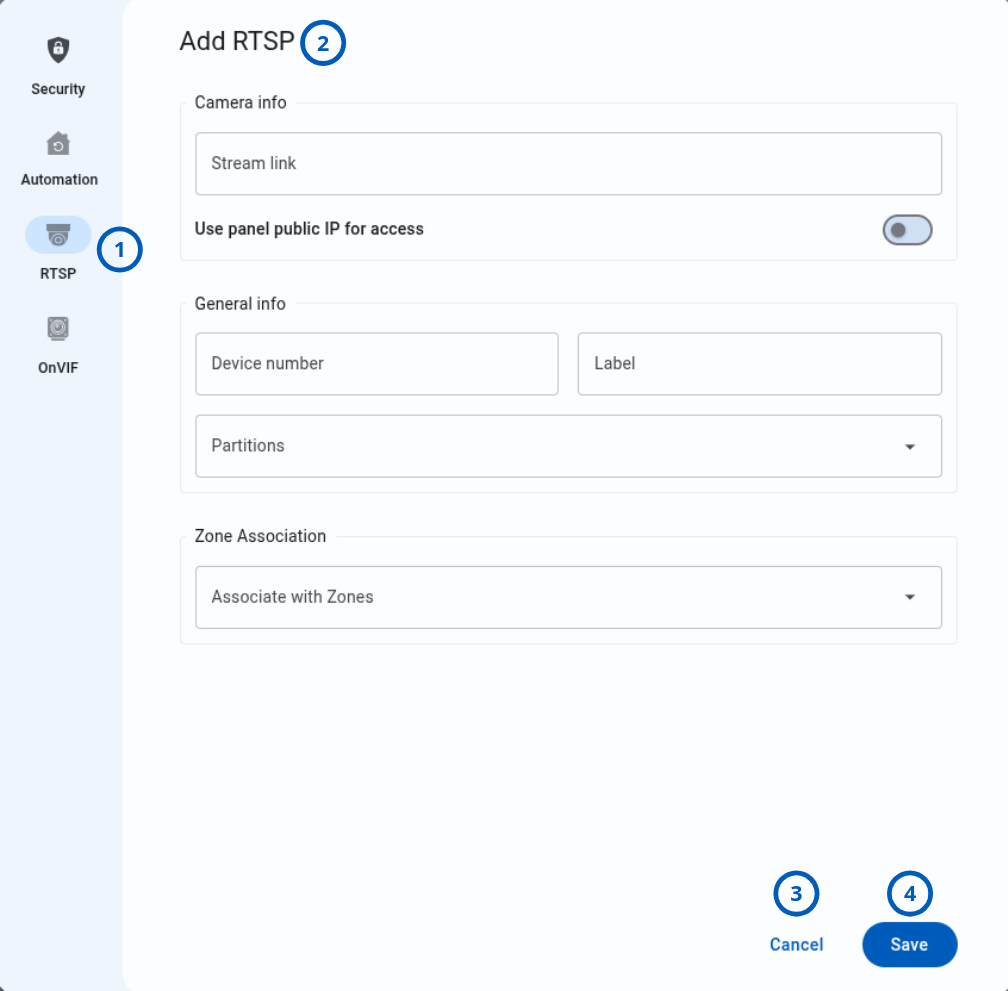
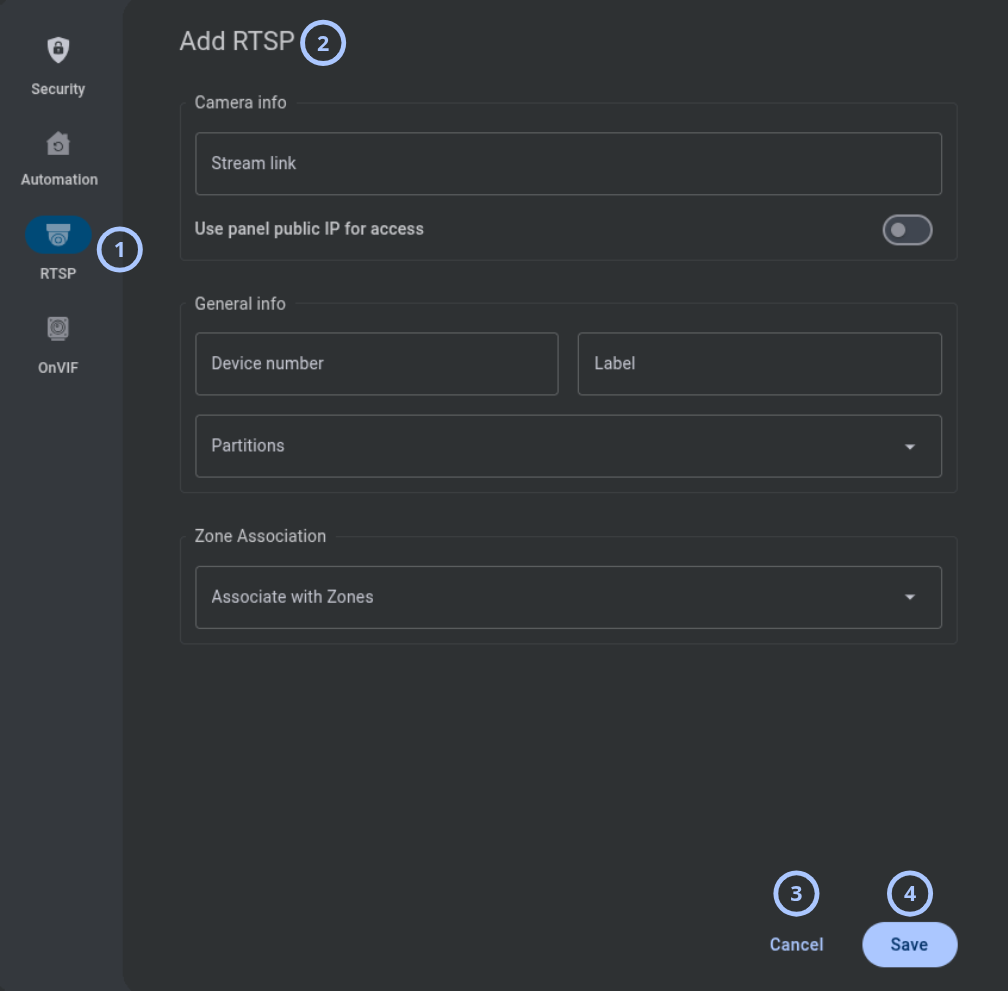
| Callout | UI element | Description | When to use |
|---|---|---|---|
| 1 | Modal window tab | Shows the current modal window tab. | Use to confirm that the RTSP tab is selected. |
| 2 | Modal title | Shows Add RTSP. | Use to confirm the current task. |
| 3 | Cancel button | Closes the modal window without saving changes. | Use when you do not want to add the camera. |
| 4 | Save button | Adds the RTSP camera to the panel when all required fields contain valid values. | Use after entering valid camera information. |
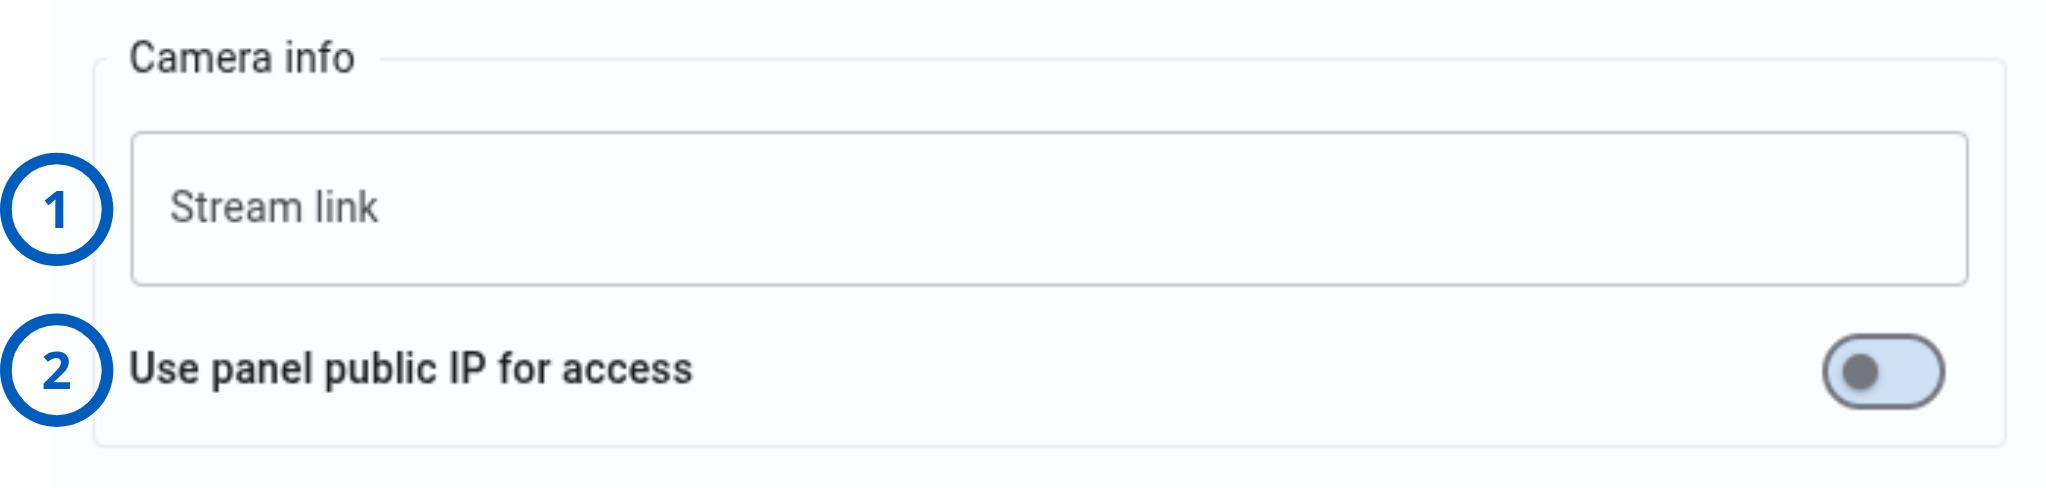
| Callout | UI element | Description | When to use |
|---|---|---|---|
| 1 | Stream link | Accepts the RTSP stream link. | Use to enter the camera stream address. |
| 2 | Use panel public IP for access | Controls whether the panel public IP address is used to access the camera. | Enable when the camera must be accessed through the panel public IP address. |
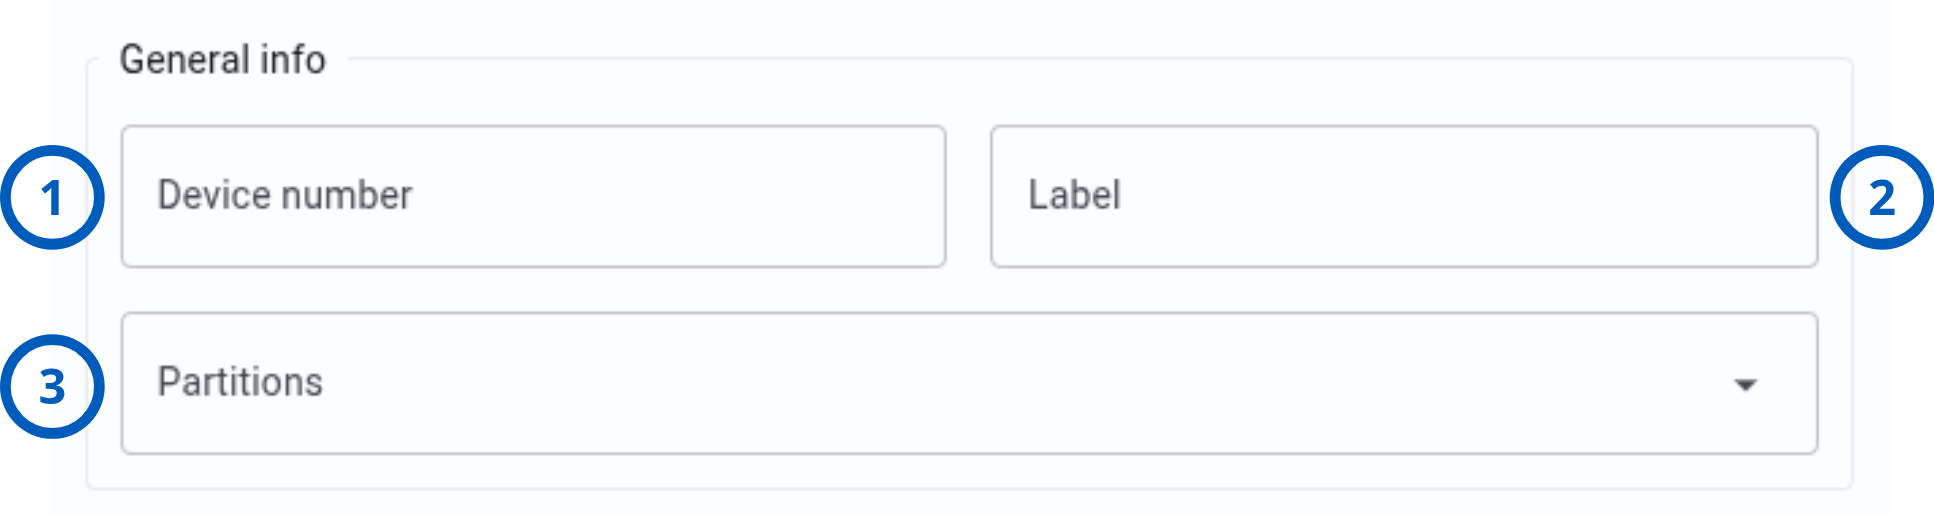
| Callout | UI element | Description | When to use |
|---|---|---|---|
| 1 | Device number | Accepts the camera device number. | Use to identify the camera on the panel. |
| 2 | Label | Accepts the camera label. | Use to enter a recognizable camera name. |


| Callout | UI element | Description | When to use |
|---|---|---|---|
| 1 | Associate with zones | Shows the zones available for camera association. | Use to associate the camera with one or more zones. |
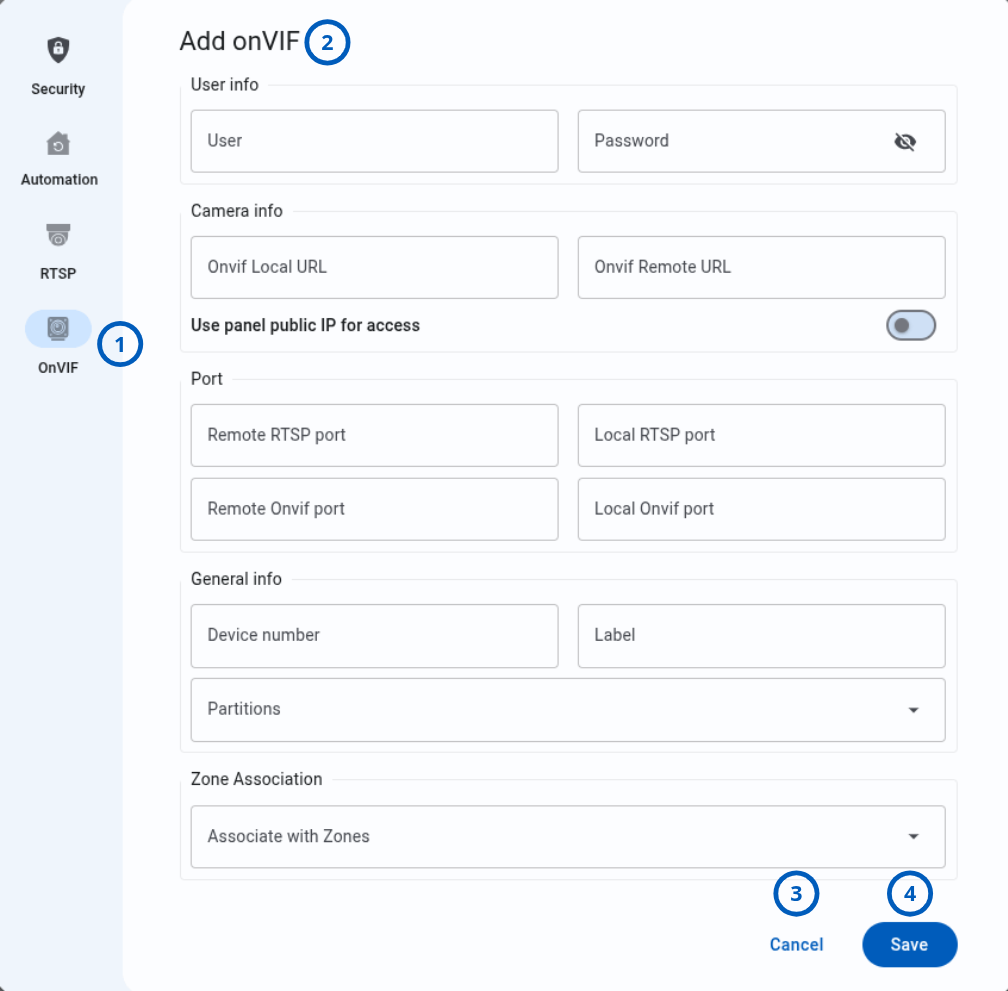
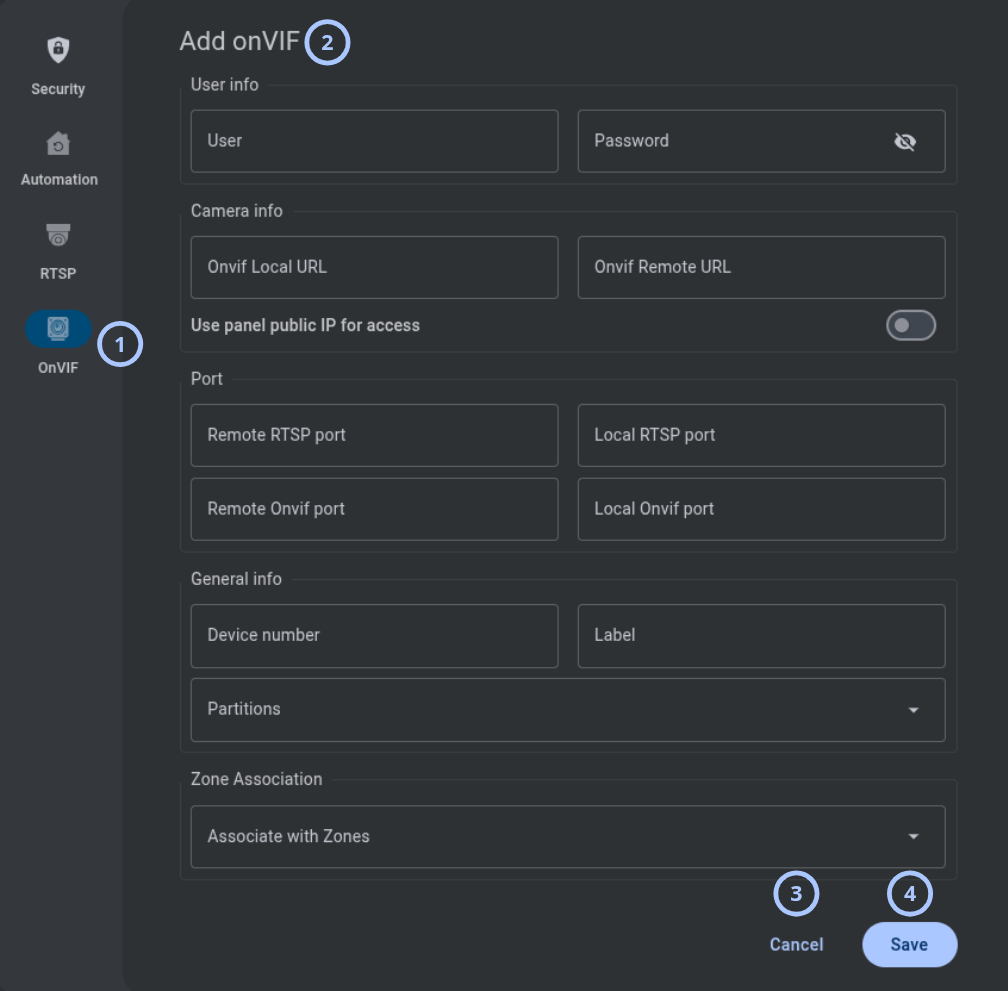
Use this tab to add an OnVIF camera to the panel.
- Overview
- User info
- Camera info
- Port
- General info
- Zone association
| Callout | UI element | Description | When to use |
|---|---|---|---|
| 1 | Modal window tab | Shows the current modal window tab. | Use to confirm that the OnVIF tab is selected. |
| 2 | Modal title | Shows Add OnVIF. | Use to confirm the current task. |
| 3 | Cancel button | Closes the modal window without saving changes. | Use when you do not want to add the camera. |
| 4 | Save button | Adds the OnVIF camera to the panel when all required fields contain valid values. | Use after entering valid camera information. |


| Callout | UI element | Description | When to use |
|---|---|---|---|
| 1 | User | Accepts the camera user name. | Use to enter the credentials required to access the camera. |
| 2 | Password | Accepts the camera password. | Use to enter the password for the camera user. |


| Callout | UI element | Description | When to use |
|---|---|---|---|
| 1 | OnVIF Local URL | Accepts the local OnVIF URL. | Use to enter the camera address used on the local network. |
| 2 | OnVIF Remote URL | Accepts the remote OnVIF URL. | Use to enter the camera address used for remote access. |
| Callout | UI element | Description | When to use |
|---|---|---|---|
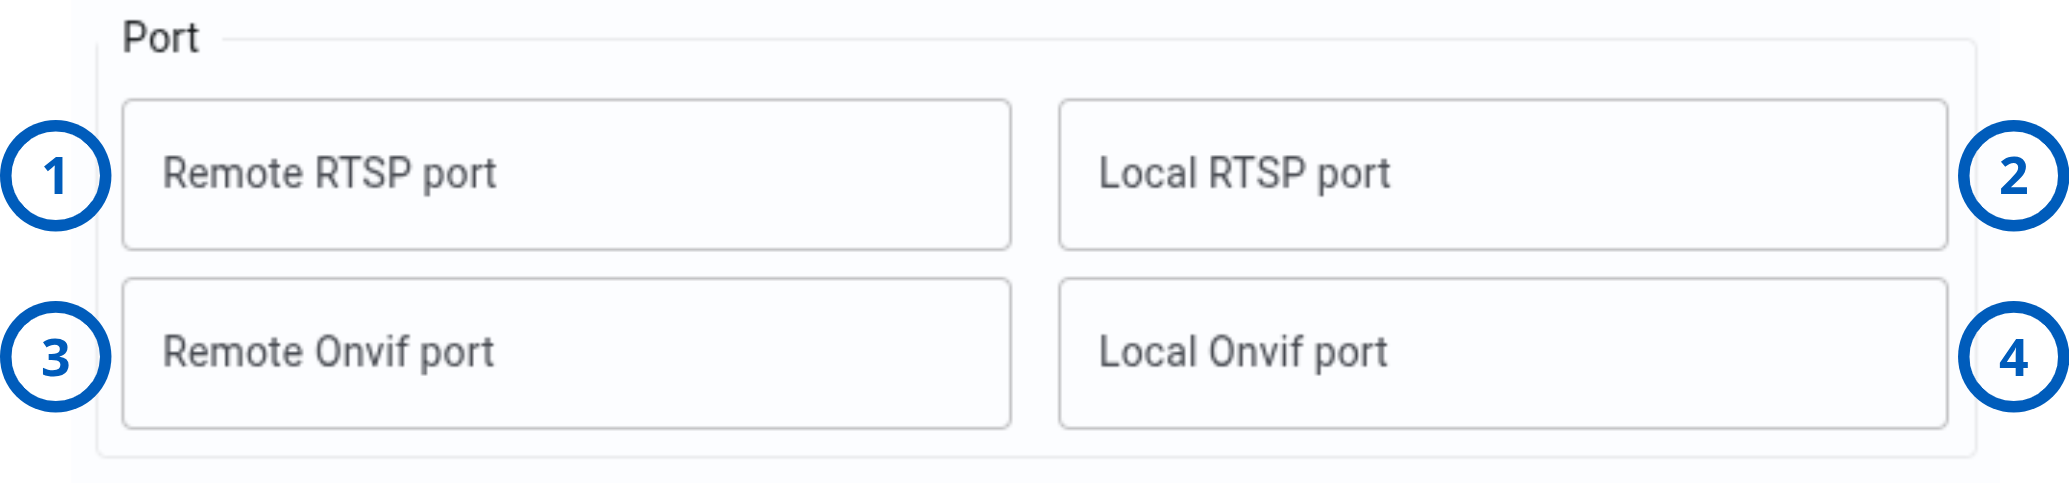
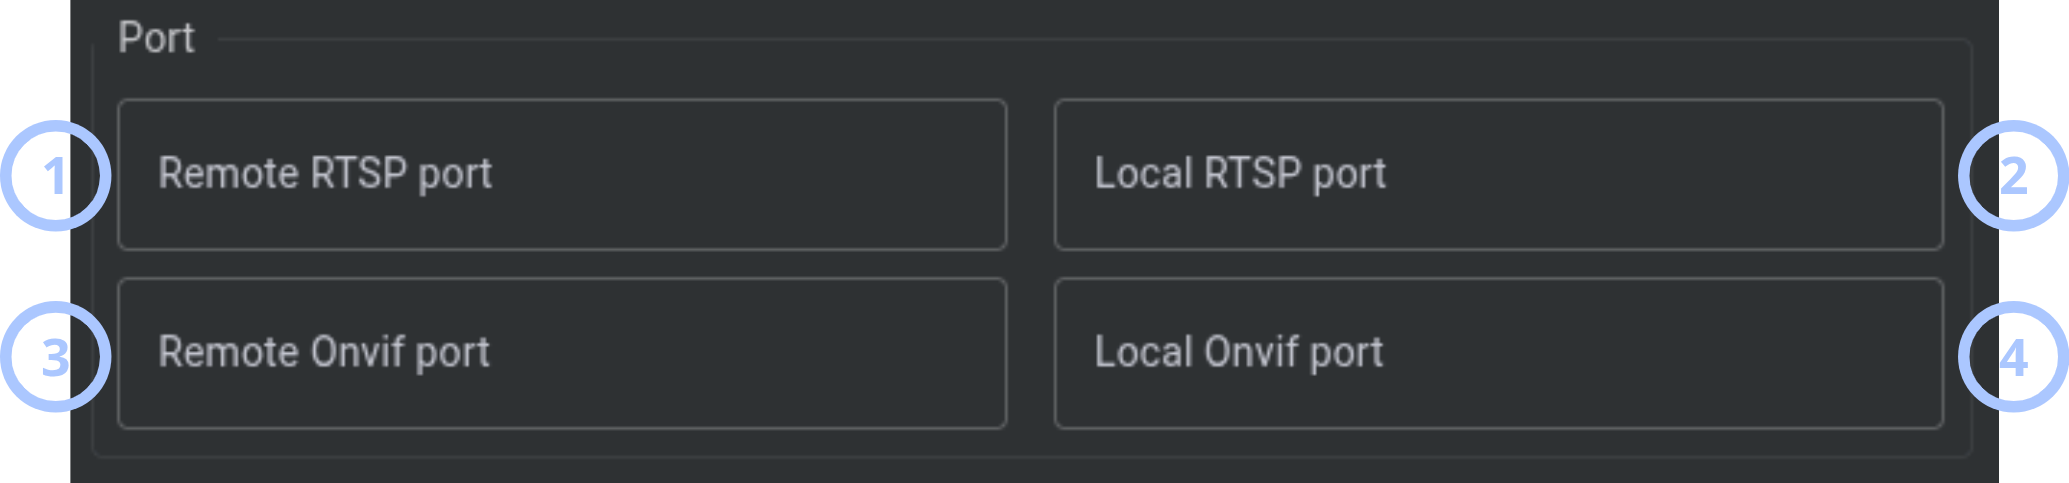
| 1 | Remote RTSP port | Accepts the remote RTSP port. | Use to define the RTSP port used for remote access. |
| 2 | Local RTSP port | Accepts the local RTSP port. | Use to define the RTSP port used on the local network. |
| 3 | Remote OnVIF port | Accepts the remote OnVIF port. | Use to define the OnVIF port used for remote access. |
| 4 | Local OnVIF port | Accepts the local OnVIF port. | Use to define the OnVIF port used on the local network. |
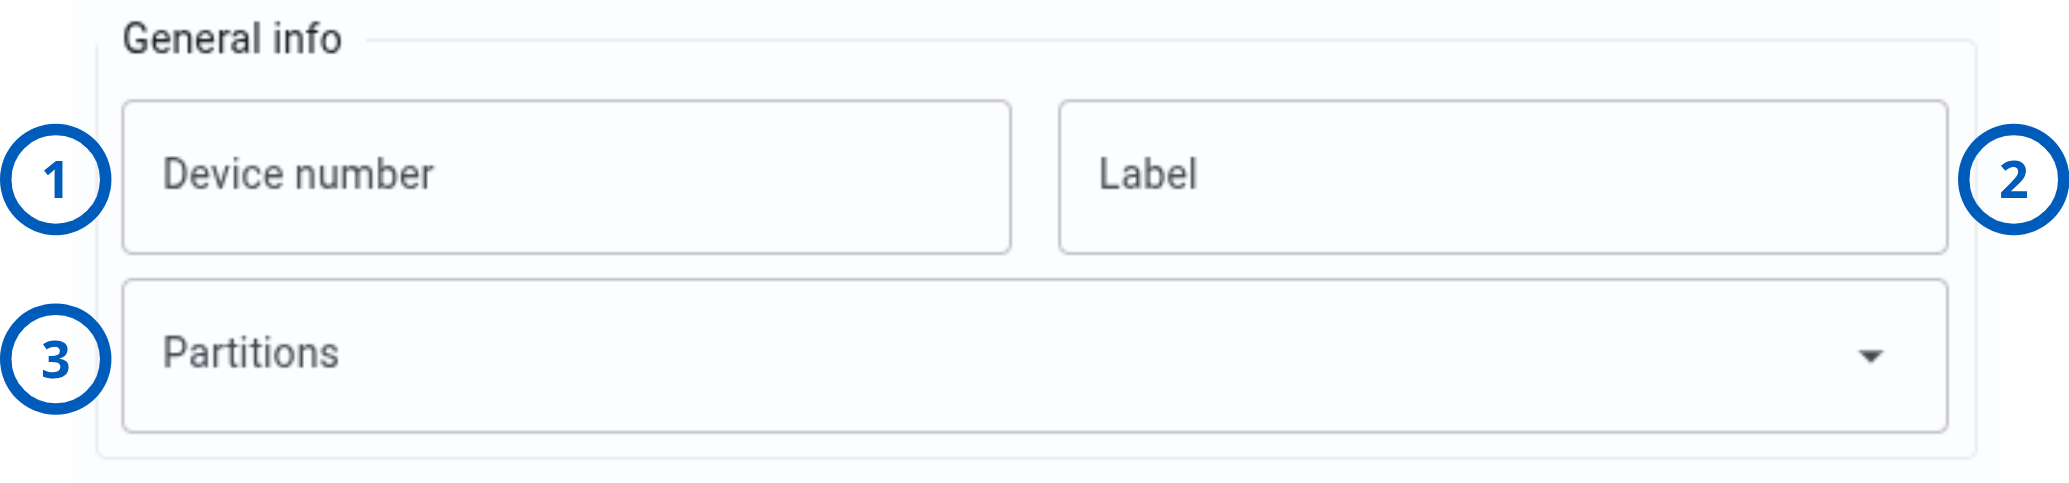
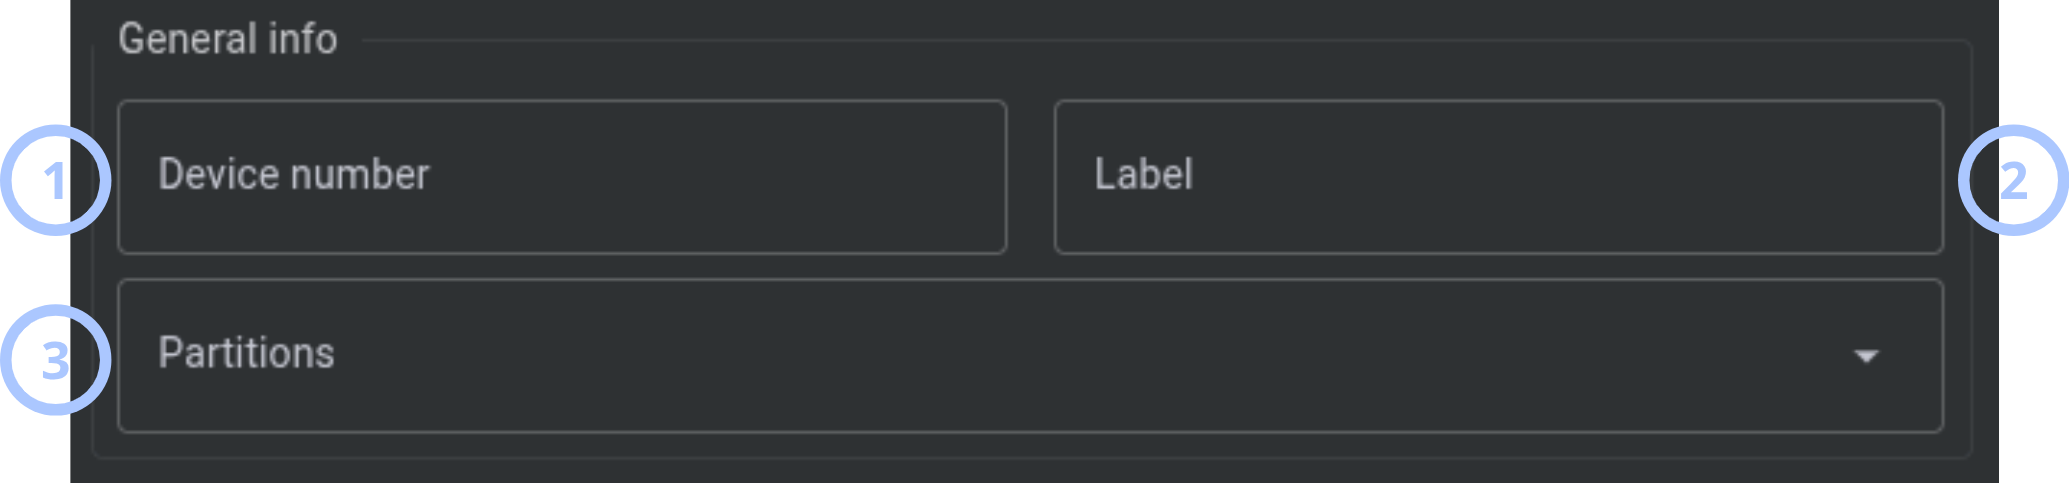
| Callout | UI element | Description | When to use |
|---|---|---|---|
| 1 | Device number | Accepts the camera device number. | Use to identify the camera on the panel. |
| 2 | Label | Accepts the camera label. | Use to enter a recognizable camera name. |
| 3 | Partitions | Shows the partitions available for the camera. | Use to assign the camera to one or more partitions. |


| Callout | UI element | Description | When to use |
|---|---|---|---|
| 1 | Associate with zones | Shows the zones available for camera association. | Use to associate the camera with one or more zones. |
Autolearn continues after you add or skip an individual detected device. Select Stop when you want to end the Autolearn process.
Devices tab in Walktest mode
Walktest verifies that supported security devices operate correctly. During the test, physically trigger each included device. For example, open a door contact or walk past a motion detector.
When you start Walktest, the Devices tab switches to Walktest mode.
Walktest is supported for:
- Visonic panels
- DSC Neo, Neo 5, and PSP panels
- IQ4, IQ4 Hub, IQ4 NS, and IQ Pro panels
Only security zones that support Walktest are included. Supported devices can include:
- Door and window contacts
- Motion detectors
- Glass-break detectors
- Other triggerable security sensors
The following devices are excluded:
- Repeaters
- Temperature sensors
- Keyfobs and pendants
- Keypads
- Automation devices, such as door locks, smart plugs, and dimmers
- PGMs
- Modules
- Accessories
You cannot start Walktest when the panel is:
- Armed
- In an alarm state
- Disconnected from the server
- In progress
- Finished
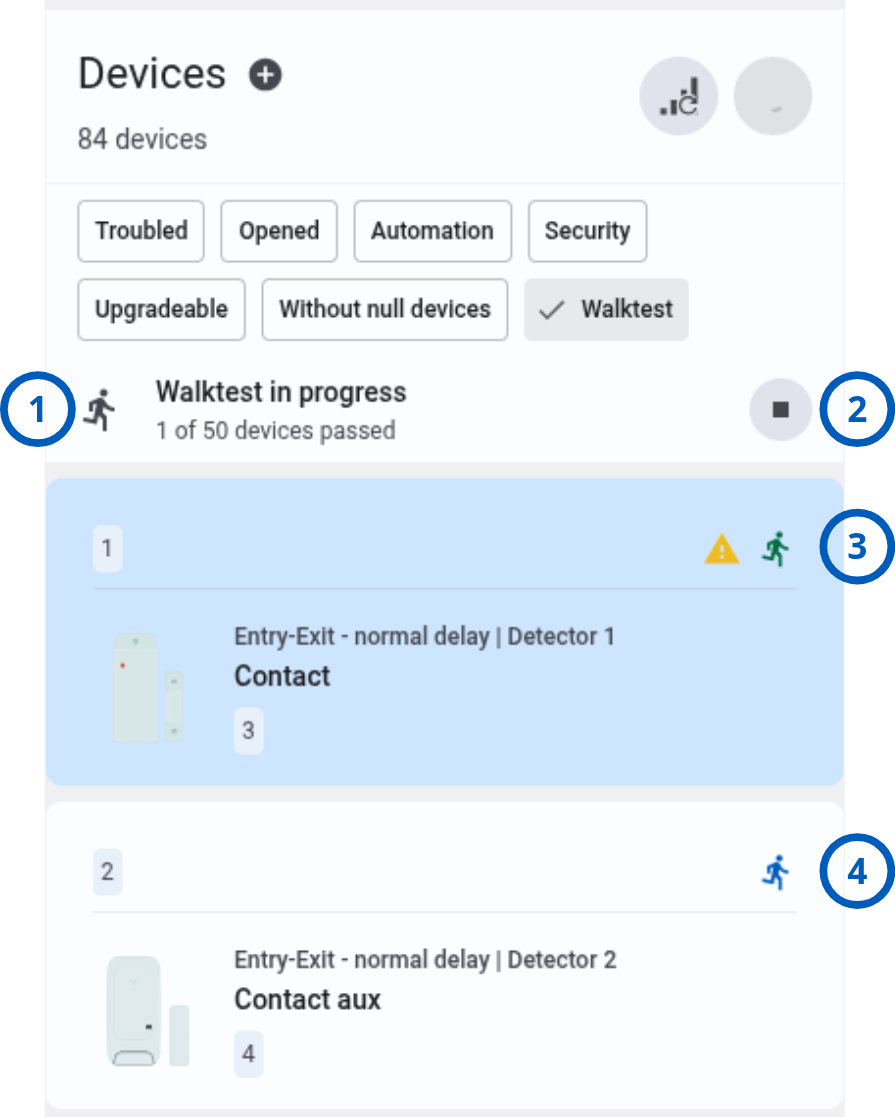
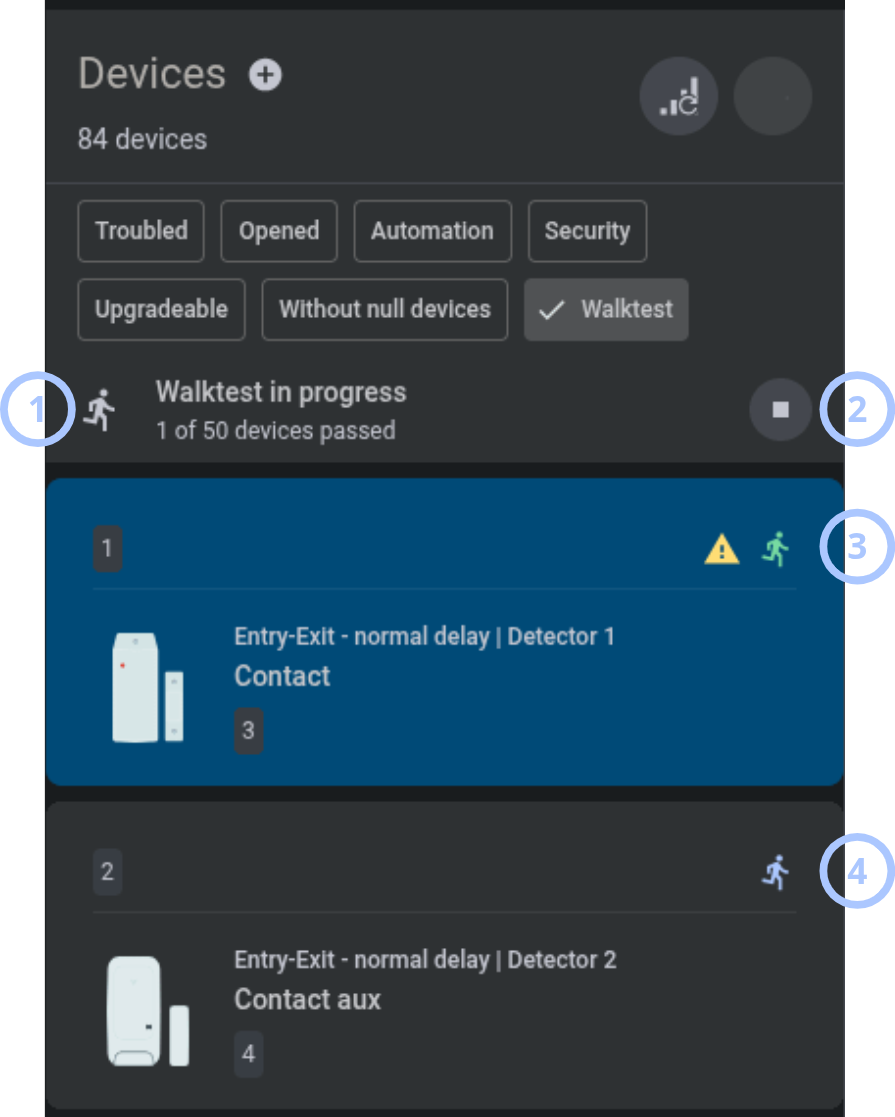
The In progress view shows the current Walktest progress and identifies devices that still need to be triggered.
| Callout | UI element | Description | When to use |
|---|---|---|---|
| 1 | Walktest status | Shows that Walktest is in progress and displays the number of devices that have passed, for example, 3 of 12 passed. | Use to monitor overall test progress. |
| 2 | Stop button | Stops Walktest immediately. PowerManage preserves the results collected before the test was stopped and displays the Finished view. | Use to end the test early when the required devices have been tested or the test must be canceled. |
| 3 | Green Walktest result icon | Indicates that the device was triggered successfully and passed the test. | Use to identify devices that require no further action during the current test. |
| 4 | Blue Walktest result icon | Indicates that the device is waiting to be triggered. | Use to identify devices that you still need to test. |
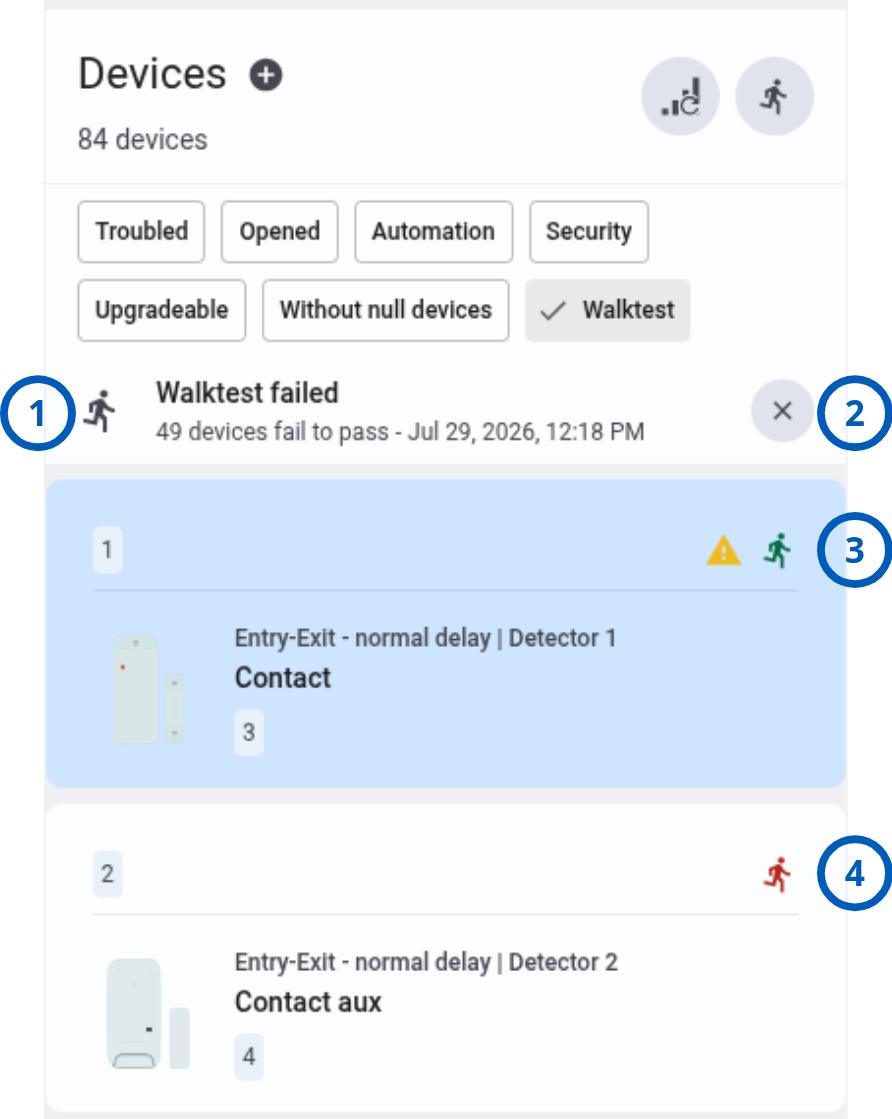
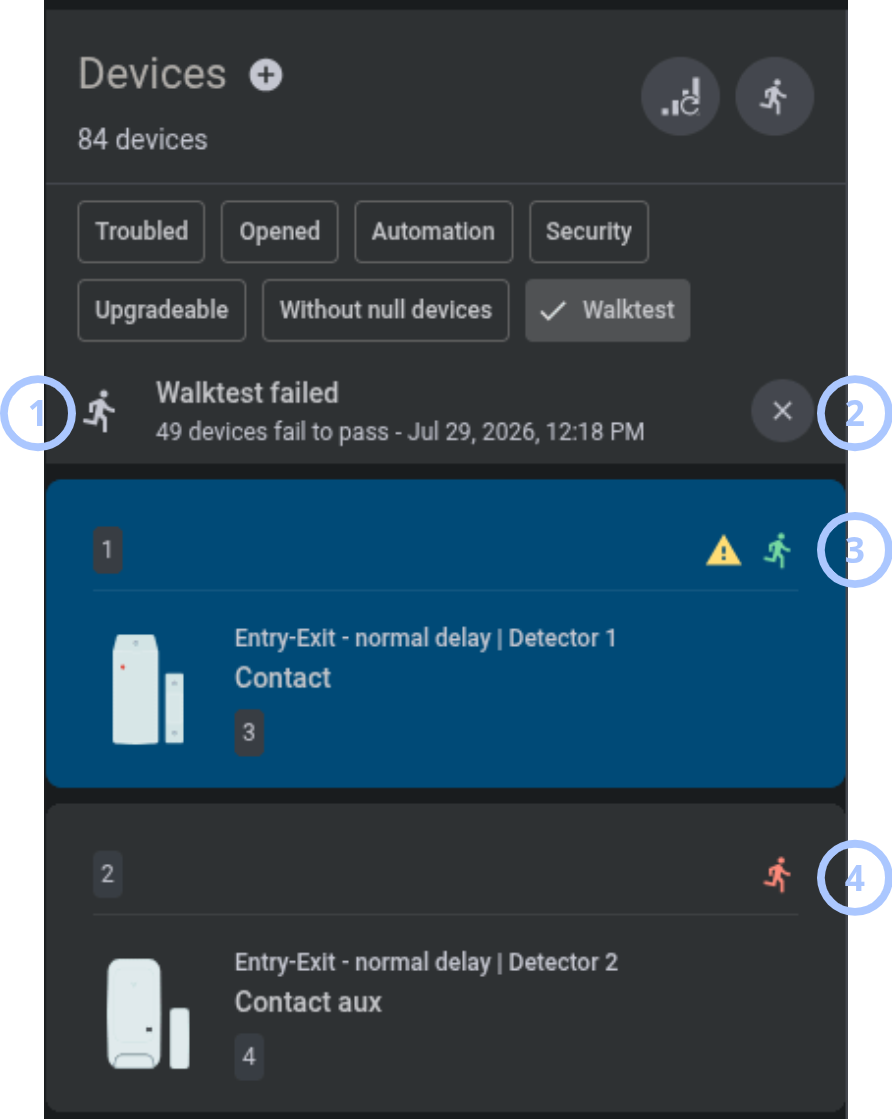
The Finished view shows the final Walktest result and the result for each included device.
| Callout | UI element | Description | When to use |
|---|---|---|---|
| 1 | Walktest status | Shows the final result, completion timestamp, and number of devices that passed or failed. The result is Passed when every included device was triggered successfully. The result is Failed when one or more devices were not triggered. | Use to review the overall test outcome. |
| 2 | Close button | Closes Walktest mode and returns the Devices tab to the standard device-list view. Walktest results remain available in the Processes tab. | Use after reviewing the completed test results. |
| 3 | Green Walktest result icon | Indicates that the device was triggered successfully and passed the test. | Use to identify devices that passed. |
| 4 | Red Walktest result icon | Indicates that the device was not triggered and failed the test. | Use to identify devices that require investigation or another test. |
Panel and modules
Use these tabs to review the control panel and installed modules.
- Panel
- Module (Power Link)
- Device card
- Info and actions
- General
- Connection status
- Configuration
- Firmware
- GSM RSSI
- Wi-Fi RSSI
Device card
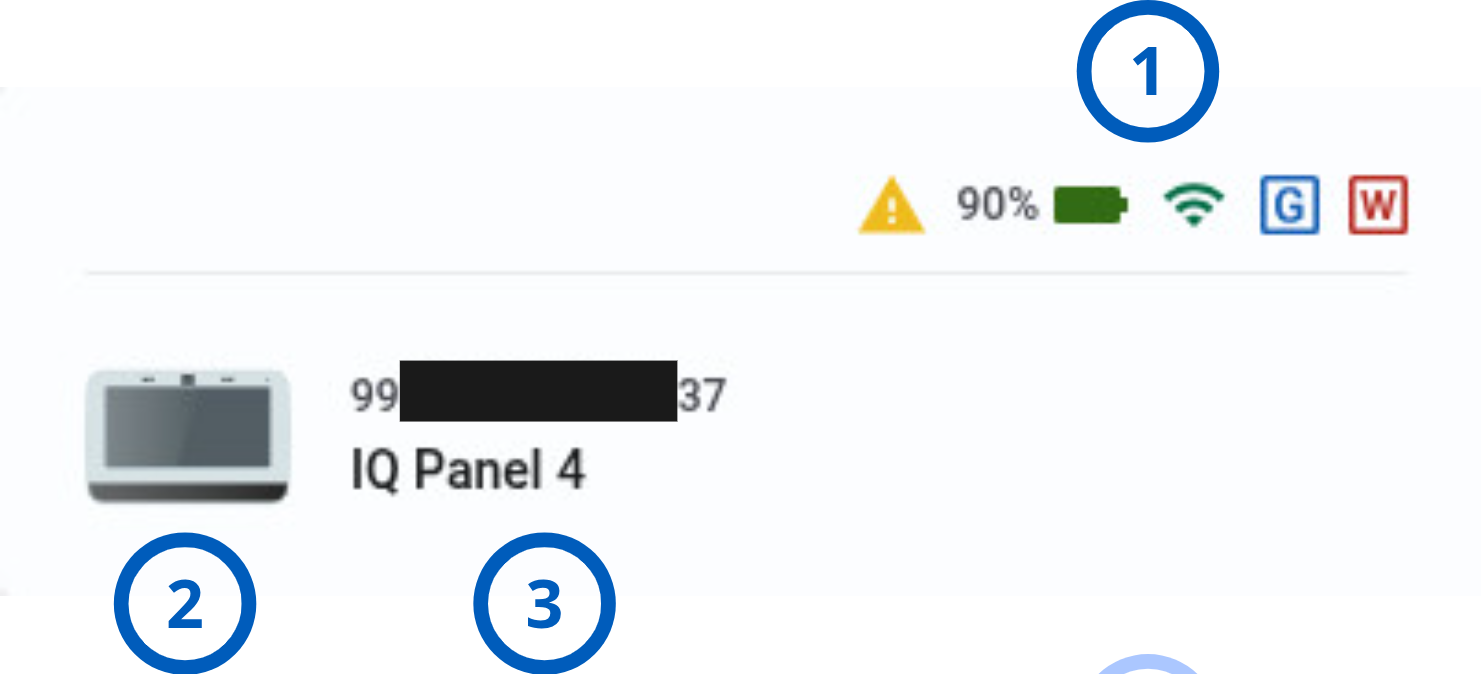
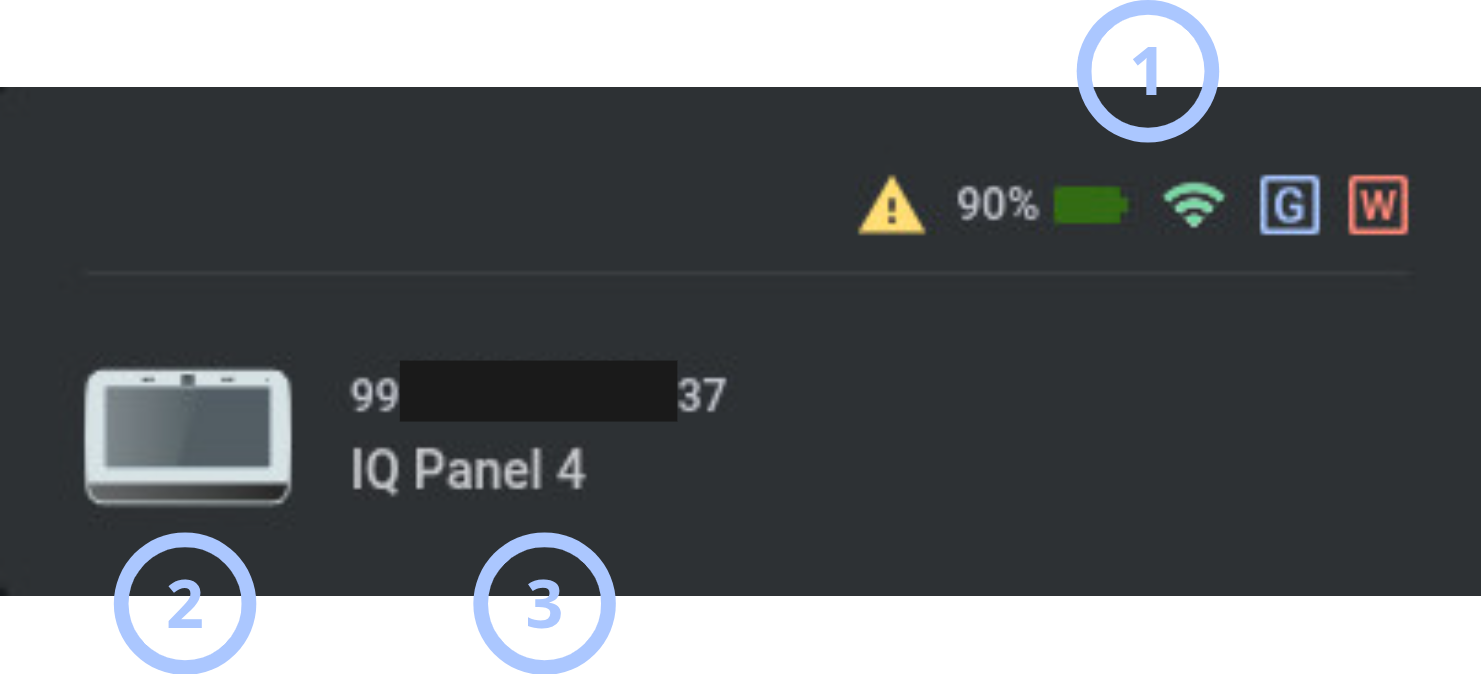
| Callout | UI element | Description | When to use |
|---|---|---|---|
| 1 | Status and troubles | Shows battery percentage, connection-status icons, trouble indicators, and other panel status icons. | Use to review panel health and connectivity. |
| 2 | Device icon | Shows the icon associated with the panel type. | Use to identify the panel family. |
| 3 | Device info | Shows the panel model and panel ID. | Use to identify the panel. |
Device info and actions
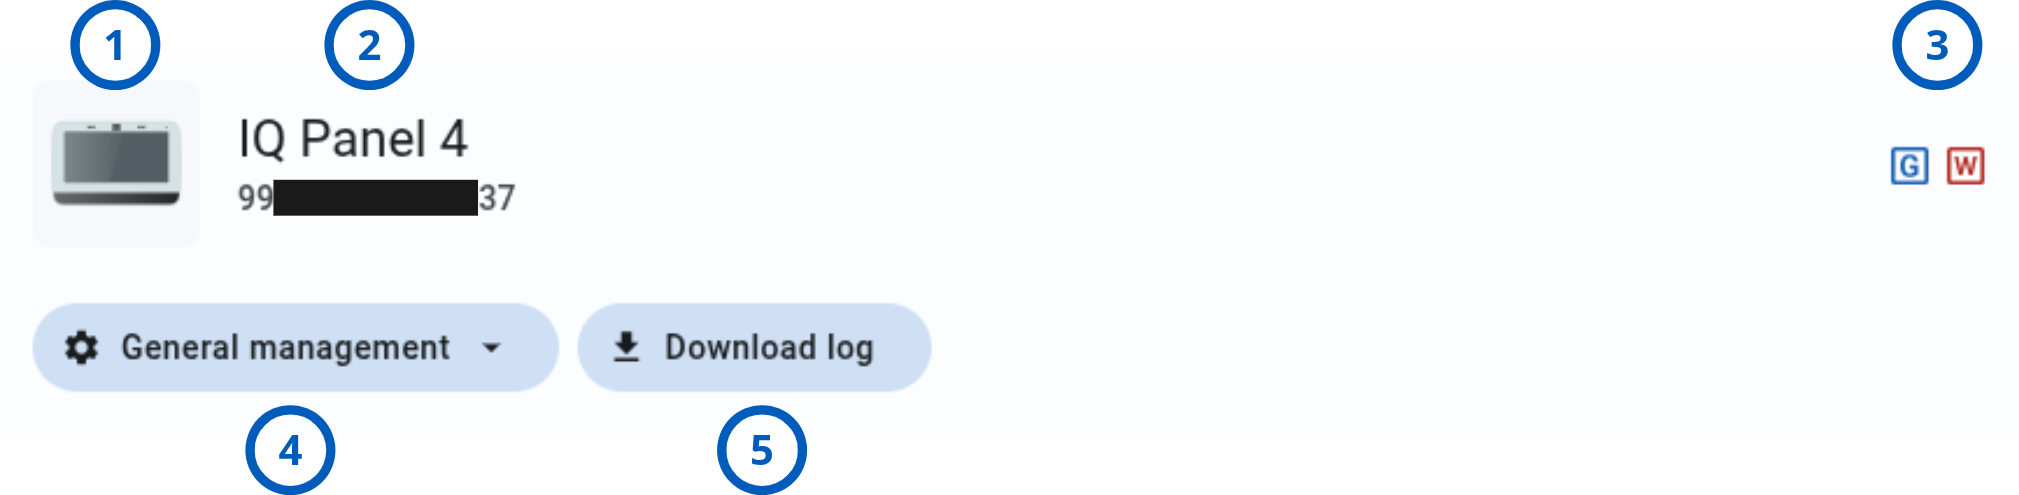
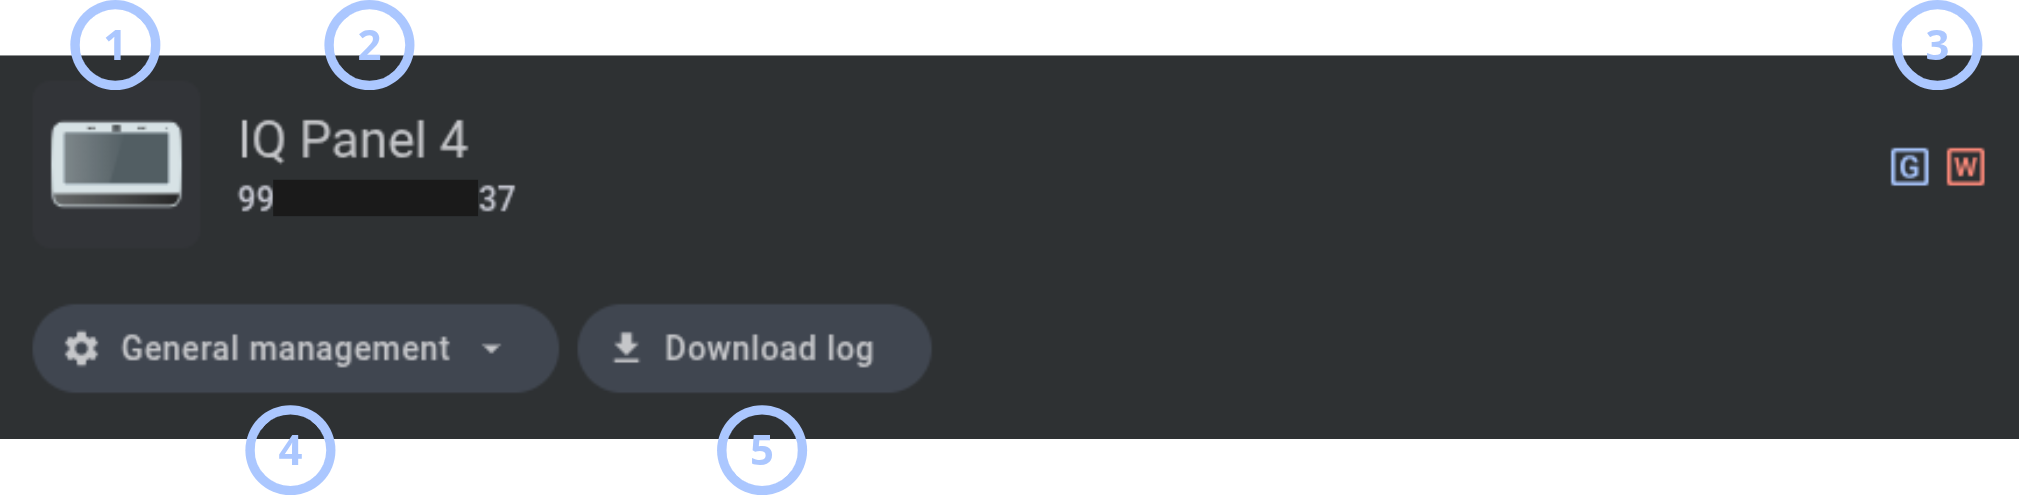
| Callout | UI element | Description | When to use |
|---|---|---|---|
| 1 | Device icon | Shows the panel icon. | Use to identify the panel type. |
| 2 | Device info | Shows the panel model and panel ID. | Use to confirm the selected panel. |
| 3 | Connection status icons | Show the connection state of the panel communication channels. | Use to review active and available channels. |
| 4 | General management button | Provides Reboot panel and Reboot modem actions. | Use when panel or modem restart is required. |
| 5 | Download log button | Downloads the panel log to IQMS servers for diagnostics. | Use when diagnostic logs are required. |
General tab
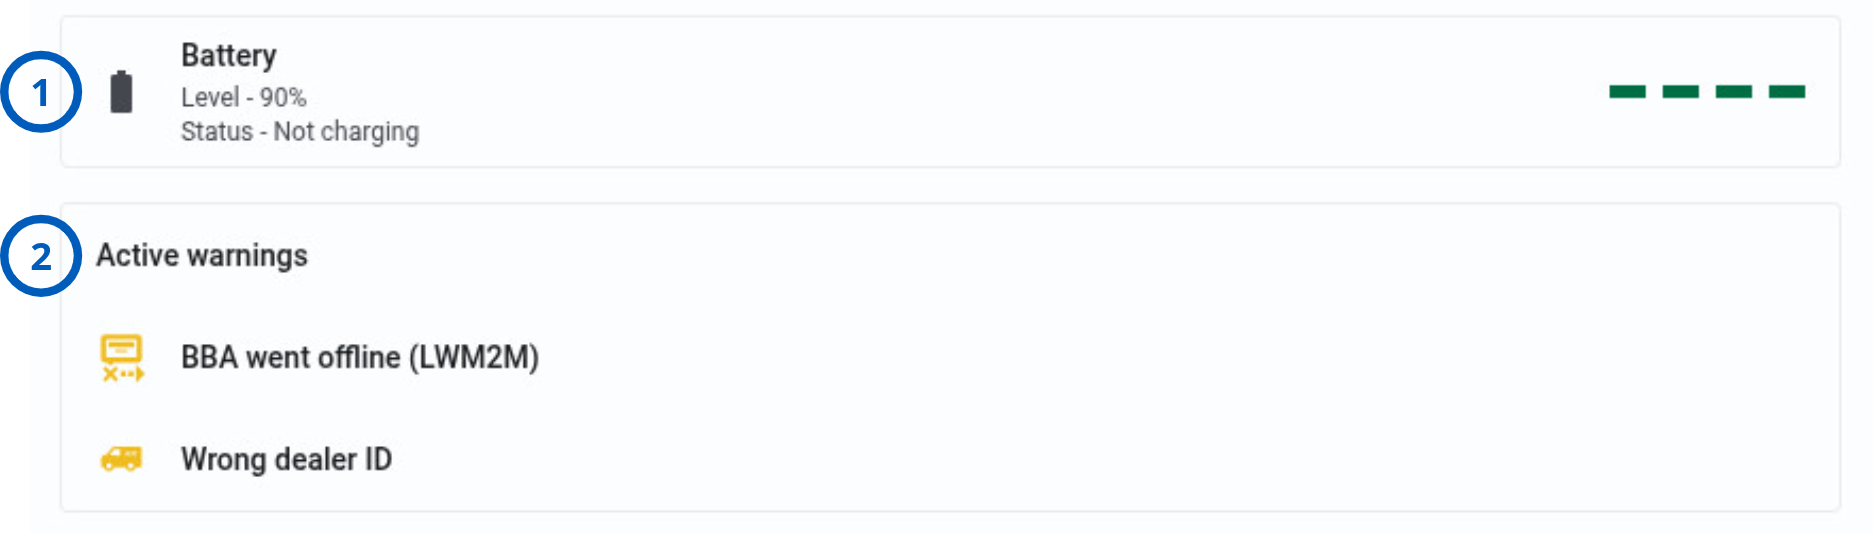
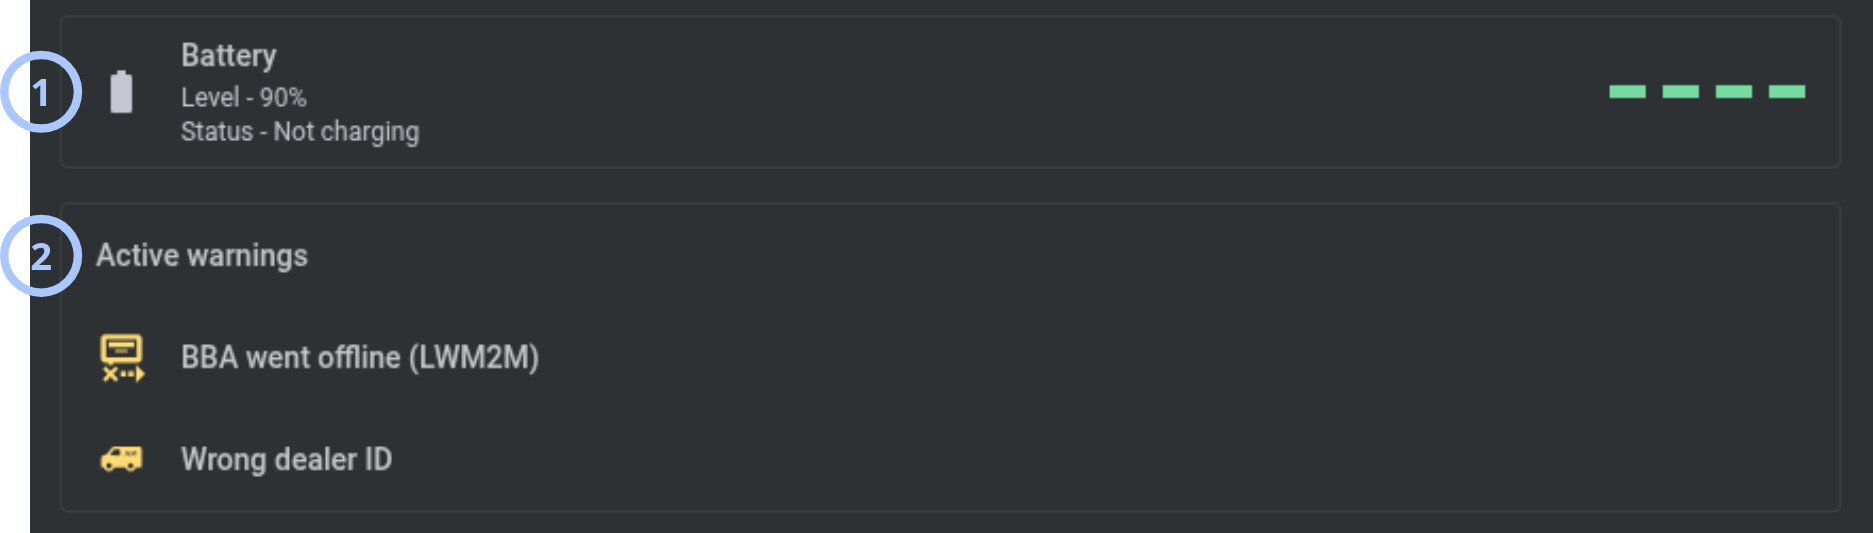
| Callout | UI element | Description | When to use |
|---|---|---|---|
| 1 | Battery level | Shows a battery icon, level percentage, charging status, and a color-coded level indicator. Status values include Disconnected, Charging, Discharging, Not charging, and Charging full. The information is available for IQ panels and panels with an installed battery module. Battery information updates after discovery, tamper events, and automatically once per day. | Use to review panel battery state. |
| 2 | Active warnings | Shows active warning icons and descriptions, such as Fibro account duplication, Fibro swap, Fibro unencrypted, or Fibro encryption not supported. The section can be empty or hidden when no warnings are active. | Use to identify conditions that require attention. |
Connection status tab
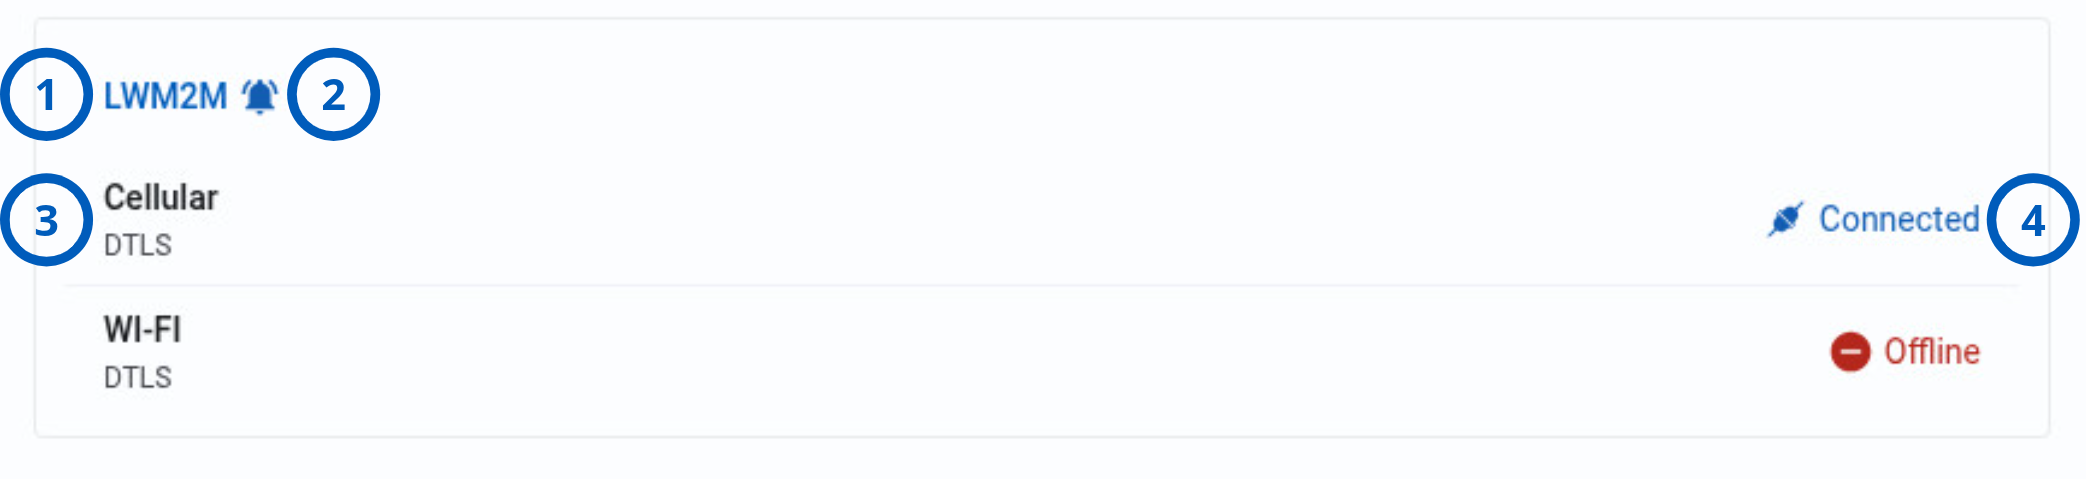
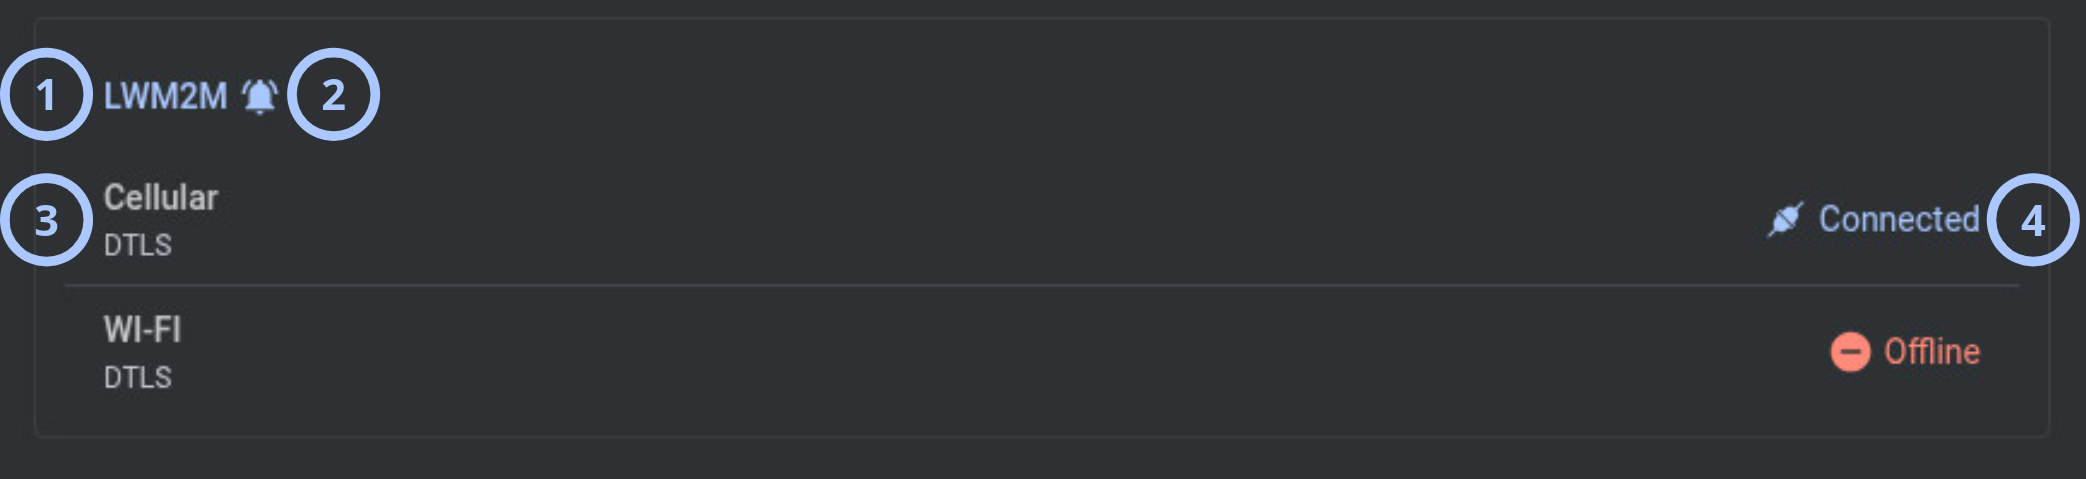
| Callout | UI element | Description | When to use |
|---|---|---|---|
| 1 | Connection protocol | Shows each configured protocol, such as LwM2M, Fibro, ITv2, or P2, with connection details. Available protocols depend on panel configuration. | Use to review protocol-specific connectivity. |
| 2 | Event path icon | Shows a bell next to the protocol currently used to receive events. Only one protocol has this icon at a time. | Use to identify the current event path. |
| 3 | Protocol communication channel | Shows the channel used by each protocol, such as Wi-Fi, Cellular, or BBA/Ethernet. | Use to identify the transport used by a protocol. |
| 4 | Protocol communication channel status | Shows the current status for each protocol and channel combination. | Use to diagnose protocol or channel connectivity. |
Configuration tab
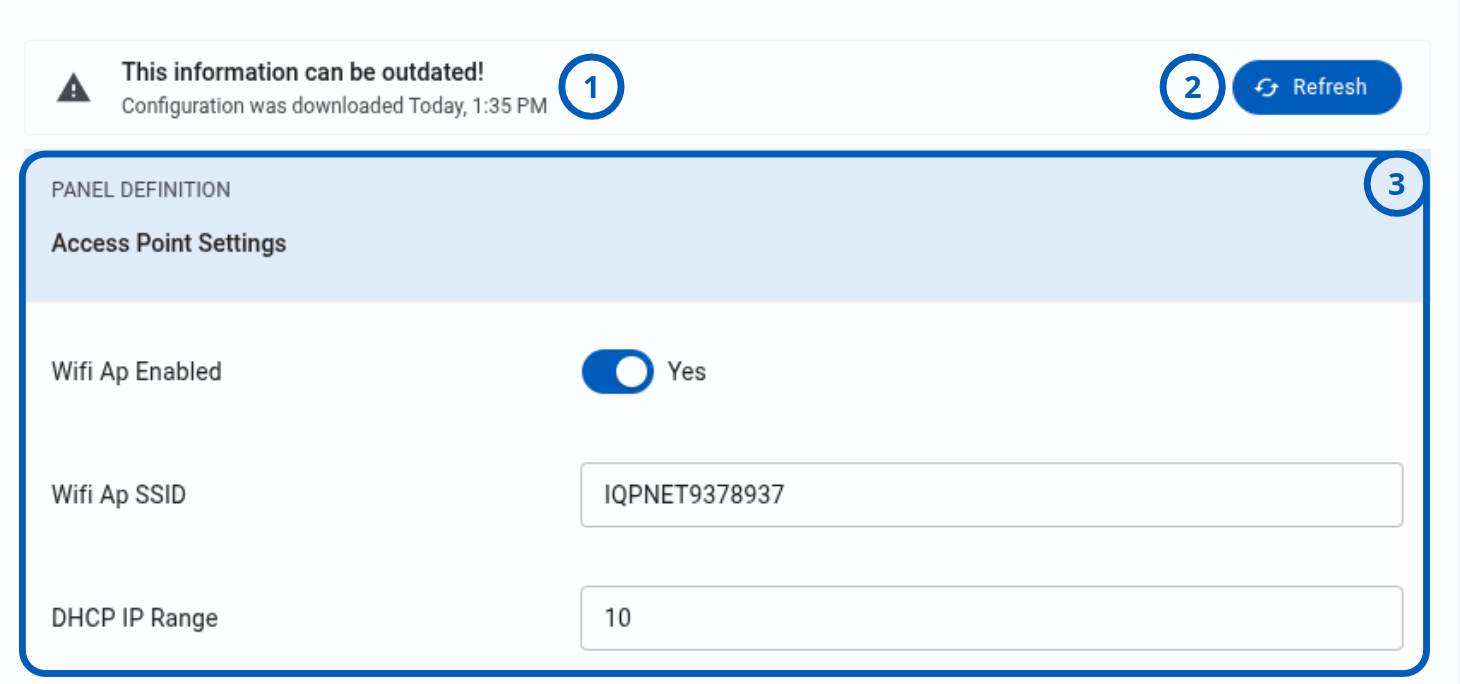
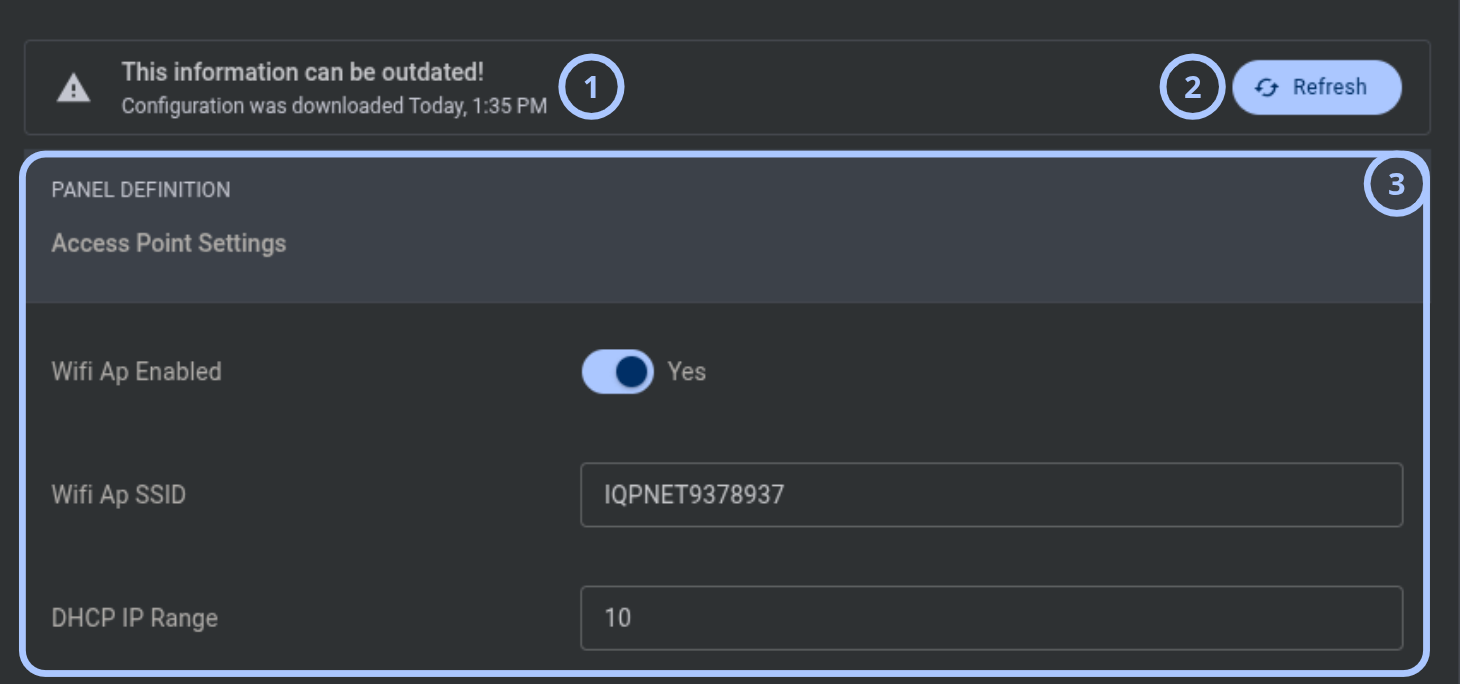
| Callout | UI element | Description | When to use |
|---|---|---|---|
| 1 | Warning message | Indicates that the displayed information can be outdated and shows the configuration download timestamp. | Use to check the age of the displayed configuration. |
| 2 | Refresh button | Downloads the latest configuration from the panel. | Use before reviewing settings that might have changed. |
| 3 | Configuration items | Show configuration values related to the selected device. | Use to review device configuration. |
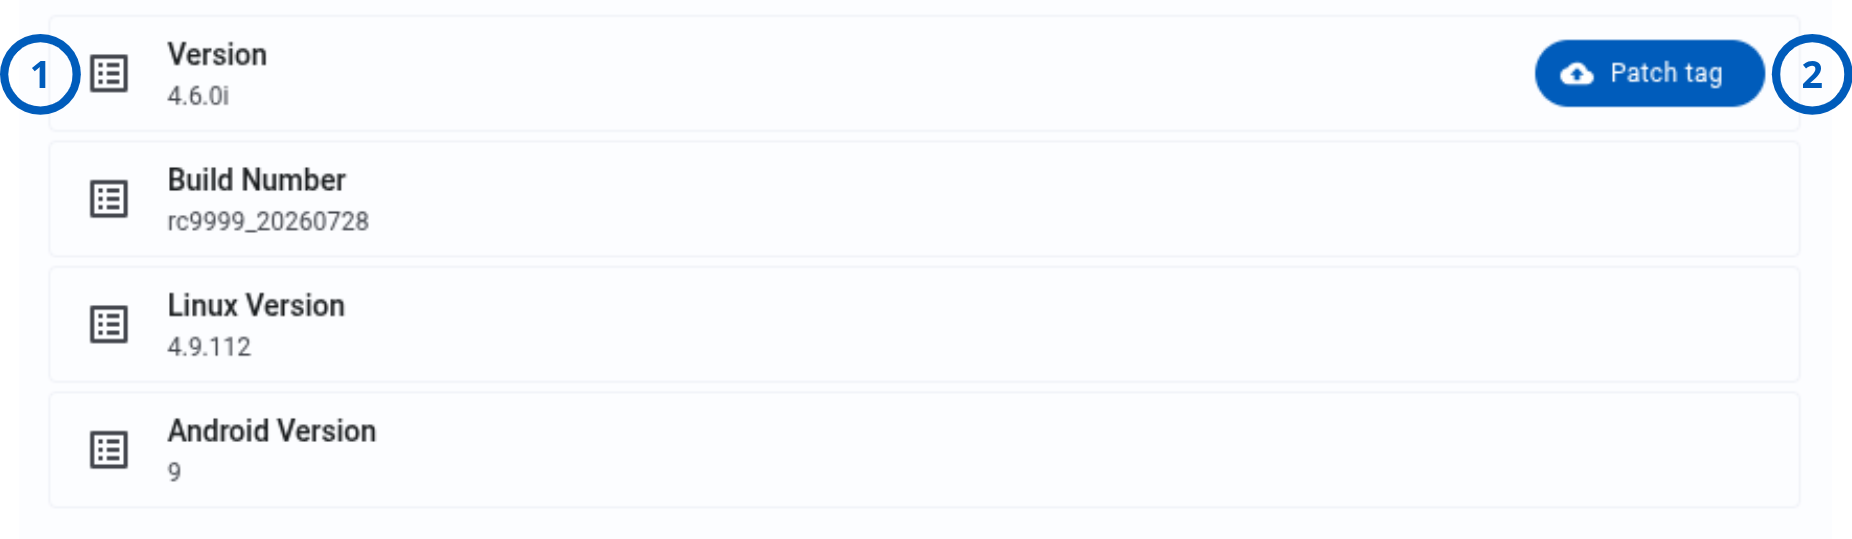
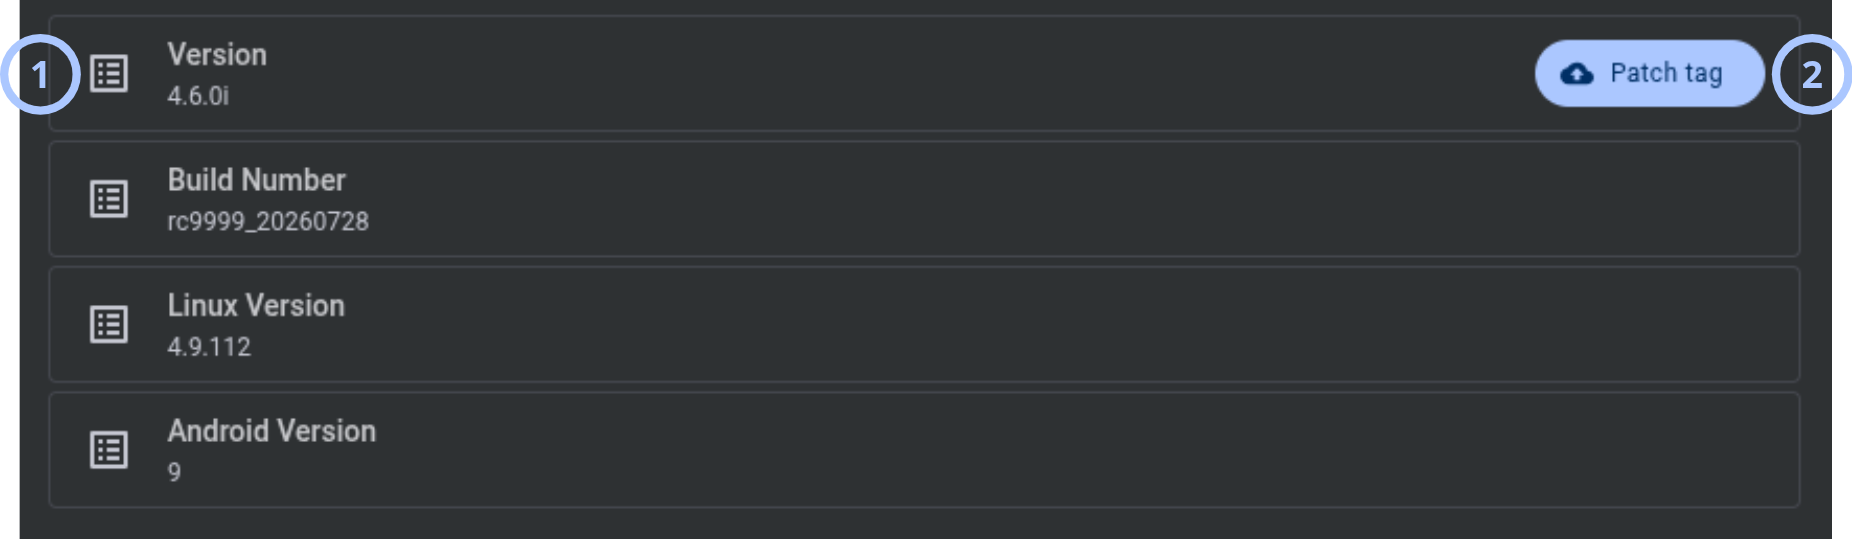
Firmware tab
| Callout | UI element | Description | When to use |
|---|---|---|---|
| 1 | Firmware info item | Shows panel firmware and hardware version information. | Use to review installed versions. |
| 2 | Patch Tag button | For IQ panels only, starts a Patch Tag Update by using a patch tag name or package from the IQMS repository. The action starts a remote software upgrade process. | Use to update supported IQ panel software. |
- Overview
- Expanded chart
GSM RSSI tab
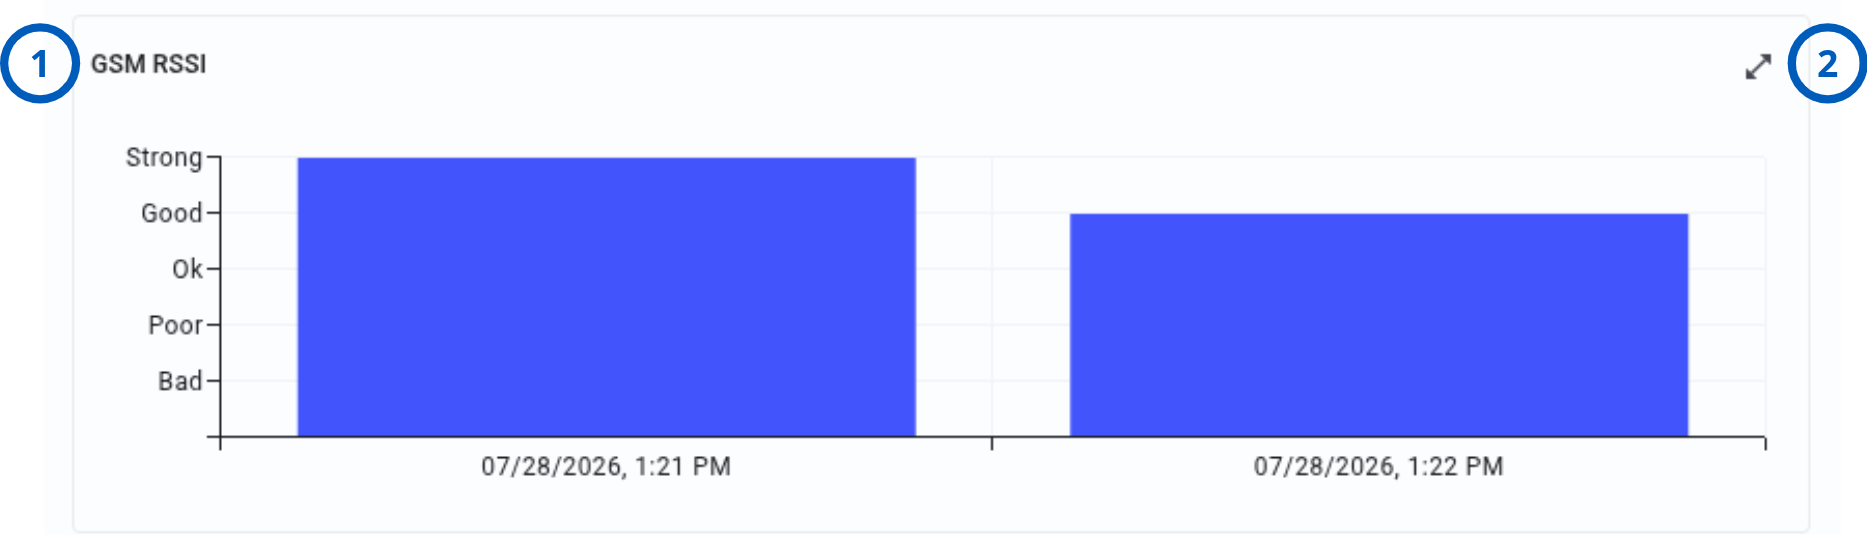
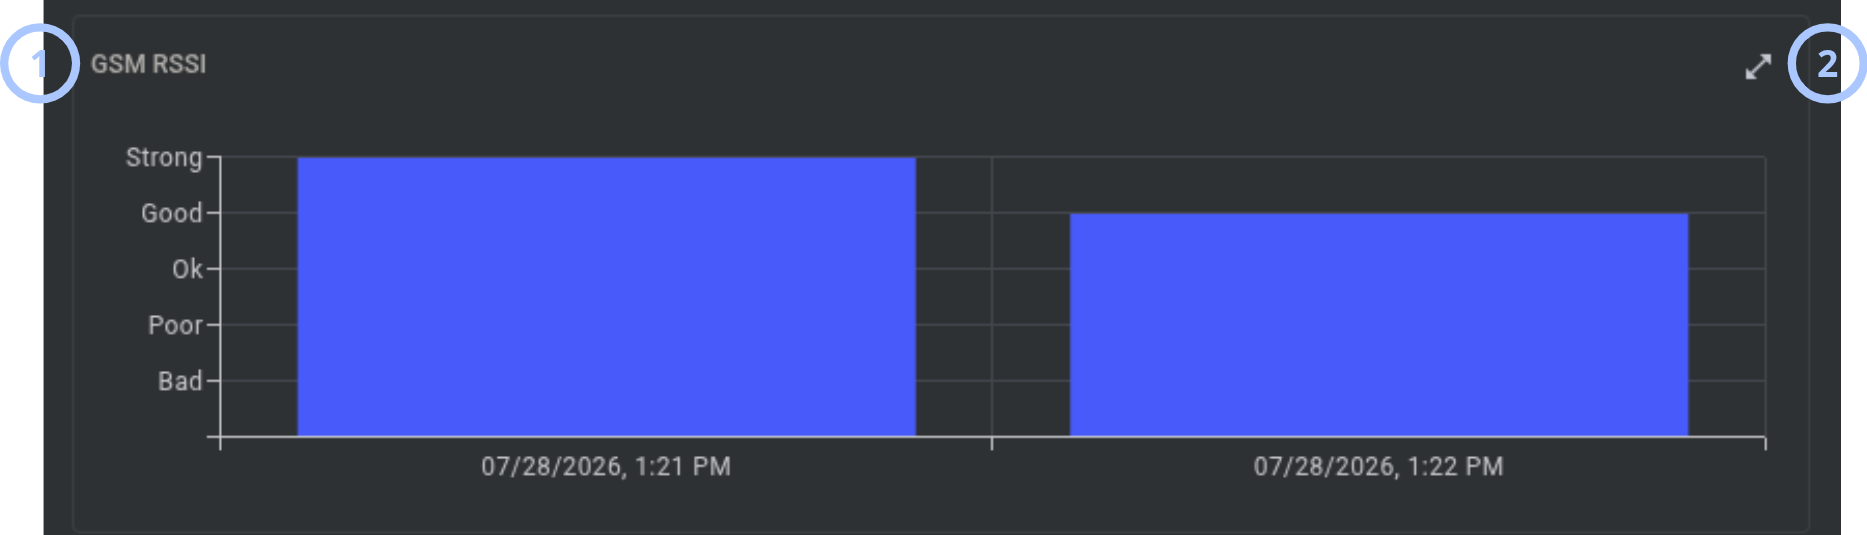
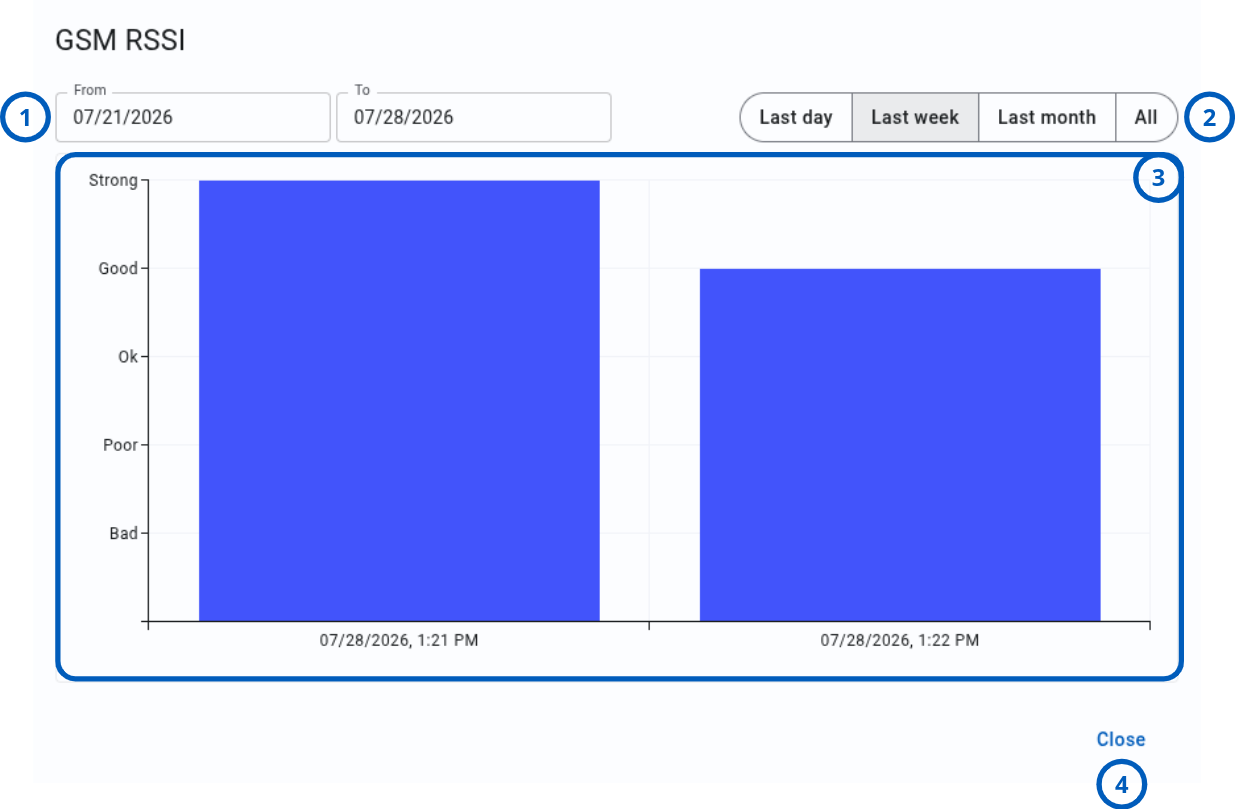
This tab appears only for panels connected through a cellular/GSM modem.
| Callout | UI element | Description | When to use |
|---|---|---|---|
| 1 | GSM RSSI chart | Shows GSM signal level on the Y-axis and date on the X-axis. | Use to review GSM signal history. |
| 2 | Expand button | Opens the GSM RSSI modal window. | Use to review a larger chart and select a date range. |
GSM RSSI modal window
| Callout | UI element | Description | When to use |
|---|---|---|---|
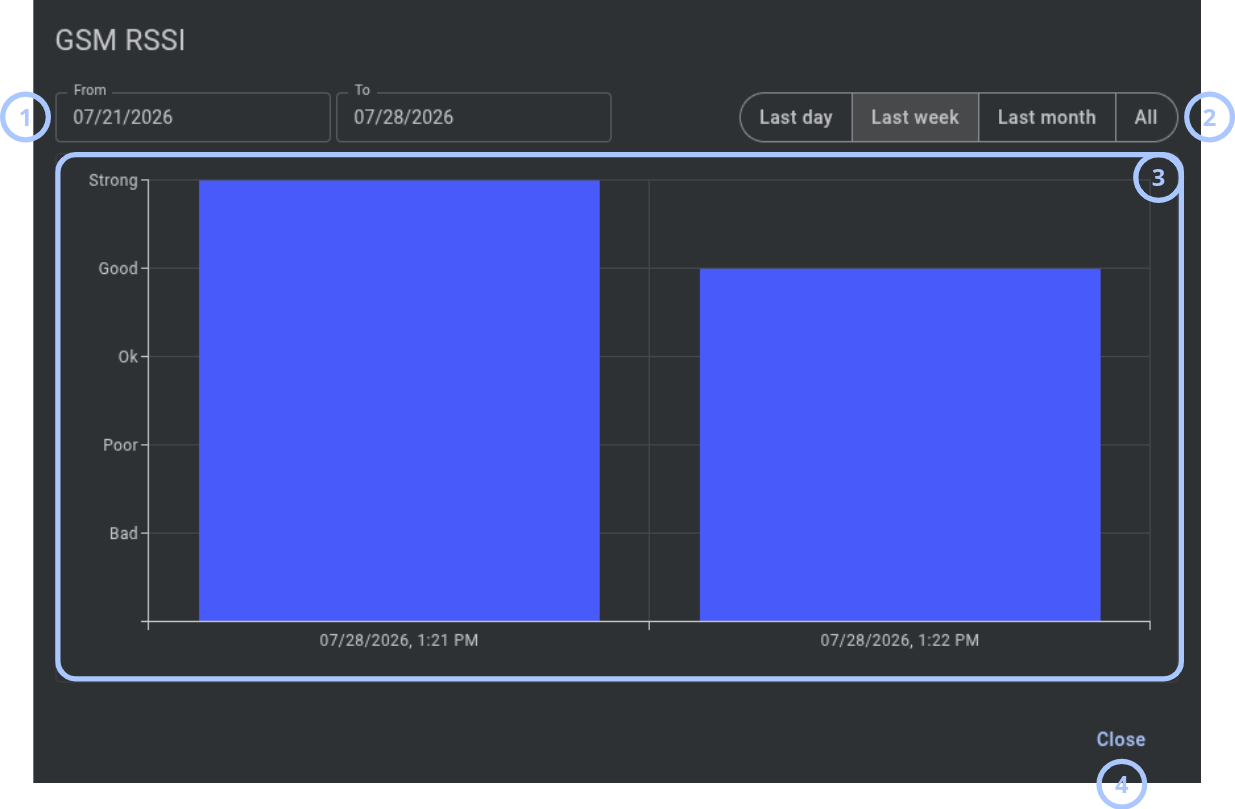
| 1 | Date selector | Provides two date fields for selecting the GSM RSSI chart range. | Use to review a specific period. |
| 2 | Quick filters | Provides Last day, Last week, Last month, and All range options. | Use to select a common date range. |
| 3 | GSM RSSI chart | Shows GSM signal level on the Y-axis and date on the X-axis. | Use to review GSM signal changes. |
- Overview
- Expanded chart
Wi-Fi RSSI tab
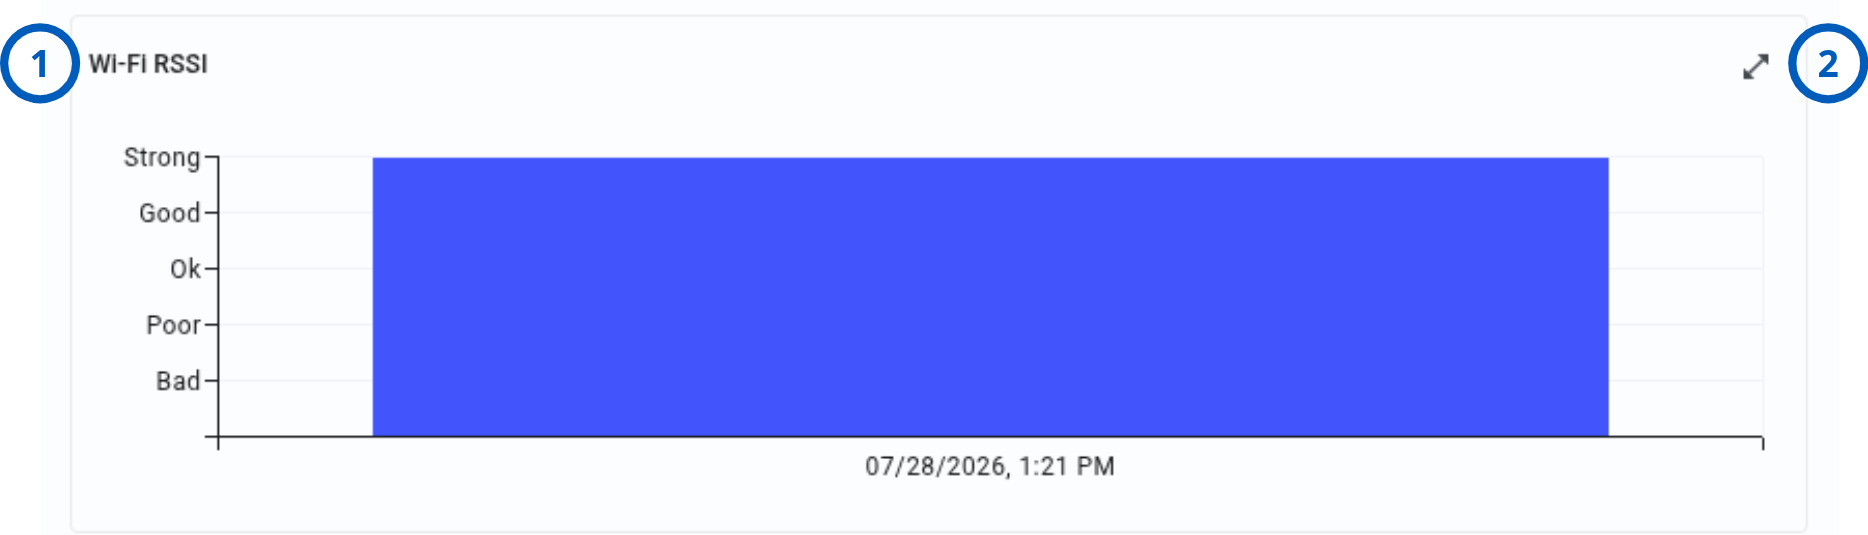
This tab appears only for panels connected through Wi-Fi.
| Callout | UI element | Description | When to use |
|---|---|---|---|
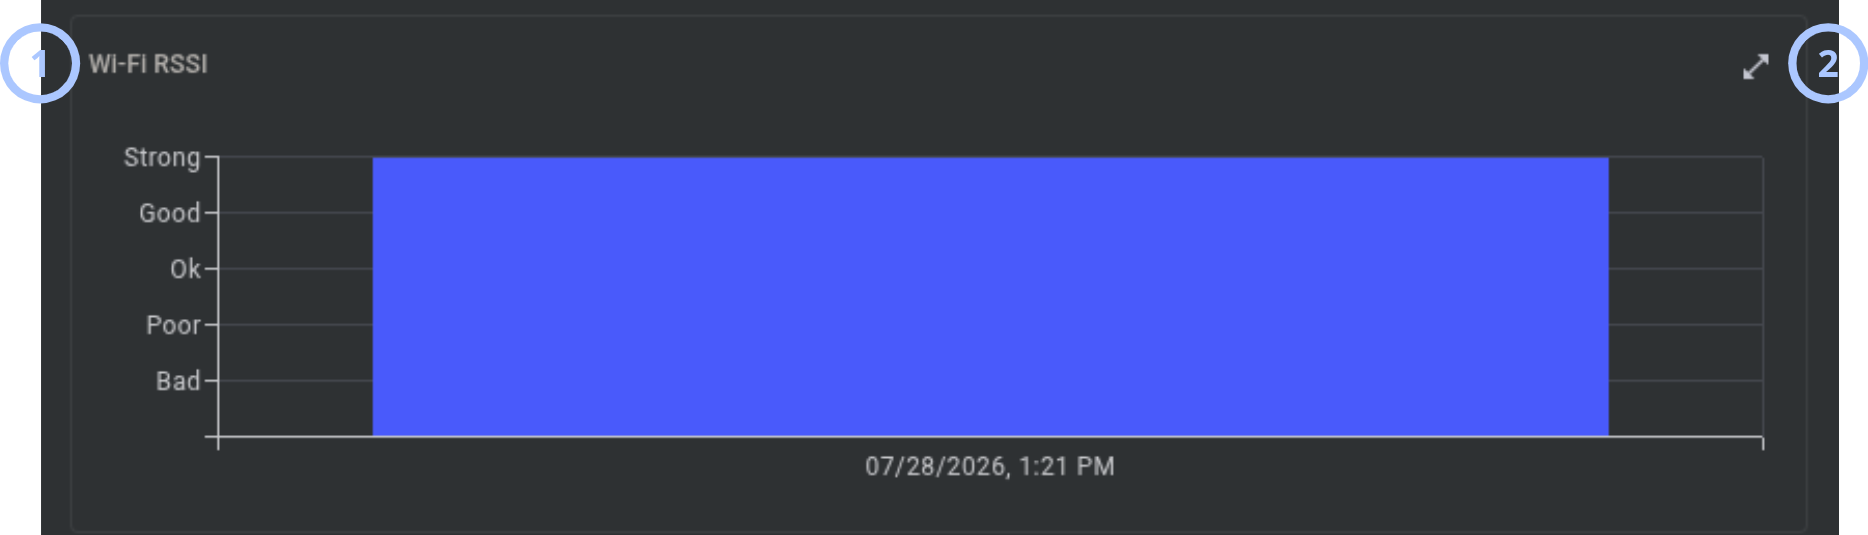
| 1 | Wi-Fi RSSI chart | Shows Wi-Fi signal level on the Y-axis and date on the X-axis. | Use to review Wi-Fi signal history. |
| 2 | Expand button | Opens the Wi-Fi RSSI modal window. | Use to review a larger chart and select a date range. |
Wi-Fi RSSI modal window
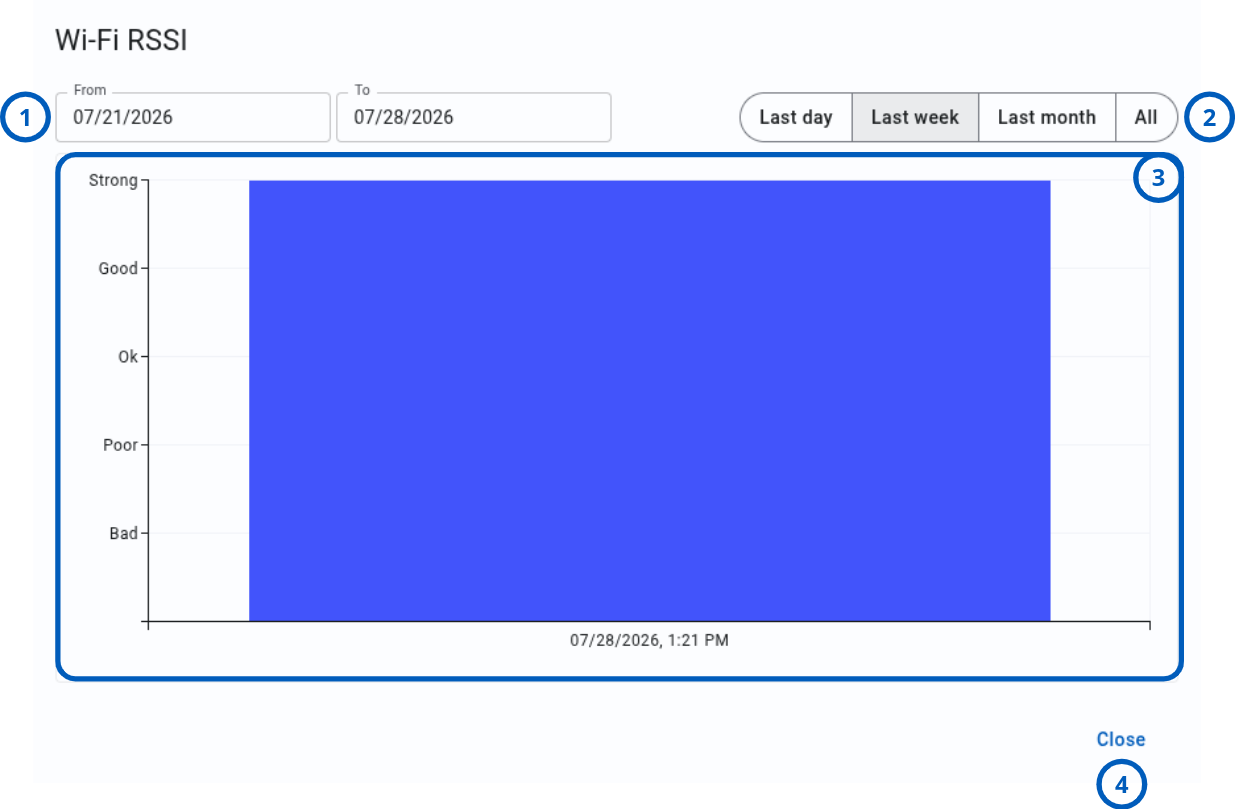
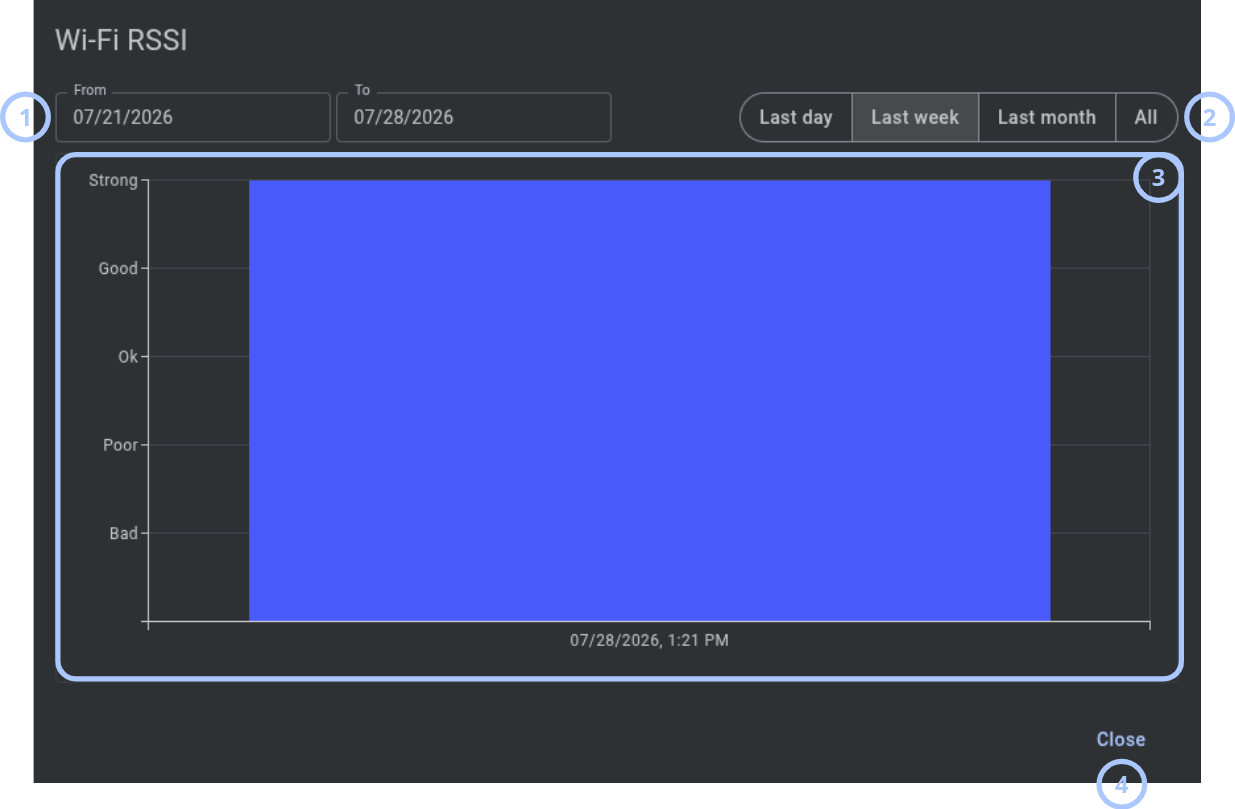
| Callout | UI element | Description | When to use |
|---|---|---|---|
| 1 | Date selector | Provides two date fields for selecting the Wi-Fi RSSI chart range. | Use to review a specific period. |
| 2 | Quick filters | Provides Last day, Last week, Last month, and All range options. | Use to select a common date range. |
| 3 | Wi-Fi RSSI chart | Shows Wi-Fi signal level on the Y-axis and date on the X-axis. | Use to review Wi-Fi signal changes. |
- Device card
- Info and actions
- General
- Configuration
- Firmware
Device card
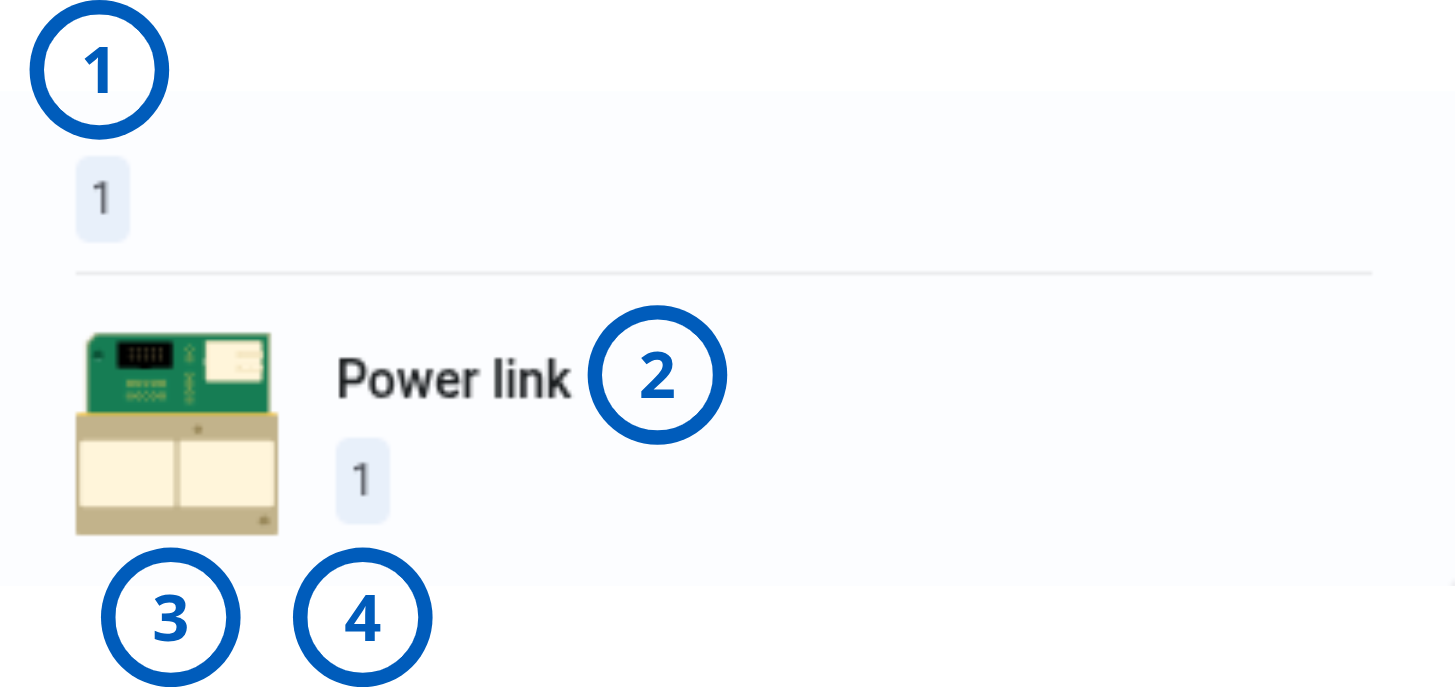
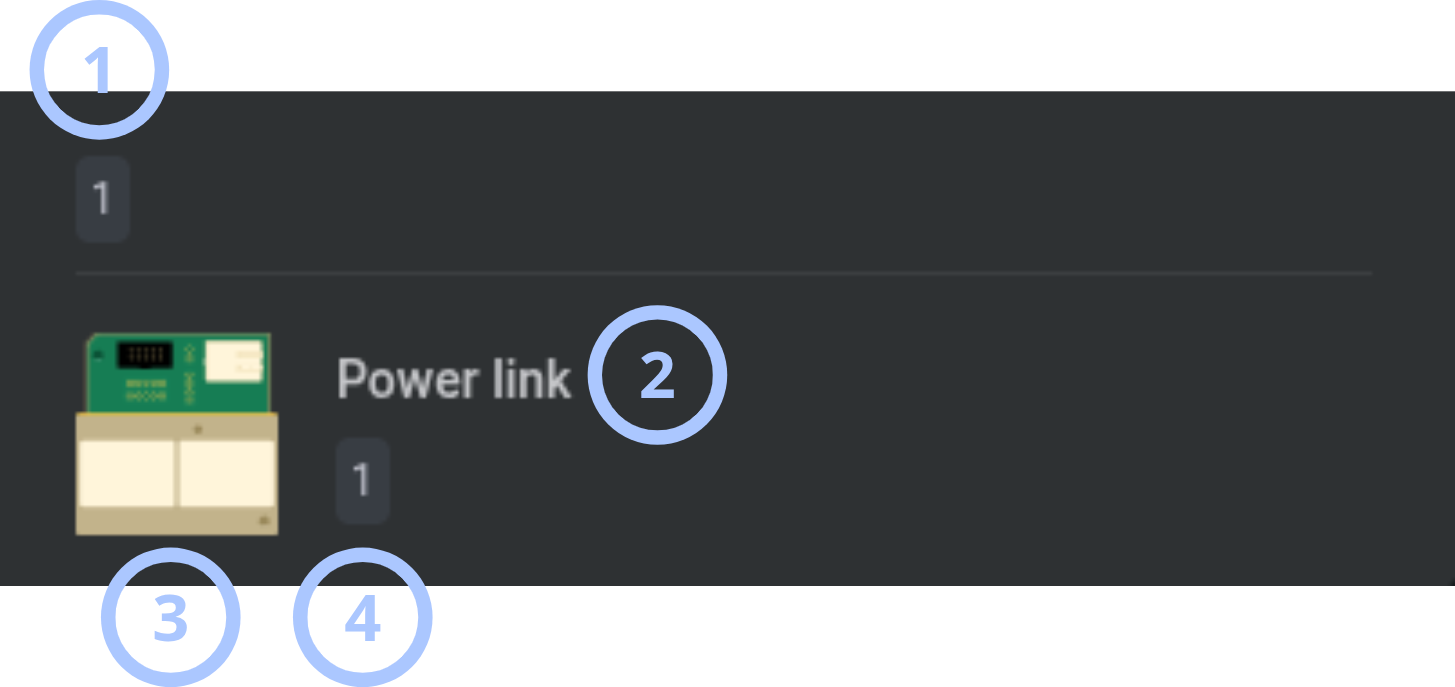
| Callout | UI element | Description | When to use |
|---|---|---|---|
| 1 | Device number | Shows the device number. | Use to identify the module slot. |
| 2 | Device info | Shows the device name. | Use to identify the module. |
| 3 | Device icon | Shows the module icon. | Use to identify the device type. |
| 4 | Device partitions | Shows assigned partitions. | Use to review partition assignment. |
Device info and actions
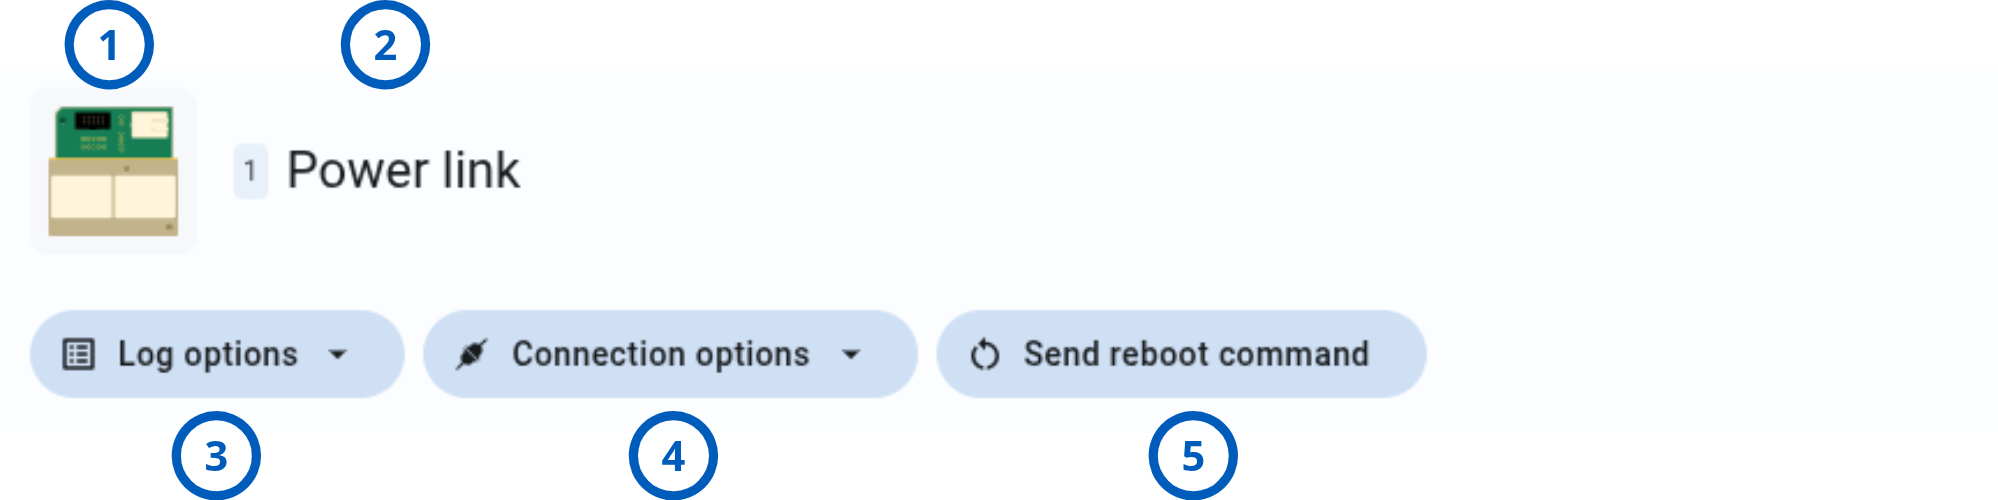
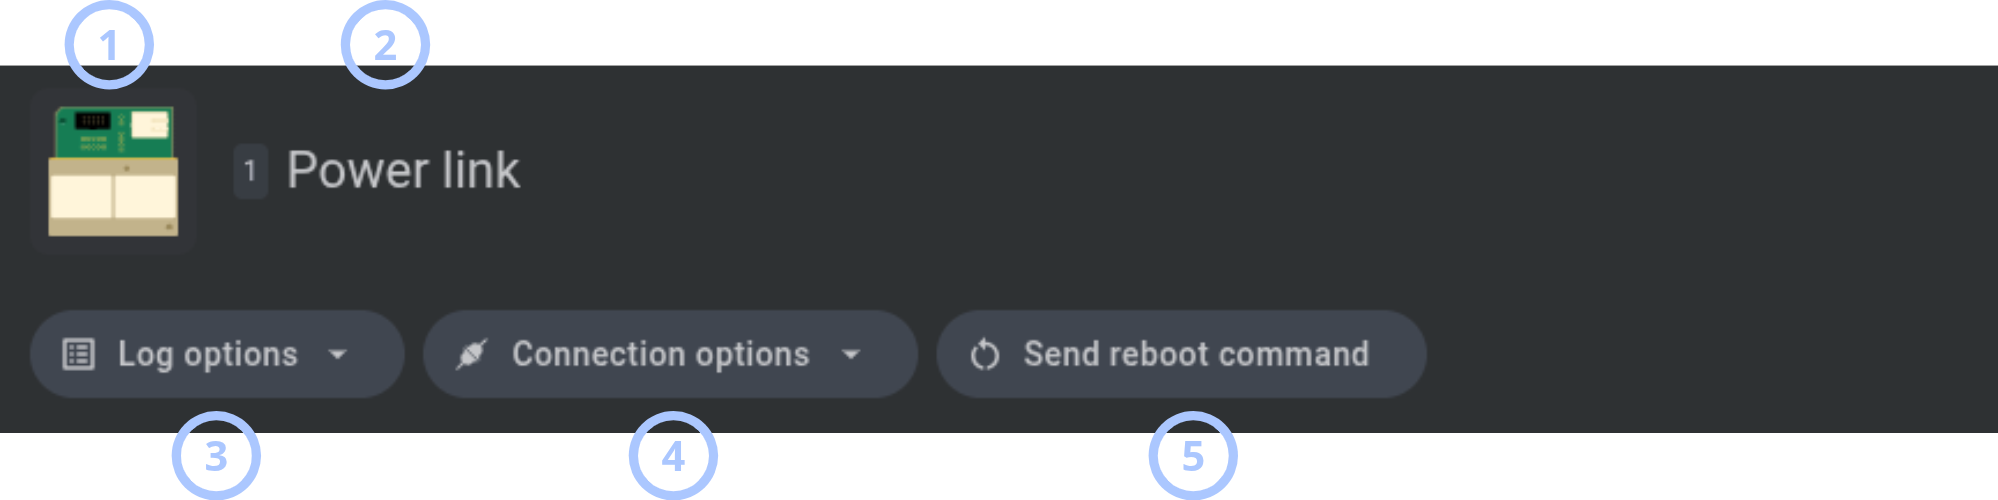
| Callout | UI element | Description | When to use |
|---|---|---|---|
| 1 | Device icon | Shows the device icon. | Use to identify the module. |
| 2 | Device info | Shows the device number and name. | Use to confirm the selected module. |
| 3 | Log options button | Provides Enable remote log service, Disable remote log service, and Send log dump. | Use to manage remote diagnostic logging. |
| 4 | Connection options button | Provides Enable SSH connection and Disable SSH connection. | Use to manage diagnostic SSH access. |
| 5 | Send reboot command button | Reboots the Power Link module. | Use when the module must restart. |
General tab


| Callout | UI element | Description | When to use |
|---|---|---|---|
| 1 | Partitions | Shows the device partition assignments. | Use to review where the module is assigned. |
Configuration tab
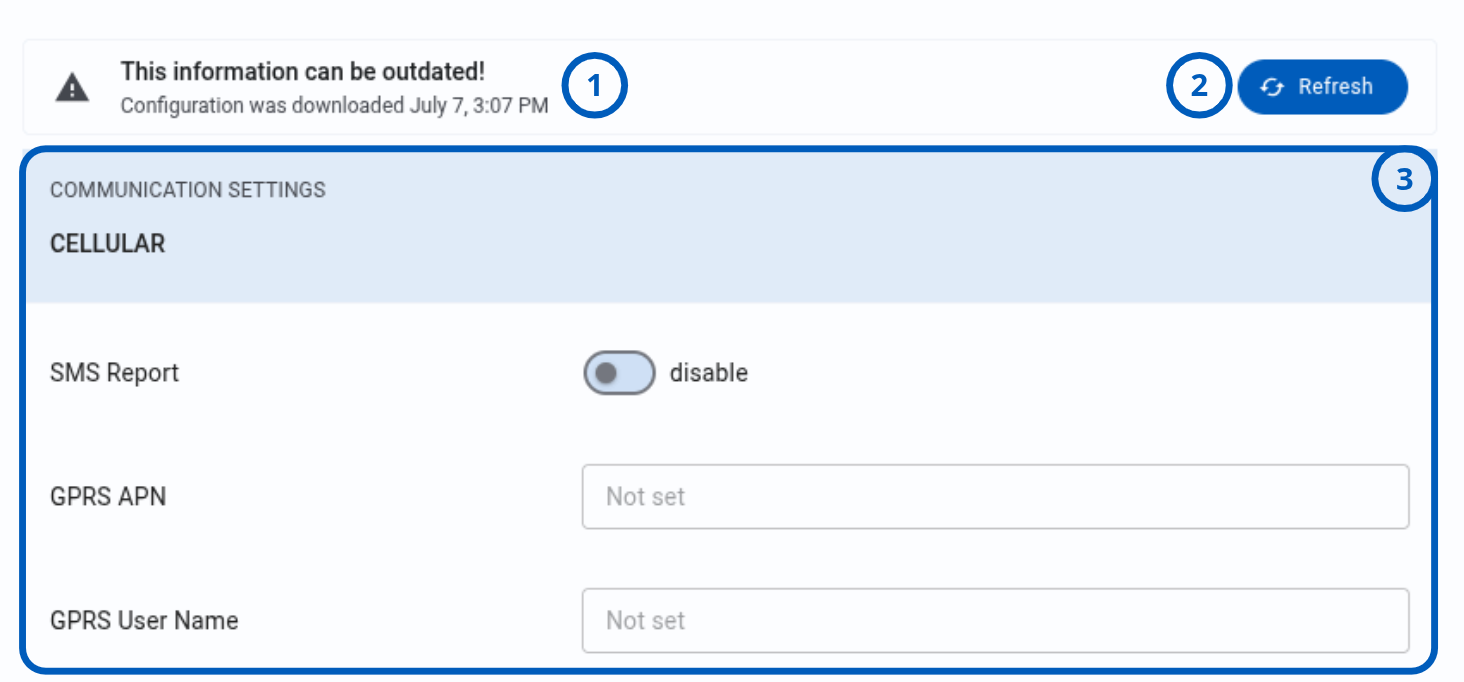
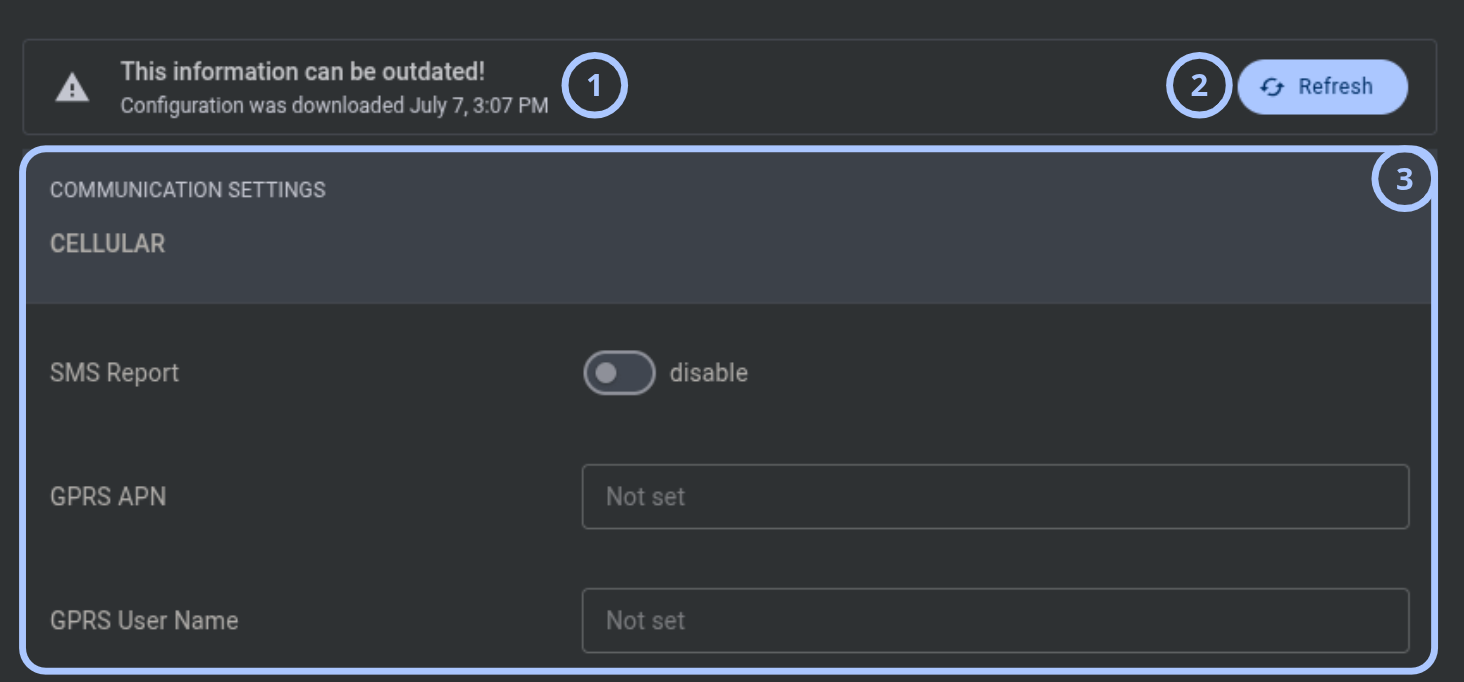
| Callout | UI element | Description | When to use |
|---|---|---|---|
| 1 | Warning message | Indicates that the displayed information can be outdated and shows the configuration download timestamp. | Use to check the age of the displayed configuration. |
| 2 | Refresh button | Downloads the latest configuration from the panel. | Use before reviewing settings that might have changed. |
| 3 | Configuration items | Show configuration values related to the selected device. | Use to review device configuration. |
Firmware tab


| Callout | UI element | Description | When to use |
|---|---|---|---|
| 1 | Current version | Shows the installed device firmware version. | Use to check the current version. |
| 2 | Upgrade device | Provides a package selector and Upgrade button. | Use to select and install an available firmware package. |
Security devices
Use these views to review and manage enrolled security devices. Tabs appear only when the selected device supports the related function.
- Device card
- Info and actions
- General
- Parent
- Children
- Configuration
- Video on demand
- Meteo
Device card
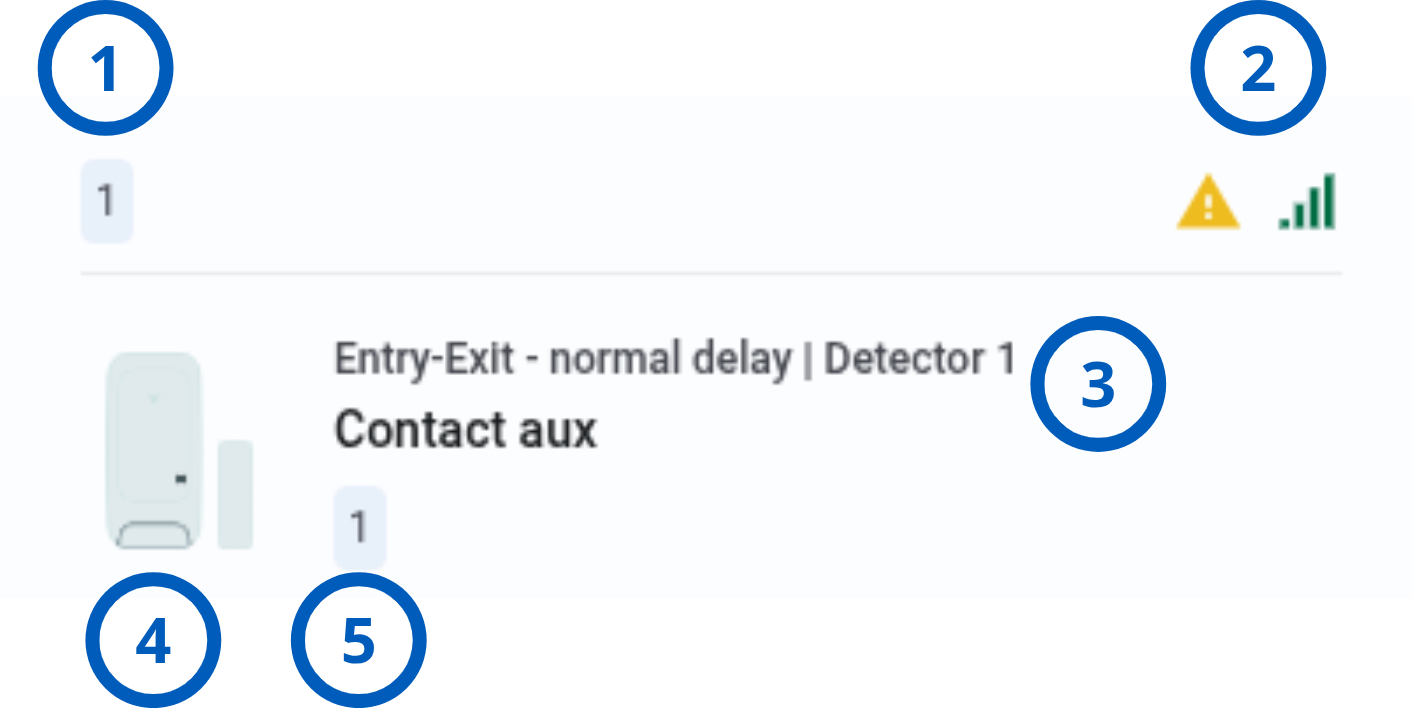
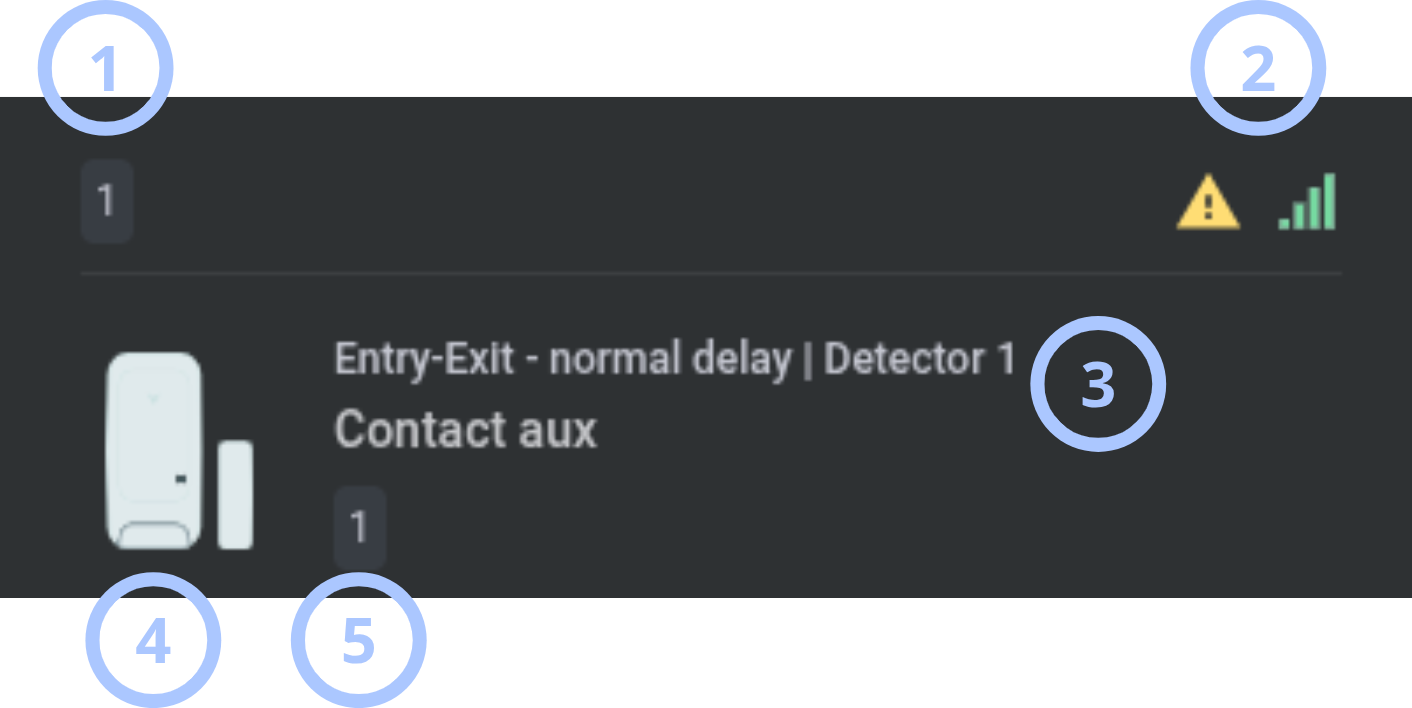
| Callout | UI element | Description | When to use |
|---|---|---|---|
| 1 | Device or zone number | Shows the device or zone number. | Use to identify the device location. |
| 2 | Status icons | Show RSSI level, troubles, walk-test result, and other available states. | Use to review device health and test results. |
| 3 | Device info | Shows the device name and zone type. | Use to identify the security function. |
| 4 | Device icon | Shows the device icon. | Use to identify the device category. |
| 5 | Device partitions | Shows assigned partitions. | Use to review partition assignment. |
Device info and actions


| Callout | UI element | Description | When to use |
|---|---|---|---|
| 1 | Device icon | Shows the device icon. | Use to identify the device. |
| 2 | Device info | Shows the device or zone number, name, and zone type. | Use to confirm the selected device. |
| 3 | Rename device | Opens the Rename device modal window. | Use to change the device label. |
| 4 | Remove device | Opens the Remove device modal window. | Use to remove the device from the panel. |
General tab
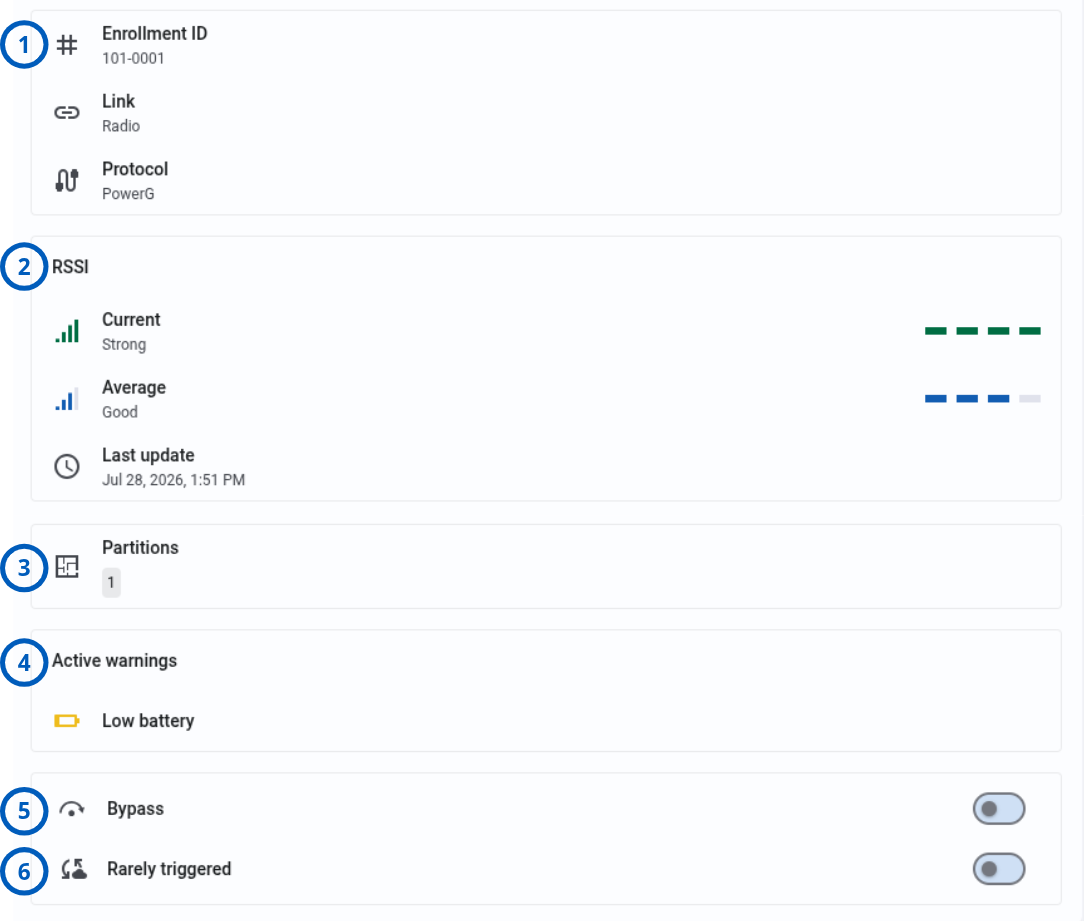
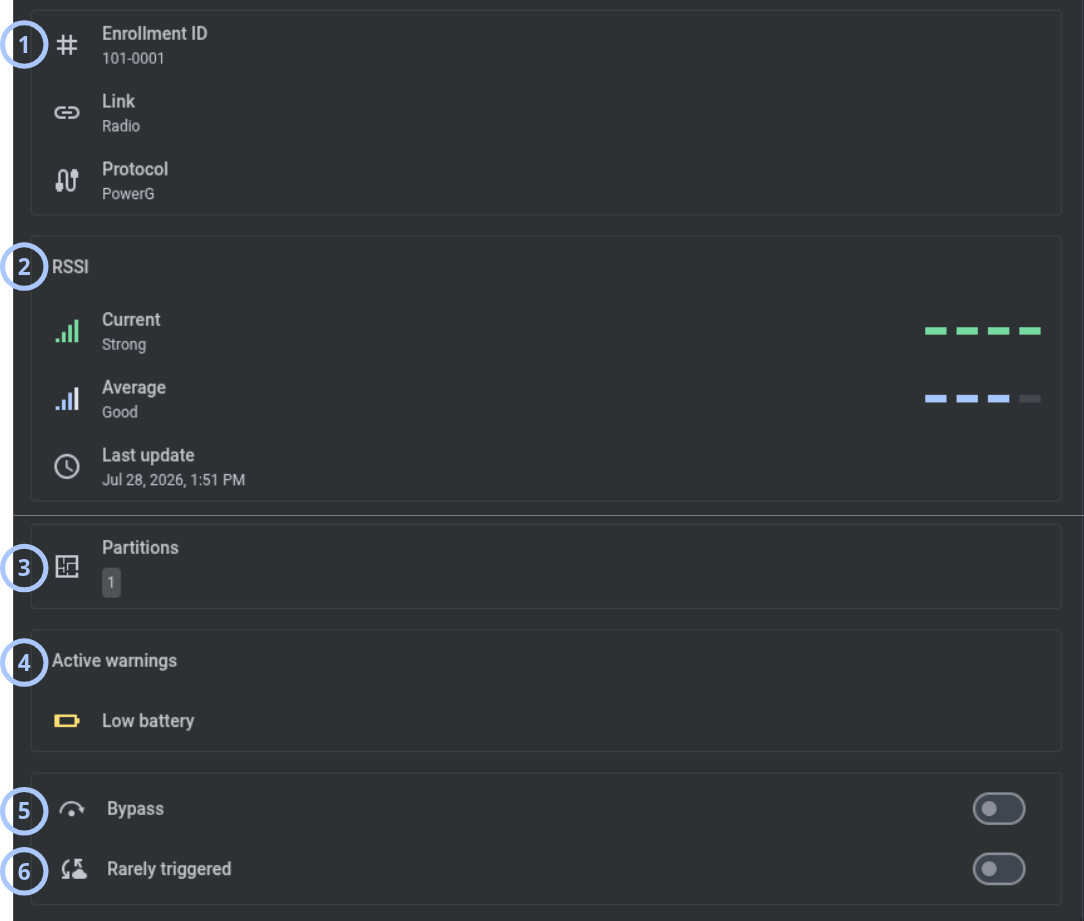
| Callout | UI element | Description | When to use |
|---|---|---|---|
| 1 | Enrollment info | Shows Enrollment ID, link type such as Radio or Wired, and protocol. | Use to review enrollment details. |
| 2 | RSSI | Shows current and average RSSI levels and the last update timestamp. Values appear only after Refresh RSSI completes. | Use to assess wireless signal quality. |
| 3 | Partitions | Shows assigned partitions. | Use to review partition assignment. |
| 4 | Active warnings | Shows active warning icons and descriptions. | Use to identify device conditions that require attention. |
| 5 | Bypass toggle | Bypasses the device so it does not prevent arming. | Use when a supported device must be temporarily excluded. |
| 6 | Rarely triggered toggle | Marks a device that is expected to trigger infrequently to help prevent false supervision troubles. | Use for devices with intentionally infrequent activity. |
Parent tab


| Callout | UI element | Description | When to use |
|---|---|---|---|
| 1 | Parent device card | Shows the parent device icon, partition, name, and related information. This tab appears only when the selected device has a parent. | Use to review the module or device to which the selected child device belongs. |
Children tab
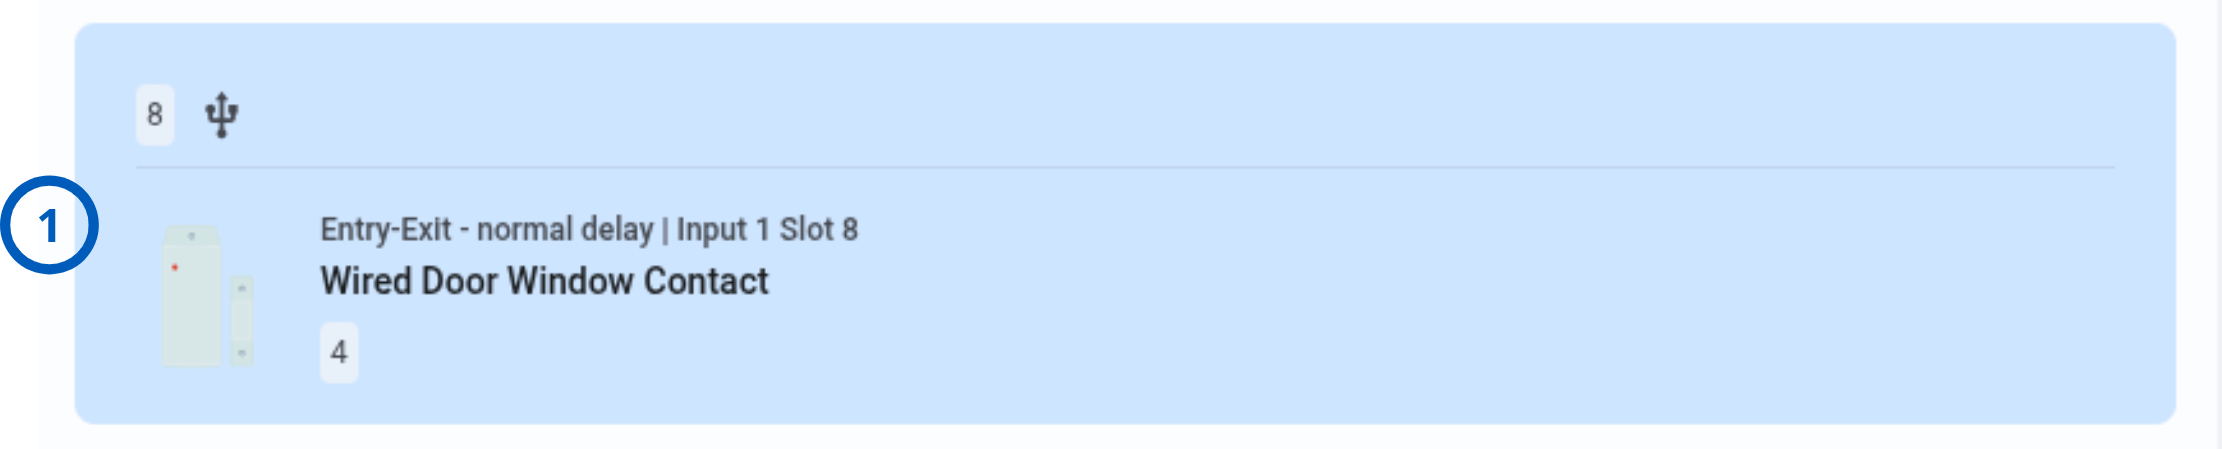
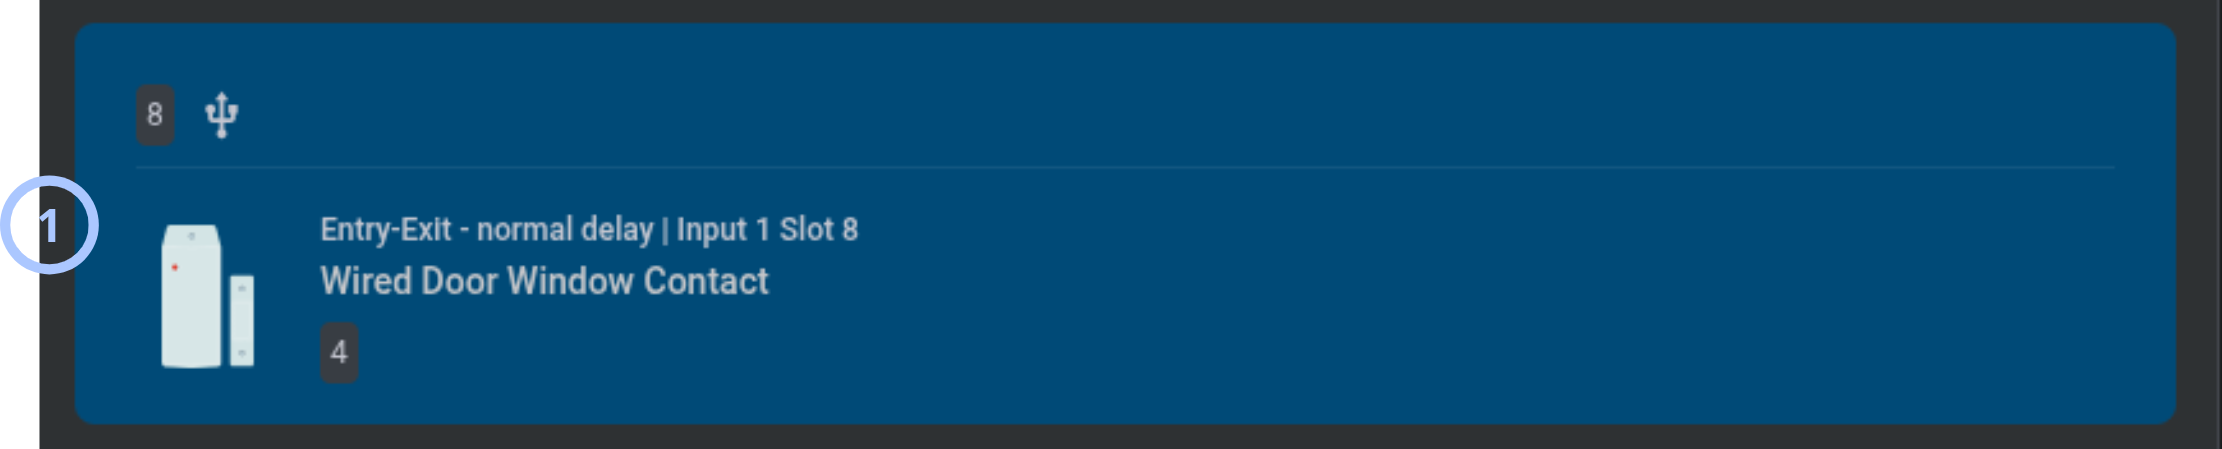
| Callout | UI element | Description | When to use |
|---|---|---|---|
| 1 | Child device card | Shows each child device icon, partition, name, and related information. This tab appears only when the selected device has children. | Use to review devices connected to the selected parent device. |
Configuration tab
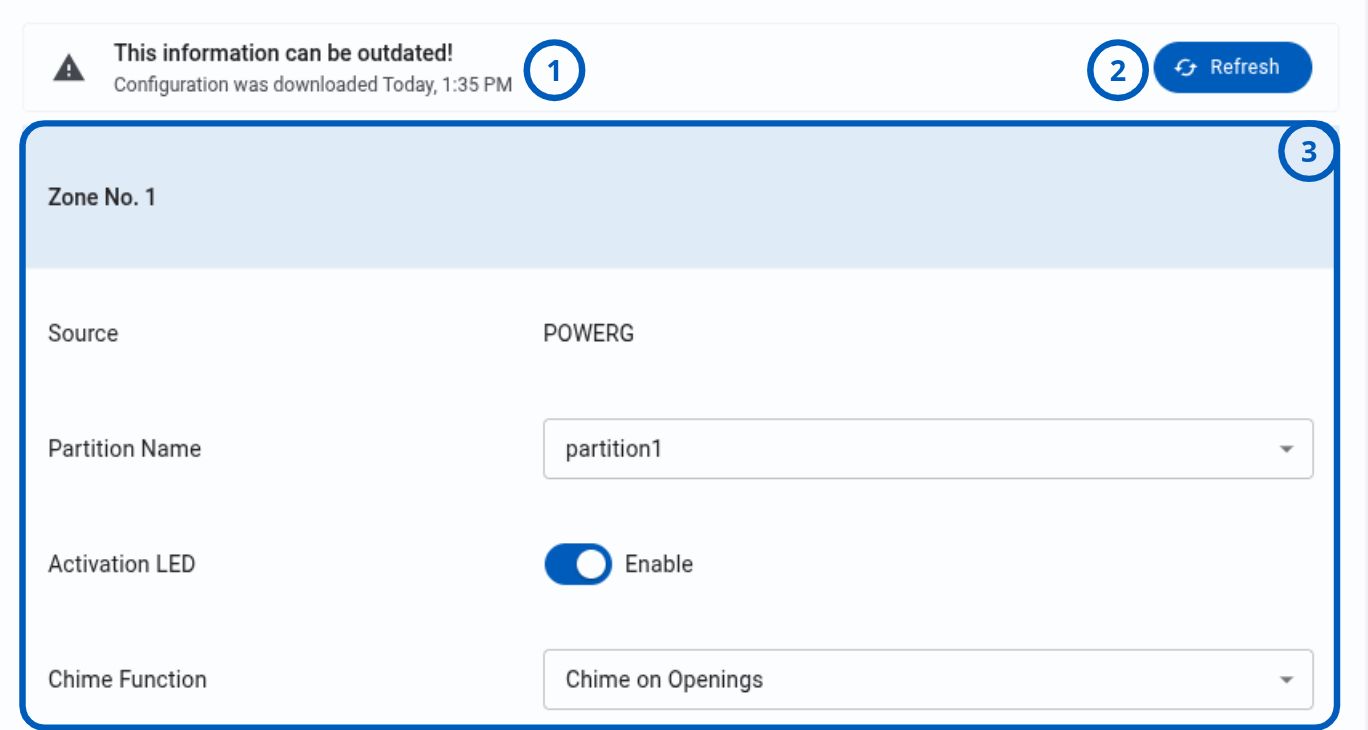
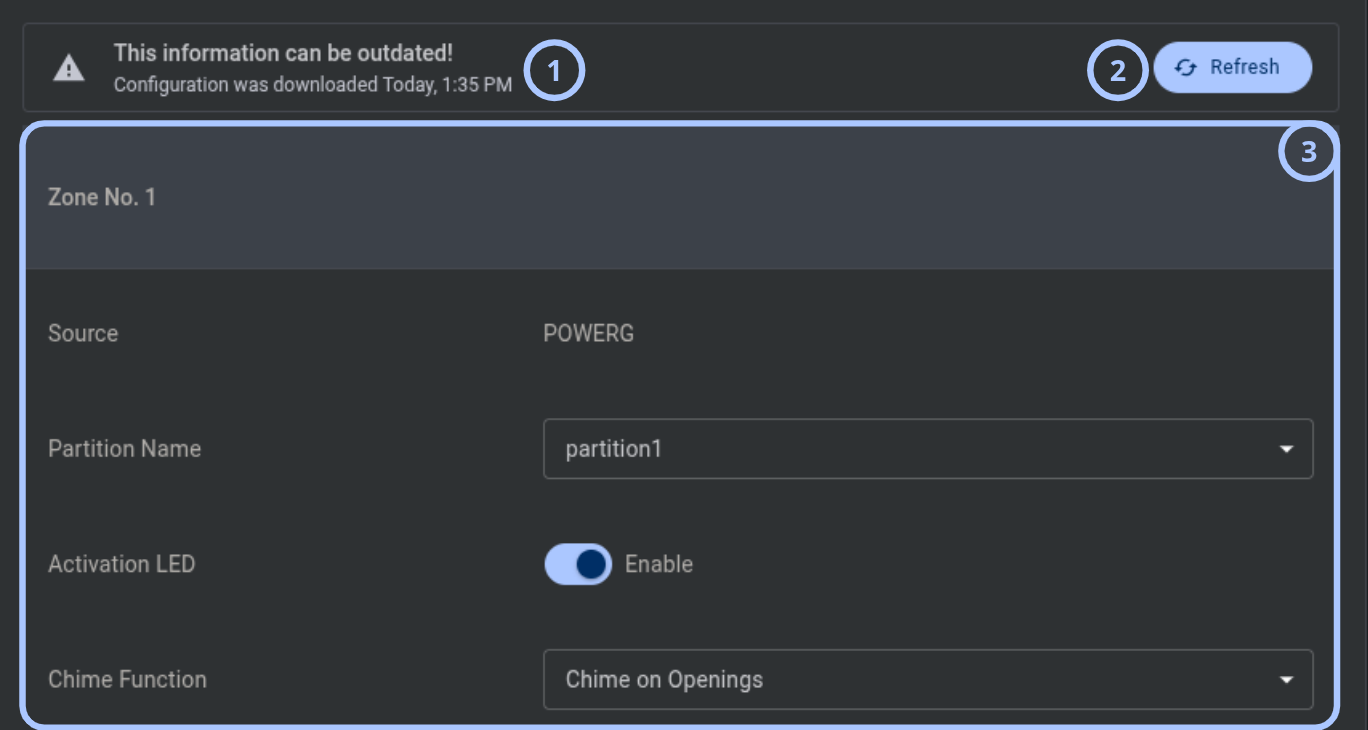
| Callout | UI element | Description | When to use |
|---|---|---|---|
| 1 | Warning message | Indicates that the displayed information can be outdated and shows the configuration download timestamp. | Use to check the age of the displayed configuration. |
| 2 | Refresh button | Downloads the latest configuration from the panel. | Use before reviewing settings that might have changed. |
| 3 | Configuration items | Show configuration values related to the selected device. | Use to review device configuration. |
Video on demand tab
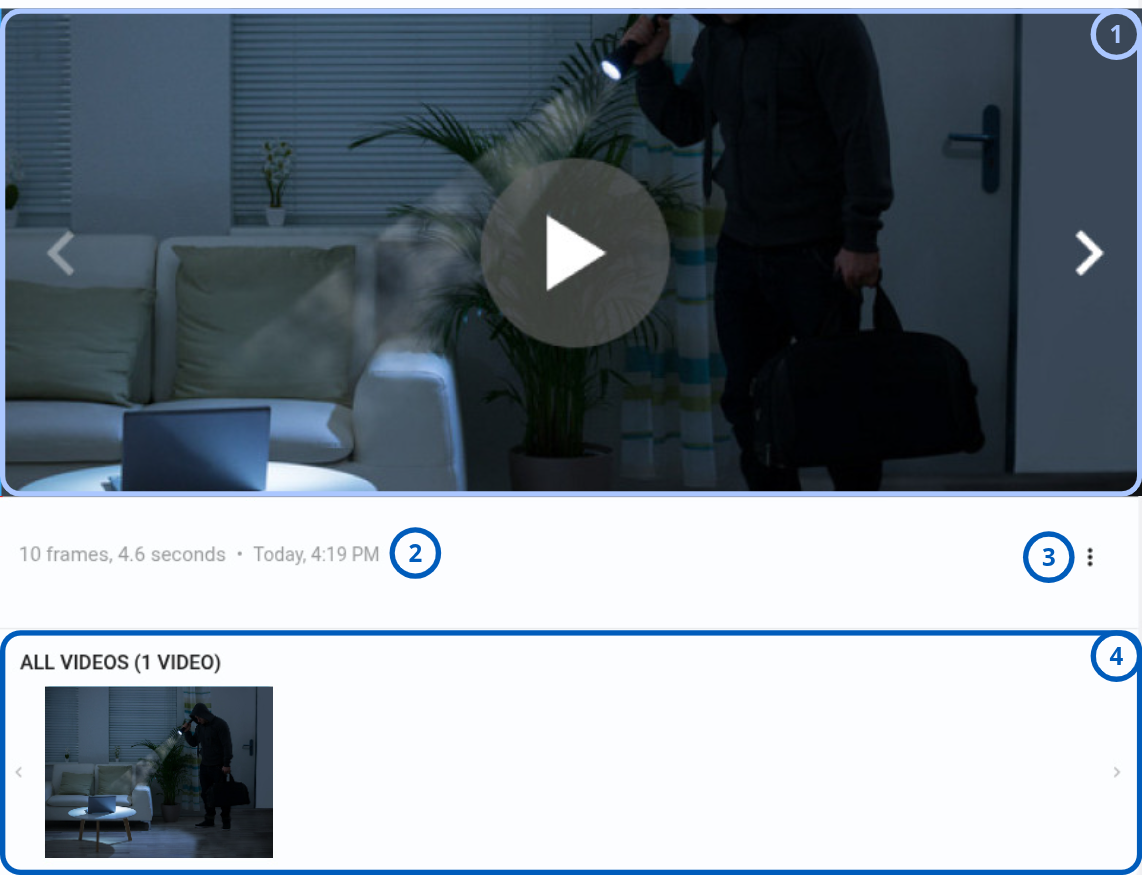
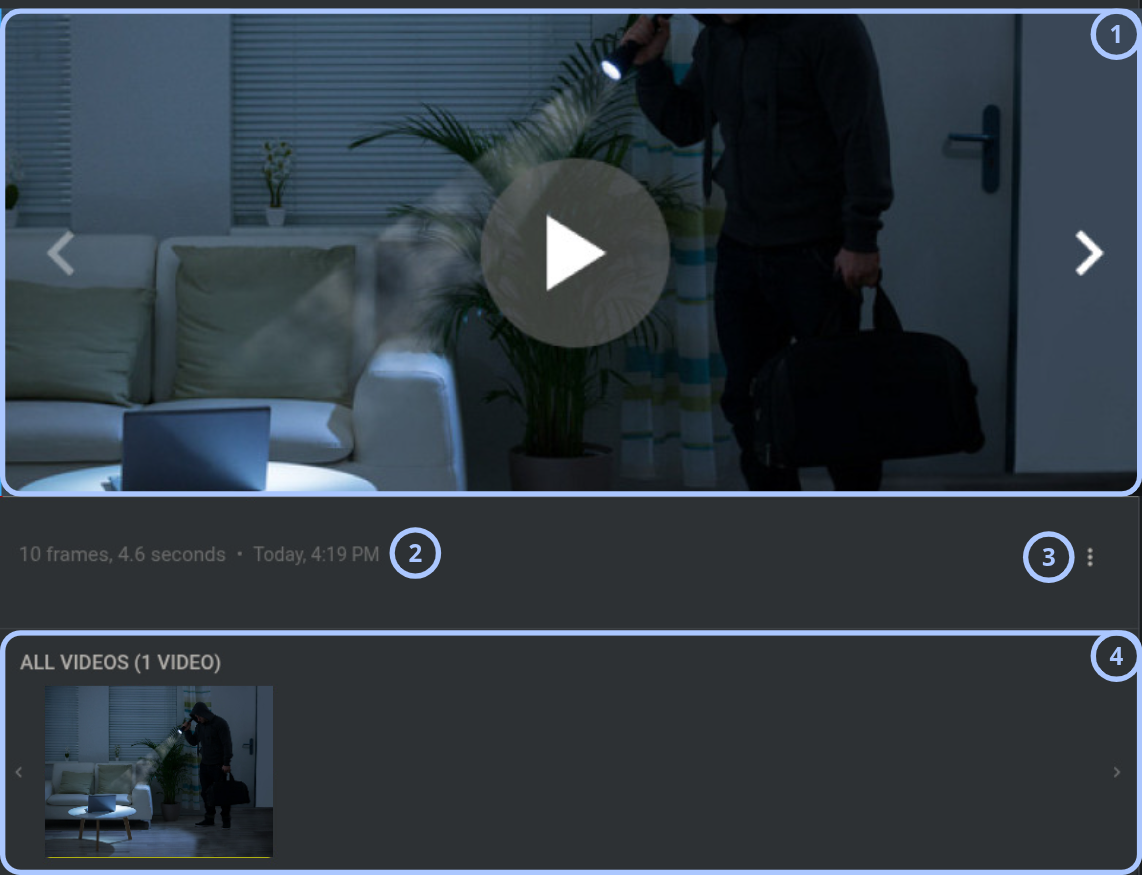
The Video on demand tab appears only for camera-type security zones. VOD can be requested within the configured viewing window after an alarm or at any time when the panel configuration allows it. Group settings control VOD history size from 1 to 20 videos per zone; the default is 3. The oldest video is replaced when the limit is reached. Peek-in without an alarm is supported only for IQ panels version 4.6.0 or later through ConnectAlarm, not through the PowerManage GUI.
| Callout | UI element | Description | When to use |
|---|---|---|---|
| 1 | Latest VOD | Shows the latest video in a player. | Use to review the most recent available video. |
| 2 | Video information | Shows the frame count, video length, and timestamp. | Use to review video metadata. |
| 3 | More actions | Provides Request new video and Download video. | Use to request or save a video. |
| 4 | All videos | Shows all retained videos for the device. | Use to review video history. |
- General
- Temperature
- Brightness
General
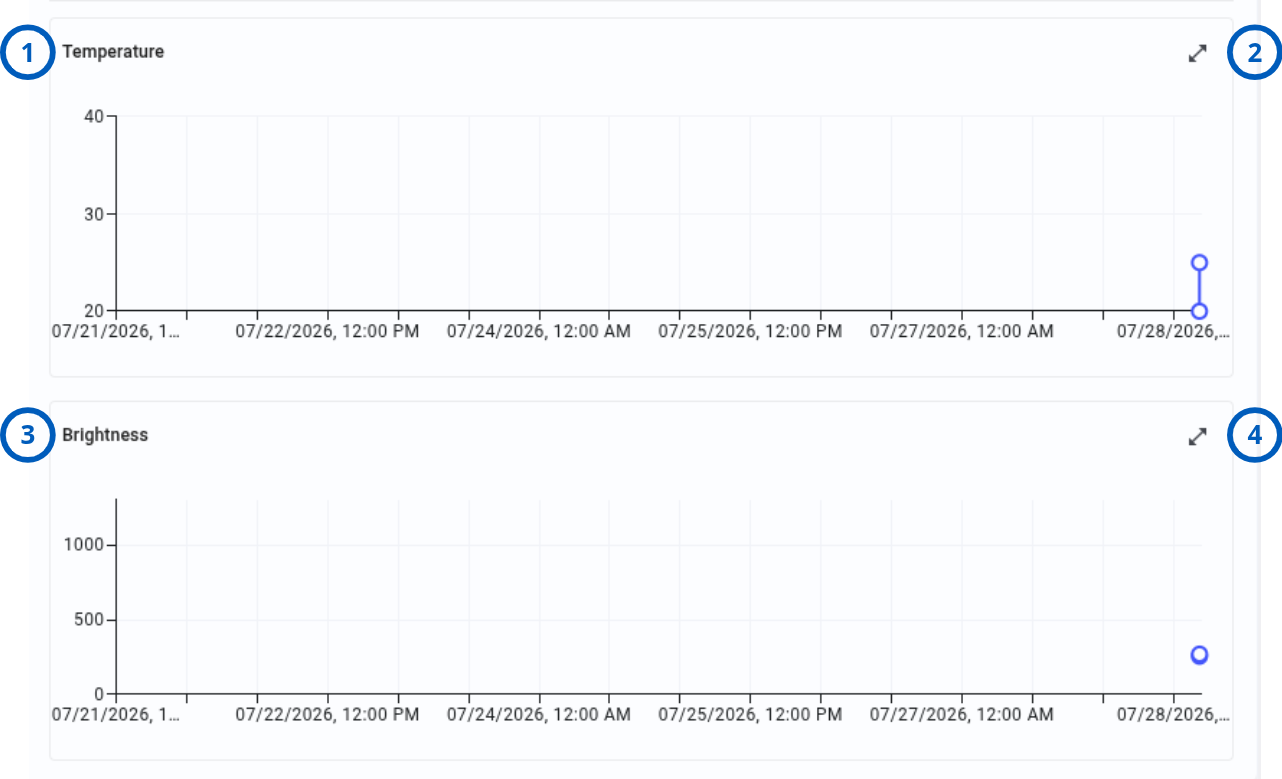
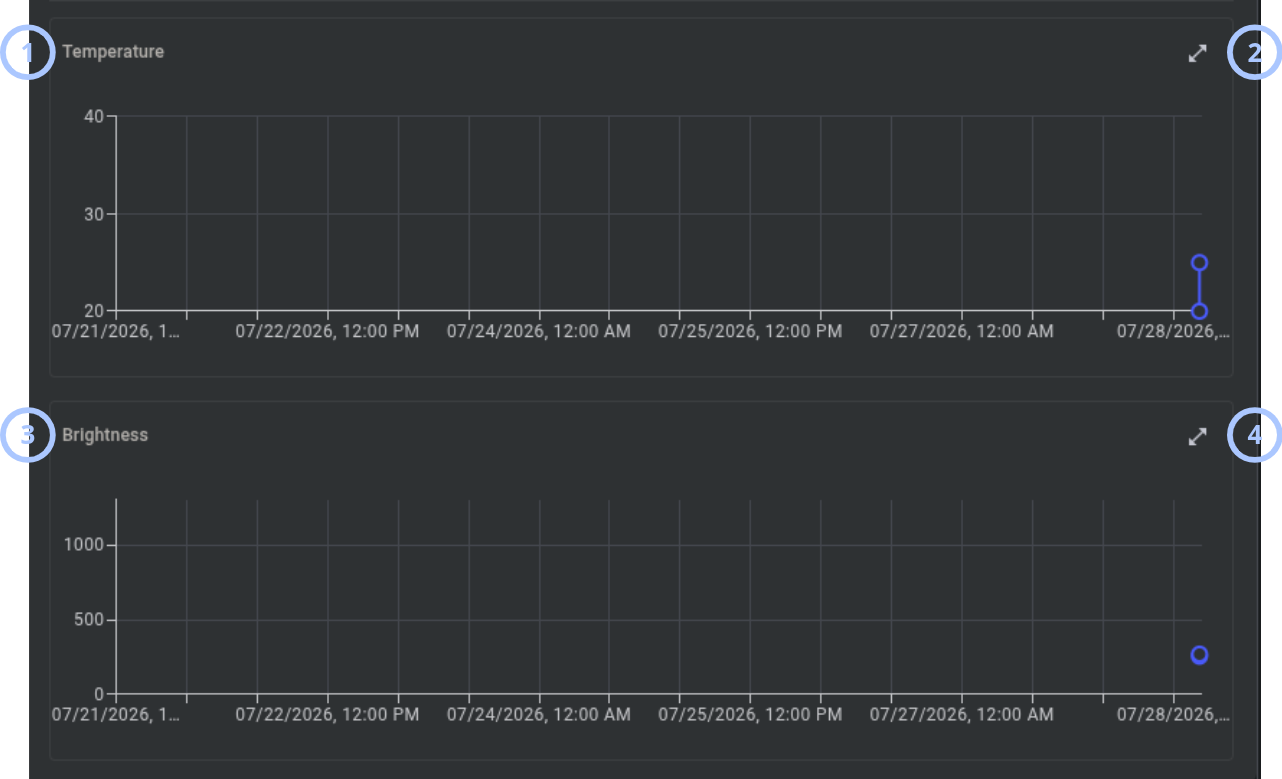
The Meteo tab appears only for smart sensors that report temperature or brightness. Enable Temperature/light statistic in Group settings and run discovery for a setting change to take effect. Temperature is supported for Visonic, DSC, and IQ panel families. Meteo data updates in the GUI every 10 minutes.
| Callout | UI element | Description | When to use |
|---|---|---|---|
| 1 | Temperature chart | Shows temperature on the Y-axis and date on the X-axis. The display unit follows the employee GUI setting: Celsius or Fahrenheit. | Use to review temperature history. |
| 2 | Expand button | Opens the Temperature modal window. | Use to select a date range and enlarge the chart. |
| 3 | Brightness chart | Shows brightness on the Y-axis and date on the X-axis. Brightness is supported for Visonic and IQ panels, but not DSC panels. | Use to review brightness history. |
| 4 | Expand button | Opens the Brightness modal window. | Use to select a date range and enlarge the chart. |
Temperature modal window
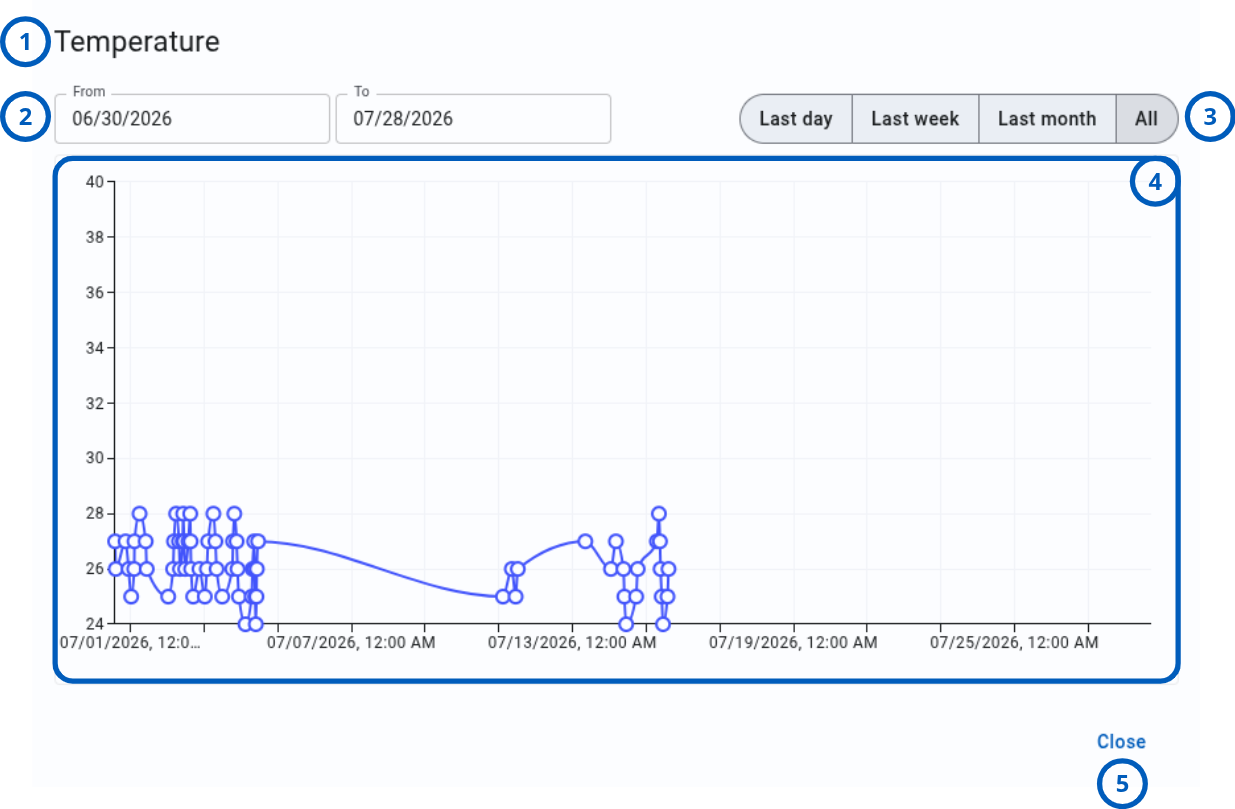
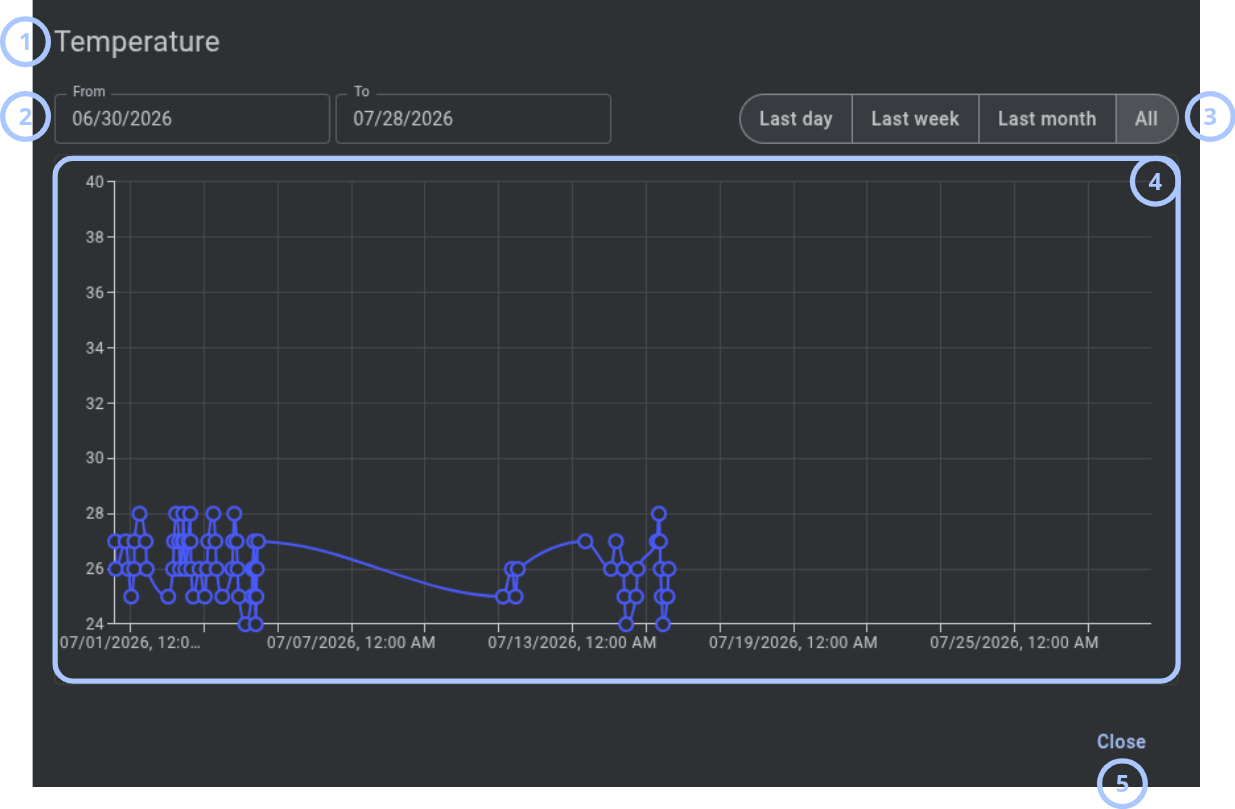
| Callout | UI element | Description | When to use |
|---|---|---|---|
| 1 | Date selector | Provides two date fields for selecting the temperature chart range. | Use to review a specific period. |
| 2 | Quick filters | Provides Last day, Last week, Last month, and All. | Use to select a common date range. |
| 3 | Temperature chart | Shows temperature on the Y-axis and date on the X-axis. | Use to review temperature changes. |
Brightness modal window
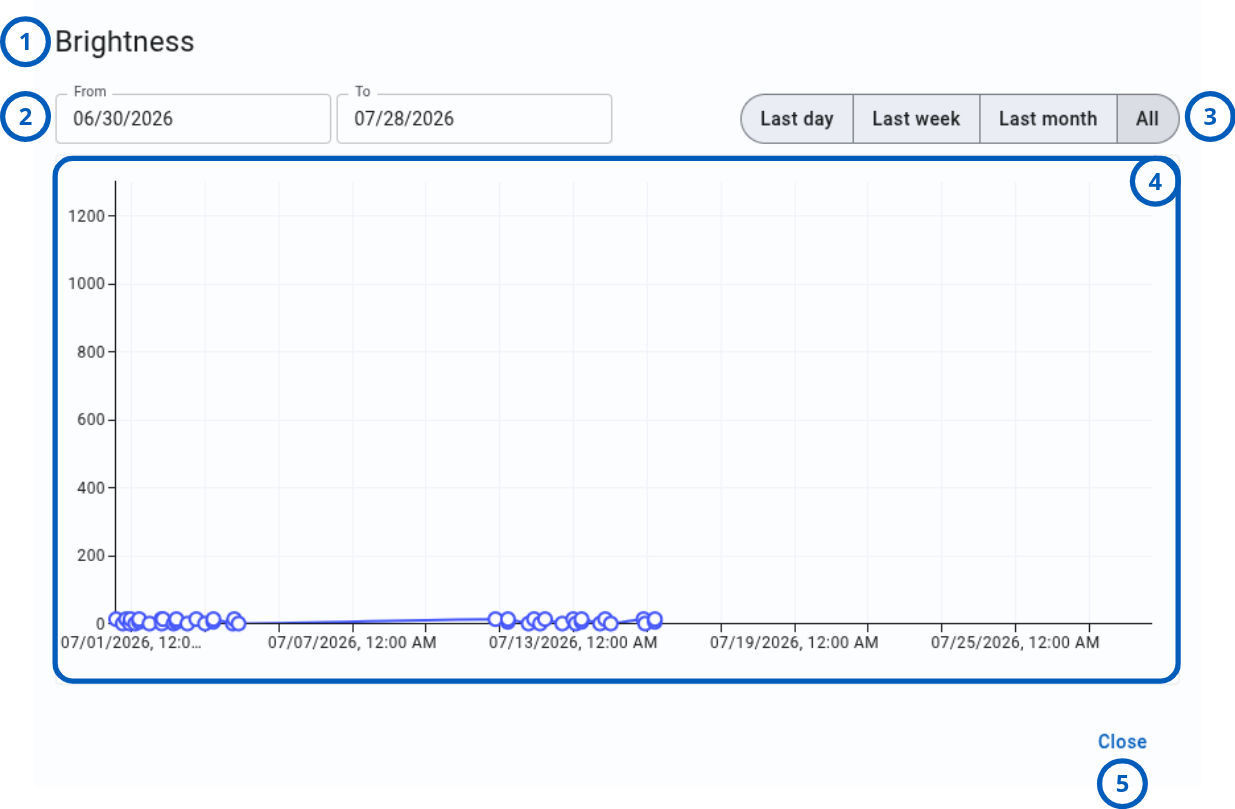
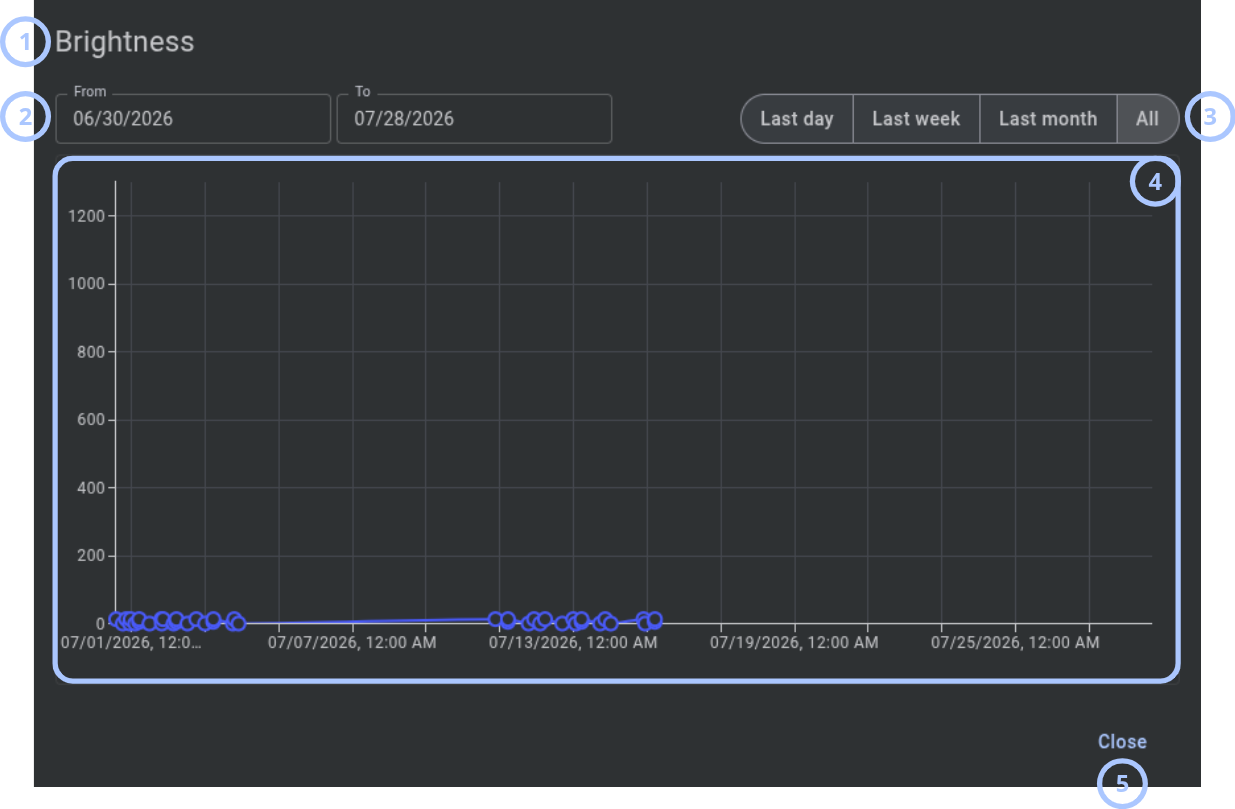
| Callout | UI element | Description | When to use |
|---|---|---|---|
| 1 | Date selector | Provides two date fields for selecting the brightness chart range. | Use to review a specific period. |
| 2 | Quick filters | Provides Last day, Last week, Last month, and All. | Use to select a common date range. |
| 3 | Brightness chart | Shows brightness on the Y-axis and date on the X-axis. | Use to review brightness changes. |
Automation devices
Use these views to review and control supported automation devices.
The Control tab appears only for devices that support remote state or level changes. Control availability also depends on Automation Activation Settings.
- Device card
- Info and actions
- General
- Control
- Parent
- Configuration
Device card
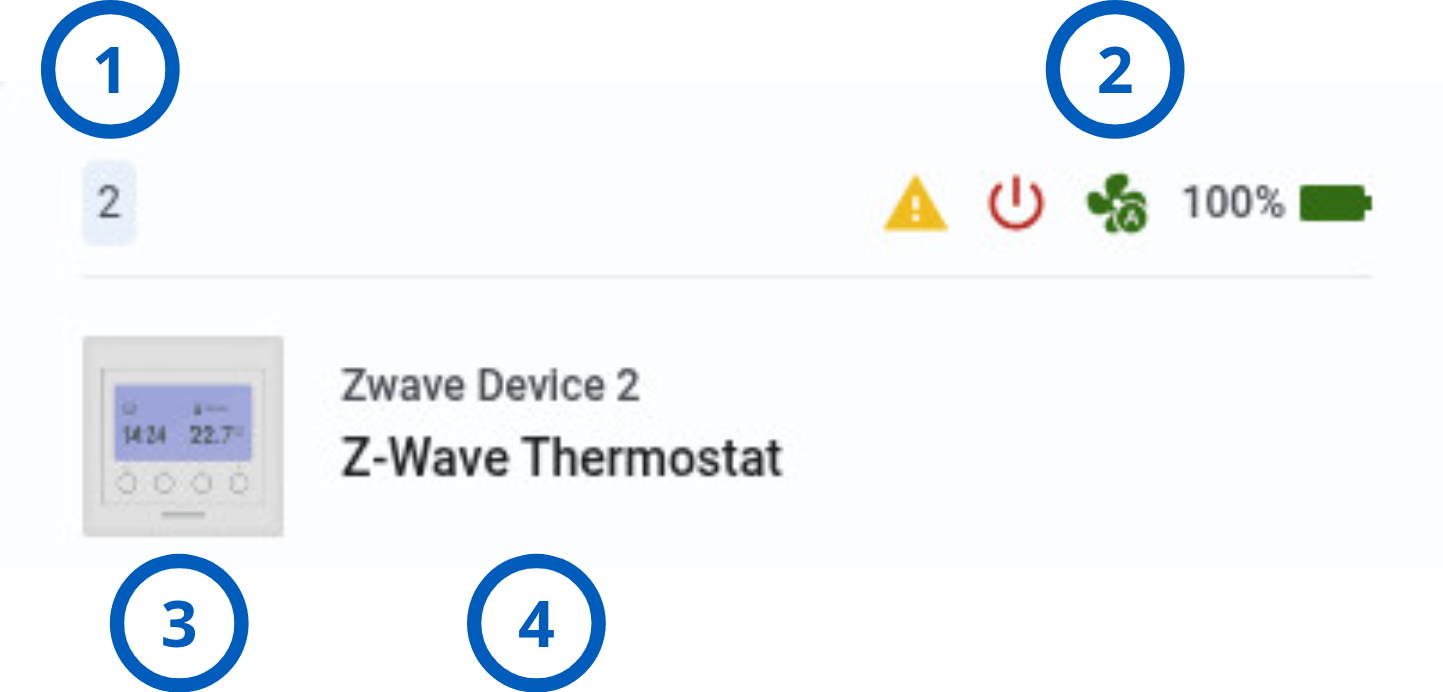
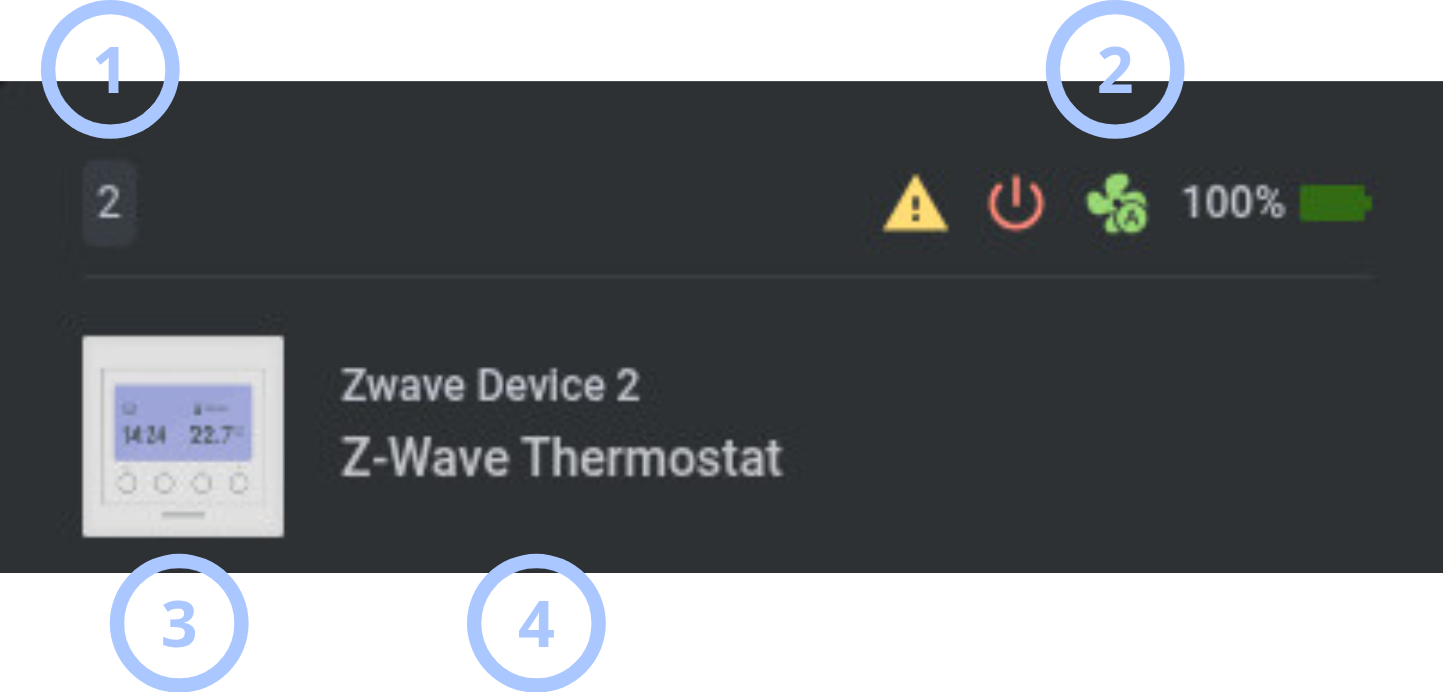
| Callout | UI element | Description | When to use |
|---|---|---|---|
| 1 | Device or zone number | Shows the device or zone number. | Use to identify the device. |
| 2 | Status icons | Show troubles, status, battery level, and other available states. | Use to review device health. |
| 3 | Device icon | Shows the device icon. | Use to identify the device category. |
| 4 | Device info | Shows the device name and type. | Use to identify the device. |
- General
- PGM
Device info and actions


| Callout | UI element | Description | When to use |
|---|---|---|---|
| 1 | Device icon | Shows the device icon. | Use to identify the device. |
| 2 | Device info | Shows the device or zone number, name, and type. | Use to confirm the selected device. |
| 3 | Rename device | Opens the Rename device modal window. | Use to change the device label. |
| 4 | Remove device | Opens the Remove device modal window. | Use to remove the device. |
Device info and actions


| Callout | UI element | Description | When to use |
|---|---|---|---|
| 1 | Device icon | Shows the device icon. | Use to identify the PGM device. |
| 2 | Device info | Shows the PGM number, name, and type. | Use to confirm the selected PGM device. |
| 3 | Edit icon | Opens the Edit icon modal window. | Use to change the icon assigned to the PGM device. |
| 4 | Rename device | Opens the Rename device modal window. | Use to change the PGM device label. |
General tab
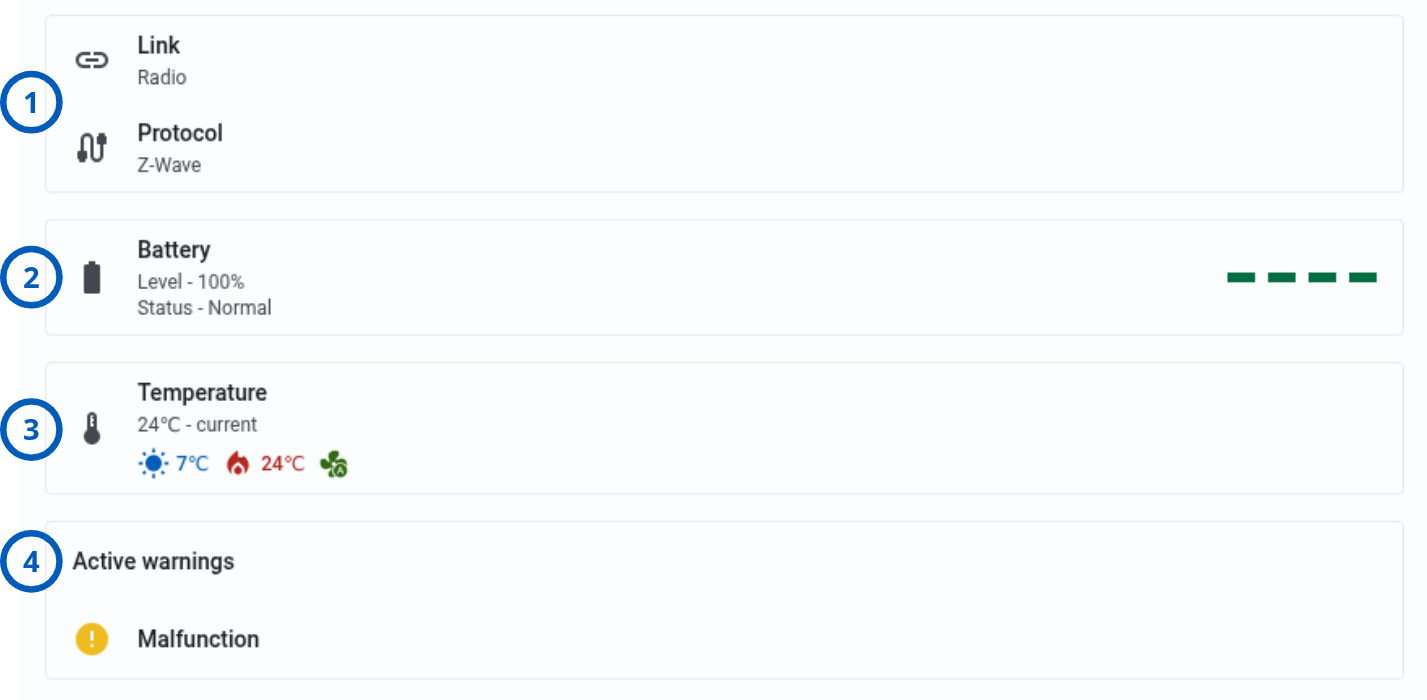
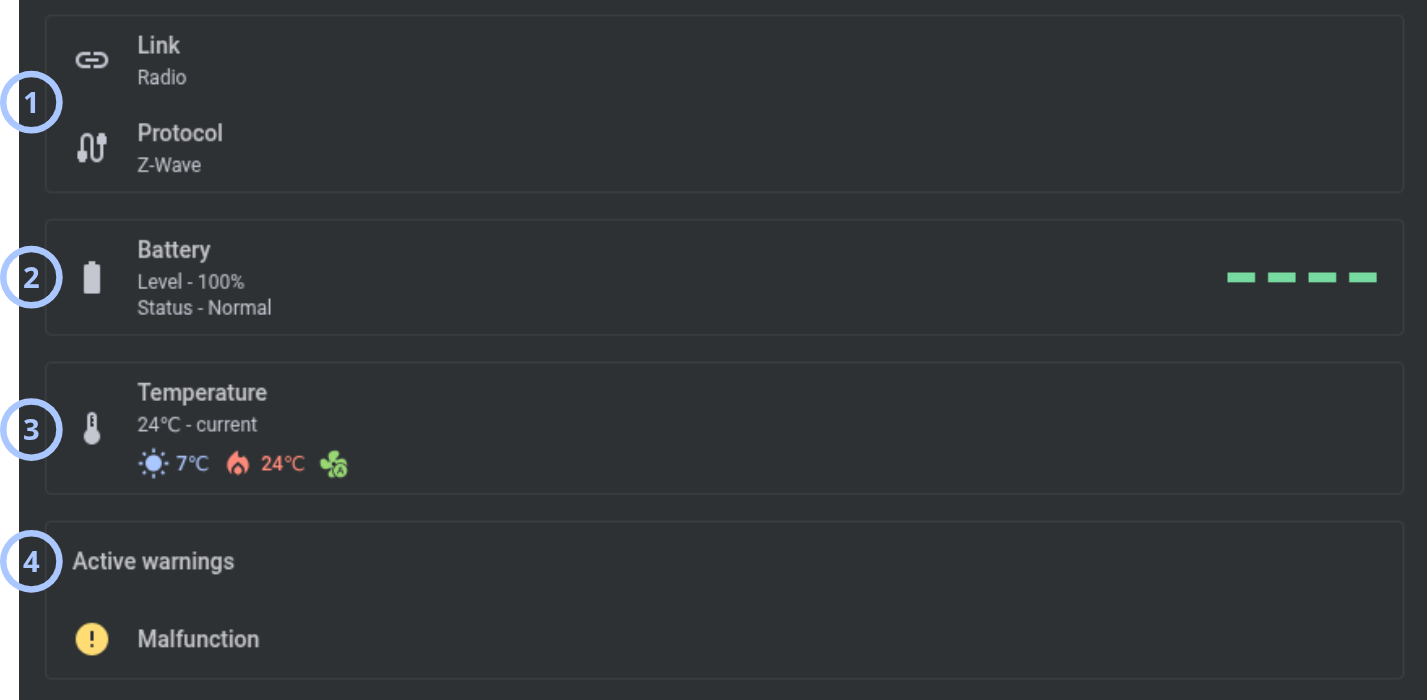
| Callout | UI element | Description | When to use |
|---|---|---|---|
| 1 | Enrollment info | Shows Enrollment ID, link type such as Radio or Wired, and protocol. | Use to review enrollment details. |
| 2 | Battery level | Shows the current battery level when supported. | Use to check battery condition. |
| 3 | Device status | Shows device-type-specific status. | Use to review the current device state. |
| 4 | Active warnings | Shows active warning icons and descriptions. | Use to identify conditions that require attention. |
- Thermostat
- Door lock
- Light
- Garage door
- Water valve
- Dimmer
- PGM
Thermostat
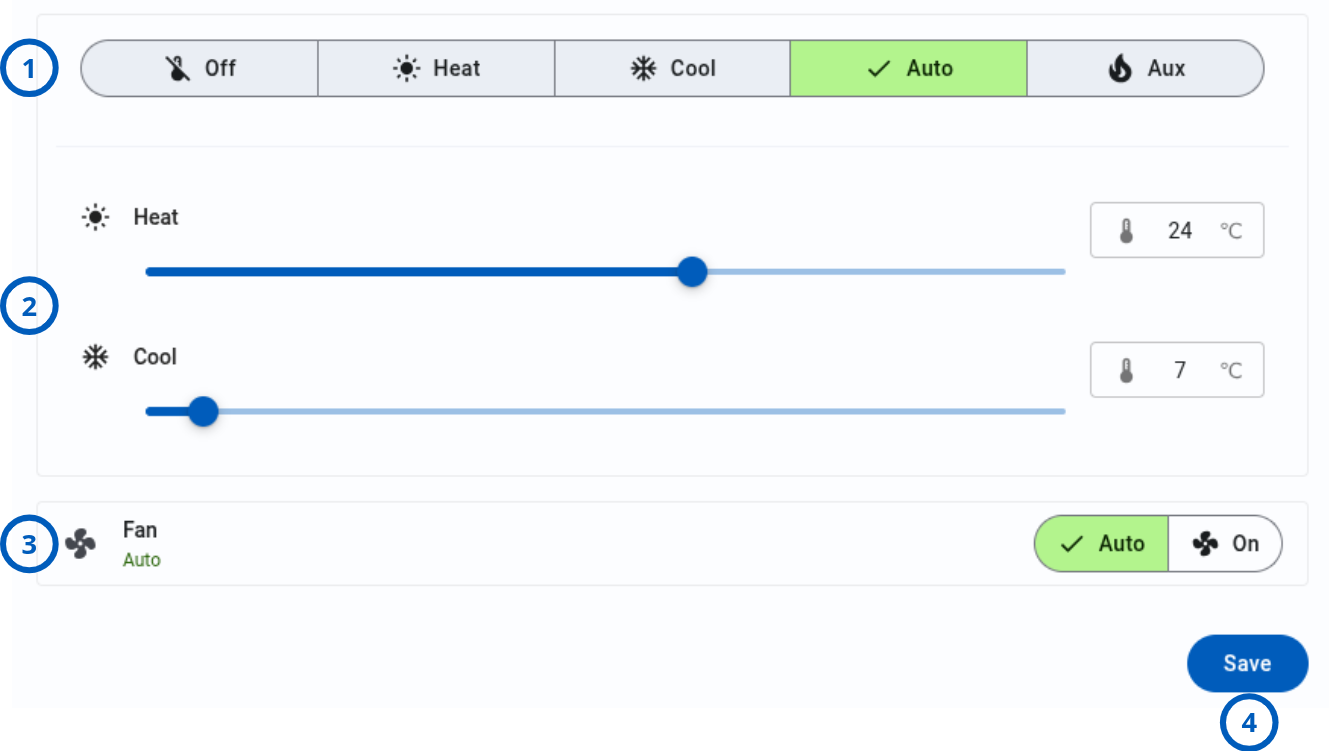
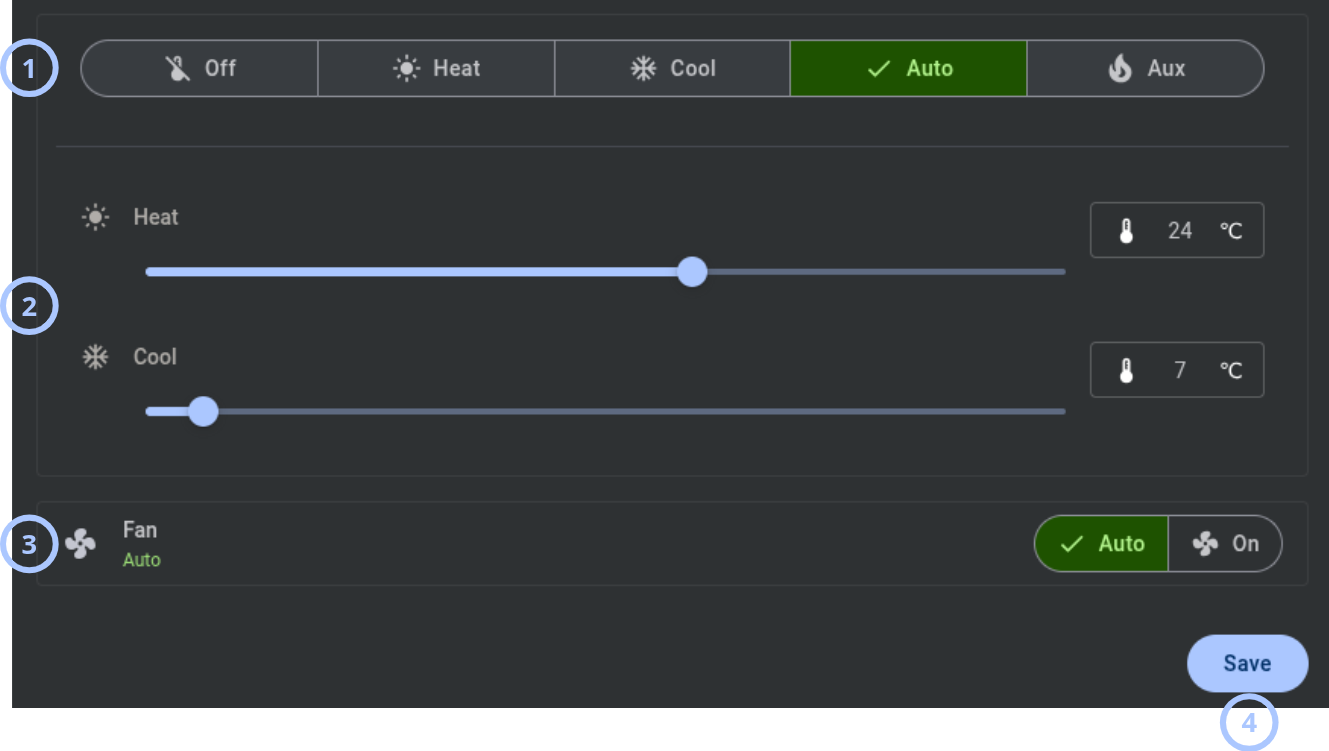
| Callout | UI element | Description | When to use |
|---|---|---|---|
| 1 | Temperature mode | Provides buttons for selecting thermostat mode. | Use to choose the operating mode. |
| 2 | Heat and Cool | Provides controls for selecting heating and cooling temperatures. | Use to set target temperatures. |
| 3 | Fan mode | Provides buttons for selecting fan mode. | Use to configure fan operation. |
| 4 | Save button | Applies the selected settings. | Use after changing thermostat controls. |
Door lock
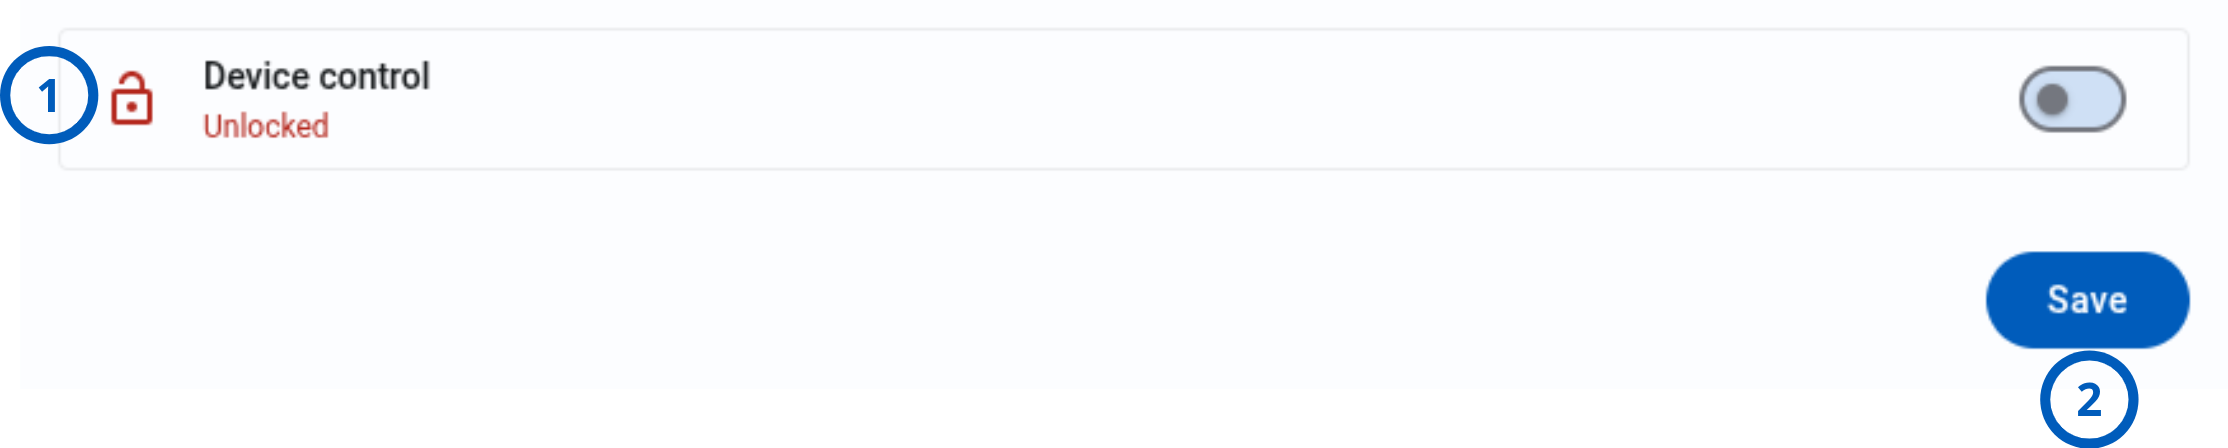
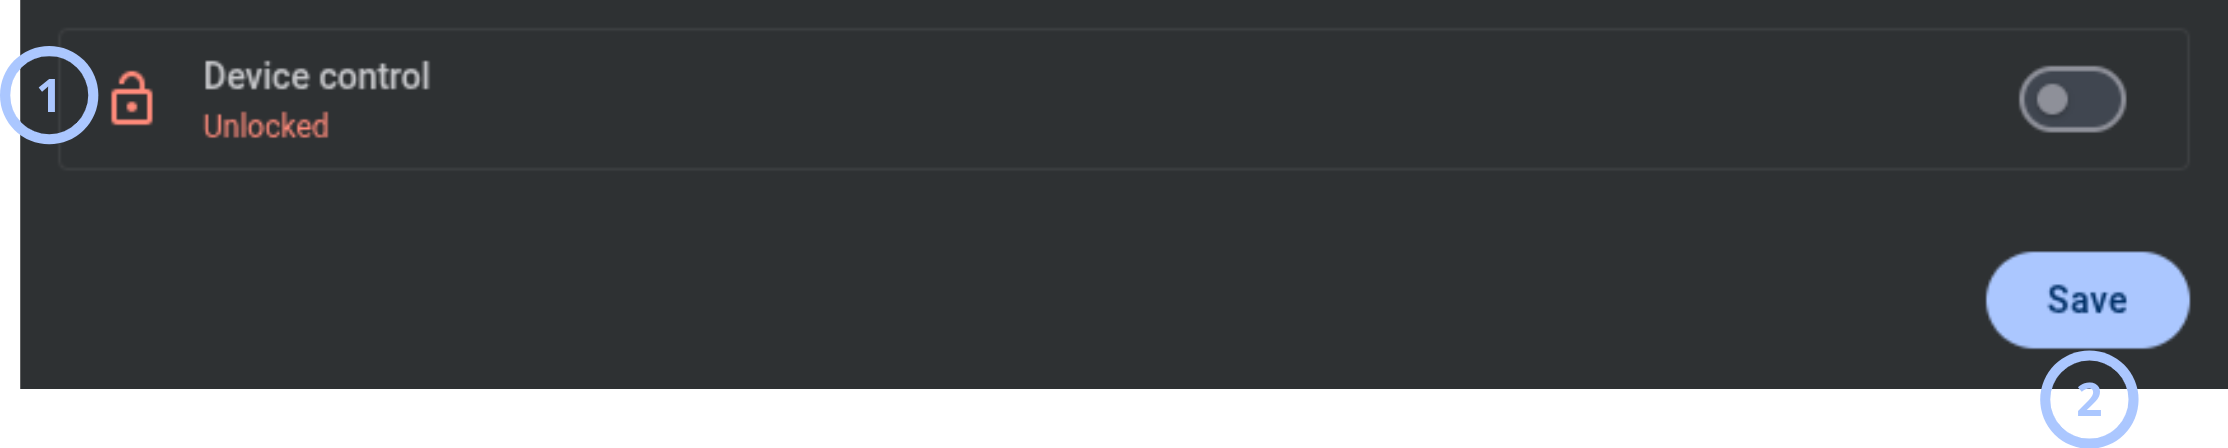
| Callout | UI element | Description | When to use |
|---|---|---|---|
| 1 | Device control | Shows the current lock state and a toggle for changing it. | Use to lock or unlock the door. |
| 2 | Save button | Applies the selected state. | Use after changing the control. |
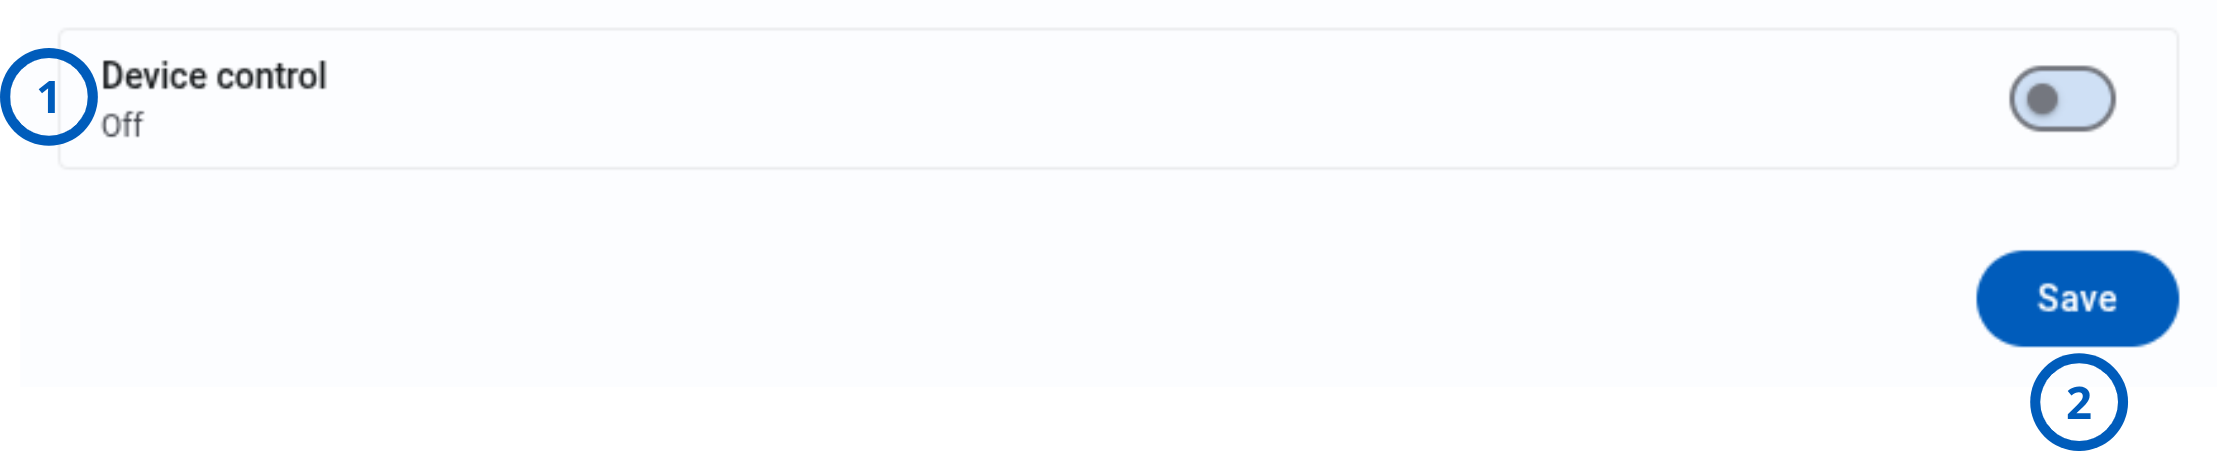
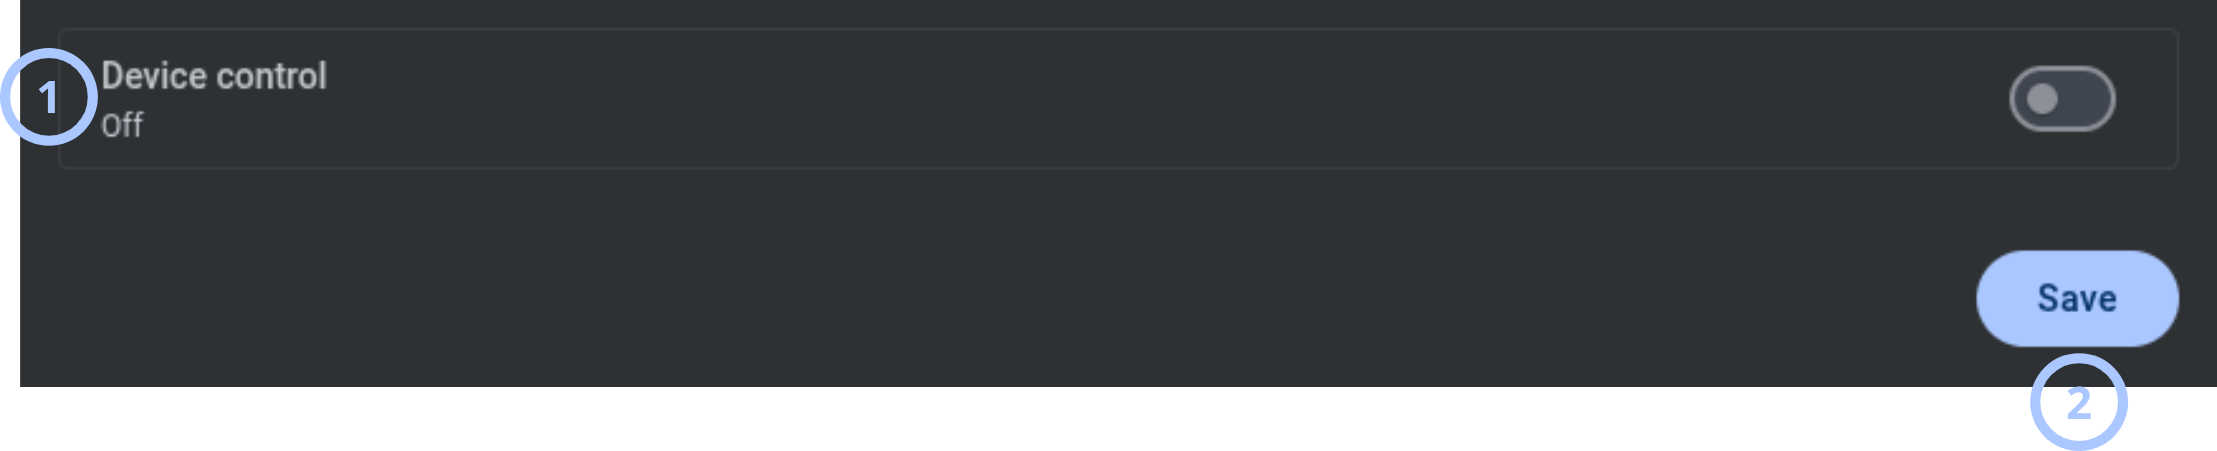
Light
| Callout | UI element | Description | When to use |
|---|---|---|---|
| 1 | Device control | Shows the current state and a toggle for changing it. | Use to turn the light on or off. |
| 2 | Save button | Applies the selected state. | Use after changing the control. |
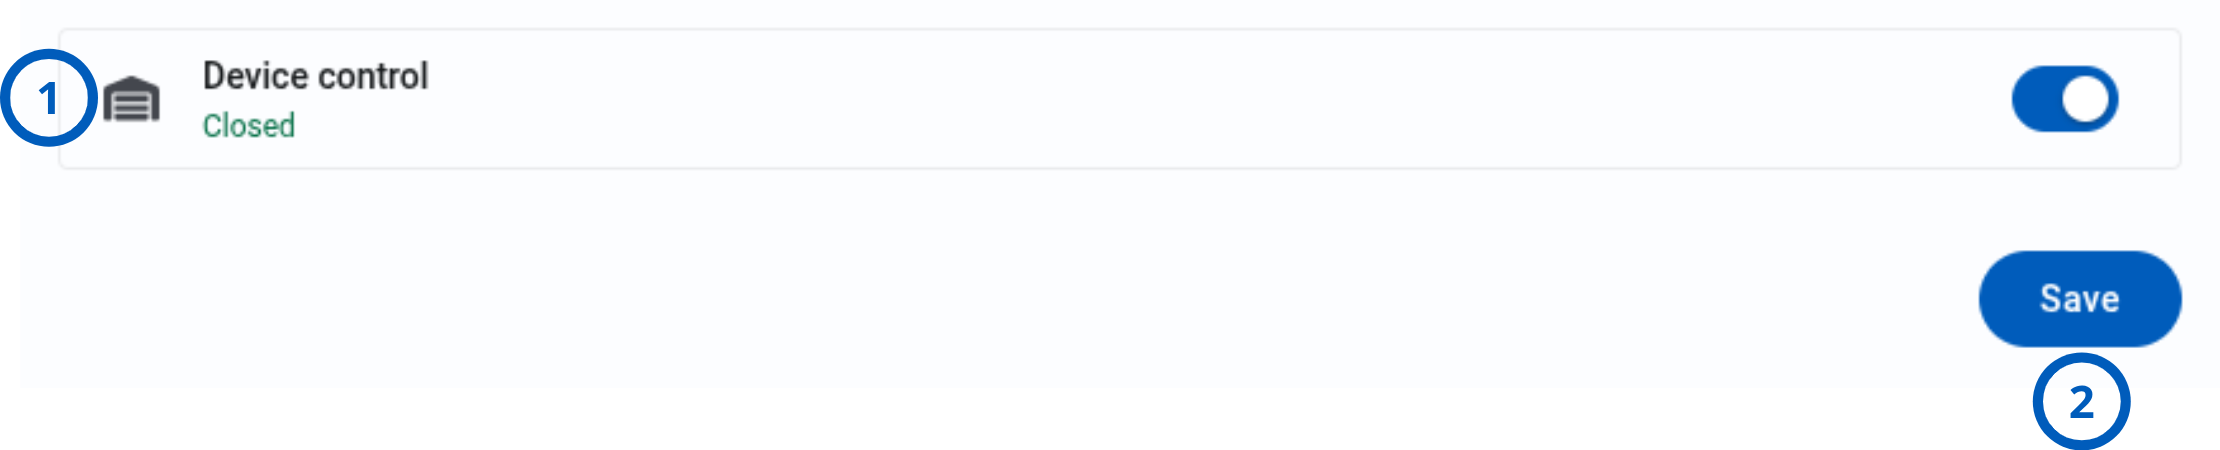
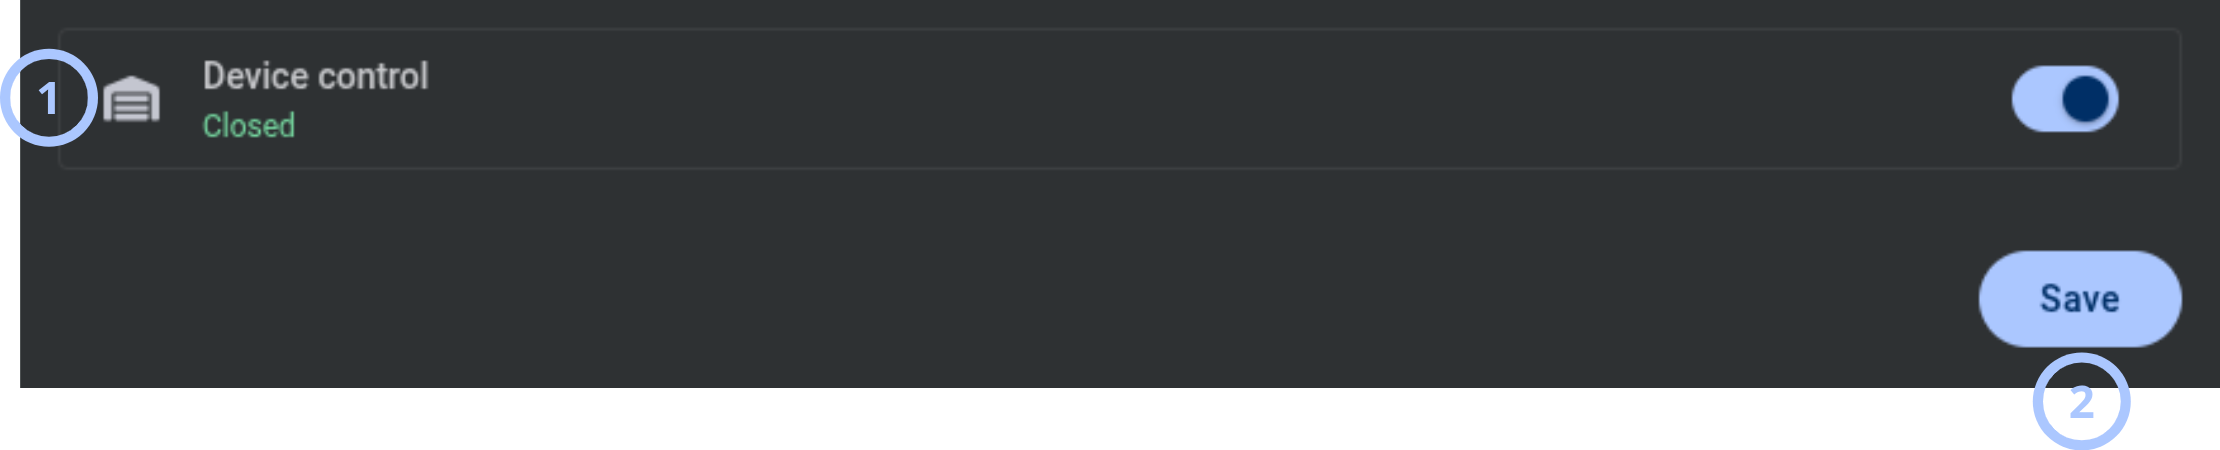
Garage door
| Callout | UI element | Description | When to use |
|---|---|---|---|
| 1 | Device control | Shows the current state and a toggle for changing it. | Use to change the garage-door state. |
| 2 | Save button | Applies the selected state. | Use after changing the control. |
Water valve
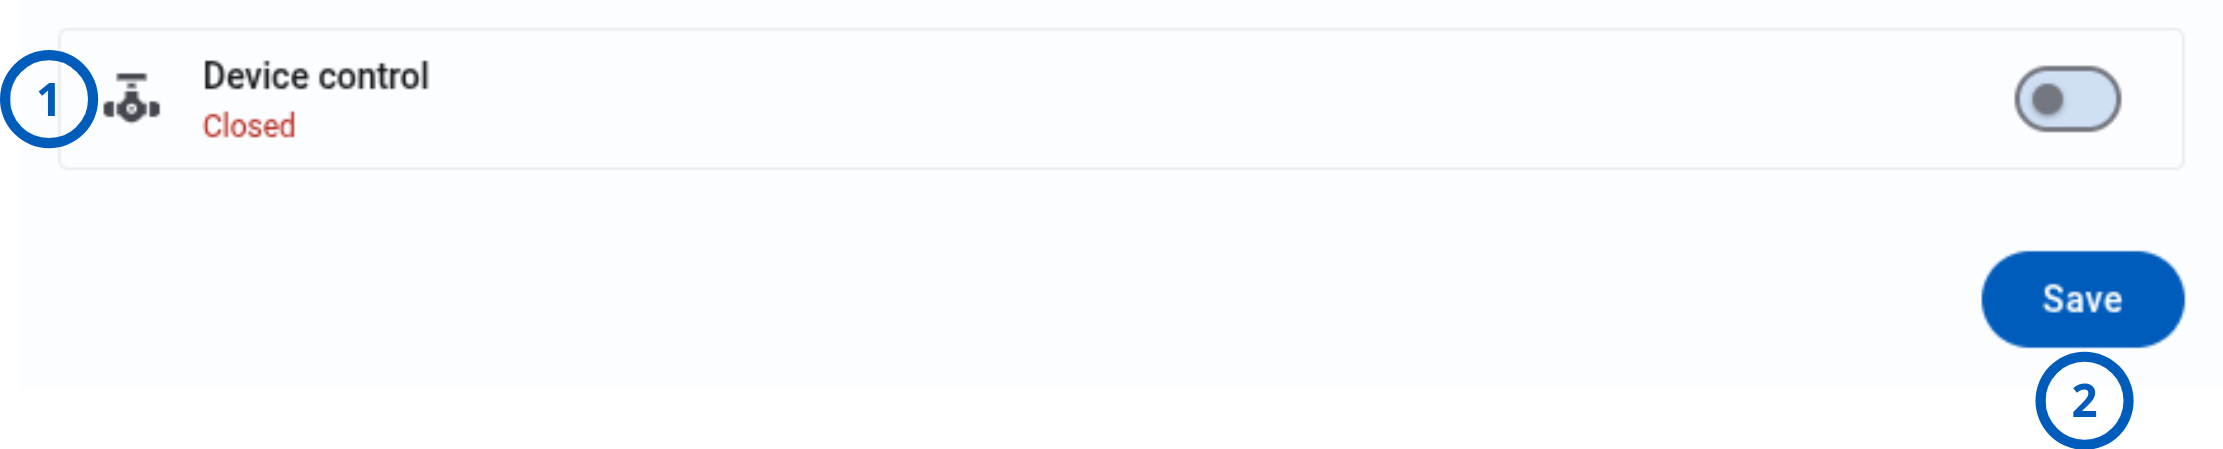
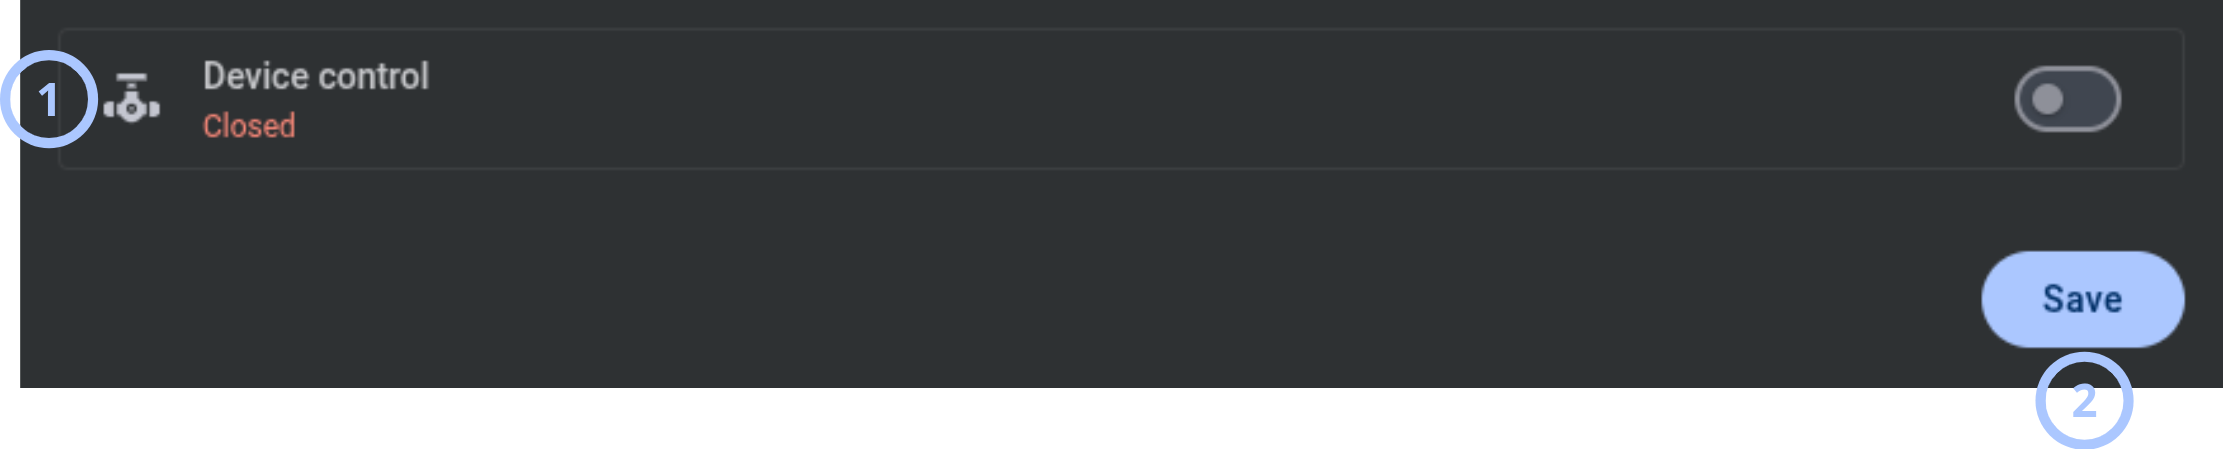
| Callout | UI element | Description | When to use |
|---|---|---|---|
| 1 | Device control | Shows the current state and a toggle for changing it. | Use to open or close the valve. |
| 2 | Save button | Applies the selected state. | Use after changing the control. |
Dimmer
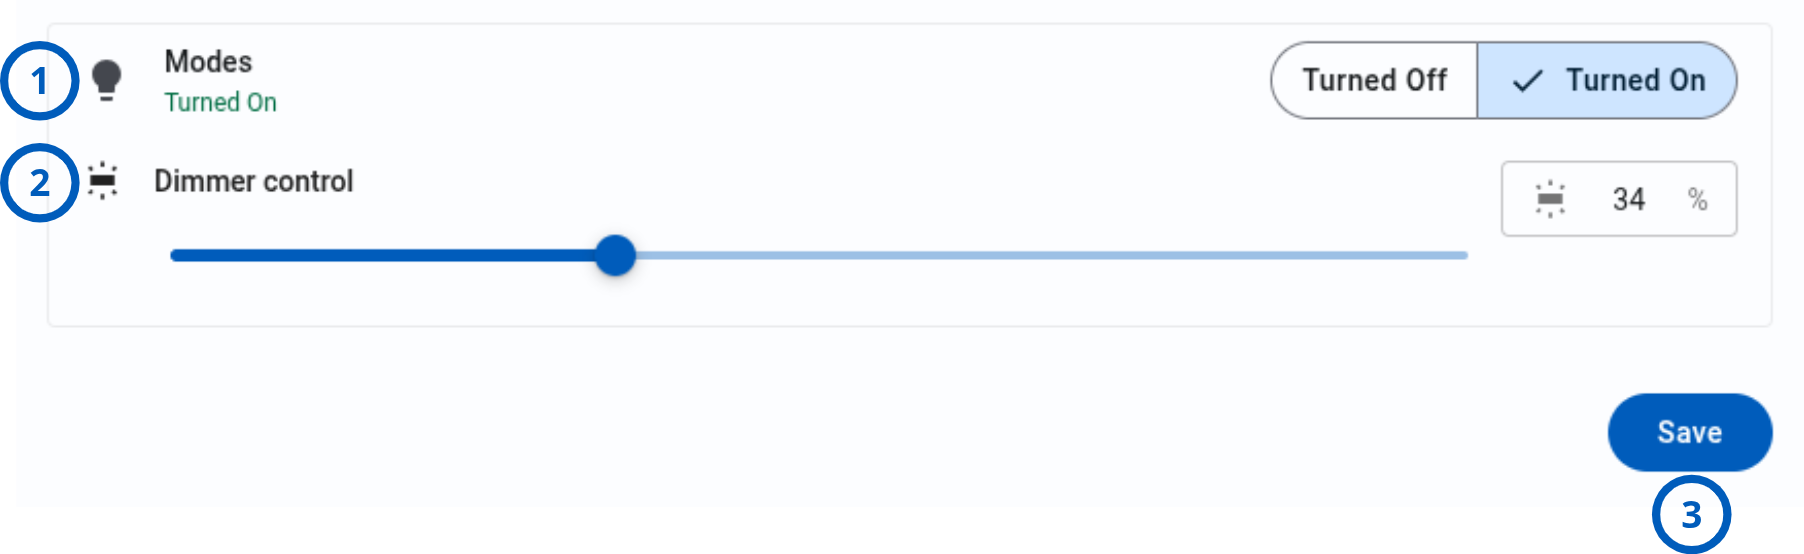
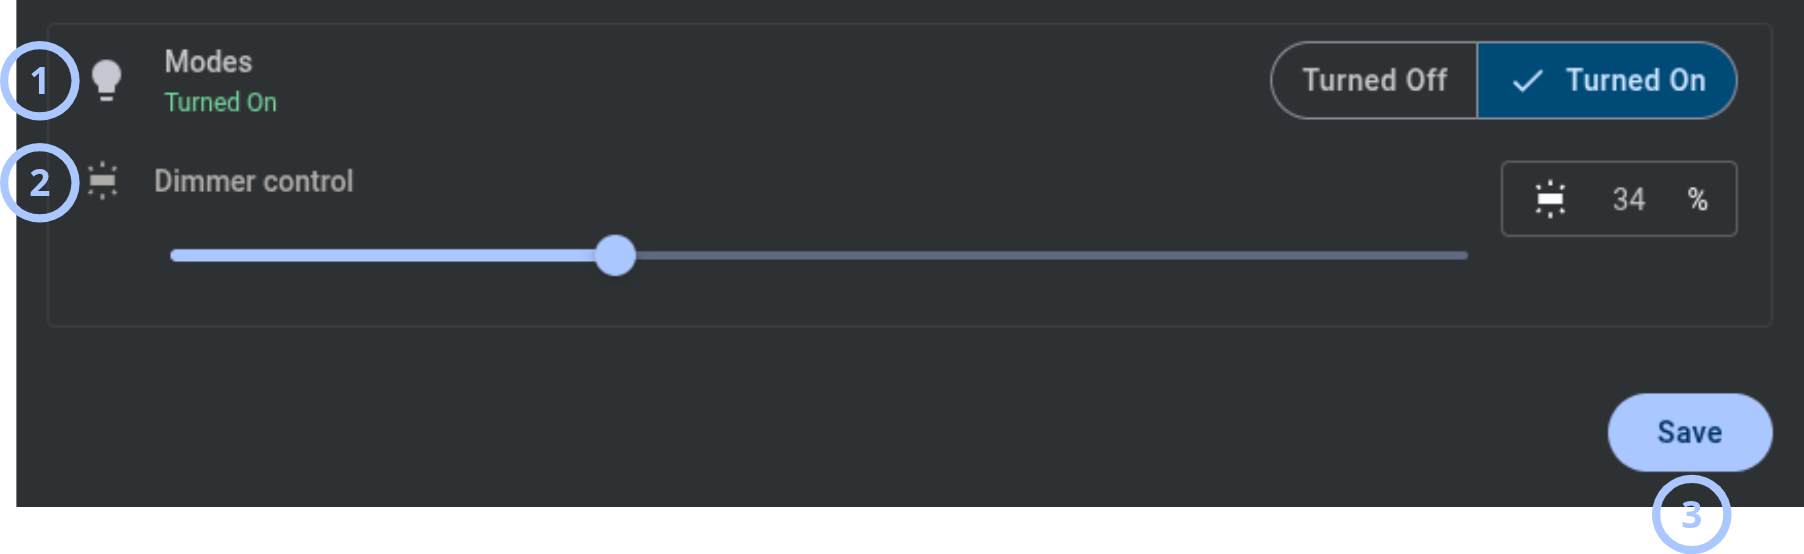
| Callout | UI element | Description | When to use |
|---|---|---|---|
| 1 | Modes | Provides buttons for turning the dimmer on or off. | Use to change the power state. |
| 2 | Dimmer control slider | Changes the dimmer level. | Use to set the required brightness. |
| 3 | Save button | Applies the selected settings. | Use after changing dimmer controls. |
PGM
| Callout | UI element | Description | When to use |
|---|---|---|---|
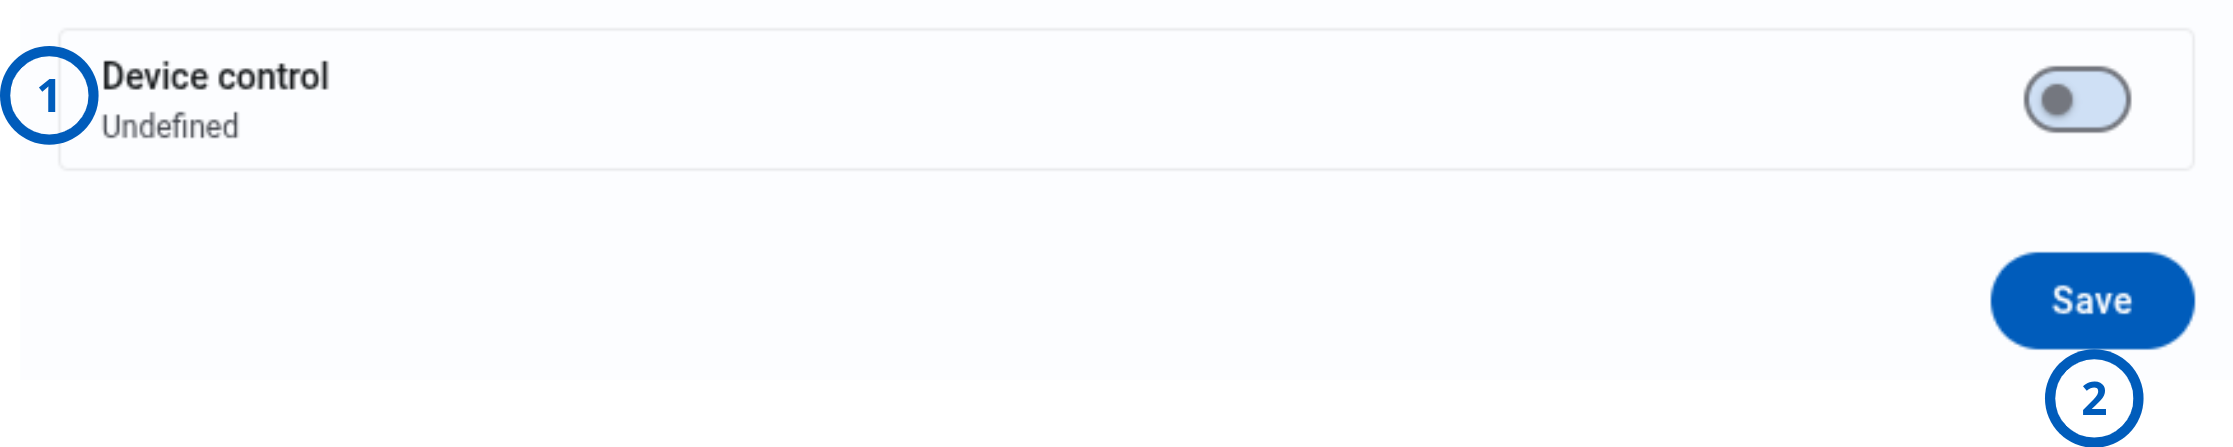
| 1 | Device control | Shows the current status when the panel reports it and provides a toggle for changing state. warning PGM is a stateless device, so its actual state is unknown. You can send a request to turn the PGM output ON or OFF, but PowerManage cannot confirm the actual state. | Use to control the PGM output. |
| 2 | Save button | Applies the selected state. | Use after changing the control. |
Parent tab
| Callout | UI element | Description | When to use |
|---|---|---|---|
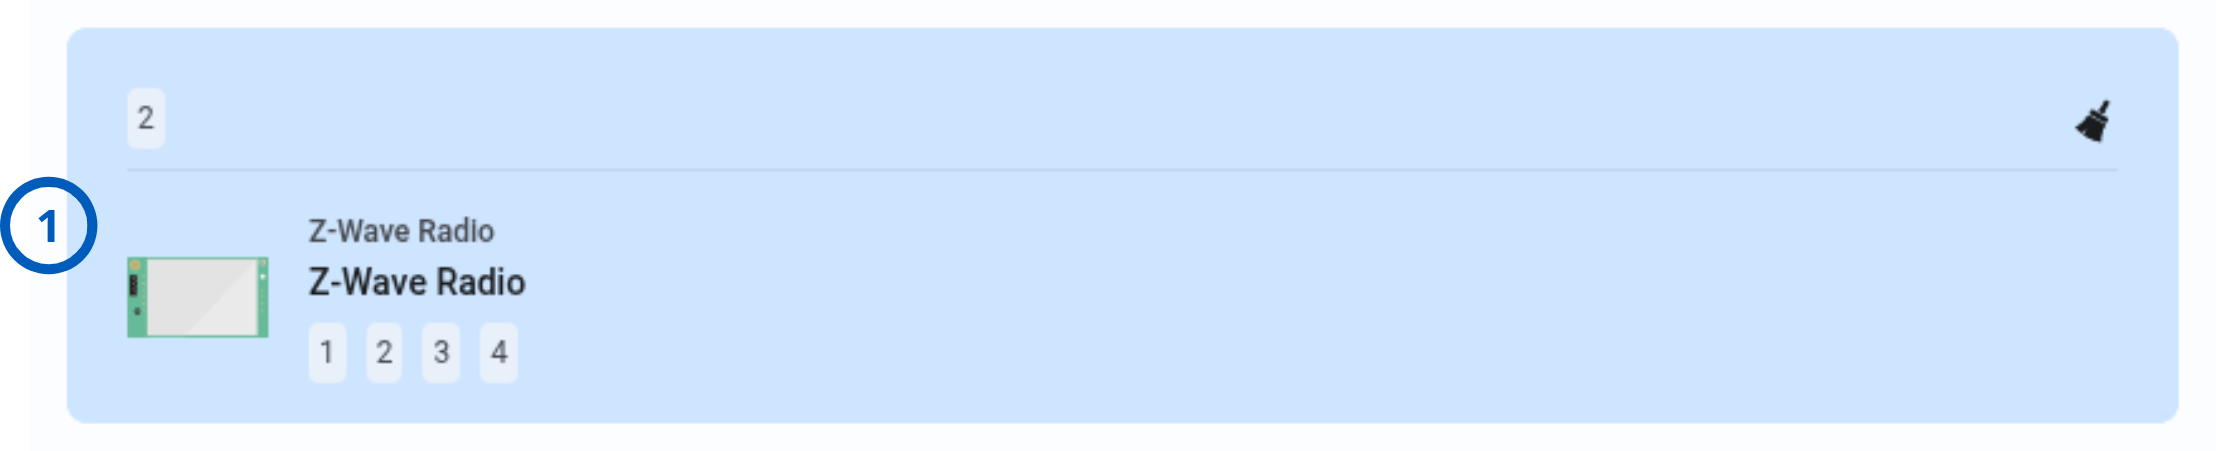
| 1 | Parent device card | Shows the parent device icon, partition, name, and related information. This tab appears only when the selected device has a parent. | Use to review the parent device. |
Configuration tab
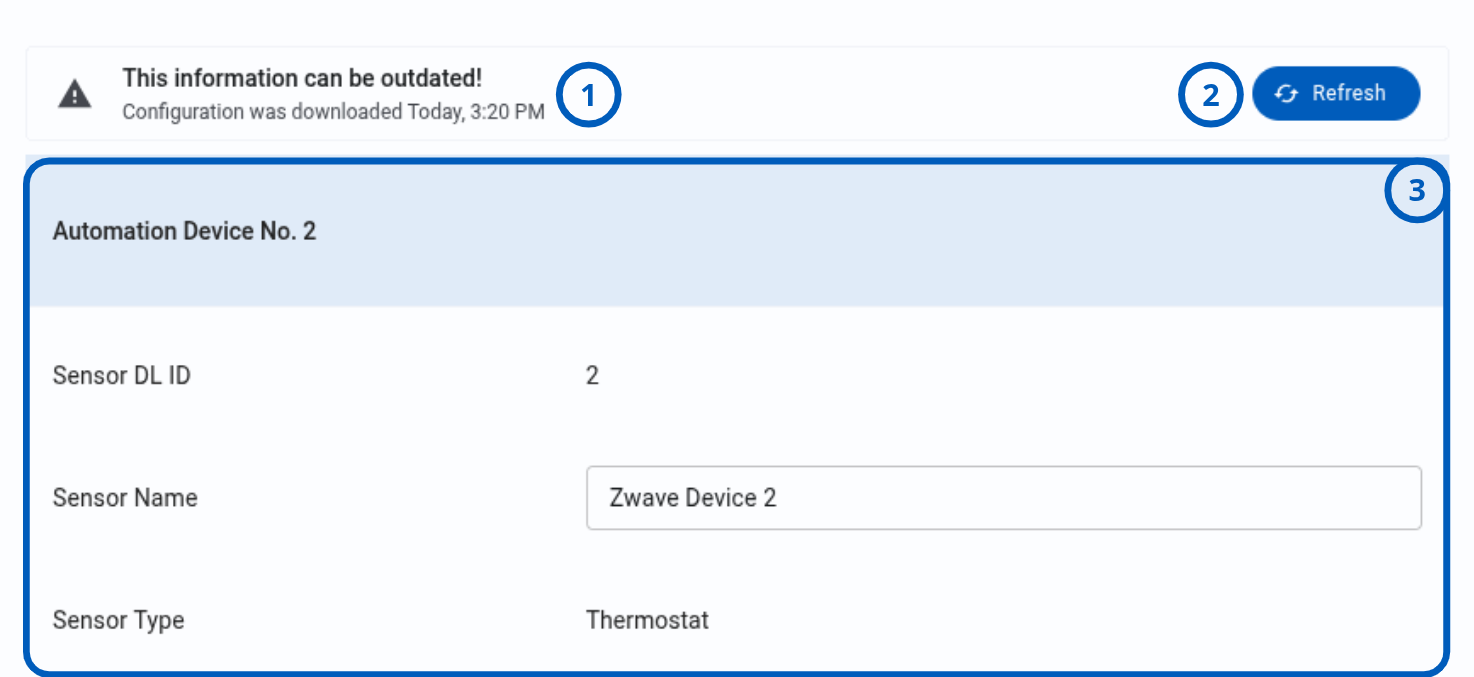
| Callout | UI element | Description | When to use |
|---|---|---|---|
| 1 | Warning message | Indicates that the displayed information can be outdated and shows the configuration download timestamp. | Use to check the age of the displayed configuration. |
| 2 | Refresh button | Downloads the latest configuration from the panel. | Use before reviewing settings that might have changed. |
| 3 | Configuration items | Show configuration values related to the selected device. | Use to review device configuration. |
How to use this page
Open the Devices tab
Goal:
- Review and manage devices for a selected panel.
Steps:
- Open the Equipment page.
- Select the required panel.
- In Equipment hub, select the Devices tab.
Expected result:
- The Devices tab opens.
- PowerManage displays the panel, installed modules, and enrolled devices available for the selected panel.
Filter the device list
Goal:
- Show only devices that meet specific conditions.
Steps:
- Open the Devices tab.
- Select one or more quick filters.
- Review the filtered device list.
Expected result:
- Only devices that match all selected filters are displayed.
- The device count updates to show the number of matching devices.
Add a security device manually
Goal:
- Enroll a security device by entering its enrollment information.
Steps:
- Select Add Device.
- Select the Security tab.
- Select Manual as the enrollment mode.
- Select the device protocol.
- Enter the enrollment ID.
- Select the device partition.
- Select Add.
Expected result:
- PowerManage sends the enrollment information to the panel.
- The device appears in the Devices tab after enrollment and synchronization complete.
For a PowerG device, enter the enrollment ID in the XXX-XXXX format. Available protocols and partitions depend on the panel configuration.
Add security devices with Autolearn
Goal:
- Detect and enroll supported security devices without entering each enrollment ID manually.
Steps:
- Select Add Device.
- Select the Security tab.
- Select Autolearn as the enrollment mode.
- Select Start.
- Trigger or prepare the device according to its installation instructions.
- When PowerManage detects the device, verify its model and enrollment ID.
- Complete one of the following actions:
- Select Add device to enroll the device without a PIN.
- Select Add with PIN, enter the device PIN, and select Apply.
- Select Cancel to skip the detected device and continue Autolearn.
- Repeat the process for other devices.
- Select Stop when device detection is complete.
Expected result:
- Added devices appear in the Autolearn status list.
- Autolearn continues after you add or skip an individual device.
- The detected-device grid shows the enrollment status of each device.
Add a PowerG automation device with Autolearn
Goal:
- Detect and enroll a supported PowerG automation device.
Steps:
- Select Add Device.
- Select the Automation tab.
- Select Autolearn.
- Select the PowerG protocol.
- Select Start.
- Prepare or trigger the PowerG device for enrollment.
- Verify the detected device model and enrollment ID.
- Complete one of the following actions:
- Select Add device.
- Select Add with PIN, enter the PIN, and select Apply.
- Select Cancel to skip the device.
- Select Stop when all required devices are enrolled.
Expected result:
- The PowerG device is added to the panel.
- The Autolearn status grid shows its ID, number, name, state, and status.
Add a Z-Wave automation device with Autolearn
Goal:
- Detect and securely enroll a supported Z-Wave device.
Steps:
- Select Add Device.
- Select the Automation tab.
- Select Autolearn.
- Select the Z-Wave protocol.
- Select Start.
- Put the Z-Wave device into enrollment mode.
- When PowerManage detects the device, enable Access control if secure enrollment is required.
- Select Continue.
- Enter the Device Specific Key in the DSK field.
- Select Confirm.
- Select Stop when all required devices are enrolled.
Expected result:
- The Z-Wave device is added to the panel.
- The Autolearn status grid shows its ID, type, name, state, and status.
Add an RTSP camera
Goal:
- Add an RTSP camera to the selected panel.
Steps:
- Select Add Device.
- Select the RTSP tab.
- In Camera info, enter the RTSP stream link.
- Enable Use panel public IP for access if the camera must be accessed through the panel public IP address.
- In General info, enter the device number and label.
- In Zone association, select the zones to associate with the camera.
- Review the entered information.
- Select Save.
Expected result:
- The RTSP camera is added to the panel.
- The camera appears in the Devices tab.
- Associated zones are linked to the camera.
Use the stream-link format required by the camera. A typical RTSP link can include the camera user name, password, IP address, port, and stream path.
Associating a camera with a zone can make the camera available from event-related video actions for that zone.
Add an OnVIF camera
Goal:
- Add an OnVIF camera with local and remote connection information.
Steps:
- Select Add Device.
- Select the OnVIF tab.
- In User info, enter the camera user name and password.
- In Camera info, enter the local and remote OnVIF URLs.
- In Port, enter:
- Remote RTSP port
- Local RTSP port
- Remote OnVIF port
- Local OnVIF port
- In General info, enter the device number and label.
- Select the required partitions.
- In Zone association, select the zones to associate with the camera.
- Review the entered information.
- Select Save.
Expected result:
- The OnVIF camera is added to the panel.
- The camera appears in the Devices tab.
- The camera is associated with the selected partitions and zones.
Local URLs and ports apply to access from the local network. Remote URLs and ports apply to access through the external network or configured port forwarding.
Confirm camera credentials, URLs, ports, and network routing before saving.
Refresh device RSSI
Goal:
- Retrieve the current signal strength of supported wireless devices.
Steps:
- Open the Devices tab.
- Select Refresh RSSI.
- Wait for the process to finish.
- Open a supported wireless device.
- On the General tab, review:
- Current RSSI
- Average RSSI
- Last update timestamp
Expected result:
- PowerManage updates the RSSI information for supported PowerG and PowerG+ devices.
- Device cards display the latest available signal information.
You cannot start another Refresh RSSI process while one is running. Wired zones and reed-switch sub-zones do not support device RSSI refresh.
Refresh GSM signal strength
Goal:
- Retrieve the cellular signal strength for the panel communicator.
Steps:
- Open the Devices tab.
- Select Refresh GSM.
- Wait for the process to finish.
- Open the panel device information.
- Select the GSM RSSI tab.
- Review the GSM signal chart.
Expected result:
- PowerManage updates the cellular signal information for each supported communicator module.
- The GSM RSSI chart shows signal level by date.
Review GSM signal history
Goal:
- Review cellular signal levels over a selected period.
Steps:
- Open the panel device information.
- Select the GSM RSSI tab.
- Select the expand button.
- In the GSM RSSI modal window, select one of the quick filters:
- Last day
- Last week
- Last month
- All
- Alternatively, use the date fields to select a custom range.
Expected result:
- The expanded chart shows GSM signal levels for the selected date range.
Refresh Wi-Fi signal strength
Goal:
- Retrieve the current Wi-Fi signal strength for a supported panel communicator.
Steps:
- Open the Devices tab.
- Select Refresh WiFi.
- Wait for the process to finish.
- Open the panel device information.
- Select the Wi-Fi RSSI tab.
- Review the Wi-Fi signal chart.
Expected result:
- PowerManage updates the Wi-Fi signal information.
- The chart shows Wi-Fi signal level by date.
Refresh WiFi is available only for supported Neo 5 panels with a Wi-Fi-capable communicator. Device RSSI, GSM RSSI, and Wi-Fi RSSI are separate processes.
Start Walktest
Goal:
- Verify that supported security devices report activity to the panel.
Steps:
- Confirm that the panel is disarmed, not in an alarm state, and connected to the server.
- Open the Devices tab.
- Select Walktest.
- Physically trigger each included device. For example:
- Open a door or window contact.
- Walk past a motion detector.
- Trigger a supported glass-break detector according to its test procedure.
- Review the device result icons:
- Green indicates that the device passed.
- Blue indicates that the device is waiting to be triggered.
- Continue until all required devices pass or select Stop to finish the test early.
Expected result:
- The Devices tab switches to Walktest mode.
- The progress indicator shows how many included devices have passed.
- PowerManage preserves results collected before the test finishes or is stopped.
During Walktest, PowerManage queues Discovery, Refresh State, Device Autolearn, Bypass, Set State, and Remove Device actions until Walktest finishes.
Review completed Walktest results
Goal:
- Identify devices that passed or failed a completed Walktest.
Steps:
- Wait for Walktest to finish or select Stop.
- Review the final status and completion timestamp.
- Review each device result:
- Green indicates that the device passed.
- Red indicates that the device failed.
- Select Close to return to the standard Devices view.
- Open the Processes page or Action Log if you need to review recorded Walktest activity.
Expected result:
- The final result shows Passed when all included devices were triggered.
- The final result shows Failed when one or more included devices were not triggered.
- Walktest results remain available after you close Walktest mode.
Bypass a security device
Goal:
- Temporarily exclude a supported security device so that it does not prevent arming.
Steps:
- Select the security device.
- Open the General tab.
- Enable the Bypass toggle.
- Wait for the panel operation to finish.
- Review the updated device state.
Expected result:
- The device is bypassed on the panel.
- The updated bypass state appears in the device information.
Bypassing a security device changes how the panel handles that device during arming and alarm monitoring. Confirm the operational requirement before enabling bypass.
Mark a security device as rarely triggered
Goal:
- Identify a device that is expected to report activity infrequently.
Steps:
- Select the security device.
- Open the General tab.
- Enable Rarely triggered.
Expected result:
- The device is marked as rarely triggered.
- PowerManage can account for the device's expected low activity when evaluating supervision information.
Rename a device
Goal:
- Change the displayed device label.
Steps:
- Select the device.
- In the device information and actions pane, select Rename device.
- Enter the new label.
- Save the change.
Expected result:
- The updated label appears on the device card and in device details after synchronization completes.
Remove a device
Goal:
- Remove a device from the panel.
Steps:
- Select the device.
- In the device information and actions pane, select Remove device.
- Review the confirmation message.
- Confirm the removal.
Expected result:
- PowerManage starts the device-removal process.
- The device no longer appears after removal and synchronization complete.
Removing a parent device can affect its child devices. Review parent and child relationships before removing a device.
Review a device's parent
Goal:
- Identify the parent module or device associated with a child device.
Steps:
- Select a device that has a parent.
- Select the Parent tab.
- Review the parent device card.
Expected result:
- The tab displays the parent device icon, name, partition, and available identifying information.
Review child devices
Goal:
- Identify devices connected to a parent device or module.
Steps:
- Select a device that has child devices.
- Select the Children tab.
- Review the child device cards.
Expected result:
- The tab shows the devices associated with the selected parent.
Download the latest device configuration
Goal:
- Retrieve current configuration information for a panel, module, or supported device.
Steps:
- Select the panel, module, or device.
- Open the Configuration tab.
- Review the displayed configuration timestamp.
- Select Refresh.
- Wait for the configuration download to finish.
- Review the updated configuration items.
Expected result:
- PowerManage downloads the latest available configuration.
- The configuration timestamp and displayed values are updated.
Request a new video
Goal:
- Request video from a supported camera-type security zone.
Steps:
- Select a security device that has the video icon.
- Open the Video on demand tab.
- Open the More actions menu.
- Select Request new video.
- Wait for the video request to complete.
- Review the video in Latest VOD.
Expected result:
- PowerManage requests a new video from the panel.
- The video appears in the VOD history after it is received.
Video requests depend on the panel type and the configured viewing window. A request can be available during the allowed period after an alarm or at any time when the panel configuration permits it.
Play a video-on-demand recording
Goal:
- Review a video retained for a supported security device.
Steps:
- Select a security device that has the video icon.
- Open the Video on demand tab.
- Select a video from Latest VOD or All videos.
- Use the video player to review the recording.
- Review the frame count, video length, and timestamp.
Expected result:
- The selected video opens in the player.
- Video metadata appears with the recording.
Download a video-on-demand recording
Goal:
- Save a retained video to the local machine.
Steps:
- Select a security device that has the video icon.
- Open the Video on demand tab.
- Select the required video.
- Open the More actions menu.
- Select Download video.
Expected result:
- PowerManage downloads the selected video to the local machine.
Group settings control the number of retained videos per zone. When the history limit is reached, the oldest video is replaced.
Review temperature data
Goal:
- Review temperature readings from a supported smart sensor.
Steps:
- Select a security device that has the Meteo icon.
- Open the Meteo tab.
- Review the temperature chart.
- Select the expand button.
- Select a quick filter:
- Last day
- Last week
- Last month
- All
- Alternatively, select a custom date range.
Expected result:
- The chart shows temperature by date for the selected period.
- Temperature is displayed in Celsius or Fahrenheit according to your display settings.
Review brightness data
Goal:
- Review brightness readings from a supported smart sensor.
Steps:
- Select a security device that supports brightness reporting.
- Open the Meteo tab.
- Review the brightness chart.
- Select the expand button.
- Select a quick filter or custom date range.
Expected result:
- The chart shows brightness by date for the selected period.
The Meteo tab requires Temperature/light statistic to be enabled in Group settings. Run discovery after changing this setting. Brightness reporting is available for supported Visonic and IQ panels, but not DSC panels.
Control a thermostat
Goal:
- Change the operating mode, temperature setpoints, or fan mode of a supported thermostat.
Steps:
- Select the thermostat.
- Open the Control tab.
- Select the temperature mode.
- Set the heating and cooling temperatures.
- Select the fan mode.
- Select Save.
Expected result:
- PowerManage sends the selected thermostat settings to the panel.
- The device state updates after the panel applies the command.
Control a door lock
Goal:
- Lock or unlock a supported door lock.
Steps:
- Select the door lock.
- Open the Control tab.
- Change the device-control toggle to the required state.
- Select Save.
Expected result:
- PowerManage sends the lock or unlock command.
- The displayed state updates after the panel reports the result.
Control a light, garage door, or water valve
Goal:
- Change the state of a supported automation device.
Steps:
- Select the automation device.
- Open the Control tab.
- Change the device-control toggle to the required state.
- Select Save.
Expected result:
- PowerManage sends the requested command to the panel.
- The device state updates when the panel reports the result.
Control a dimmer
Goal:
- Turn a dimmer on or off and change its level.
Steps:
- Select the dimmer.
- Open the Control tab.
- Select the required on or off mode.
- Move the dimmer-control slider to the required level.
- Select Save.
Expected result:
- PowerManage sends the selected state and level to the panel.
- The displayed dimmer state updates after the command completes.
Control a PGM output
Goal:
- Change the state of a supported PGM output.
Steps:
- Select the PGM device.
- Open the Control tab.
- Change the device-control toggle.
- Select Save.
Expected result:
- PowerManage sends the requested output command.
- The displayed status updates when the panel supports PGM status reporting.
The Control tab appears only for supported automation devices. Control availability depends on the Automation Activation Settings configured under Settings > Resolve.
Download a panel diagnostic log
Goal:
- Send panel log information to IQMS servers for diagnostics.
Steps:
- Select the panel device card.
- In Device info and actions, select Download log.
- Wait for the log operation to complete.
Expected result:
- The panel log is downloaded to IQMS servers for diagnostic review.
Manage Power Link diagnostic access
Goal:
- Enable logging or SSH access for Power Link diagnostics.
Steps:
- Select the Power Link module.
- In Device info and actions, complete one of the following:
- Open Log options and select Enable remote log service.
- Open Log options and select Send log dump.
- Open Connection options and select Enable SSH connection.
- Disable the remote log service or SSH connection when diagnostic work is complete.
Expected result:
- The selected diagnostic service or action is applied to the Power Link module.
Enable remote logging or SSH access only when required for diagnostics. Disable diagnostic access after the investigation is complete.
Reboot a Power Link module
Goal:
- Restart a Power Link module while diagnosing a communication issue with a Visonic panel.
Steps:
- In the device list, select the Power Link module.
- In Device info and actions, select Send reboot command.
- Confirm the action.
- Wait for the Power Link module to restart and reconnect.
- Review the panel connection status and active troubles.
Expected result:
- PowerManage sends a reboot command to the Power Link module.
- Communication through the module is temporarily interrupted.
- The Power Link module attempts to reconnect after the restart.
Rebooting the Power Link module can help when diagnosing a communication issue with a Visonic panel. After the restart, confirm that the module reconnects and that the panel connection status returns to its expected state.
Restarting the Power Link module temporarily interrupts communication through the module. Review active operations before sending the reboot command.
Tips
- Run discovery before reviewing devices if the panel hardware, modules, or enrolled devices recently changed.
- Use Refresh RSSI before reviewing the current and average signal strength of PowerG and PowerG+ devices.
- Use Refresh GSM and Refresh WiFi separately. Each action updates a different signal-strength result.
- During Autolearn, verify the detected device model and enrollment ID before adding the device.
- Before adding an RTSP or OnVIF camera, verify the camera credentials, URLs, stream link, ports, network routing, and zone associations.
- Associate cameras with the relevant zones so employees can identify video related to alarm activity.
- Review parent and child relationships before removing a module or device.
- Use bypass only when a security device must be temporarily excluded. Review the device state before arming the panel.
- Enable Rarely triggered only for devices that are expected to report activity infrequently.
- Confirm that Temperature/light statistic is enabled in Group settings before troubleshooting missing Meteo information.
- Run discovery after changing the Temperature/light statistic setting.
- Review Automation Activation Settings if an automation device is visible but its controls are unavailable.
- Disable remote log service and SSH access after Power Link diagnostic work is complete.
Troubleshooting
Add Device button is not available
Possible causes
- Your role does not include the required device-management permission.
- The selected panel type does not support enrollment from PowerManage.
- The panel is a Fibro transmitter or another unsupported panel type.
- The panel has not completed discovery.
What to do
- Confirm that your role includes permission to add devices.
- Confirm that the selected panel supports device enrollment.
- Check whether discovery completed successfully.
- Review active panel processes.
- Refresh the Devices tab and try again.
A protocol is not available during enrollment
Possible causes
- The panel does not support the protocol.
- The required daughter card or communication module is not installed.
- Discovery has not detected the installed module.
- The selected enrollment category does not support the protocol.
What to do
- Confirm that the panel model supports the protocol.
- Confirm that the required module or daughter card is installed.
- Run discovery.
- Open the correct Security or Automation tab.
- Review the protocol dropdown again.
A device cannot be added manually
Possible causes
- The enrollment ID is invalid.
- The selected protocol does not match the device.
- A required partition is not selected.
- The device is already enrolled.
- The panel is offline.
- The entered device information does not meet panel requirements.
What to do
- Confirm the device protocol.
- For a PowerG device, enter the enrollment ID in the XXX-XXXX format.
- Select an available partition.
- Confirm that the device is not already enrolled.
- Confirm that the panel is connected.
- Enter the required information again and select Add.
Autolearn does not detect a device
Possible causes
- The device is not in enrollment mode.
- The selected protocol does not match the device.
- The device is outside the supported communication range.
What to do
- Confirm that Autolearn is still running.
- Confirm the selected protocol.
- Put the device into enrollment mode according to its installation instructions.
- Move the device closer to the panel if appropriate.
- Restart Autolearn.
Add with PIN is not displayed
Possible causes
- The detected device does not support PIN enrollment.
- The panel or protocol does not require a PIN for the device.
What to do
- Verify whether the device supports PIN enrollment.
- Confirm that the correct device was detected.
- Select Add device if PIN enrollment is not required.
- Restart enrollment if the detected device information is incorrect.
A Z-Wave device cannot complete secure enrollment
Possible causes
- The DSK is incorrect.
- Access control was not enabled when secure enrollment was required.
- The device left enrollment mode.
- The panel cannot communicate with the device.
What to do
- Confirm that Access control is enabled when required.
- Enter the DSK again.
- Put the Z-Wave device back into enrollment mode.
- Move the device closer to the panel if appropriate.
- Confirm that the Z-Wave module is installed and detected.
- Restart Autolearn and try again.
An RTSP camera cannot be added
Possible causes
- The stream link is invalid.
- The camera credentials in the stream link are incorrect.
- The camera IP address or port is unavailable.
- The camera cannot be reached from the panel network.
- Use panel public IP for access is configured incorrectly.
- A required device number or label is missing.
What to do
- Verify the RTSP stream link.
- Confirm the camera user name and password.
- Confirm the camera IP address, stream path, and RTSP port.
- Confirm that the camera is reachable from the required network.
- Review the Use panel public IP for access setting.
- Enter the required general information.
- Select Save again.
An OnVIF camera cannot be added
Possible causes
- The camera credentials are incorrect.
- A local or remote URL is invalid.
- The RTSP or OnVIF ports are incorrect.
- Port forwarding is not configured for remote access.
- The selected device number is not available.
- Required fields are empty.
What to do
- Verify the camera user name and password.
- Confirm the local OnVIF URL.
- Confirm the remote OnVIF URL when remote access is required.
- Verify the local and remote RTSP ports.
- Verify the local and remote OnVIF ports.
- Confirm router and port-forwarding settings.
- Enter the required device information and select Save.
Refresh RSSI is not available
Possible causes
- The panel has no supported PowerG or PowerG+ devices.
- Only wired zones or unsupported sub-zones are enrolled.
- Your role does not include the required permission.
What to do
- Confirm that supported wireless devices are enrolled.
- Review active processes.
- Wait for the current Refresh RSSI process to finish.
- Confirm your role permissions.
- Refresh the Devices tab.
RSSI values are not shown
Possible causes
- Refresh RSSI has not been run.
- The latest refresh failed or timed out.
- The device does not support RSSI reporting.
What to do
- Select Refresh RSSI.
- Wait for the process to finish.
- Review the process result.
- Open the device's General tab.
- Check the current and average RSSI values and last update timestamp.
- Confirm that the device supports RSSI reporting.
Refresh GSM is not available
Possible causes
- The panel has no cellular bearer.
- The cellular communicator is not installed or detected.
- Your role does not include the required permission.
- The selected panel does not support GSM RSSI refresh.
What to do
- Confirm that a cellular communicator is installed.
- Run discovery.
- Confirm that the panel reports a cellular channel.
- Confirm your role permissions.
- Open the Devices tab again.
Refresh WiFi is not available
Possible causes
- The selected panel is not a Neo 5 panel.
- The communicator does not support Wi-Fi.
- Your role does not include the required permission.
What to do
- Confirm the panel model.
- Confirm that the communicator supports Wi-Fi.
- Run discovery.
- Confirm your role permissions.
- Review the Devices tab again.
Walktest cannot be started
Possible causes
- The panel is armed.
- The panel is in an alarm state.
- The panel is disconnected.
- Your role does not include required permission.
- The selected panel type does not support Walktest.
What to do
- Disarm the panel.
- Clear the active alarm condition.
- Confirm that the panel is connected.
- Confirm the required permission.
- Confirm that the panel supports Walktest.
- Review active panel processes.
- Select Walktest again.
A device is not included in Walktest
Possible causes
- The device does not support Walktest.
- The device is an automation device, module, keypad, keyfob, pendant, repeater, PGM, temperature sensor, or unsupported accessory.
- The device was not discovered correctly.
What to do
- Confirm the device type.
- Confirm that the device supports physical triggering during Walktest.
- Review the device enrollment information.
- Run discovery if the device was recently added.
- Restart Walktest.
A device remains in progress during Walktest
Possible causes
- The device was not physically triggered.
- The panel did not receive the device transmission.
- The device is out of range.
What to do
- Trigger the device again.
- Confirm the correct test action for the device type.
- Review device troubles and battery status.
- Move the device closer to the panel for testing if appropriate.
- Stop and restart Walktest if the device still does not report.
Walktest finished with a Failed result
Possible causes
- One or more included devices were not triggered.
- The panel did not receive one or more device transmissions.
- A device has a battery, range, enrollment, or communication problem.
- Walktest was stopped before all devices passed.
What to do
- Review devices with a red result icon.
- Check each failed device for active troubles.
- Confirm the device battery and enrollment information.
- Refresh RSSI for supported wireless devices.
- Correct the identified problems.
- Start another Walktest.
A device cannot be bypassed
Possible causes
- The device does not support bypass.
- Your role does not include the required permission.
- The panel is offline.
What to do
- Confirm that the device supports bypass.
- Confirm your role permissions.
- Confirm that the panel is connected.
- Wait for active processes to finish.
- Refresh the device information.
- Enable the Bypass toggle again.
Video on demand tab is not displayed
Possible causes
- The selected device is not a camera-type security zone.
- The panel or device does not support VOD.
- Video functionality is not available in the current panel configuration.
- Your role does not allow access.
What to do
- Confirm that the selected device has video capability.
- Confirm that the camera is enrolled and connected.
- Review the panel and device configuration.
- Confirm your role permissions.
- Refresh the Devices tab.
Request new video is not available
Possible causes
- The panel configuration does not allow video requests at any time.
- The selected device does not support VOD.
- The panel is offline.
- Another video request is active.
What to do
- Confirm that the device supports VOD.
- Check whether the request is within the allowed post-alarm viewing period.
- Confirm that the panel is connected.
- Wait for an active video request to finish.
- Open More actions and try again.
A requested video does not appear
Possible causes
- The video request is still processing.
- The panel or camera is offline.
- The request timed out.
- The camera did not produce a recording.
What to do
- Review the related process status.
- Confirm panel and camera connectivity.
- Refresh the Video on demand tab.
- Review All videos.
- Request another video when the panel is available.
An older video is missing
Possible causes
- The VOD history limit was reached.
- PowerManage replaced the oldest video with a newer recording.
- Group settings allow fewer retained videos than expected.
What to do
- Review the VOD history size in Group settings.
- Download recordings that must be retained before the history limit is reached.
- Increase the history size if operational requirements allow it.
Meteo tab is not displayed
Possible causes
- The device does not support temperature or brightness reporting.
- Temperature/light statistic is disabled in Group settings.
- Discovery was not run after changing the setting.
- The panel has not received a Meteo data report.
- Your role does not allow access.
What to do
- Confirm that the selected sensor supports Meteo reporting.
- Enable Temperature/light statistic in Group settings.
- Run discovery.
- Wait for a new data report.
- Refresh the Devices tab.
- Confirm your role permissions.
Brightness chart is not shown
Possible causes
- The sensor does not support brightness reporting.
- The selected panel is a DSC panel.
- No brightness data has been received.
- Temperature/light statistic is disabled.
What to do
- Confirm that the sensor supports brightness reporting.
- Confirm that the panel is a supported Visonic or IQ model.
- Enable Temperature/light statistic.
- Run discovery.
- Wait for the next Meteo data update.
Temperature is shown in the wrong unit
Possible causes
- Your display settings use a different temperature scale.
What to do
- Open your profile settings.
- Change the temperature scale to Celsius or Fahrenheit.
- Return to the Devices tab.
- Review the temperature chart again.
Control tab is not displayed
Possible causes
- The selected device does not support remote control.
- The selected device is a security-only device.
- Automation devices are hidden by server settings.
- Your role does not include the required permission.
- The panel has not completed discovery.
What to do
- Confirm that the selected device supports remote state or level changes.
- Review the Display Z-Wave, ZigBee, and PowerG+ devices setting.
- Confirm whether the device appears under Automation or Outputs.
- Confirm your role permissions.
- Run discovery.
An automation command does not complete
Possible causes
- The panel is offline.
- The device is unavailable or has an active trouble.
- The requested state is not supported.
- The displayed state is outdated.
What to do
- Confirm panel connectivity.
- Review active device warnings and troubles.
- Refresh the panel state.
- Confirm that the requested action is supported.
- Send the command again.
- Review the related process if the action fails.
Device configuration appears outdated
Possible causes
- The displayed configuration is from an earlier download.
- The latest configuration process failed.
What to do
- Review the configuration download timestamp.
- Select Refresh.
- Wait for the download process to finish.
- Review the process result if the values do not update.
Parent or Children tab is not displayed
Possible causes
- The selected device has no corresponding relationship.
- A parent module or child device was removed.
What to do
- Confirm the expected device relationship.
- Run discovery.
- Refresh the Devices tab.
- Check whether the related device or module is still enrolled.
Patch Tag button is not available
Possible causes
- The selected panel is not a supported IQ panel.
- Your role does not allow firmware upgrades.
What to do
- Confirm the panel model.
- Confirm your firmware-upgrade permission.
- Confirm that an applicable package or patch tag is available.
- Confirm that the panel is connected.
- Refresh the firmware information.
Power Link diagnostic action is not available
Possible causes
- The selected device is not a Power Link module.
- Your role does not allow diagnostic actions.
What to do
- Confirm that the selected device is a Power Link module.
- Confirm your role permissions.
- Confirm panel and module connectivity.