Network map
Overview
The Network map tab in Equipment hub shows the selected panel device network as a Tree Layout graph.
Use this tab to:
- Review enrolled modules, devices, and communication channels in a tree view.
- See how devices and modules are connected to the panel.
- Identify the active communication channel.
- Review active troubles and alarms on device nodes.
- Expand and collapse device groups.
- Open management options for a selected panel, module, or device.
- Change the map orientation, center the map, and zoom in or out.
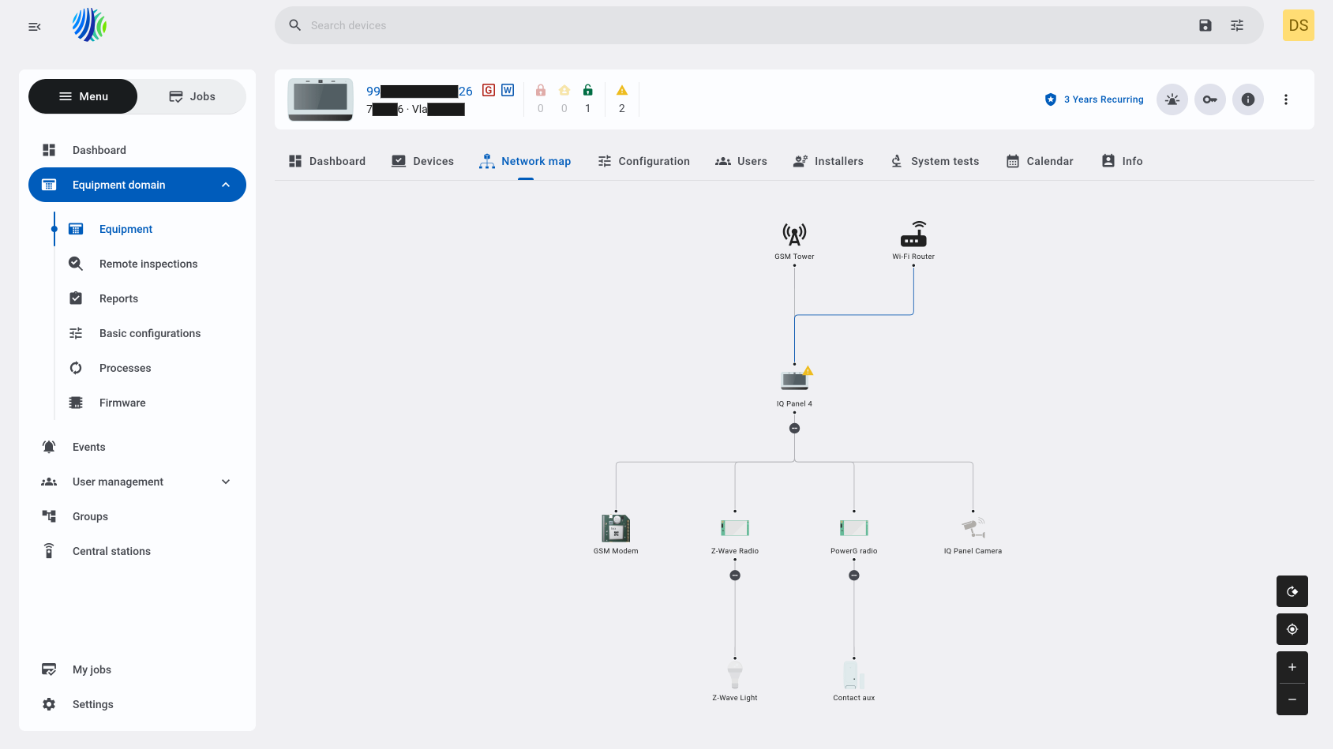
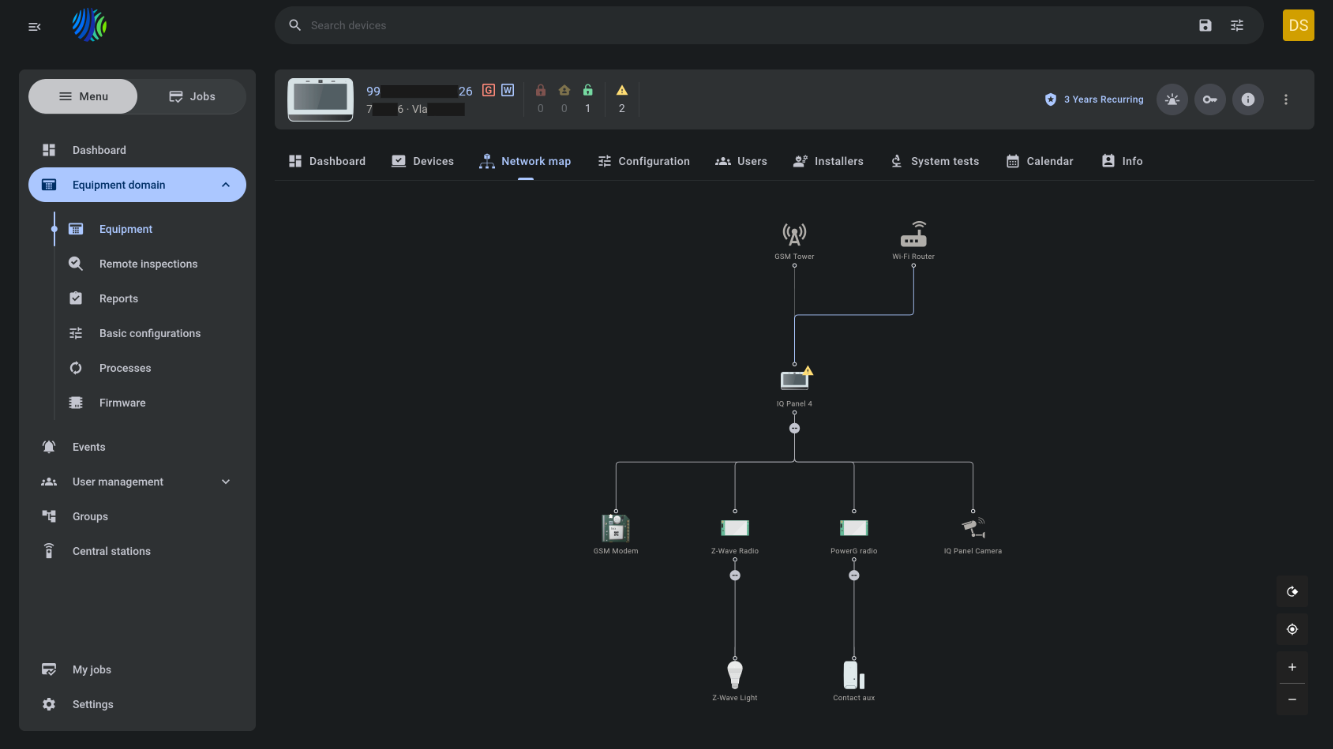
The Network map tab is available on the panel page after successful discovery.
Before you begin
Required permissions
Required permissions depend on the action that you want to complete.
- You must have permission to open Equipment hub.
- You must have permission to view the selected panel.
- You must have permission to view devices and modules for the selected panel.
- You must have permission to manage devices if you want to use management options from the node details panel.
Access to the Equipment hub page, panel data, and device management options is controlled by role permission group named Unit.
Preconditions
- Open Equipment hub by selecting a panel from the Equipment page.
- Discovery must complete successfully for the selected panel.
- Devices, modules, or communication channels must be enrolled or available on the panel to appear on the map.
Dependencies
- Communication channel nodes depend on panel hardware configuration and available modules.
- Device and module nodes depend on devices enrolled on the panel.
- Z-Wave, ZigBee, PowerG, wired zones, and other device groups depend on the selected panel type and installed modules.
- Troubles and alarms depend on real-time status returned for the selected panel and devices.
- The Network map updates dynamically when devices are enrolled on or removed from the panel.
- Troubles and alarms are displayed and restored in real time on map nodes.
- Adding or removing a module affects all child device nodes for that module.
Important limitations
- The Network map tab is not shown until panel discovery completes successfully.
- Adding or removing a module removes all child device nodes for that module from the map.
Page layout
Network map
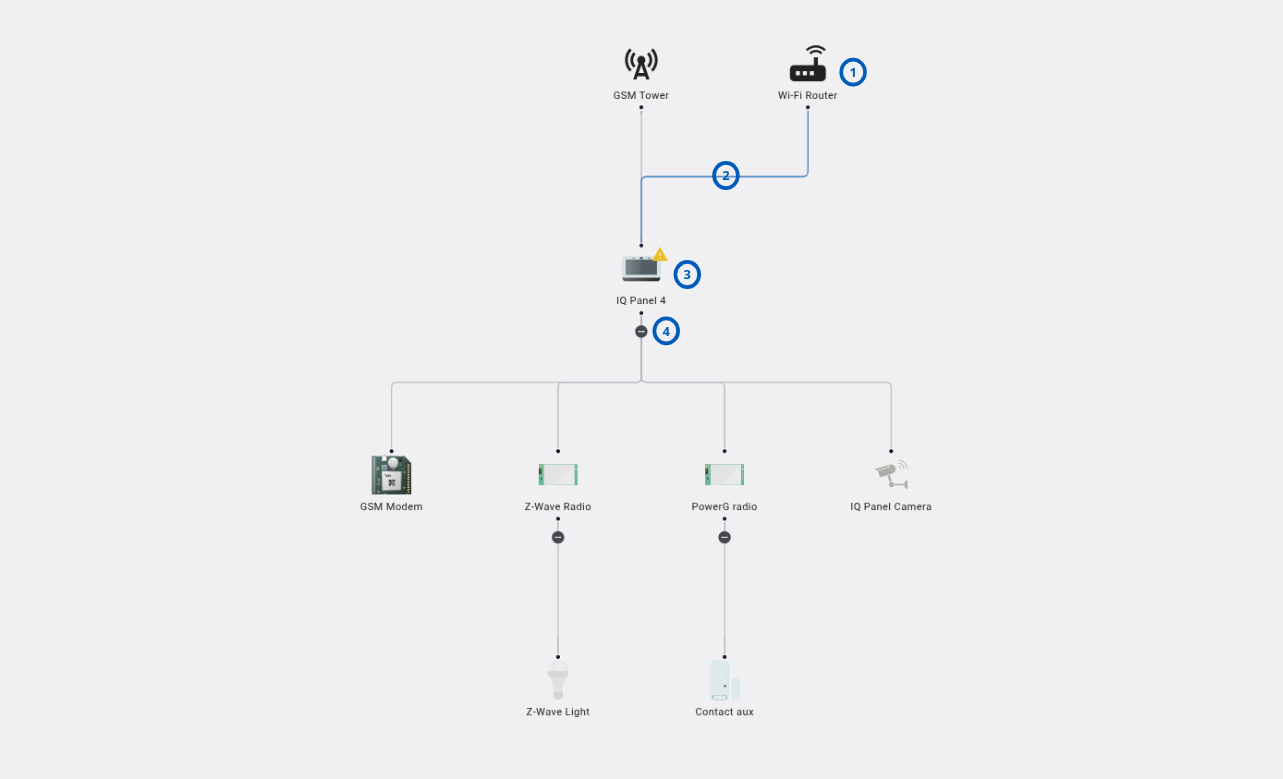
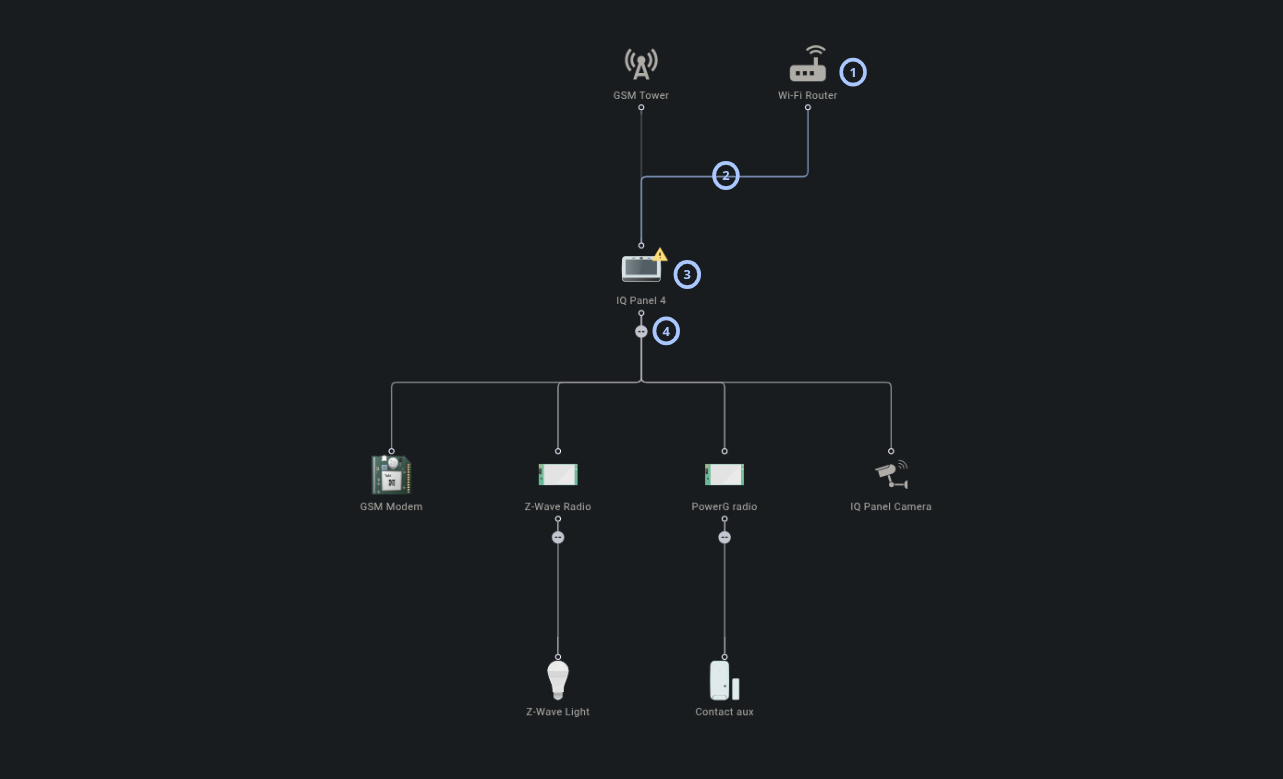
The Network map shows communication channels, the panel, modules, and enrolled devices in a Tree Layout graph.
| Callout | UI element | Description | When to use |
|---|---|---|---|
| 1 | Communication channel nodes | Shows available panel connection types at the top of the tree. Supported channel nodes include Broadband (Ethernet), Wi-Fi, and Cellular. Nodes are shown based on the panel hardware configuration and available modules. The active or current connection is highlighted with a colored link. | Use to identify available communication channels and the active panel connection. |
| 2 | Edges | Shows connection links between nodes in the tree. Links represent actual data flows in the installation. When you select a node, all edges from the selected node up to the panel are highlighted, and the map adjusts zoom and position to show the highlighted path. | Use to understand how a selected device, module, or channel is connected to the panel. |
| 3 | Panel, module, and device nodes | Shows icons for each element in the device tree. Each node shows a device label, device icon, and active troubles as warning icons near the node. Nodes are organized into sections such as Zones, Modules, Extenders, Sirens, Keyfobs, Accessories, Repeaters, Wi-Fi cameras, PGMs, and Home Automation. | Use to review the panel device structure and identify nodes with active troubles. |
| 4 | Expand/Collapse control | Expands or collapses device groups and their child nodes and edges on the tree. | Use to focus on a specific group or reduce visual clutter on the map. |
Supported node categories include Control Panel, hardware modules, security sensors, home automation devices, accessories, repeaters, and Wi-Fi cameras.
Node selection behavior includes:
- Selected node — Highlights the selected panel, module, or device node on the map.
- Highlighted path — Highlights all edges from the selected node up to the panel and adjusts the map zoom and position to show the path.
- Right-side blind modal window — Shows management options for the selected panel, module, or device. The available options are similar to functionality on the Devices tab and can differ by node type and permissions.
Navigation
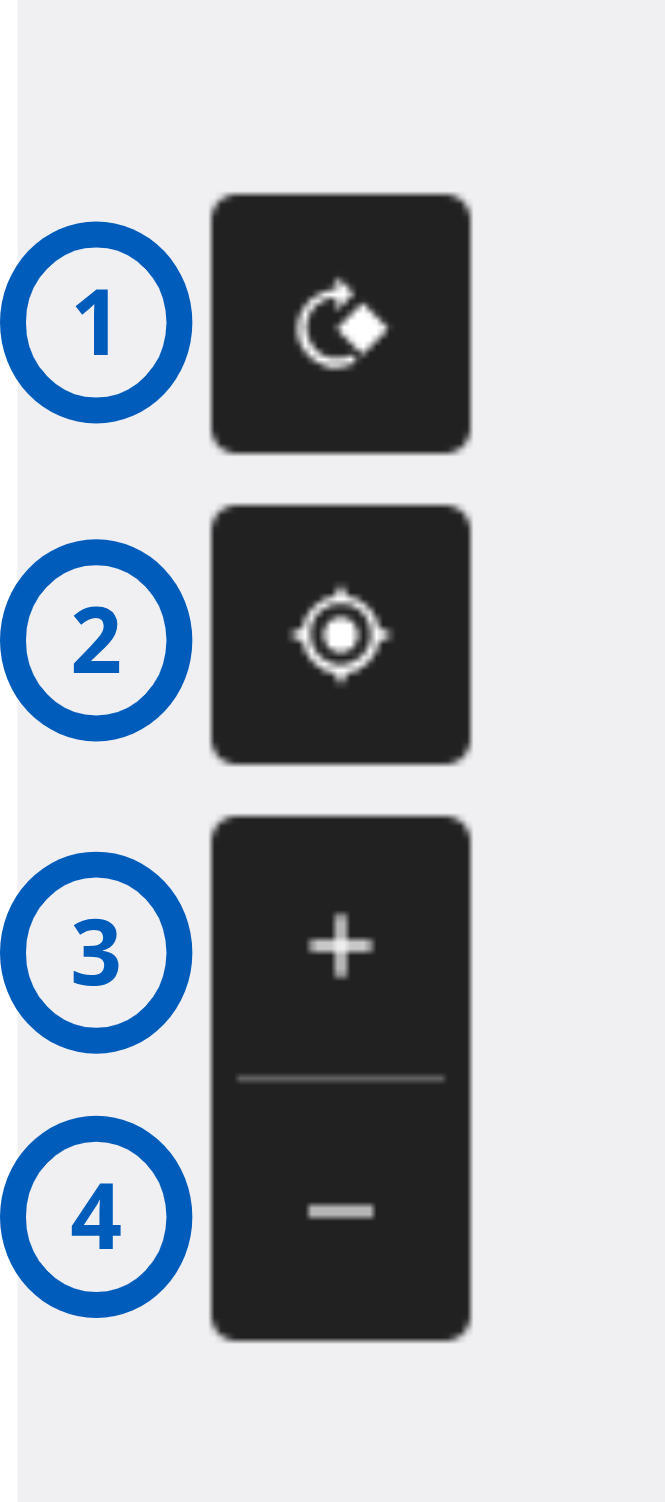
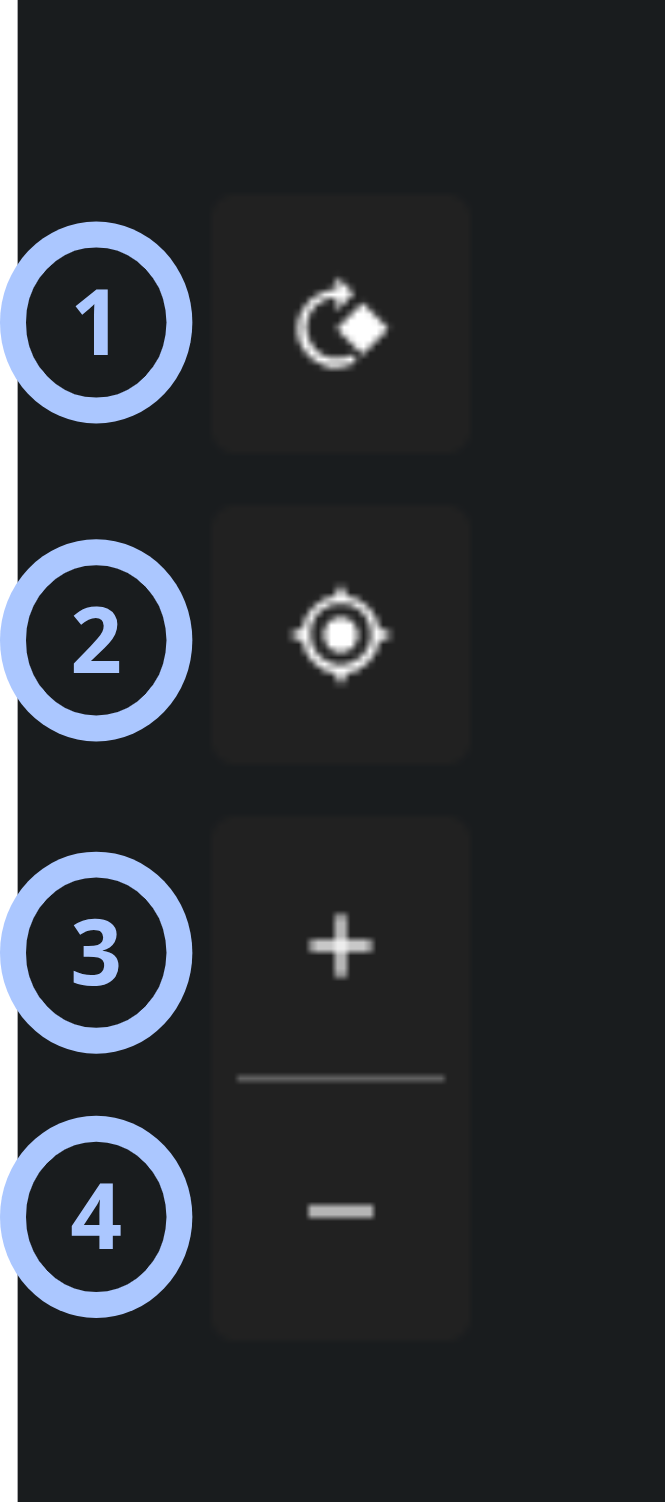
Navigation controls help you change the map layout and view area.
| Callout | UI element | Description | When to use |
|---|---|---|---|
| 1 | Orientation button | Switches the Network map layout between horizontal and vertical tree orientations. | Use to choose the layout that makes the map easier to review. |
| 2 | Fit-to-screen button | Refocuses and centers the Network map on the panel position on the screen. | Use to return to the main panel position after panning or zooming. |
| 3 | Zoom in button | Zooms in the Network map. | Use to review nodes and labels in more detail. |
| 4 | Zoom out button | Zooms out the Network map. | Use to see more of the network tree at one time. |
How to use this page
Open the Network map tab
Goal:
- Open the device Network map for a selected panel.
Steps:
- Open the Equipment page.
- Select the panel that you want to review.
- Confirm that discovery completed successfully.
- In Equipment hub, select the Network map tab.
Expected result:
- The Network map tab opens.
- The map shows available communication channels, the panel, modules, and enrolled devices.
Review communication channels
Goal:
- Identify the panel communication channels and active connection.
Steps:
- Open the Network map tab.
- Review the communication channel nodes at the top of the tree.
- Identify the highlighted link that shows the active or current connection.
Expected result:
- You can see the connection types available for the panel.
- The active or current connection is highlighted when available.
Trace a device connection path
Goal:
- Understand how a device or module connects to the panel.
Steps:
- Open the Network map tab.
- Select a panel, module, or device node.
- Review the highlighted edges from the selected node up to the panel.
- Review the adjusted map zoom and position.
Expected result:
- The selected node path to the panel is highlighted.
- The map adjusts so that the path is visible.
Open node management options
Goal:
- Review or manage a selected panel, module, or device.
Steps:
- Open the Network map tab.
- Select a node on the map.
- Review the right-side blind modal window.
- Use the available management options if needed.
Expected result:
- The right-side blind modal window opens for the selected node.
- Available management options are shown according to node type and permissions.
Expand or collapse device groups
Goal:
- Show or hide device groups and child nodes.
Steps:
- Open the Network map tab.
- Find an expand or collapse control icon.
- Select the icon.
Expected result:
- The group expands to show child nodes or collapses to hide them.
- Related child edges are shown or hidden with the group.
Change map orientation
Goal:
- Switch between horizontal and vertical tree layouts.
Steps:
- Open the Network map tab.
- Select the Orientation button.
Expected result:
- The Network map switches between horizontal and vertical orientation.
Center the map on the panel
Goal:
- Refocus the map on the panel node.
Steps:
- Open the Network map tab.
- Pan or zoom the map if needed.
- Select the Fit-to-screen button.
Expected result:
- The map centers on the panel position.
Zoom the Network map
Goal:
- Change the map zoom level.
Steps:
- Open the Network map tab.
- Select Zoom in to view nodes in more detail.
- Select Zoom out to view more of the tree.
Expected result:
- The map zoom level changes.
Review troubles or alarms on nodes
Goal:
- Identify devices or modules with active troubles or alarms.
Steps:
- Open the Network map tab.
- Review warning or alarm indicators near nodes.
- Select an affected node.
- Review the details in the right-side blind modal window.
Expected result:
- Active troubles or alarms are visible near affected nodes.
- The selected node details open for review.
Tips
- Complete panel discovery before using the Network map tab.
- Use expand and collapse controls to focus on the device group that you need.
- Select a node to highlight its path to the panel.
- Use Fit-to-screen to return to the panel position after panning or zooming.
Troubleshooting
Network map tab is not visible
Possible causes
- Discovery has not completed successfully.
- The selected panel does not support the Network map tab.
- Your role does not allow viewing the tab.
What to do
- Confirm that discovery completed successfully.
- Confirm that the selected panel supports the Network map tab.
- Confirm that your role allows viewing panel and device information.
- Refresh Equipment hub.
Communication channel node is missing
Possible causes
- The related communication module is not installed.
- The panel hardware configuration does not include that channel.
What to do
- Confirm the panel hardware configuration.
- Confirm that the related module is installed.
- Refresh or rerun discovery if hardware data has changed.
Node is not shown on the map
Possible causes
- The device is not enrolled on the panel.
- The device belongs to a collapsed group.
- The device was removed from the panel.
- The parent module was removed.
- Discovery data is out of date.
What to do
- Expand the related device group.
- Confirm that the device is enrolled on the panel.
- Confirm that the parent module is installed.
- Refresh or rerun discovery if needed.
Child devices disappeared after module removal
Possible causes
- Removing a module removes all child device nodes that depend on that module.
What to do
- Confirm whether the parent module was removed.
- Reinstall or re-enroll the module if needed.
- Run discovery again after the module is available.
Troubles or alarms are not shown on nodes
Possible causes
- No active trouble or alarm exists for the node.
- The status has not refreshed yet.
What to do
- Refresh the Network map tab.
- Check the related device status on the Devices tab.
Right-side blind modal window does not open
Possible causes
- The node is not selectable.
- Your role does not allow viewing or managing the selected node.
What to do
- Select the node again.
- Refresh the Network map tab.
- Confirm that your role allows viewing or managing the selected device.
- Open the Devices tab for additional details.
Map is difficult to read
Possible causes
- Too many device groups are expanded.
- The map is zoomed in or out too far.
- The current orientation does not fit the panel device structure.
What to do
- Collapse groups that you do not need to review.
- Use Fit-to-screen to center the map.
- Use Zoom in or Zoom out.
- Switch the map orientation.