Overview
Overview
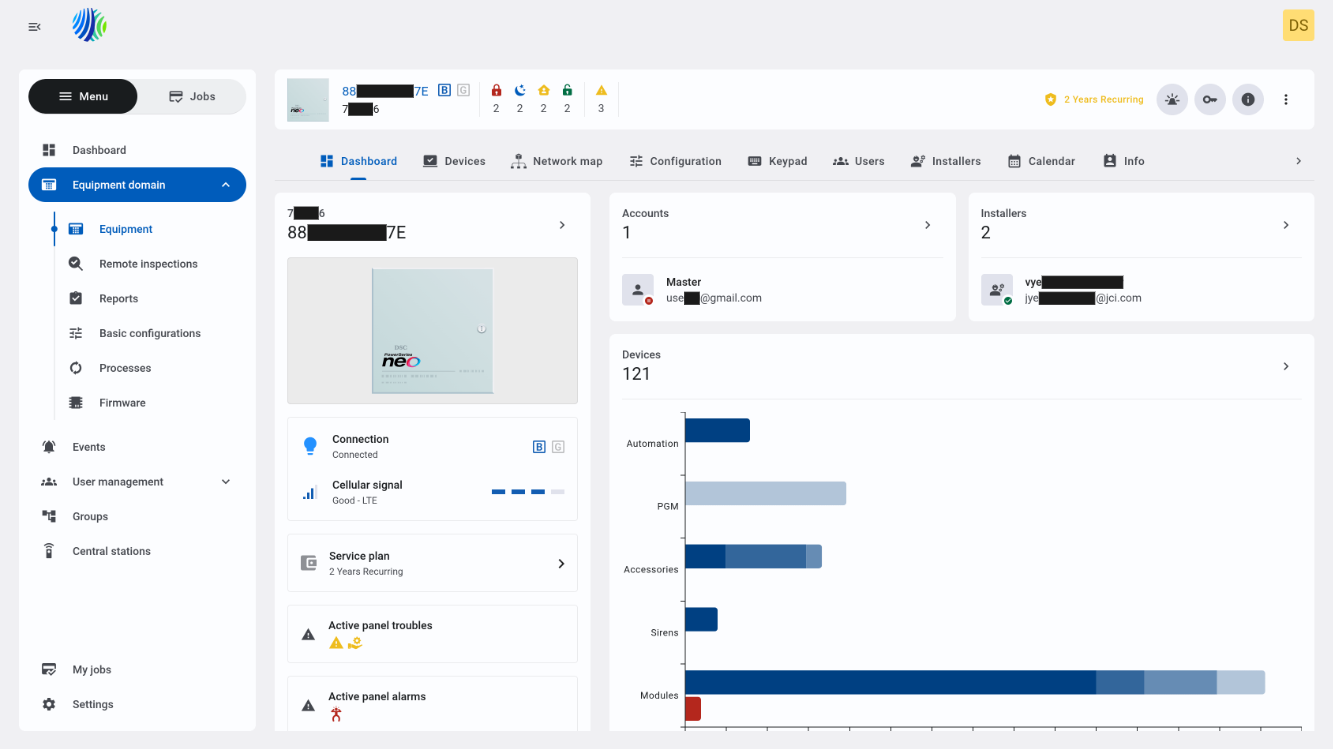
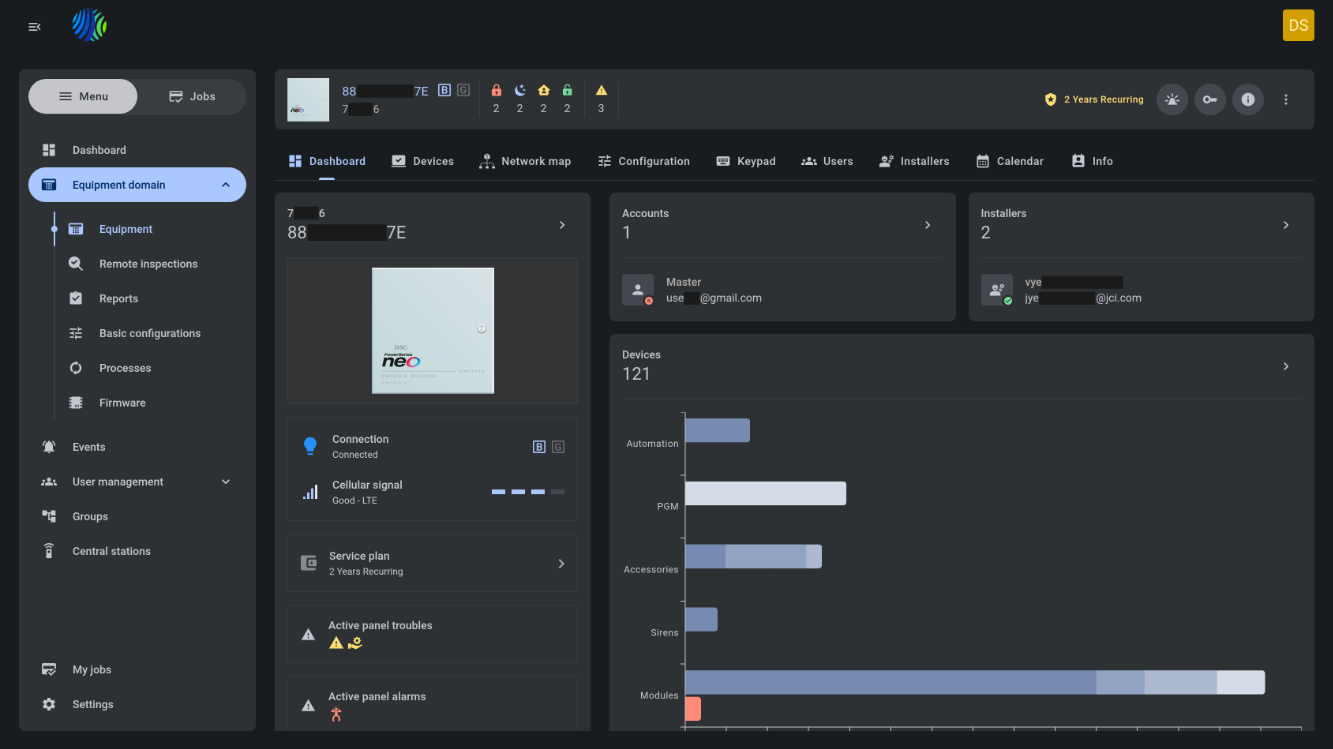
The Equipment hub gives operators a central place to review and manage a selected panel.
Use this page to:
- Review the panel identity, account code, connection status, state, alarms, discovery progress, and billing plan.
- Open state management and troubles widget.
- Trigger an emergency.
- Reset communication working keys.
- Open additional panel remarks and logs.
- Start common panel actions from the More actions menu.
- Run discovery, refresh state, refresh configuration, push basic configuration, manage service assignment, and manage faults.
- Control installer and customer application access.
The Actions Bar is shown at the top of Equipment hub and appears on each Equipment hub tab. It gives quick access to panel status, high-priority alerts, and common actions.
Before you begin
Required permissions
Required permissions depend on the action you want to complete.
- You must have permission to view the selected panel.
- You must have permission to initiate emergency actions to see the Emergencies button.
- You must have permission to manage working keys to reset communication working keys.
- You must have permission to run discovery, refresh state, refresh configuration, or push basic configuration to use those actions.
- You must have permission to manage service assignment to mark or reassign a panel for service.
- You must have permission to manage faults to resolve, resume, or suspend faults.
- You must have permission to remove panels to remove a panel from the server.
Access to the Equipment hub page and panel management is controlled by the role permission group named Unit.
Preconditions
- Open Equipment hub by selecting a panel from the Equipment page.
- The selected panel must exist on the PowerManage server.
- Some actions require the panel to be connected.
- Some actions depend on panel family and protocol.
Dependencies
- Billing plan actions depend on billing support and are shown for IQ and Neo 5 panels in dealer groups.
- Panel logs depend on panel type and on the log entries available in the panel buffer.
- Customer app access for billing installations requires an active billing plan.
Important limitations
- Some Actions Bar features are limited for fresh panels that have not completed first discovery. Actions that are not supported for undiscovered panels include emergency trigger, refresh state, refresh configuration, push basic configuration, and trigger discovery.
Page layout
Actions Bar


The Actions Bar appears at the top of Equipment hub. It provides quick access to panel identity, communication state, alarm state, discovery progress, billing, emergency actions, working keys, panel notes, panel logs, and additional actions.
| Callout | UI element | Description | When to use |
|---|---|---|---|
| 1 | Panel icon | Shows the panel icon that matches the panel type. | Use to visually identify the panel family. |
| 2 | Panel ID and panel account code | Shows the panel ID and account code. | Use to confirm that you are working with the correct panel. |
| 3 | Panel connection status icons | Shows active communication channels and online or offline state for Broadband/Ethernet, Cellular/GPRS, and Wi-Fi. | Use to review panel connectivity by channel. |
| 4 | Panel state management and troubles | Shows armed or disarmed partition counts and trouble count. Opens the State management and troubles widget. | Use to review or change panel state and review troubles. |
| 5 | Alarm icon | Shows when the panel has an unhandled alarm. Opens the Events page with related filters. | Use to investigate active or unhandled alarms. |
| 6 | Discovery progress | Shows discovery progress, percentage, stages count, and elapsed discovery time. | Use to monitor discovery for the selected panel. |
| 7 | Billing plan | Shows the billing plan name for IQ and Neo 5 panels in dealer groups. Opens the Billing plan modal. | Use to manage the panel billing plan. |
| 8 | Emergencies button | Opens the Emergency trigger modal window. Visibility is controlled by the Initiate Emergency permission. | Use to send an emergency command to the panel. |
| 9 | Working keys button | Opens the Working keys widget. | Use to reset cellular or broadband working keys. |
| 10 | Open additional information button | Opens the Additional actions and info modal window with Remarks and Logs tabs. | Use to add remarks or review panel logs. |
| 11 | More actions button | Opens the More actions menu. | Use to run panel actions that are available for your role and selected panel. |
State management and troubles widget
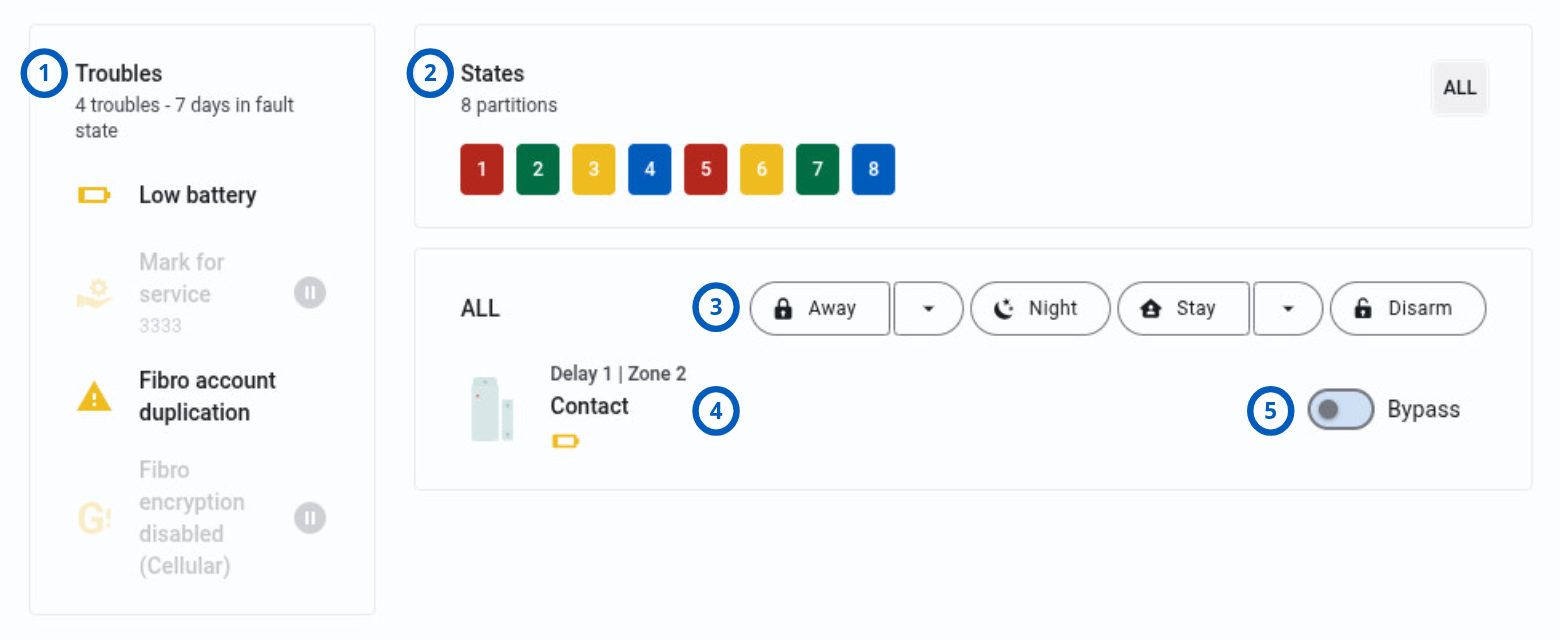
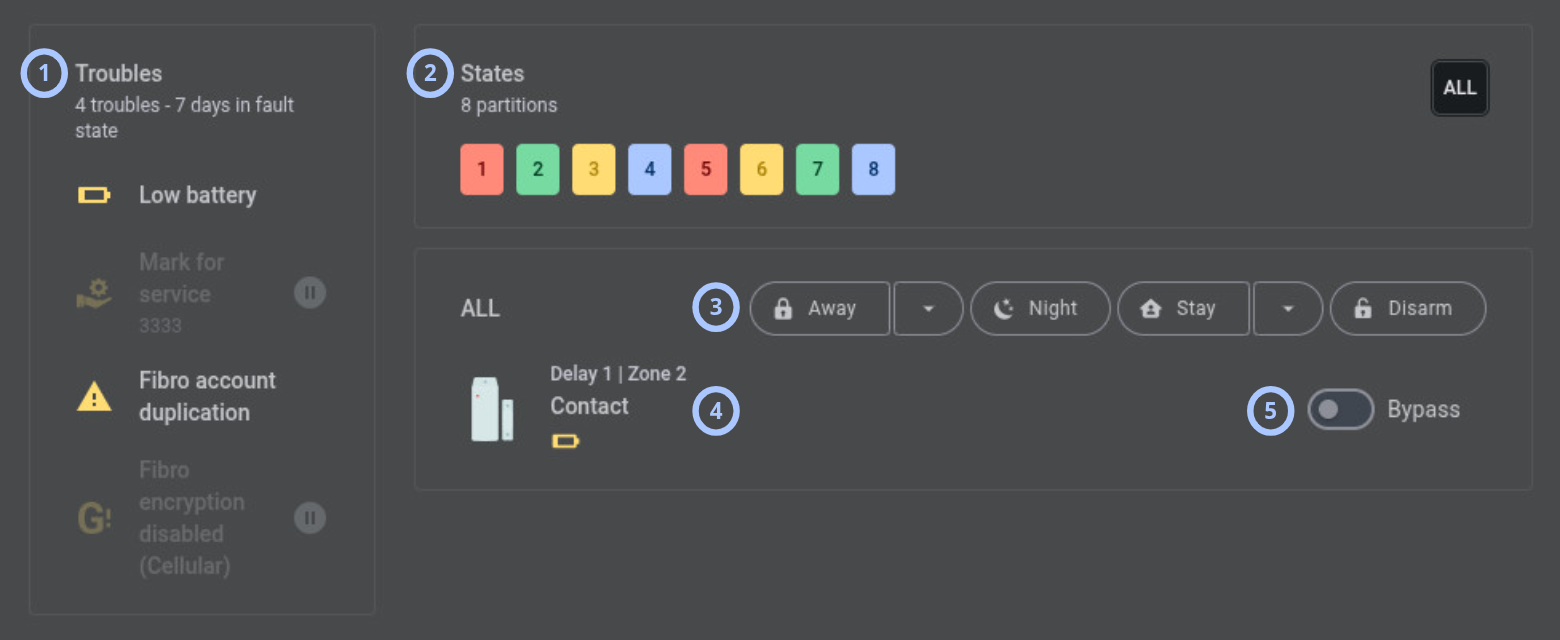
The State management and troubles widget opens when you select the state and troubles area in the Actions Bar.
| Callout | UI element | Description | When to use |
|---|---|---|---|
| 1 | Troubles | Shows trouble count, panel time in fault state, and trouble details for the selected partition. When ALL is selected, troubles are shown for all partitions. | Use to review current panel troubles. |
| 2 | States | Shows partitions, colored partition state icons, and an ALL button. Green means disarmed, red means armed away, yellow means armed home, and blue means armed night. | Use to select a partition or all partitions. |
| 3 | State control | Shows state change buttons such as Away, Night, Stay, and Disarm for the selected partition. | Use to apply a new state to a partition. |
| 4 | Troubled devices | Shows only troubled devices with device icon, zone type, zone number, zone name, and trouble icons. | Use to review devices that require attention. |
| 5 | Bypass toggle | Shows next to each bypassable troubled device. | Use to bypass a troubled device when supported. |
- Suspended faults are shown greyed out. If a fault has a comment, the comment is shown near the fault.
- The States area is not supported for Fibro transmitters or manually enrolled panels with unfinished first discovery.
- The Bypass section shows only troubled devices. Devices without troubles and non-bypassable devices are not shown.
- Additional arming parameters depend on the panel type.
Emergency trigger modal window
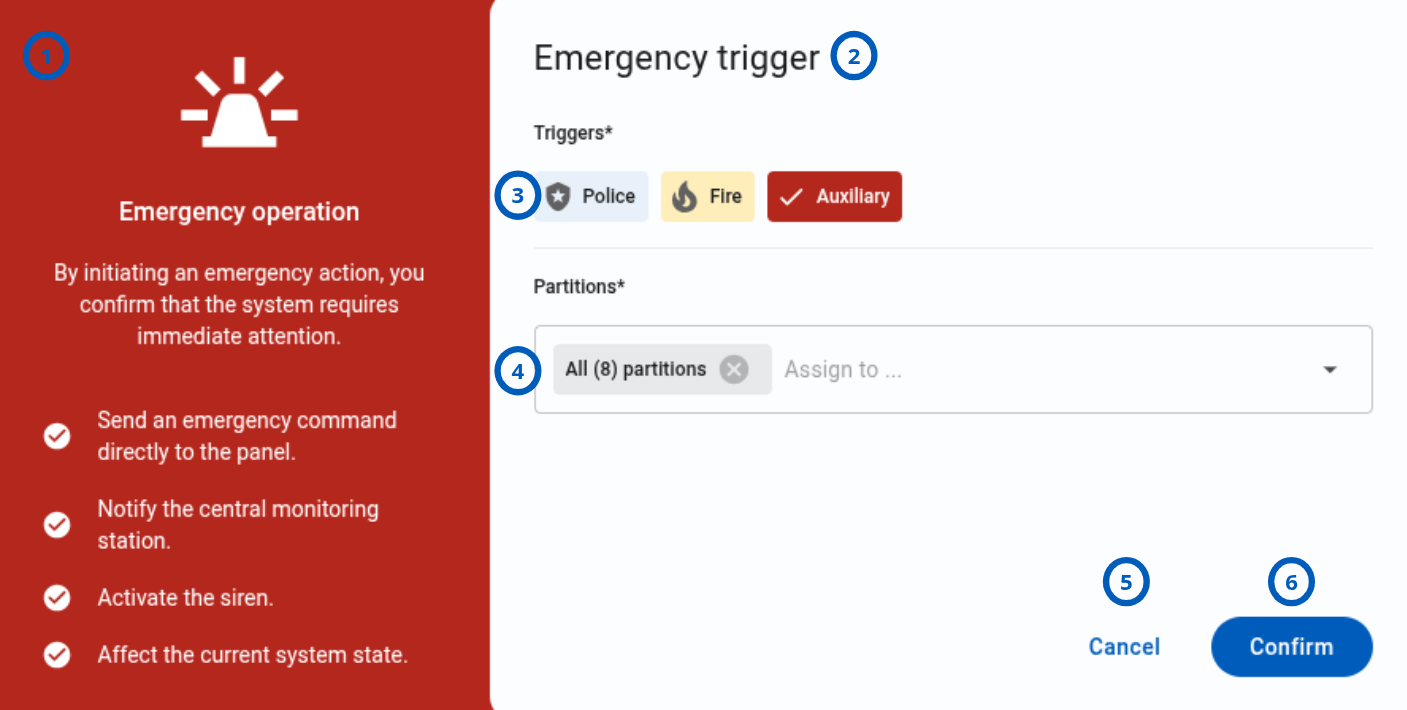
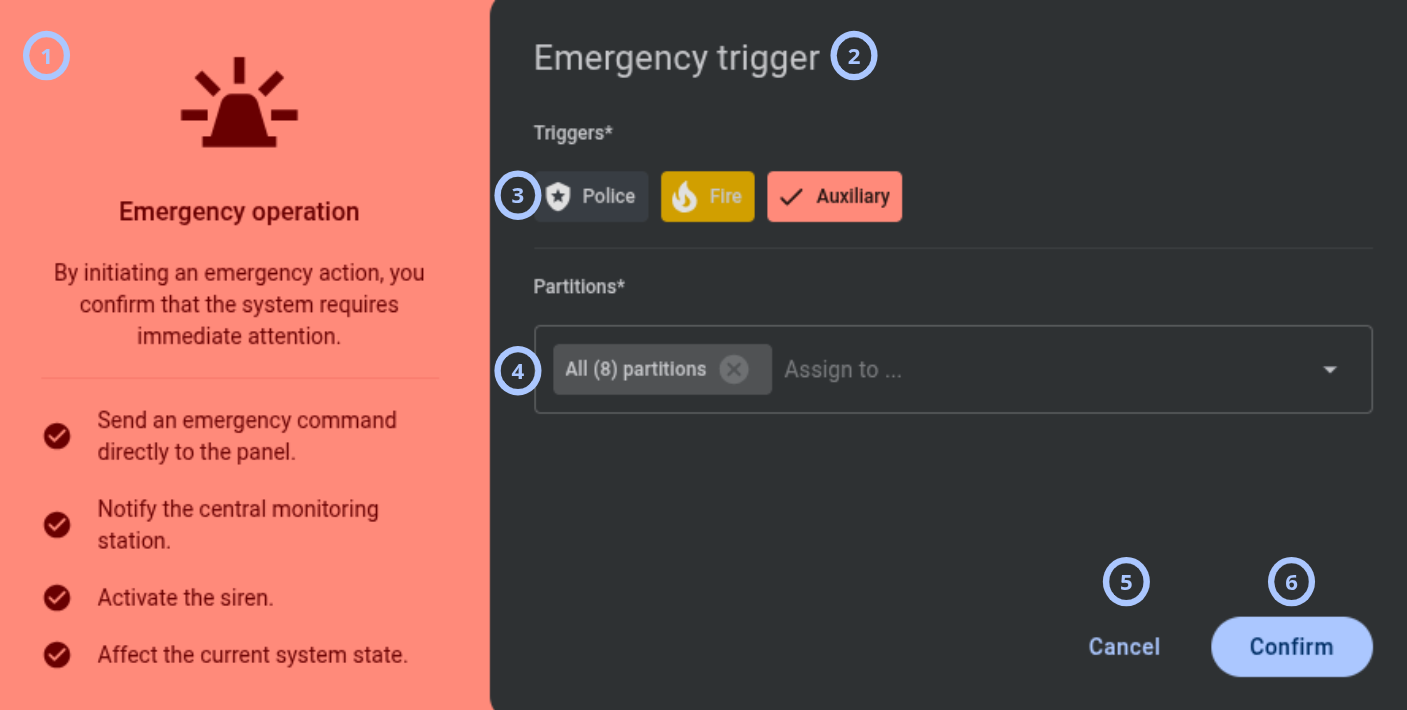
The Emergency trigger modal window opens when you select Emergencies in the Actions Bar.
| Callout | UI element | Description | When to use |
|---|---|---|---|
| 1 | Info message | Explains that emergency actions require immediate attention and can send an emergency command, notify the central monitoring station, activate the siren, and affect the current system state. | Review before initiating an emergency. |
| 2 | Modal title | Shows the modal name: Emergency trigger. | Use to confirm that you are initiating an emergency action. |
| 3 | Triggers selection | Lets you select Police, Fire, or Auxiliary. These values send the related emergency command. No trigger is selected by default. | Use to choose the emergency trigger type. The action requires the Emergencies button and a supported panel state. |
| 4 | Partitions | Lets you select All, individual partitions, or System when partitioning is disabled. The default value is All. Available values depend on panel partitioning. | Use to choose where to initiate the emergency. |
| 5 | Cancel button | Closes the modal without initiating an emergency. | Use when you do not want to continue. |
| 6 | Confirm button | Initiates the emergency on the panel according to the selected trigger and partitions. | Use only when the emergency command must be sent. |
Working keys widget
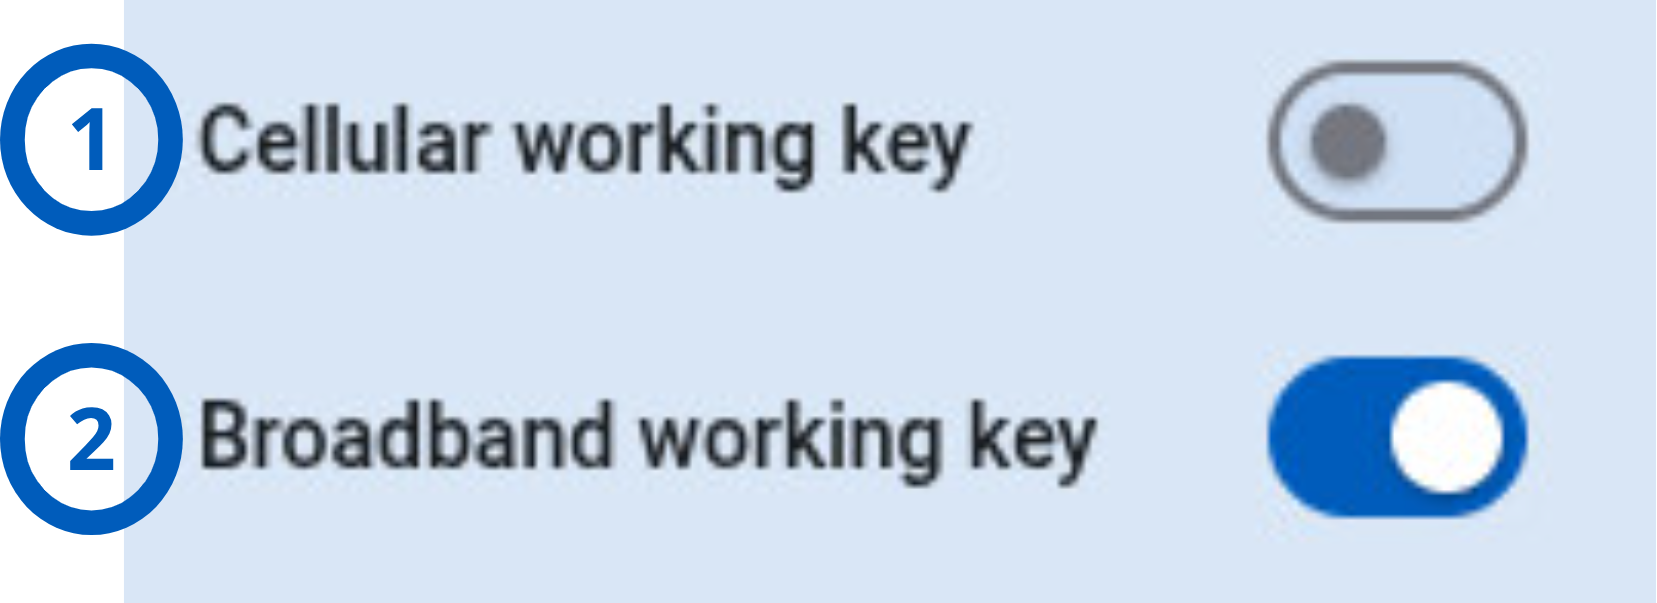
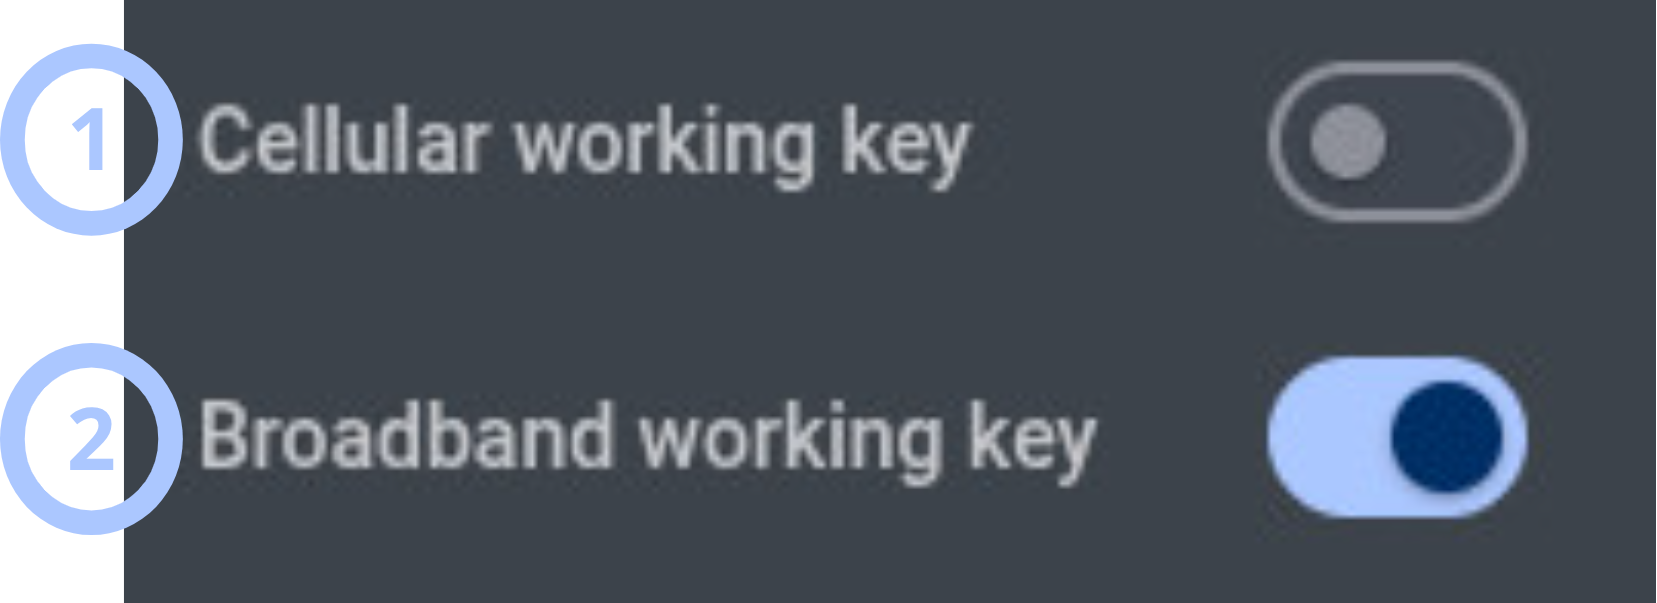
The Working keys widget opens when you select the working keys button in the Actions Bar.
| Callout | UI element | Description | When to use |
|---|---|---|---|
| 1 | Cellular working key toggle | Resets the encryption key used for the cellular communication channel between the panel and the PowerManage server. | Use to reset the cellular working key. |
| 2 | Broadband working key toggle | Resets the encryption key used for the broadband (Ethernet, or Wi-Fi) communication channel between the panel and the PowerManage server. | Use to reset the broadband working key. |
Toggle states
- On — A Working Key (WK) exists on the server for this panel on this channel. The server has successfully exchanged an encryption key with the panel.
- Off (disabled) — The Default Key (DK) is stored on the server side for this panel/channel, meaning no Working Key currently exists.
Why a toggle may be off
-
No key exchange has occurred yet — The panel has not completed its initial bootstrap on that channel. During first connection, the panel authenticates using the Default Key (DK), and the server initiates a bootstrap process that provisions a unique Working Key (WK). Until this bootstrap completes, no WK exists and the toggle remains off.
-
Panel was unable to re-establish a key after the last reset — When you reset a working key by using the toggle, the server discards the current WK and waits for the panel to reconnect and complete a new bootstrap using the DK. If the panel is offline, the channel is not configured, or the panel cannot reach the server because of a network issue, removed SIM, disconnected Ethernet cable, or another communication issue, the new key exchange cannot complete and the toggle stays off.
-
Panel was factory-defaulted or flashed — A factory reset or master reset clears the WK on the panel side. On the next connection, the panel uses the DK, and the server must complete a new bootstrap to provision a fresh WK.
-
Panel was moved from another server — When a panel is configured to connect to a new PowerManage server, the panel uses the DK for the initial connection to that new server. The old WK is not relevant.
What Reset Working Key does
When you switch the toggle from On to Off, the server resets the WK to the DK. On the panel's next connection attempt, the server rejects the old WK, the panel falls back to the DK, and a new bootstrap produces a fresh WK. After the new WK is created, the toggle returns to On.
Channel independence
Each communication channel, cellular and broadband, maintains its own independent Working Key. Resetting the key on one channel does not affect the other channel. Only toggles for installed and configured modules are displayed.
Panel independence
Resetting the Working Key for one panel does not affect any other panel on the same server.
Supported panel types
The Working Keys widget is available for:
- IQ panels (LwM2M)
- DSC NEO panels with communicator firmware 5.40 or later (ITv2 type 2 encryption)
- DSC PSP panels (ITv2 type 2 encryption)
- Neo 5 panels (ITv2 type 2 and type 3 encryption)
- Dual Path communicators
The Working Keys widget is not available for:
- Visonic panels
- Panels with ITv2 type 1 encryption only
- Fibro Transmitters
Important constraints
- For DSC panels, the toggle cannot be switched while the panel is connected. Disconnect the panel first.
- For IQ panels, the reset can be performed for both connected and disconnected panels.
Periodic key renewal for IQ panels
The PowerManage server periodically initiates a bootstrap to renew the WK (WK → WK*). The renewal interval is configurable from 1 day minimum to 31 days maximum.
During renewal, the panel momentarily interrupts its current session to complete the bootstrap with the existing WK. After the bootstrap is complete, the panel receives a new WK and resumes normal communication.
Recovery behavior for IQ panels
If the server rejects the panel's connection, the panel enters a retry loop that alternates between WK and DK (WK → DK → WK → DK). The error counter resets every 13 iterations. This fallback helps the panel recover even if the server was reinstalled without backup or restore.
Common use case
For more information, see Re-enroll a panel after factory default in the How to use this page section.
More actions menu
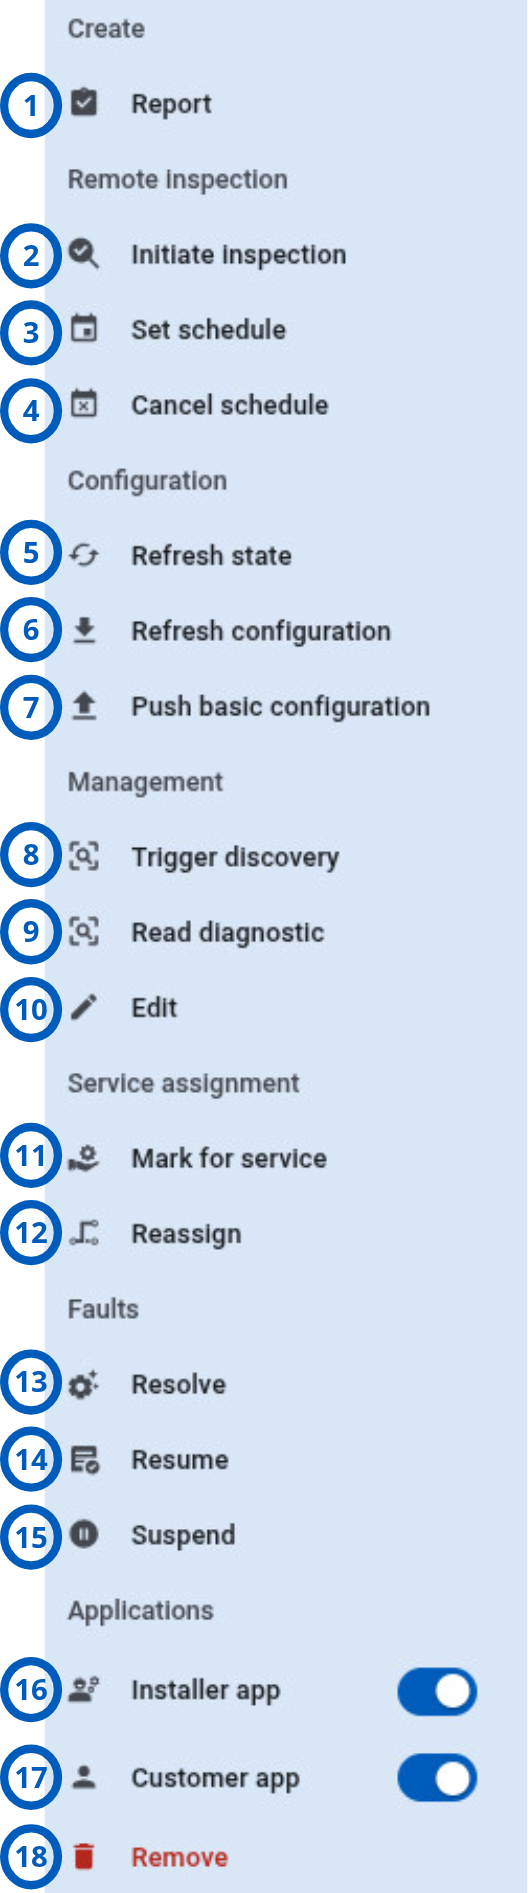
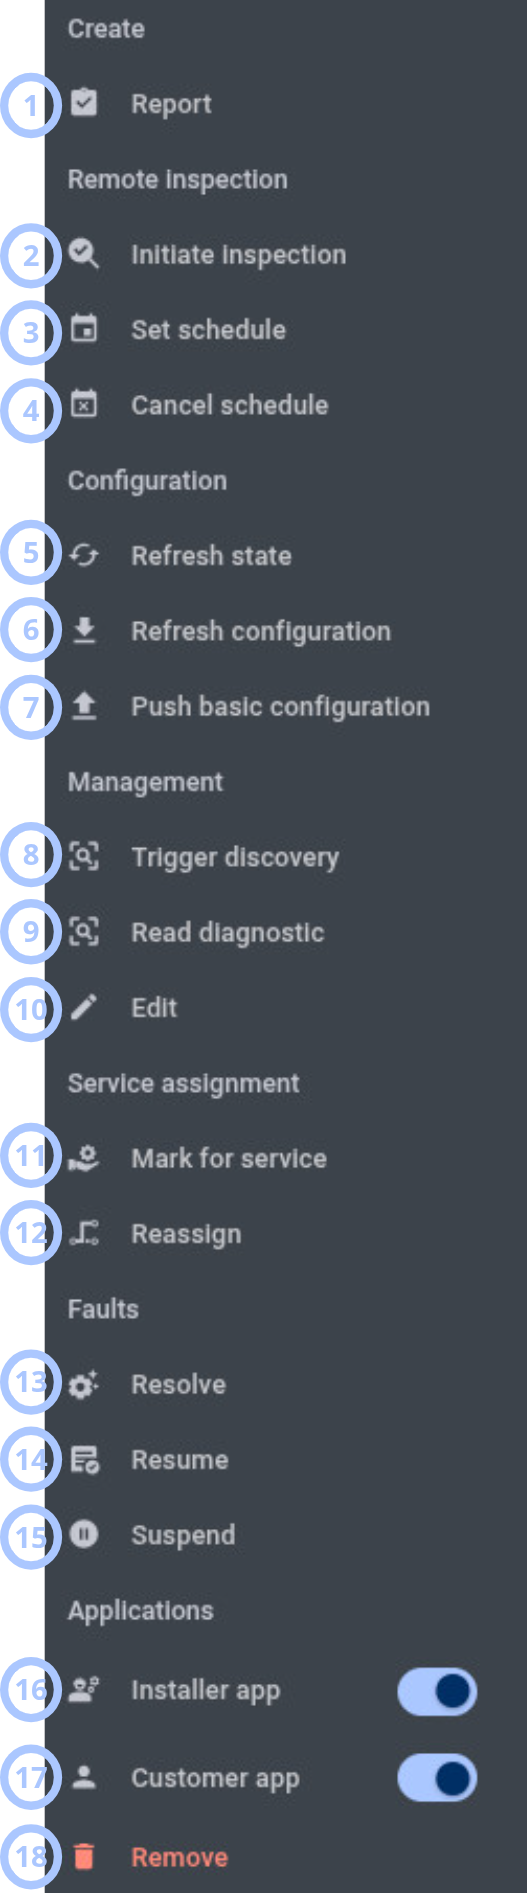
The More actions menu opens when you select the More actions button in the Actions Bar. The menu changes based on permissions, panel type, and discovery status.
| Callout | UI element | Description | When to use |
|---|---|---|---|
| 1 | Create > Report | Opens the Create new report modal window. | Use to create a report for the selected panel. |
| 2 | Remote inspection > Initiate inspection | Opens the Initiate inspection modal window. | Use to start a remote inspection. |
| 3 | Remote inspection > Set schedule | Opens the Schedule remote inspection modal window. | Use to create a recurring remote inspection schedule. |
| 4 | Remote inspection > Cancel schedule | Opens the Schedule cancellation modal window. | Use to cancel a remote inspection schedule. |
| 5 | Configuration > Refresh state | Starts the Refresh state process for the panel. | Use to refresh panel state. Not supported for fresh panels. |
| 6 | Configuration > Refresh configuration | Starts the Download configuration process for the panel. | Use to refresh panel configuration. Not supported for fresh panels. |
| 7 | Configuration > Push basic configuration | Opens the Push Basic Config modal window. | Use to upload a selected basic configuration. Not supported for fresh panels. |
| 8 | Management > Trigger discovery | Opens the Trigger discovery modal window. | Use to start discovery. Not supported for fresh panels. |
| 9 | Management > Read diagnostic | Starts the Read diagnostic info process for the panel. | Use to collect diagnostic information. |
| 10 | Management > Edit | Opens the Edit panel modal window. | Use to edit panel information. |
| 11 | Service assignment > Mark for service | Opens the Mark panel for service modal window. | Use to assign service work. |
| 12 | Service assignment > Reassign | Opens the Reassign panel for service modal window. | Use to change service assignment. |
| 13 | Faults > Resolve | Opens the Resolve faults modal window when the panel is marked for service. | Use to resolve selected faults. |
| 14 | Faults > Resume | Opens the Resume faults modal window when the panel has suspended faults. | Use to resume suspended faults. |
| 15 | Faults > Suspend | Opens the Suspend faults modal window when the panel has active faults. | Use to suspend active faults. |
| 16 | Applications > Installer app toggle | Enables or disables installer access through the AlarmInstall app. | Use to control installer app access for the panel. |
| 17 | Applications > Customer app toggle | Enables or disables customer access through the ConnectAlarm app. | Use to control customer app access for the panel. |
| 18 | Remove | Removes the panel from the PowerManage server. | Use only when the panel must be removed. |
Push Basic Config modal window
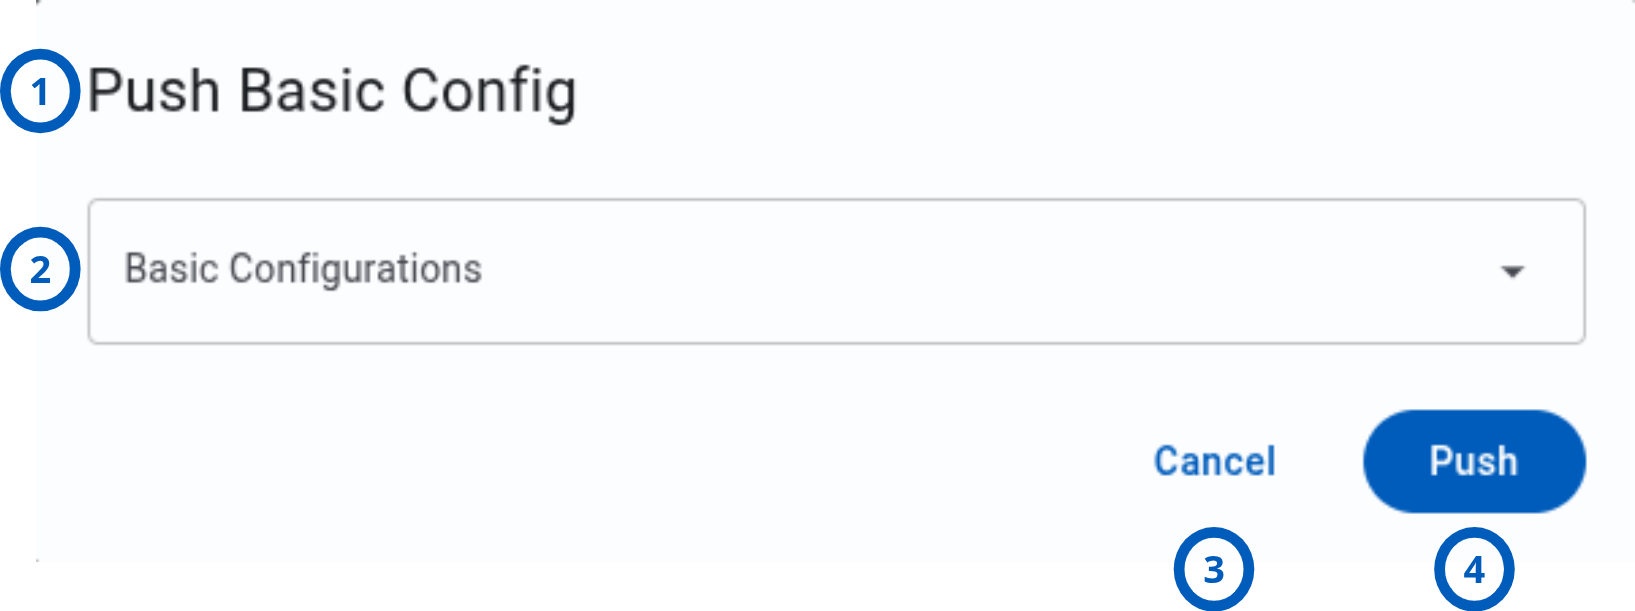
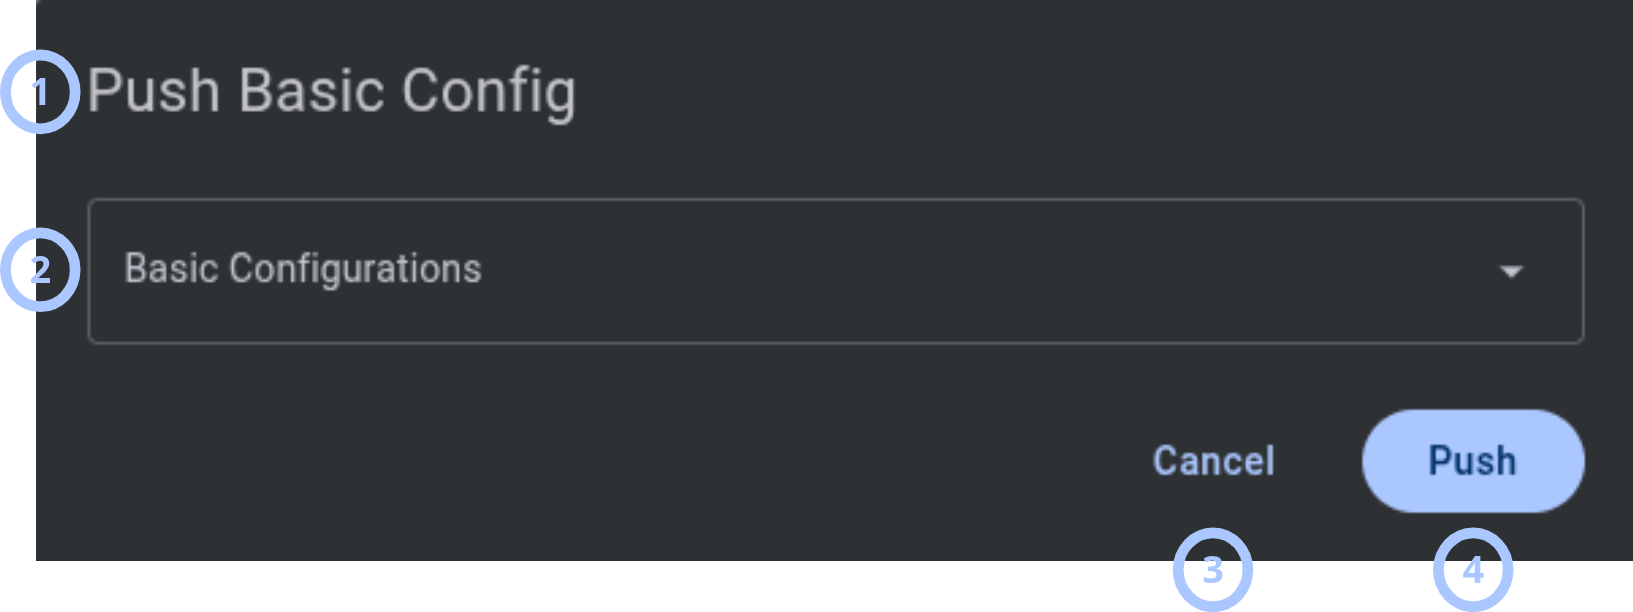
The Push Basic Config modal window opens from More actions > Configuration > Push basic configuration.
| Callout | UI element | Description | When to use |
|---|---|---|---|
| 1 | Modal title | Shows the modal name: Push Basic Config. | Use to confirm that you are uploading a basic configuration. |
| 2 | Basic Configurations dropdown | Shows acceptable configurations for the panel. Configurations are filtered by panel vendor, panel type, and group assignment. | Use to select the configuration to upload. |
| 3 | Cancel button | Closes the modal without action. | Use when you do not want to push a configuration. |
| 4 | Push button | Starts the Upload configuration process for the selected basic configuration. | Use to push the selected configuration to the panel. |
Trigger discovery modal window
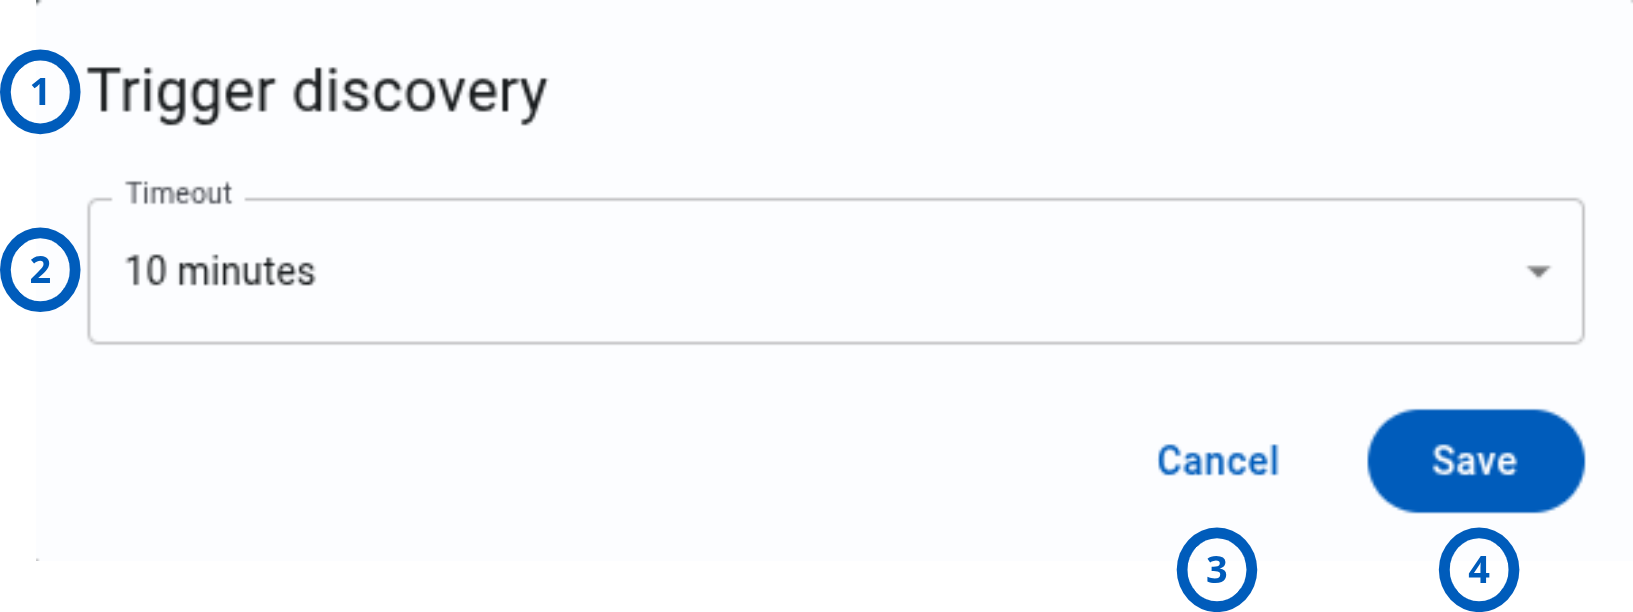
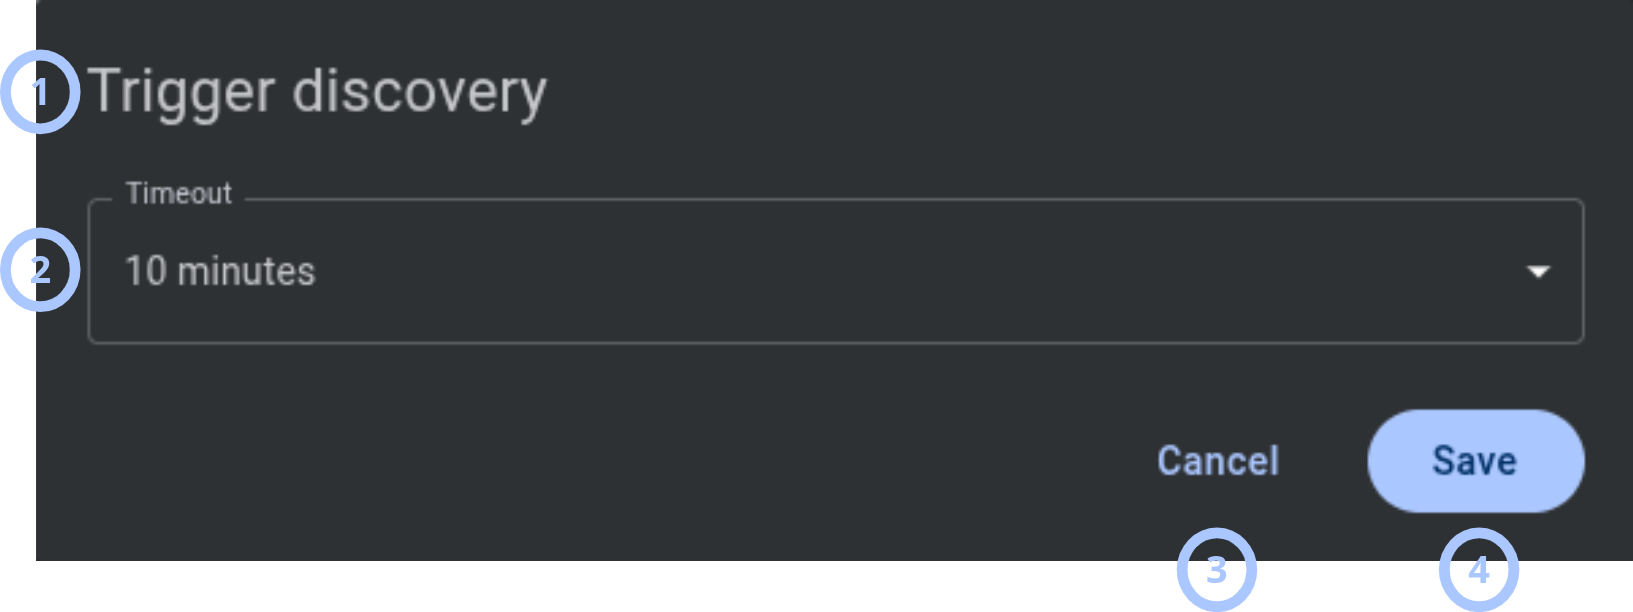
The Trigger discovery modal window opens from More actions > Management > Trigger discovery.
| Callout | UI element | Description | When to use |
|---|---|---|---|
| 1 | Modal title | Shows the modal name: Trigger discovery. | Use to confirm that you are starting discovery. |
| 2 | Timeout dropdown | Lets you select Infinite, 10 minutes, 1 hour, 12 hours, 1 day, or 1 week. If you select a timed value, discovery fails when the panel does not come to the server within that time. | Use to define when discovery fails if the panel does not come to the server. |
| 3 | Cancel button | Closes the modal without action. | Use when you do not want to start discovery. |
| 4 | Save button | Starts the Discovery process for the panel. | Use to start discovery. |
Mark panel for service modal window
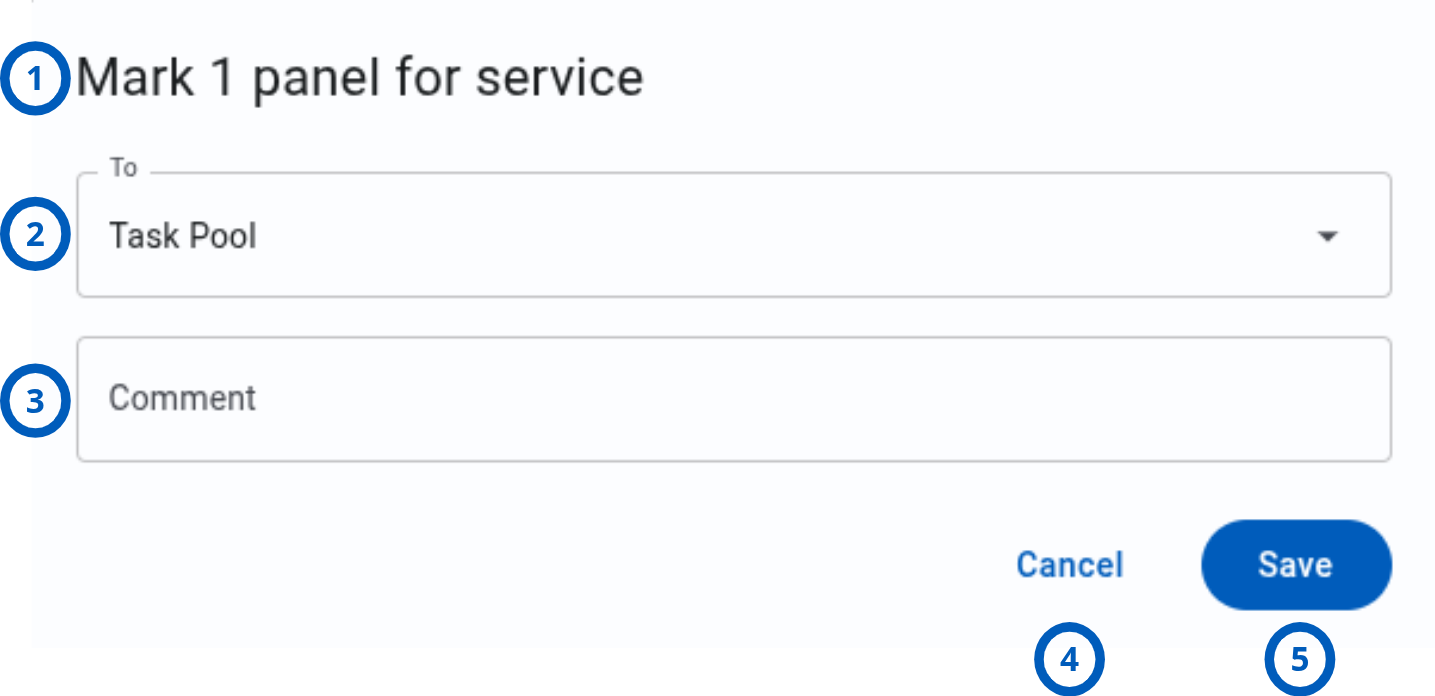
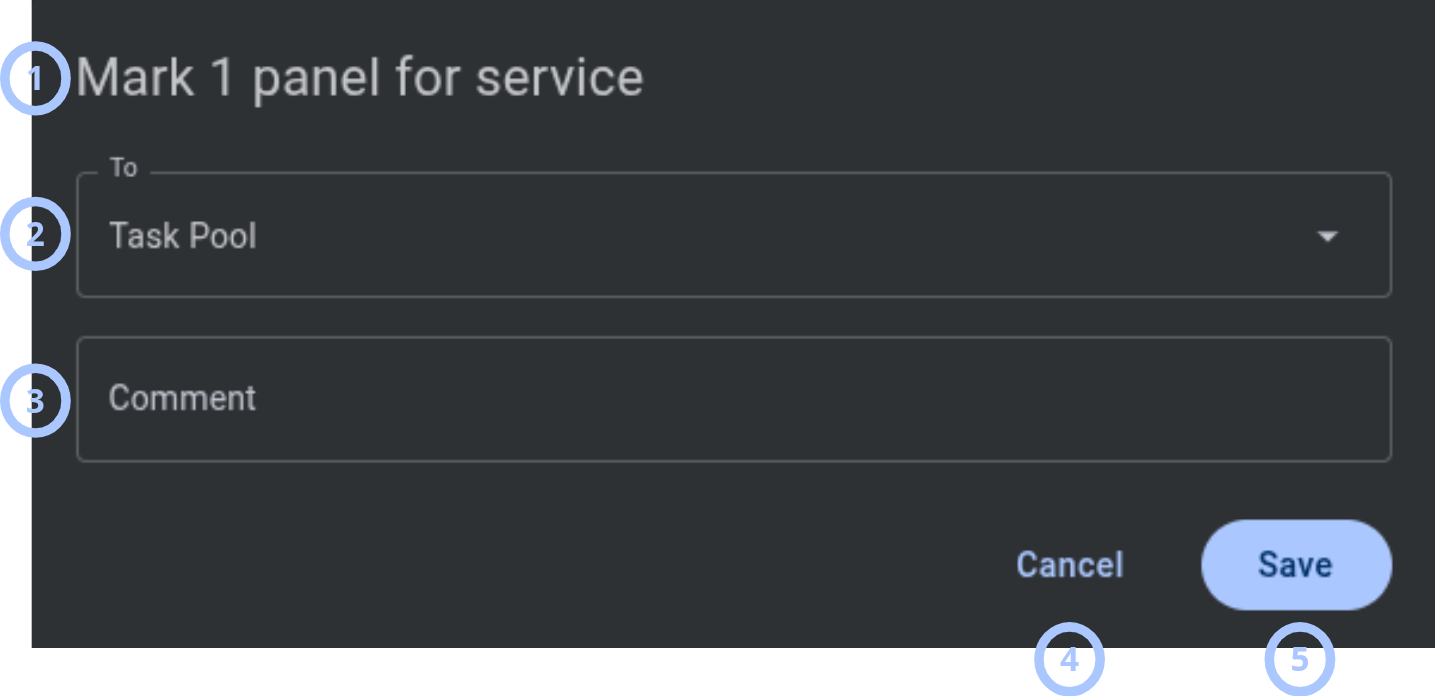
The Mark panel for service modal window opens from More actions > Service assignment > Mark for service.
| Callout | UI element | Description | When to use |
|---|---|---|---|
| 1 | Modal title | Shows the modal name: Mark panel for service. | Use to confirm that you are creating a service assignment. |
| 2 | To dropdown | Lets you select Task Pool or an employee. | Use to assign the service task. |
| 3 | Comment field | Stores a comment about the service assignment. | Use to add context for the service task. |
| 4 | Cancel button | Closes the modal without action. | Use when you do not want to mark the panel for service. |
| 5 | Save button | Marks the panel for service and creates a related Mark for service trouble with the comment. | Use to create the service assignment. |
Reassign panel for service modal window
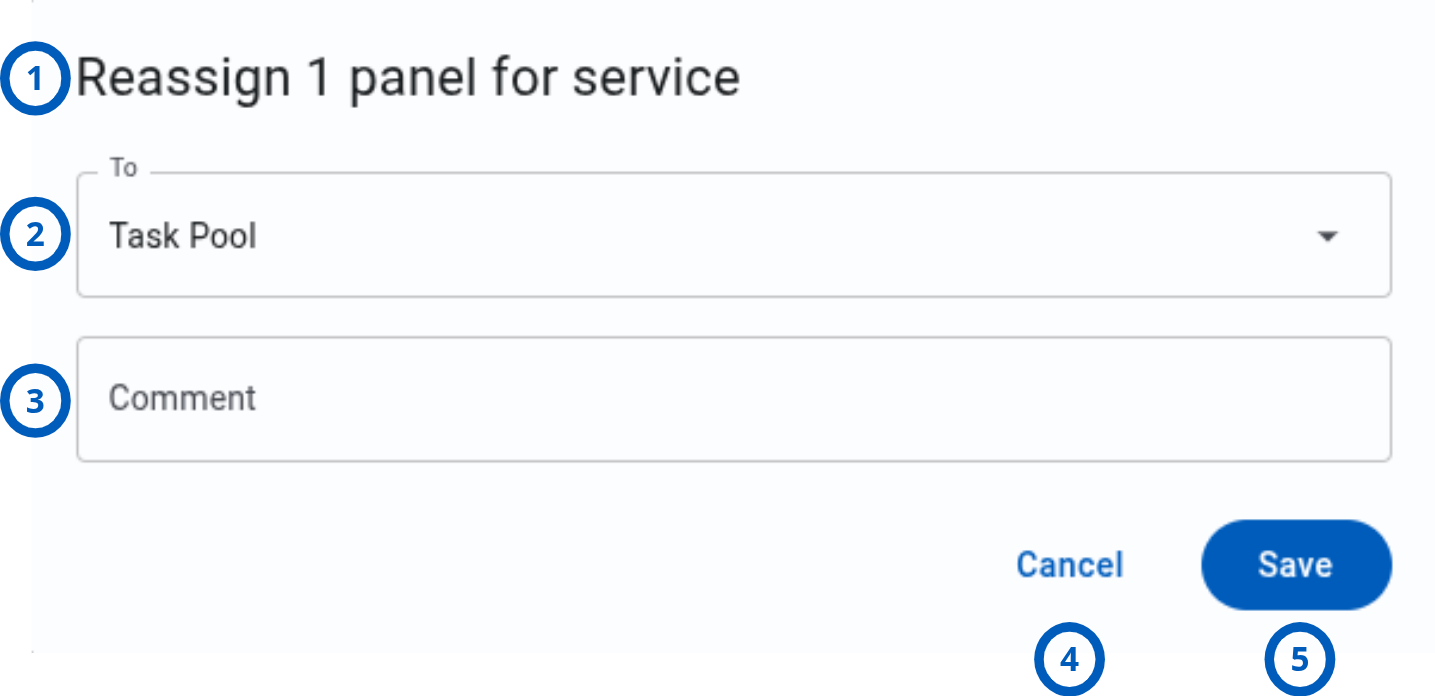
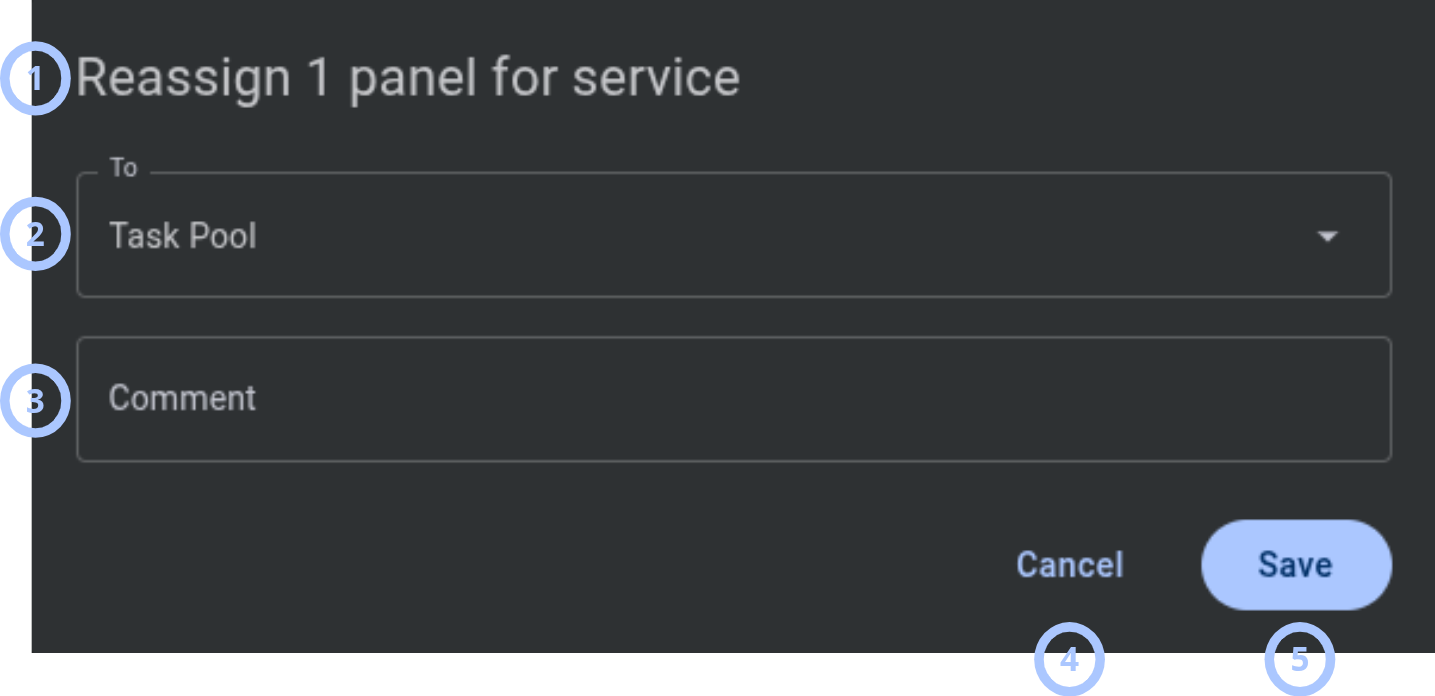
The Reassign panel for service modal window opens from More actions > Service assignment > Reassign.
| Callout | UI element | Description | When to use |
|---|---|---|---|
| 1 | Modal title | Shows the modal name: Reassign panel for service. | Use to confirm that you are changing a service assignment. |
| 2 | To dropdown | Lets you select Task Pool or an employee. | Use to select the new service assignment. |
| 3 | Comment field | Stores a comment about the reassignment. | Use to add context for the reassignment. |
| 4 | Cancel button | Closes the modal without action. | Use when you do not want to reassign the panel. |
| 5 | Save button | Reassigns the panel for service and updates the Mark for service trouble with the new assignment and comment. | Use to save the reassignment. |
Resolve faults modal window
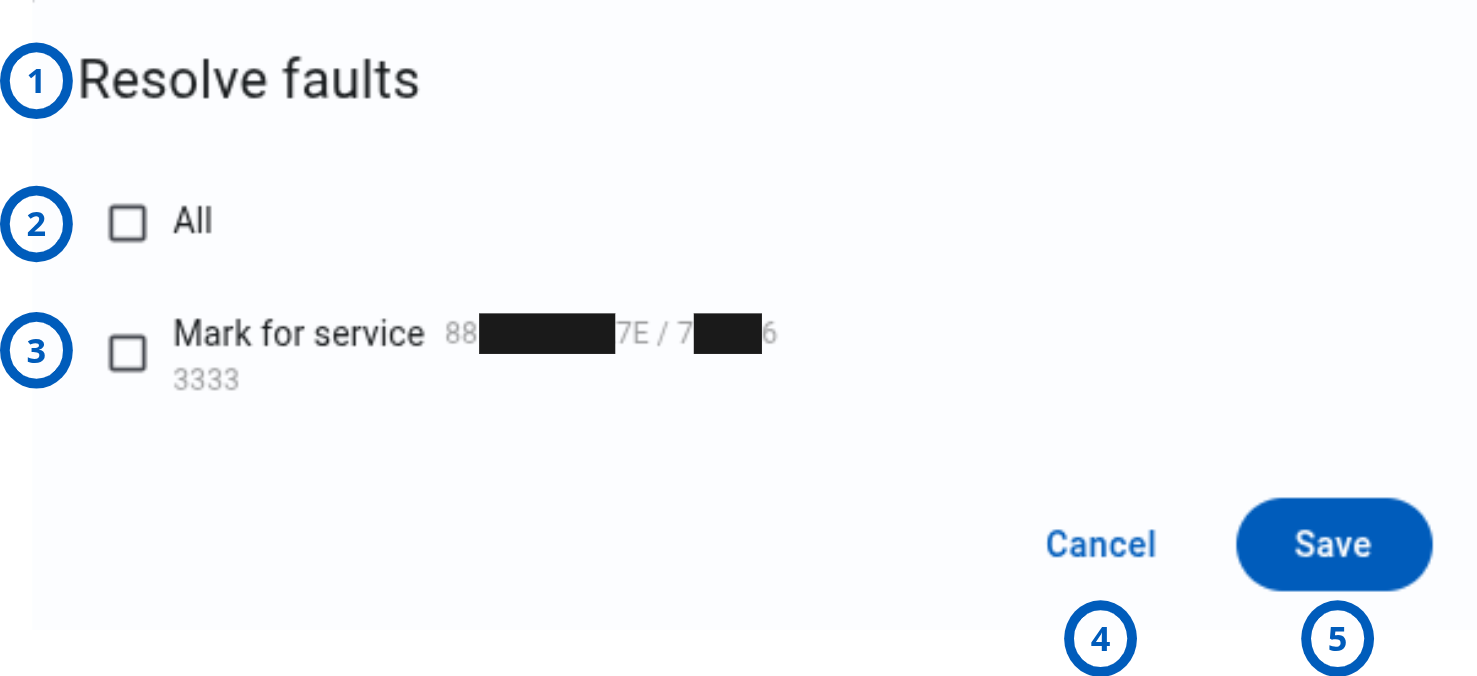
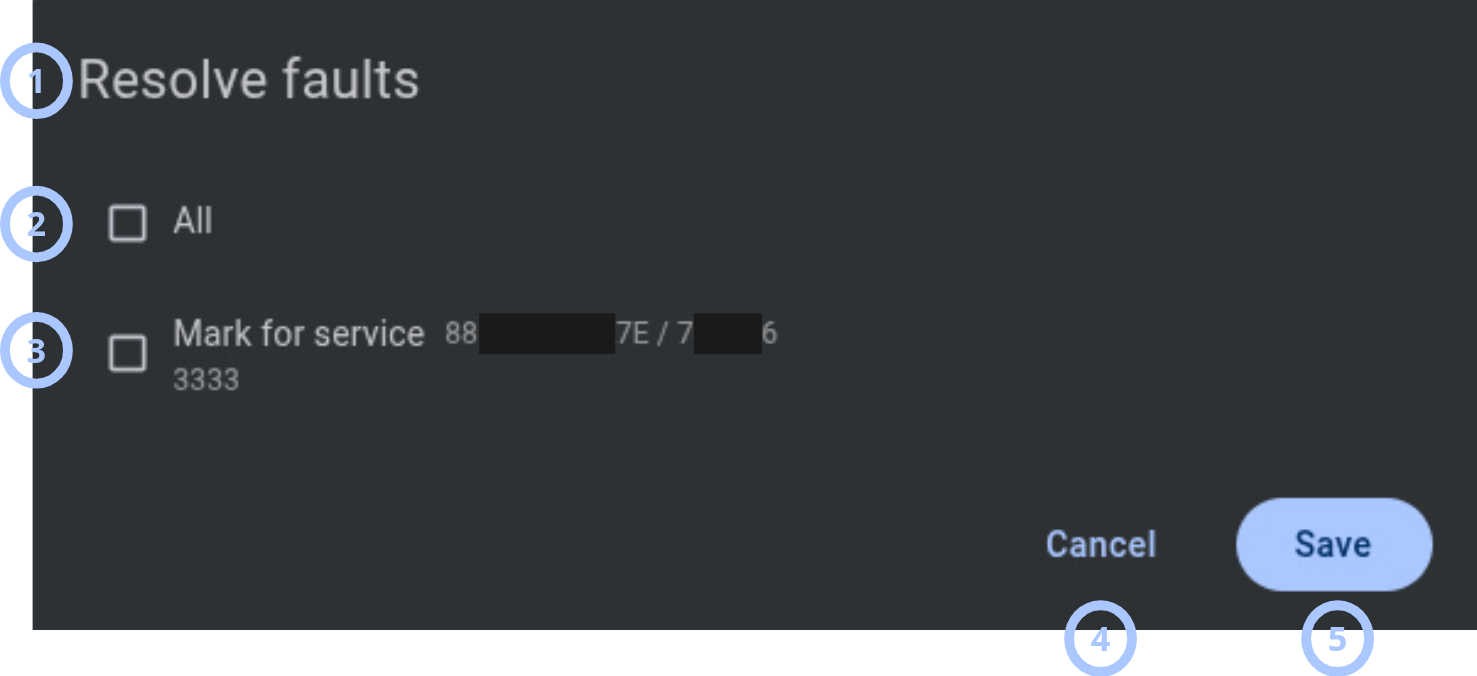
The Resolve faults modal window opens from More actions > Faults > Resolve when the panel is marked for service.
| Callout | UI element | Description | When to use |
|---|---|---|---|
| 1 | Modal title | Shows the modal name: Resolve faults. | Use to confirm that you are resolving faults. |
| 2 | All checkbox | Selects all faults. | Use to select every available fault. |
| 3 | Fault | Shows a checkbox, fault name, and comment. | Use to select specific faults. |
| 4 | Cancel button | Closes the modal without action. | Use when you do not want to resolve faults. |
| 5 | Save button | Resolves selected faults. Resolved faults disappear from the panel. | Use to save fault resolution. |
Resume faults modal window
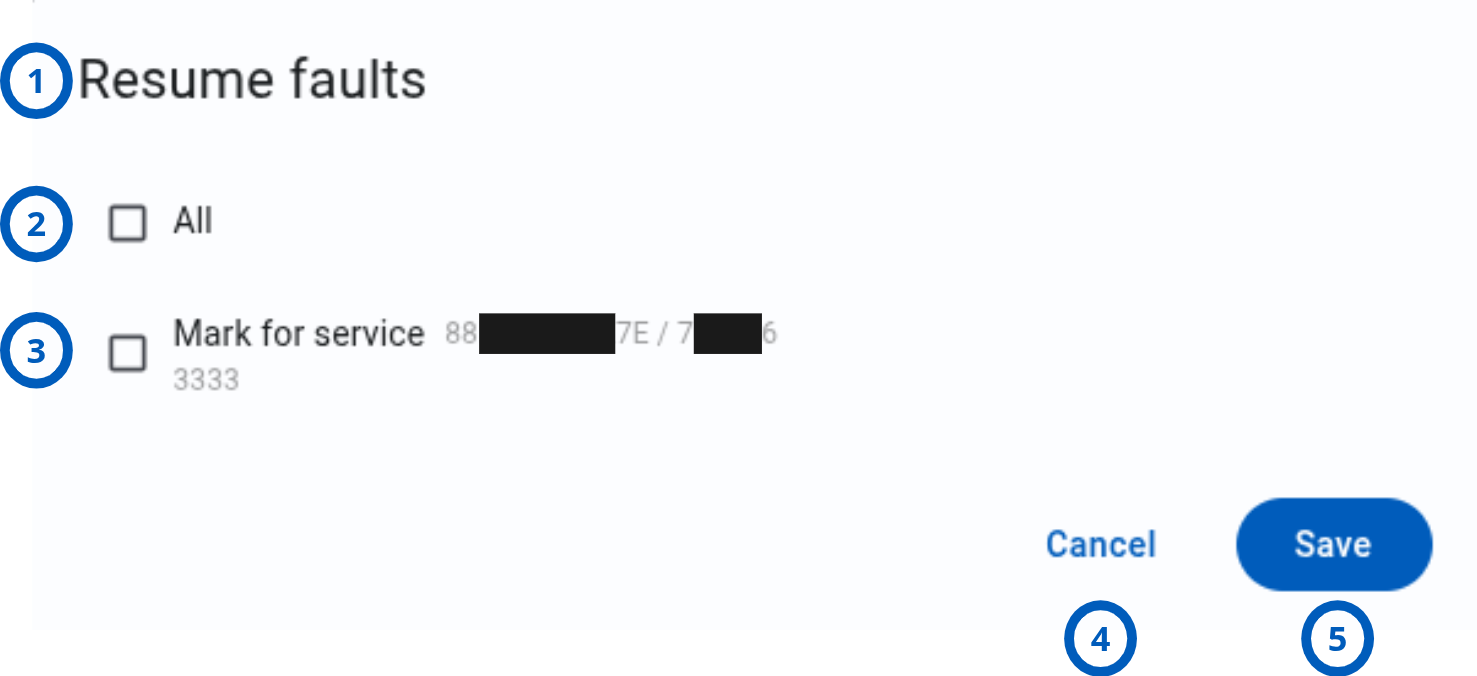
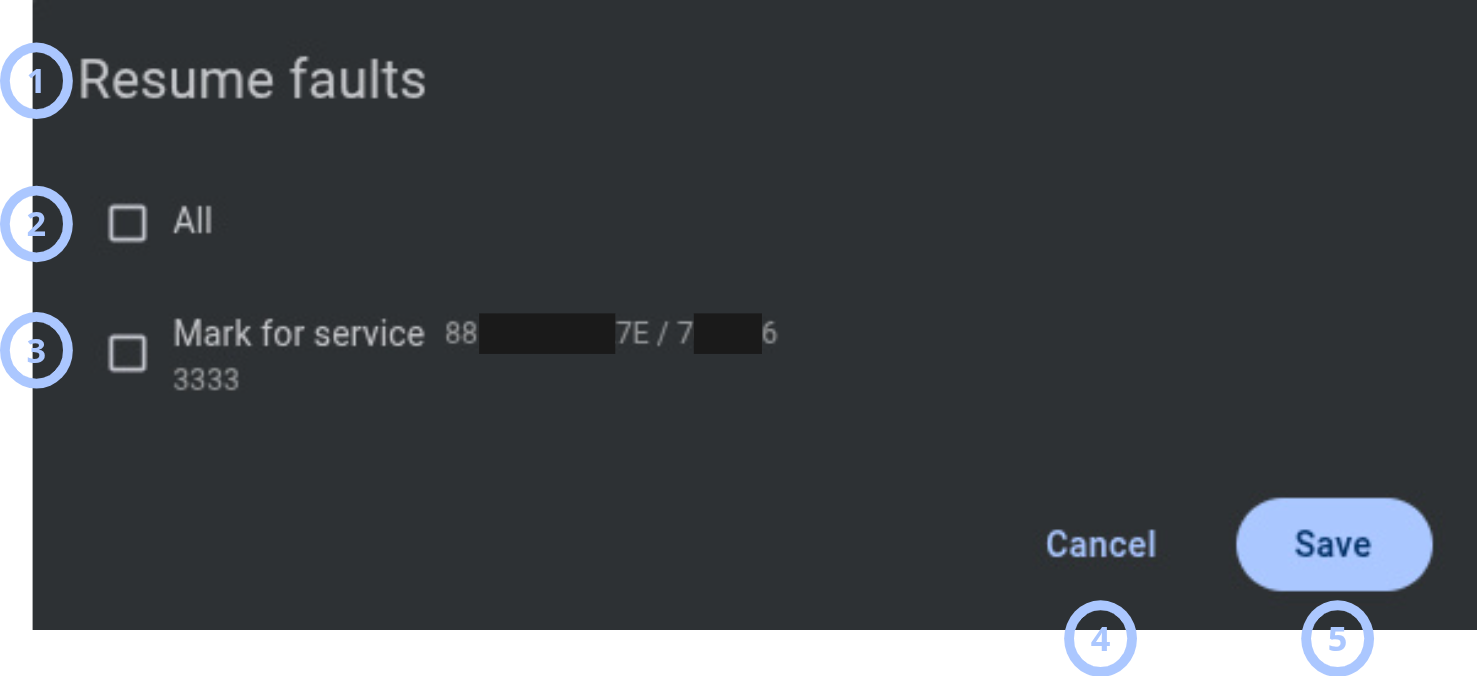
The Resume faults modal window opens from More actions > Faults > Resume when the panel has suspended faults.
| Callout | UI element | Description | When to use |
|---|---|---|---|
| 1 | Modal title | Shows the modal name: Resume faults. | Use to confirm that you are resuming faults. |
| 2 | All checkbox | Selects all faults. | Use to select every suspended fault. |
| 3 | Fault | Shows a checkbox, fault name, and comment. | Use to select specific faults. |
| 4 | Cancel button | Closes the modal without action. | Use when you do not want to resume faults. |
| 5 | Save button | Resumes selected suspended faults. Resumed faults are displayed as active again. | Use to save the change. |
Suspend faults modal window
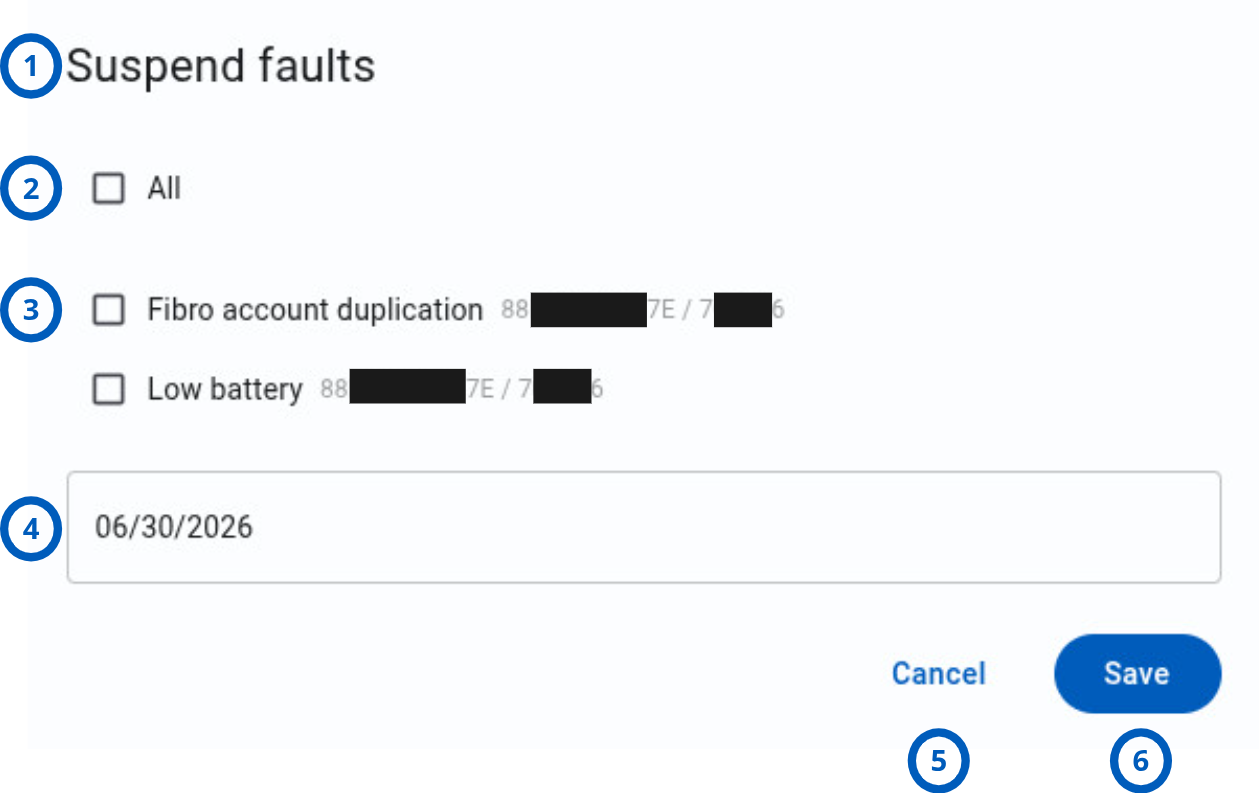
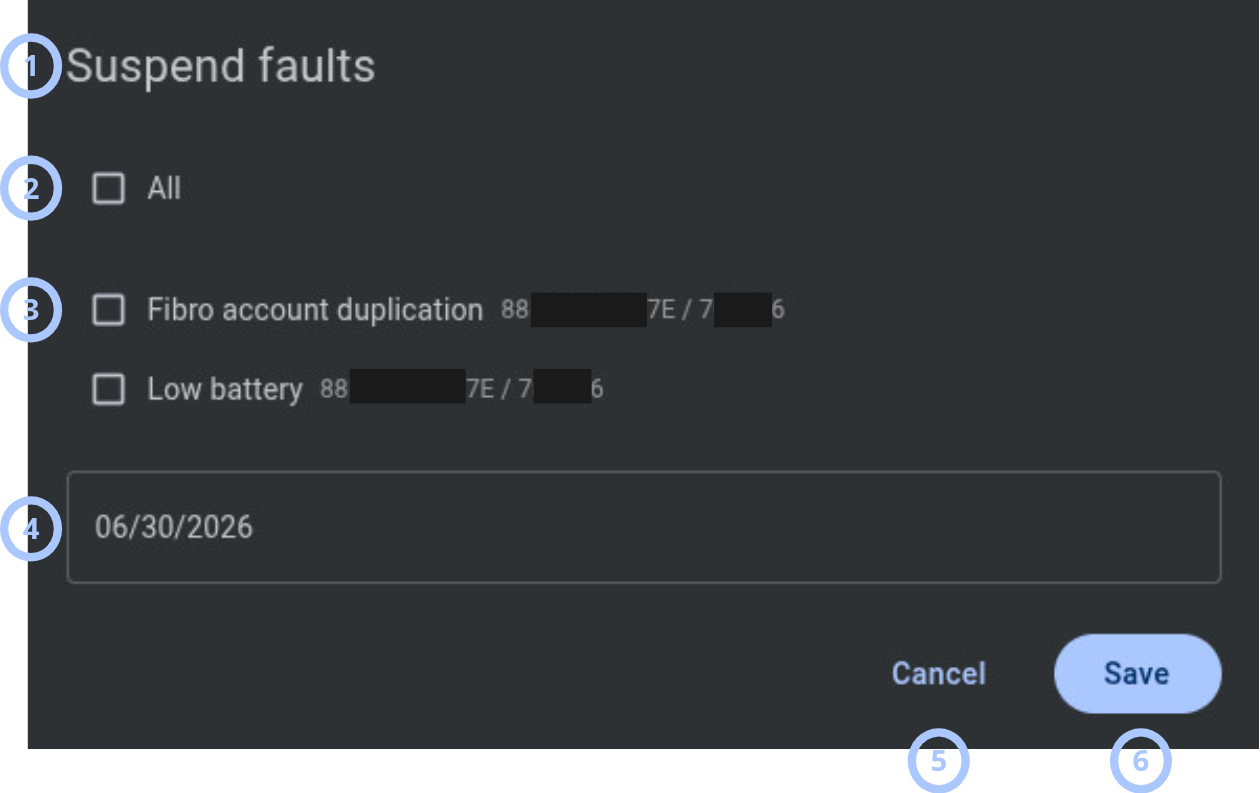
The Suspend faults modal window opens from More actions > Faults > Suspend when the panel has active faults.
| Callout | UI element | Description | When to use |
|---|---|---|---|
| 1 | Modal title | Shows the modal name: Suspend faults. | Use to confirm that you are suspending faults. |
| 2 | All checkbox | Selects all faults. | Use to select every active fault. |
| 3 | Fault | Shows a checkbox, fault name, and comment. | Use to select specific faults. |
| 4 | Date selection | Shows a calendar. | Use to select specific date until fault will be suspended. |
| 5 | Cancel button | Closes the modal without action. | Use when you do not want to suspend faults. |
| 6 | Save button | Suspends selected active faults. Suspended faults are displayed as suspended and greyed out. | Use to save the change. |
Additional actions and info modal window
The Additional actions and info modal window opens when you select the open additional information button in the Actions Bar. The modal has two tabs: Remarks and Logs.
Remarks tab
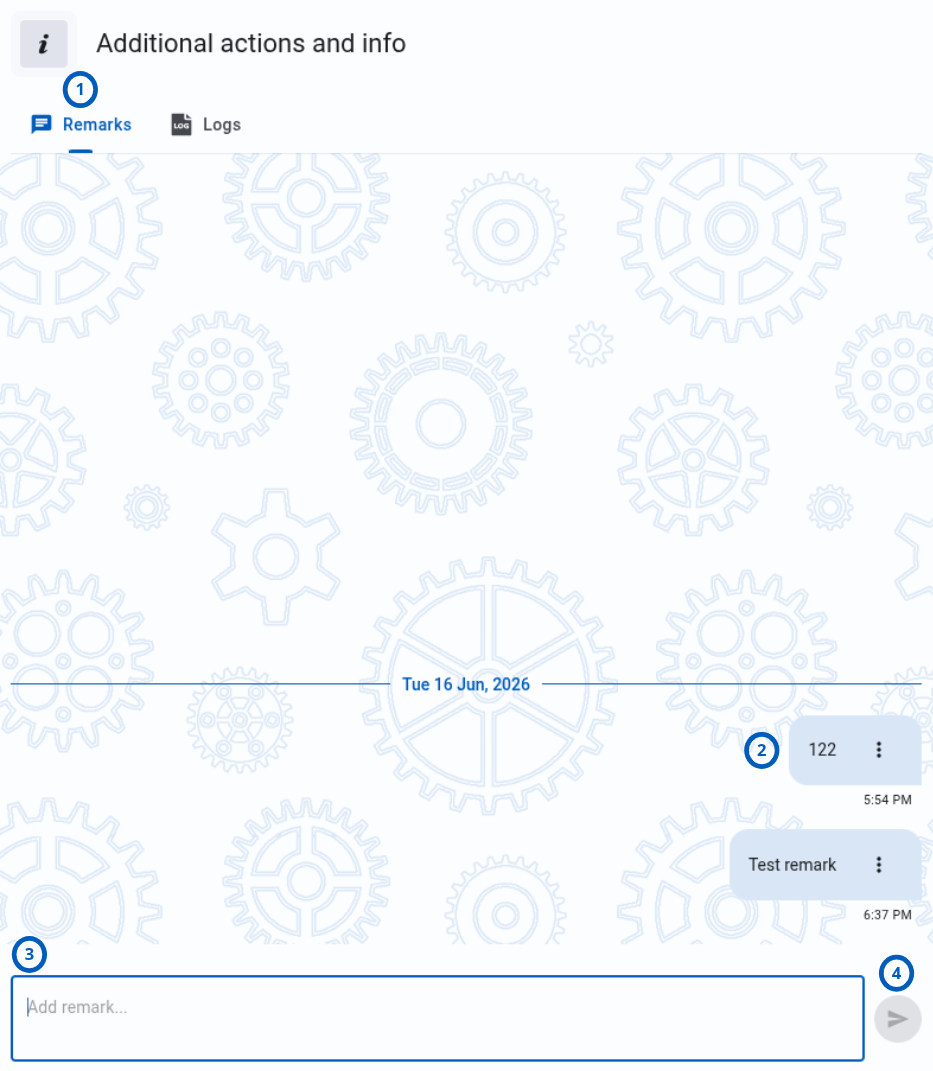
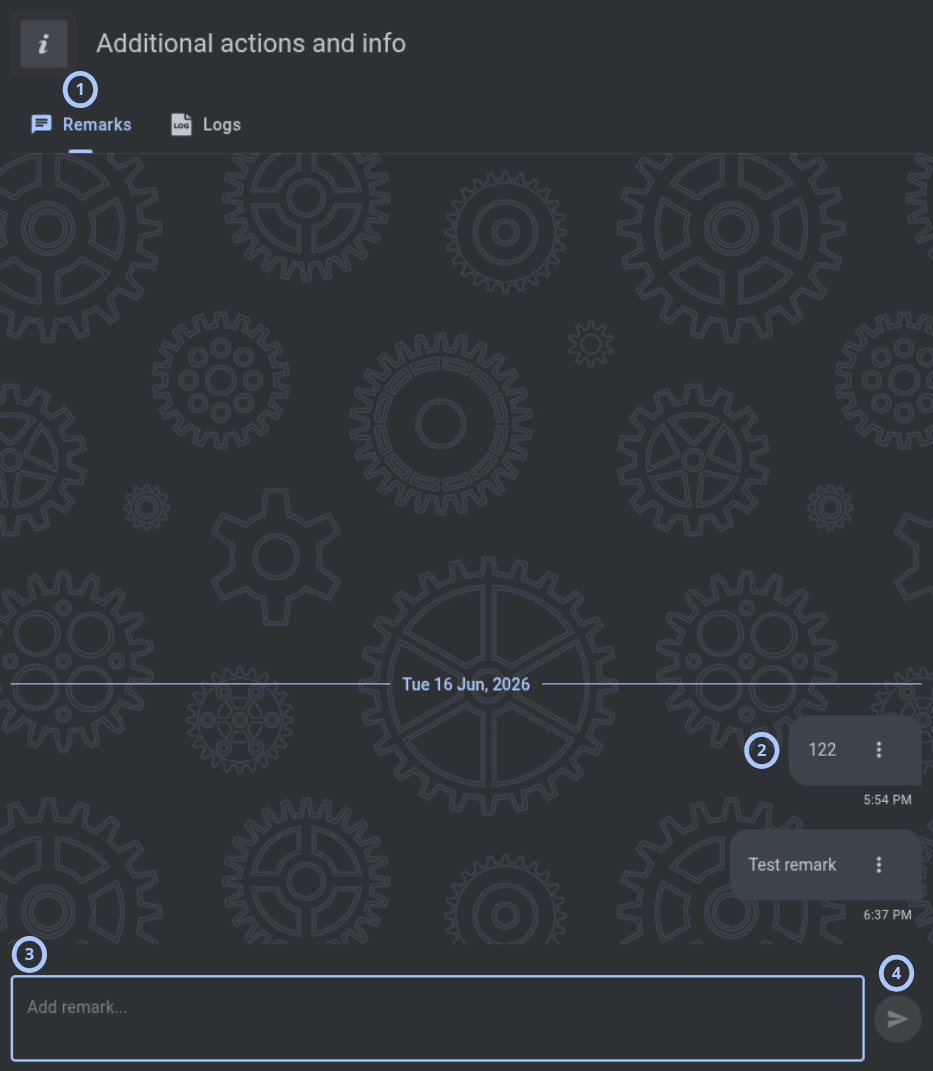
| Callout | UI element | Description | When to use |
|---|---|---|---|
| 1 | Tab title | Shows Logs. | Use to confirm that you are viewing panel logs. |
| 2 | Remark | Shows remark text, timestamp, and a three-dot menu with Remove. | Use to review or remove notes about the panel. |
| 3 | Add remark field | Provides a free-text input field. | Use to enter a new panel note. |
| 4 | Send remark button | Adds the remark to the list with a timestamp. | Use to save the remark. |
Remarks persist across user sessions. Use remarks to leave notes about panel status, maintenance actions, or known issues for other operators.
Logs tab
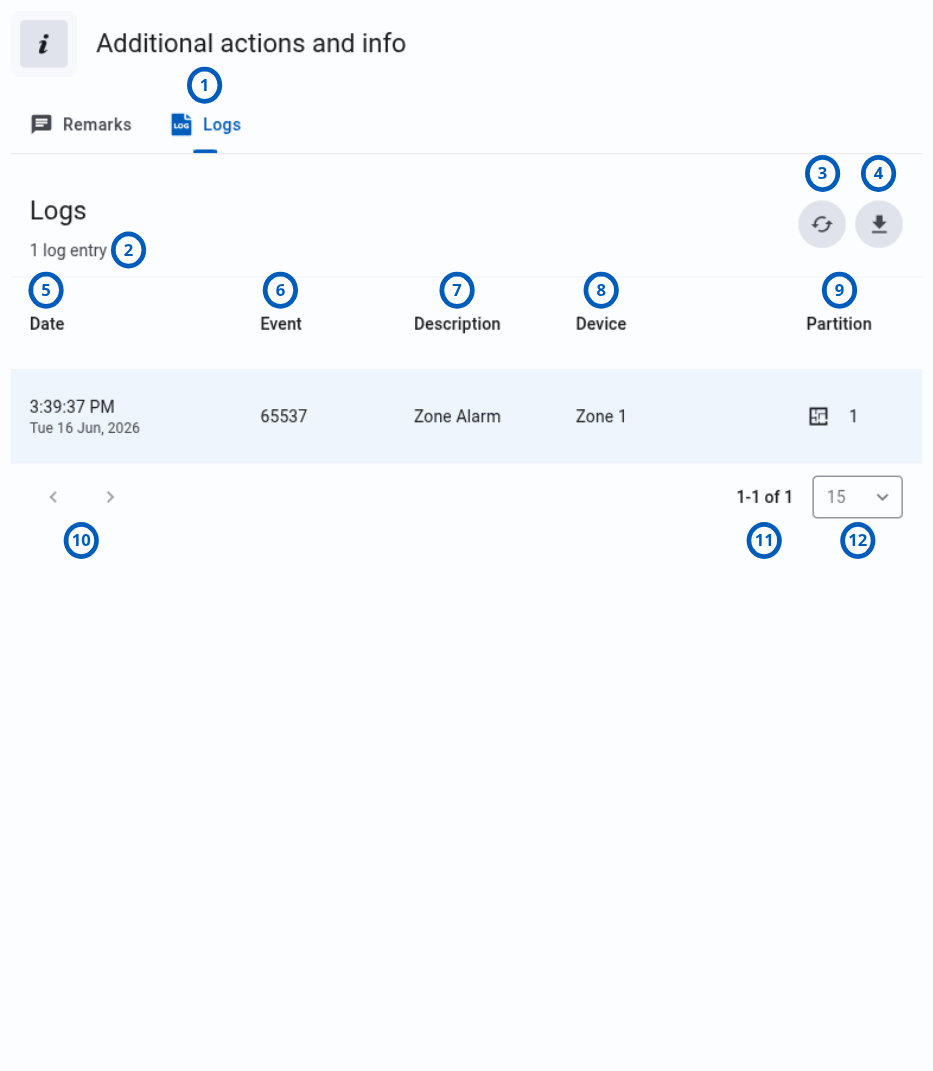
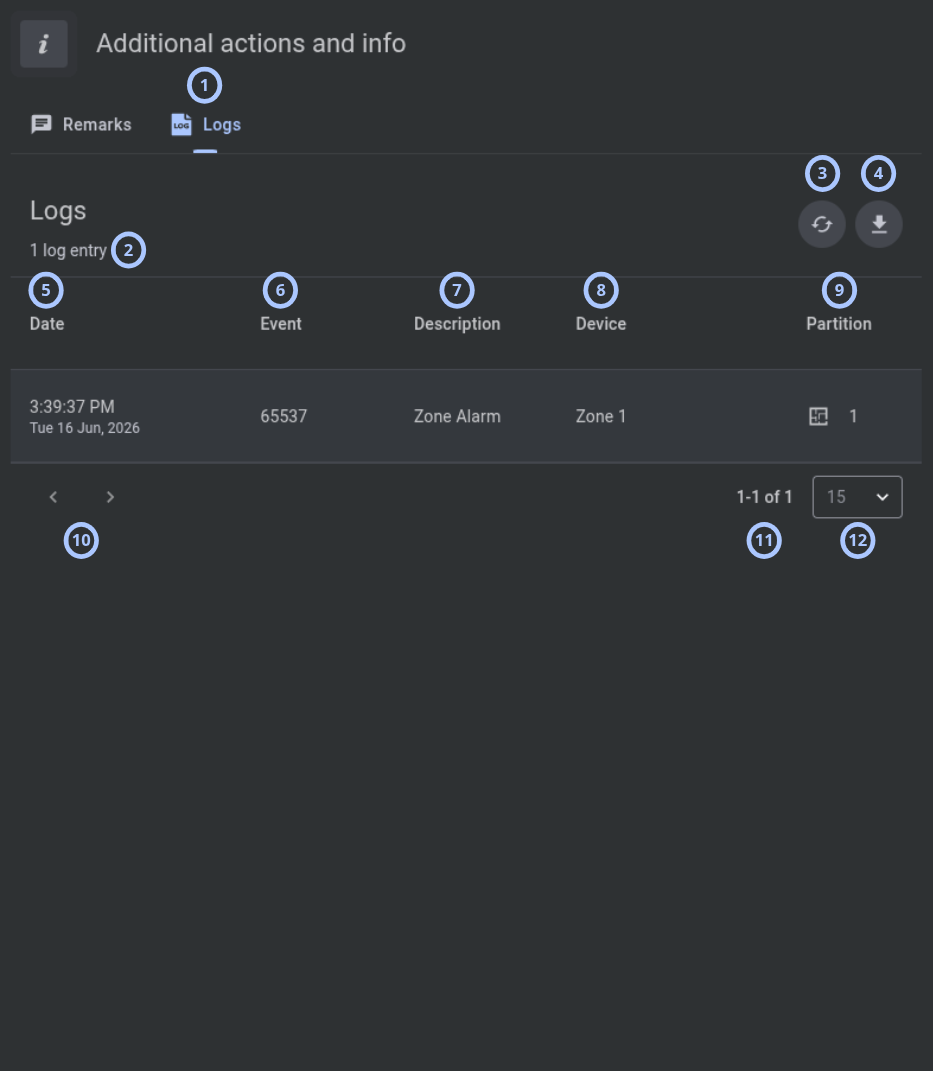
| Callout | UI element | Description | When to use |
|---|---|---|---|
| 1 | Tab title | Shows Logs. | Use to confirm that you are viewing panel logs. |
| 2 | Count of log entries | Shows the number of downloaded log entries, for example, 1 log entry. | Use to see how many log entries are available. |
| 3 | Refresh button | Starts the Download panel log process. | Use to download log entries from the panel buffer to the PowerManage server. |
| 4 | Download CSV button | Downloads panel logs to the local machine. | Use to export panel log entries. |
| 5 | Date | Shows the event timestamp as recorded by the panel. | Use to review when the event occurred. |
| 6 | Event | Shows the event for the panel log entry. | Use to identify the event type. |
| 7 | Description | Shows a human-readable event description, such as Zone Alarm, AC Trouble, or Arm Away by User 1. | Use to understand the event. |
| 8 | Device | Shows the device or source that generated the event. | Use to identify the source. |
| 9 | Partition | Shows the partition number, such as P1 or P2. System-level events can show System. | Use to understand which partition is related to the event. |
| 10 | Pagination arrows | Moves between log pages. | Use when there are more entries than the current page can show. |
| 11 | Range indicator | Shows the current range and total count, for example, 1-15 of 25. | Use to understand where you are in the log list. |
| 12 | Entries per page selector | Lets you select 10, 15, 50, 100, or 200 entries per page. | Use to change how many log entries appear on one page. |
For Visonic panels, two independent log types are supported: Legacy log with up to about 100 events and Standard log with up to about 1000 events. Neo and PSP panels support a single log type with up to about 1000 events.
How to use this page
Open Equipment hub
Goal:
- Open the Equipment hub for a selected panel.
Steps:
- Open the Equipment page.
- Select the panel that you want to manage.
Expected result:
- Equipment hub opens for the selected panel.
- The Actions Bar shows panel identity, connectivity, state, troubles, and available actions.
Review panel identity and connectivity
Goal:
- Confirm that you are working with the correct panel and review connection status.
Steps:
- Open Equipment hub for a selected panel.
- Review the panel icon.
- Review the panel ID and account code.
- Review connection status icons for Broadband (Ethernet, Wi-Fi), Cellular/GPRS.
Expected result:
- You can identify the selected panel and its active communication channels.
- You can see whether each communication channel is online or offline.
Review state and troubles
Goal:
- Open the state and troubles details for the selected panel.
Steps:
- In the Actions Bar, select the state management and troubles area.
- Review the troubles list.
- Select a partition or select ALL.
- Review troubled devices.
- Use state control buttons if a state change is required.
Expected result:
- The widget shows troubles for the selected partition or all partitions.
- The widget shows available state controls for supported panels.
- The widget shows only troubled devices in the bypass section.
Initiate an emergency
Goal:
- Send an emergency command to the panel.
Steps:
- In the Actions Bar, select Emergencies.
- In the Emergency trigger modal window, review the info message.
- Select an emergency trigger: Police, Fire, or Auxiliary.
- Select All, an individual partition, or System when partitioning is disabled.
- Select Confirm.
Expected result:
- An emergency process is created.
- The process is visible in the Processes tab or page and the My Jobs widget.
Reset working keys
Goal:
- Reset cellular or broadband communication working keys.
Steps:
- In the Actions Bar, select the working keys button.
- In the Working keys widget, disable the Cellular working key toggle, the Broadband working key toggle, or both.
Expected result:
- The selected communication working key is reset for the panel.
It can affect panel communication!
Re-enroll a panel after factory default
Goal:
- Re-establish encrypted communication between the PowerManage server and a panel that has been factory-defaulted or flashed.
Steps:
- In the Actions Bar, select the working keys button.
- In the Working keys widget, disable (turn OFF) the toggle for the relevant channel — Cellular working key, Broadband working key, or both.
- Power up or reconnect the panel.
Expected result:
- The panel authenticates with the Default Key (DK) and completes a new bootstrap.
- A new Working Key (WK) is provisioned for the reset channel(s).
- The corresponding toggle returns to the ON state.
Add a panel remark
Goal:
- Add a note that other operators can see.
Steps:
- In the Actions Bar, select the open additional information button.
- Open the Remarks tab.
- Enter text in the Add remark field.
- Select the send remark button.
Expected result:
- The remark appears in the remarks list with a timestamp.
- The remark persists across user sessions.
Download panel logs
Goal:
- Download panel log entries from the panel buffer.
Steps:
- In the Actions Bar, select the open additional information button.
- Open the Logs tab.
- Select Refresh.
- Wait for the Download panel log process to complete.
- Review the log entries.
Expected result:
- Panel log entries are downloaded from the panel buffer to the PowerManage server.
- The Logs tab shows the downloaded log entries.
Export panel logs to CSV
Goal:
- Save panel logs to the local machine.
Steps:
- Open the Logs tab in the Additional actions and info modal window.
- Confirm that log entries are available.
- Select Download CSV.
Expected result:
- A CSV file downloads to the local machine.
Trigger discovery
Goal:
- Start discovery for the selected panel.
Steps:
- Open the More actions menu.
- Select Management > Trigger discovery.
- Select a timeout value.
- Select Save.
Expected result:
- Discovery starts for the panel.
- Discovery progress appears in the Actions Bar with progress bar, percentage, stages count, and elapsed time.
Push a basic configuration
Goal:
- Upload a basic configuration to the panel.
Steps:
- Open the More actions menu.
- Select Configuration > Push basic configuration.
- In Push Basic Config, select a basic configuration.
- Select Push.
Expected result:
- The Upload configuration process starts for the panel with the selected basic configuration.
Mark a panel for service
Goal:
- Create a service assignment for a panel.
Steps:
- Open the More actions menu.
- Select Service assignment > Mark for service.
- Select Task Pool or an employee in the To dropdown.
- Enter a comment.
- Select Save.
Expected result:
- The panel is marked for service.
- A related Mark for service trouble appears for the panel with the comment.
- The trouble is visible in the State management and troubles widget.
Manage faults
Goal:
- Resolve, resume, or suspend panel faults.
Steps:
- Open the More actions menu.
- Select Faults > Resolve, Faults > Resume, or Faults > Suspend.
- Select individual faults or select All.
- Select Save.
Expected result:
- Resolved faults disappear from the panel.
- Resumed faults are displayed as active again.
- Suspended faults are displayed as suspended and greyed out.
Open Events for an unhandled alarm
Goal:
- Review events related to an unhandled panel alarm.
Steps:
- Open Equipment hub for the selected panel.
- In the Actions Bar, find the alarm icon.
- Select the alarm icon.
Expected result:
- The Events page opens.
- Related filters are applied to show events for the selected panel alarm.
Review discovery progress
Goal:
- Monitor discovery progress for the selected panel.
Steps:
- Open Equipment hub for the selected panel.
- Review the discovery progress area in the Actions Bar.
- Check the progress bar, percentage, stages count, and elapsed discovery time.
Expected result:
- You can see the current discovery progress for the panel.
- You can identify whether discovery is still running.
Open the billing plan modal
Goal:
- Review or manage the billing plan for a supported panel.
Steps:
- Open Equipment hub for an IQ or Neo 5 panel in a dealer group.
- In the Actions Bar, select the billing plan name.
Expected result:
- The Billing plan modal opens.
- You can review or manage the billing plan according to available billing permissions.
Refresh panel state
Goal:
- Start the Refresh state process for the selected panel.
Steps:
- Open the More actions menu.
- Select Configuration > Refresh state.
Expected result:
- The Refresh state process starts for the selected panel.
Refresh state is not supported for fresh panels that have not completed first discovery.
Refresh panel configuration
Goal:
- Start the Download configuration process for the selected panel.
Steps:
- Open the More actions menu.
- Select Configuration > Refresh configuration.
Expected result:
- The Download configuration process starts for the selected panel.
Refresh configuration is not supported for fresh panels that have not completed first discovery.
Read panel diagnostic information
Goal:
- Start the Read diagnostic info process for the selected panel.
Steps:
- Open the More actions menu.
- Select Management > Read diagnostic.
Expected result:
- The Read diagnostic info process starts for the selected panel.
Edit panel information
Goal:
- Open the panel edit flow for the selected panel.
Steps:
- Open the More actions menu.
- Select Management > Edit.
Expected result:
- The Edit panel modal window opens.
Reassign a panel for service
Goal:
- Change the service assignment for a panel that already has a service assignment.
Steps:
- Open the More actions menu.
- Select Service assignment > Reassign.
- Select Task Pool or an employee in the To dropdown.
- Enter a comment.
- Select Save.
Expected result:
- The panel service assignment is updated.
- The related Mark for service trouble is updated with the new assignment and comment.
Resume suspended faults
Goal:
- Return suspended faults to active state.
Steps:
- Open the More actions menu.
- Select Faults > Resume.
- Select individual faults or select All.
- Select Save.
Expected result:
- Selected suspended faults are displayed as active again.
Suspend active faults
Goal:
- Temporarily suspend active faults for the selected panel.
Steps:
- Open the More actions menu.
- Select Faults > Suspend.
- Select individual faults or select All.
- Select a date if required.
- Select Save.
Expected result:
- Selected active faults are suspended.
- Suspended faults are displayed as suspended and greyed out.
Resolve selected faults
Goal:
- Resolve selected faults for a panel that is marked for service.
Steps:
- Open the More actions menu.
- Select Faults > Resolve.
- Select individual faults or select All.
- Select Save.
Expected result:
- Selected faults are resolved.
- Resolved faults disappear from the panel.
Enable or disable installer app access
Goal:
- Control whether installers can access the panel through the AlarmInstall app.
Steps:
- Open the More actions menu.
- Go to Applications.
- Enable or disable the Installer app toggle.
Expected result:
- When the toggle is enabled, installers can log in to the panel using the AlarmInstall app.
- When the toggle is disabled, installers cannot log in to the panel using the AlarmInstall app.
Enable or disable customer app access
Goal:
- Control whether customers can access the panel through the ConnectAlarm app.
Steps:
- Open the More actions menu.
- Go to Applications.
- Enable or disable the Customer app toggle.
Expected result:
- When the toggle is enabled, customers can log in to the panel using the ConnectAlarm app.
- When the toggle is disabled, customers cannot log in to the panel using the ConnectAlarm app.
Remove a panel
Goal:
- Remove the selected panel from the PowerManage server.
Steps:
- Open the More actions menu.
- Select Remove.
- Complete the confirmation flow, if shown.
Expected result:
- The selected panel is removed from the PowerManage server.
Remove a panel only when the panel is no longer needed. This action can affect panel access and related panel data.
Tips
- Confirm the selected panel before you start actions from the Actions Bar.
- Use connection status icons before you start emergency, discovery, refresh, or configuration actions.
- Review discovery progress for newly enrolled panels before using actions that require completed discovery.
- Use remarks to share panel-specific notes with other operators.
- Use the State management and troubles widget to review fault comments before you resolve, resume, or suspend faults.
Troubleshooting
Emergencies button is not visible
Possible causes
- Your role does not include the Initiate Emergency permission.
- The panel is fresh and has not completed first discovery.
- The panel type or panel state does not support the action.
What to do
- Confirm that your role includes the Initiate Emergency permission.
- Check whether first discovery is complete.
- Confirm that the panel supports emergency actions.
Emergency process times out
Possible causes
- The panel is offline.
- The panel did not respond before the process timeout.
What to do
- Check the connection status icons in the Actions Bar.
- Wait for the panel to come online.
- Review the process in the Processes page.
More actions menu item is missing
Possible causes
- Your role does not allow the action.
- The selected panel type does not support the action.
- The selected panel has not completed first discovery.
- The panel state does not match the action requirements.
What to do
- Confirm your role permissions.
- Confirm the selected panel type.
- Confirm whether first discovery is complete.
- Check whether the panel has the required state, such as active faults or suspended faults.
Refresh state, refresh configuration, or push basic configuration is not available
Possible causes
- The panel is fresh and has not completed first discovery.
- Your role does not allow the action.
- The panel type does not support the action.
What to do
- Wait for first discovery to complete.
- Confirm your permissions.
- Confirm that the panel type supports the action.
Basic configuration is not shown in the dropdown
Possible causes
- The configuration does not match the panel vendor or type.
- The configuration is not assigned to the panel group.
- The operator does not have access to the group where the configuration is assigned.
What to do
- Confirm the panel vendor and panel type.
- Confirm that the basic configuration is assigned to the panel group.
- Confirm that your role has access to the relevant group.
Discovery progress does not update
Possible causes
- The panel did not come to the server.
- The panel is offline or communication is unavailable.
What to do
- Check panel connection status icons.
- Review the discovery process in Processes.
- Trigger discovery again with an appropriate timeout if needed.
State controls are not available
Possible causes
- The selected panel is a Fibro transmitter.
- The panel was manually enrolled and has unfinished first discovery.
- Your role does not allow state management.
- The selected partition does not support the requested action.
What to do
- Confirm the panel type.
- Confirm that first discovery is complete.
- Confirm your role permissions.
Troubled device is not shown in the bypass section
Possible causes
- The device does not have a trouble.
- The device is not bypassable.
- The selected partition does not contain the troubled device.
What to do
- Confirm that the device has an active trouble.
- Confirm that the device can be bypassed.
- Select ALL or the related partition.
Customer app login fails with Service unavailable
Possible causes
- Customer app access is enabled but the billing installation does not have an active billing plan.
- The billing plan is expired or not assigned.
What to do
- Review the billing plan in the Actions Bar.
- Open the Billing plan modal.
- Confirm that the billing plan is active.
- Try customer app login again after billing is corrected.
Panel logs are empty after refresh
Possible causes
- The panel log buffer does not contain entries.
- The panel did not return log data.
What to do
- Confirm panel connectivity.
- Select Refresh again.
- Review the Download panel log process status.
- Confirm whether the selected panel type supports log download.
Download CSV does not start
Possible causes
- No log entries are available for download.
- The browser blocked the download.
- The log refresh process has not completed.
What to do
- Refresh panel logs first.
- Confirm that log entries are displayed.
- Allow downloads in the browser.
- Select Download CSV again.
Mark for service trouble is not visible
Possible causes
- The Mark panel for service action was not saved.
- The State management and troubles widget was not refreshed.
- The selected partition filter does not show the trouble.
What to do
- Confirm that Save was selected in the Mark panel for service modal.
- Refresh the panel state or reopen the widget.
- Select ALL in the State management and troubles widget.
Resolve, resume, or suspend fault action is not available
Possible causes
- Your role does not allow fault management.
What to do
- Review panel faults in the State management and troubles widget.
- Confirm your role permissions.