Action Log
Overview
The Action Log page is used to review user actions recorded in PowerManage.
Use this page to:
- Review actions made by users.
- Check when an action was made.
- Identify the user who made an action.
- Review the detailed action description.
- Check whether an action completed successfully or with an error.
- Navigate through action log entries.
Before you begin
Required permissions
- You must have permission to view the Action Log page.
- Your role and assigned groups can affect which action log entries are visible.
info
Access to the Action Log page is controlled by the role permission group named Action Log.
Preconditions
- Action log entries must exist before the grid can show data.
Dependencies
- The action log entries grid depends on recorded user actions.
- The User column depends on available user information.
- Pagination depends on the number of available action log entries.
Important limitations
- If no action log entries are available, the grid can appear empty.
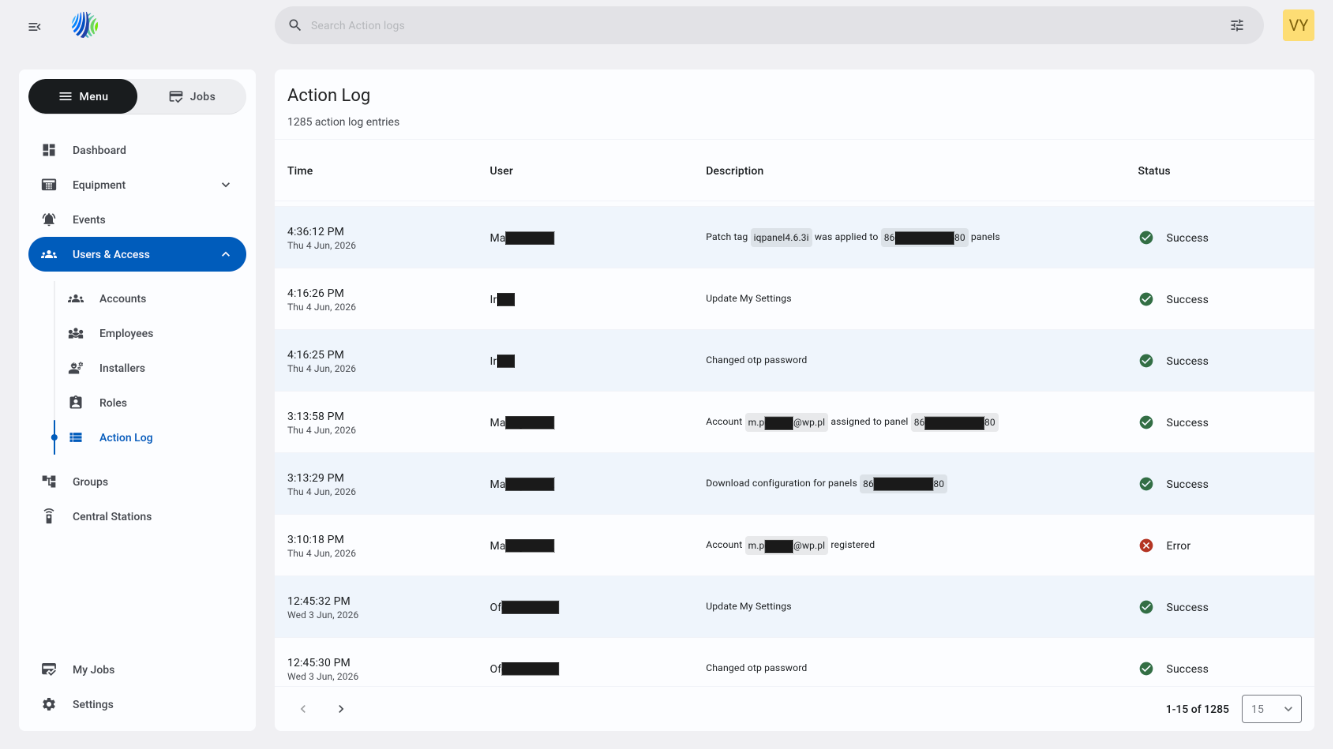
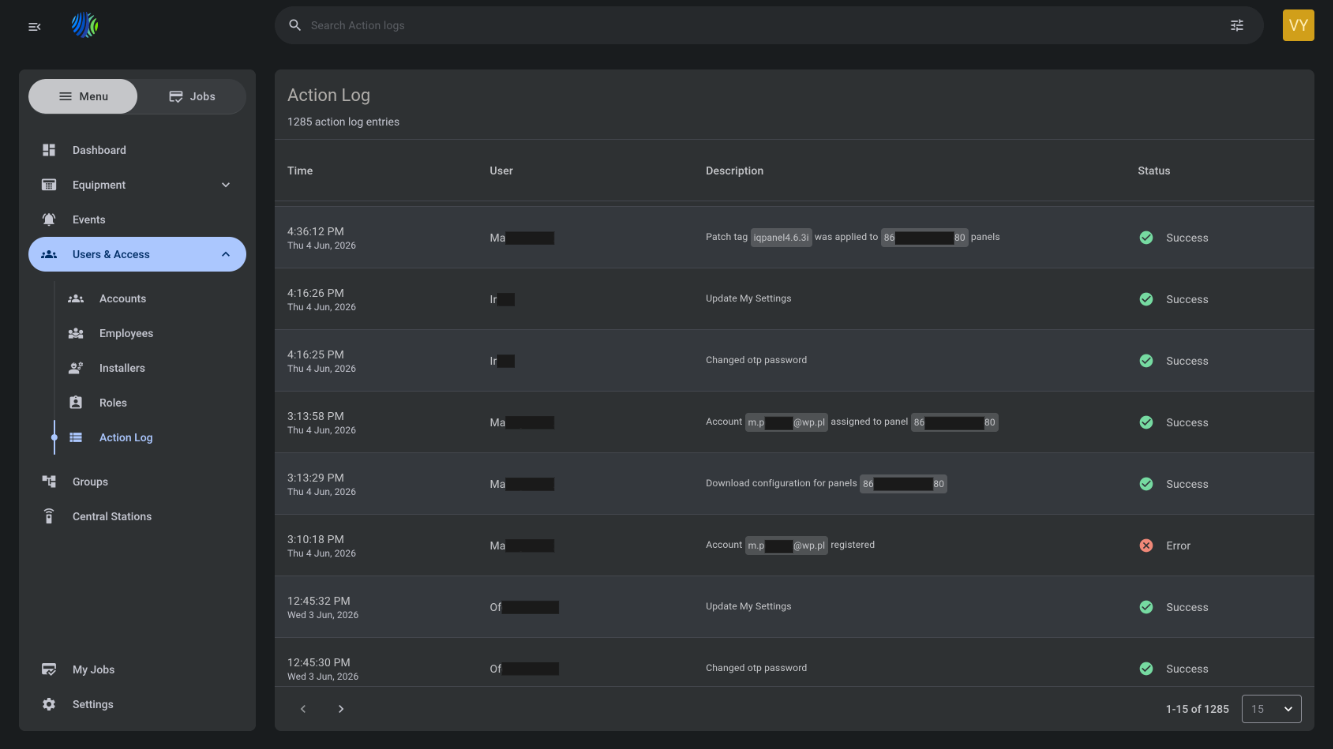
Page layout
Page header
The page header identifies the page and shows the number of available action log entries.


| Callout | UI element | Description | When to use |
|---|---|---|---|
| 1 | Page title | Shows the current page name: Action Log. | Use to confirm that you are on the Action Log page. |
| 2 | Action log entries count | Shows the total number of action log entries, for example, 1285 action log entries. | Use to understand how many action log entries are available. |
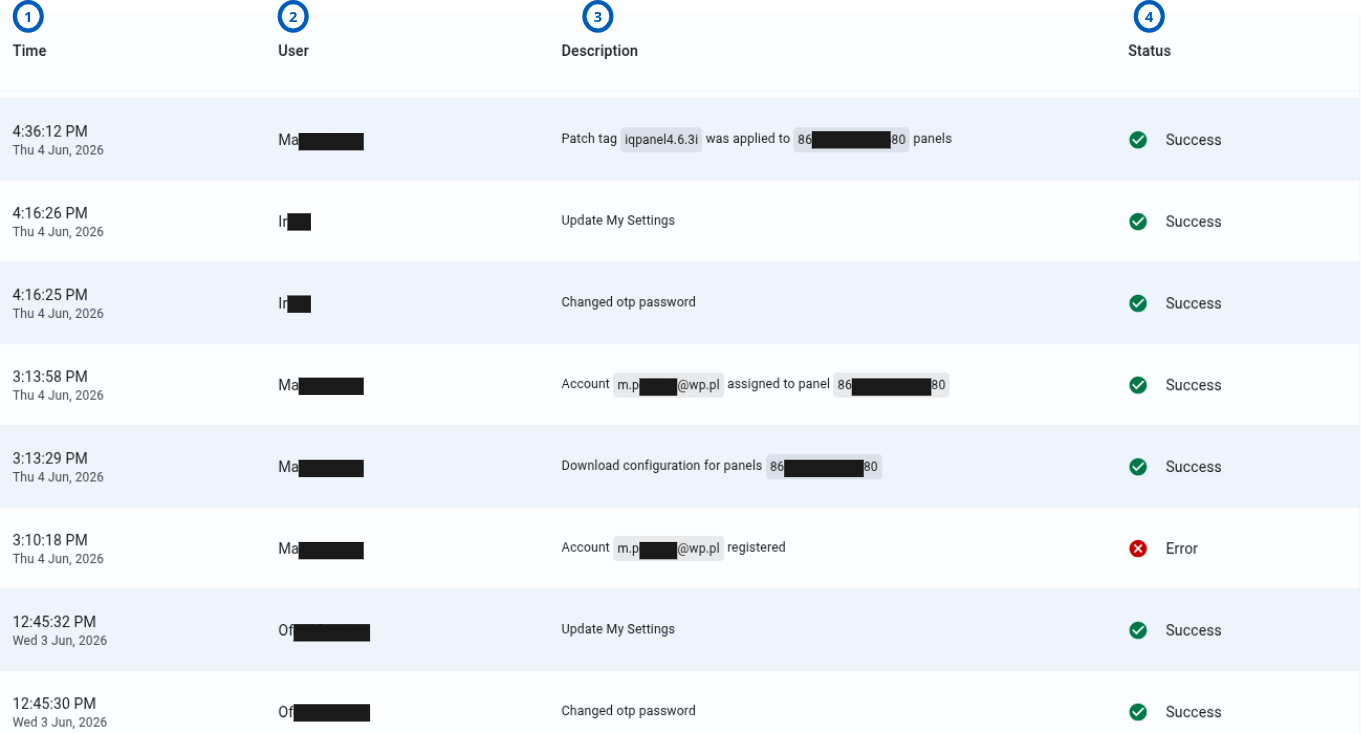
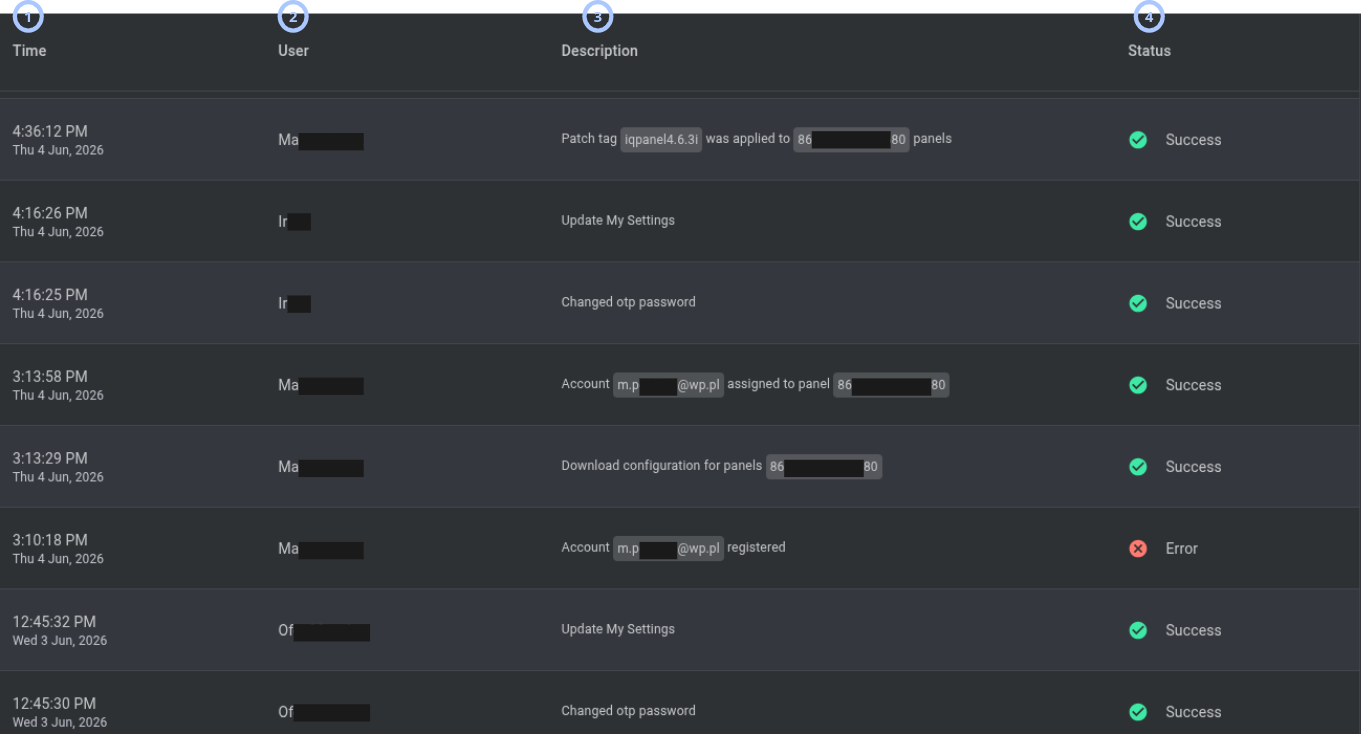
Action log entries grid
The action log entries grid appears under the page header. The grid lists action log entries and key details for each action.
| Callout | UI element | Description | When to use |
|---|---|---|---|
| 1 | Time column | Shows the time and date when the action log entry was created. | Use to understand when the action occurred. |
| 2 | User column | Shows the user who made the action. | Use to identify who performed the action. |
| 3 | Description column | Shows a detailed description of the action, for example, Changed otp password. | Use to understand what changed or what operation was performed. |
| 4 | Status column | Shows the result of the action. | Use to check whether the action ended with Success or Error. |
Pagination controls
Pagination controls appear at the bottom of the action log entries grid.


| Callout | UI element | Description | When to use |
|---|---|---|---|
| 1 | Previous and next arrows | Shows left and right arrows, such as < and >, to move between pages. | Use when the action log entries list has more records than the current page can show. |
| 2 | Range indicator | Shows the current range and total number of action log entries, for example, 1-15 of 25. | Use to understand where you are in the action log entries list. |
| 3 | Entries per page selector | Controls how many action log entries appear on one page. | Use to show fewer or more action log entries in the grid. |
How to use this page
Review action log entries
Goal:
- Review user actions and their results.
Steps:
- Open the Action Log page.
- Review the action log entries count under the page title.
- Review the Time column to check when an action occurred.
- Review the User column to identify who made the action.
- Review the Description column to understand what action was performed.
- Review the Status column to check whether the action ended with Success or Error.
Expected result:
- You can identify the action, the user who made the action, the time of the action, and the action result.
Change the number of action log entries shown on a page
Goal:
- Change how many action log entries appear in the grid.
Steps:
- Go to the bottom-right area of the action log entries grid.
- Open the entries per page selector.
- Select one of the available values:
- 10
- 15
- 50
- 100
- 200
Expected result:
- The grid updates to show the selected number of action log entries per page.
- The range indicator updates.
Move between action log pages
Goal:
- Navigate through multiple pages of action log entries.
Steps:
- Go to the bottom-left area of the action log entries grid.
- Select the next arrow to move forward.
- Select the previous arrow to move back.
- Review the range indicator, for example, 1-15 of 25.
Expected result:
- The grid shows the selected page of action log entries.
- The range indicator updates.
Field and option reference
Action log entries grid columns
| Name | Description | Accepted values | Behavior | Restrictions | Default value |
|---|---|---|---|---|---|
| Time | Time and date of the action log entry. | Date and time format, for example: 12:08:58 PM Tue 5 May, 2026. | Shows when the action was recorded. | Read-only. | Set when the action log entry is created. |
| User | User who made the action. | Existing user name. | Identifies who performed the action. | Read-only. | Set by the system. |
| Description | Detailed description of the action. | System-generated text, for example, Changed otp password. | Explains what action was performed. | Read-only. | Set by the system. |
| Status | Result of the action. | Success or Error. | Shows whether the action completed successfully or with an error. | Read-only. | Set by the system. |
Status values
| Name | Description | Accepted values | Behavior | Restrictions | Default value |
|---|---|---|---|---|---|
| Success | The action completed successfully. | Success. | Shows that the requested action was completed. | Read-only. | Set by the system. |
| Error | The action did not complete successfully. | Error. | Shows that the requested action ended with an error. | Read-only. | Set by the system. |
Pagination options
| Name | Description | Accepted values | Behavior | Restrictions | Default value |
|---|---|---|---|---|---|
| Entries per page | Controls how many action log entries appear on one page. | 10, 15, 50, 100, 200. | Updates the grid page size. | Only listed values are available. | 15. |
| Range indicator | Shows the current visible range and total count. | System-generated value, for example, 1-15 of 25. | Updates when you change page or page size. | Read-only. | Depends on total action log entries count. |
Tips
tip
- Use the Time column to find actions made during a specific period.
- Use the User column to identify who made an action.
- Use the Description column to understand what was changed or attempted.
- Use the Status column to find actions that ended with Error.
- Increase the entries per page value when reviewing many action log entries.
Troubleshooting
Action log entries are not visible
Possible causes
- No action log entries are available.
- You do not have permission to view the Action Log page.
- Your role is limited to groups with no related action log entries.
What to do
- Confirm that action log entries exist.
- Confirm that your role has permission to view the Action Log page.
- Contact an administrator if the grid remains empty.
The expected action log entry is not visible
Possible causes
- The action log entry is on another page.
- The entries per page value is too small.
What to do
- Use the pagination arrows to move between pages.
- Increase the entries per page value.
Pagination does not show the expected entries
Possible causes
- You are viewing a different page in the list.
- The entries per page value limits how many entries appear.
What to do
- Review the range indicator.
- Use the previous and next arrows to move between pages.
- Change the entries per page value if you need to show more entries.
Related pages
See also
Was this page helpful?