Billing
Billing plan
For the IQ panels, the PowerManage includes the billing plan button in the Equipment page and in the Equipment hub:


| Callout | Description |
|---|---|
| 1 | Equipment hub |
| 2 | Billing plan button |
| 3 | Equipment page |
You can set up Short view or Full view for the billing plan button. For more information, see Billing status view.
The billing plan button displays the billing plan set for the panel:
| Billing plan button | Description |
|---|---|
| Red | No active billing plan |
| Rotating star | The billing plan request is in progress |
| Gray | Mobile App Plan |
| Blue | One-month billing plan |
| Green | One-year billing plan |
| Yellow | Two-year billing plan |
| Orange | Three-year billing plan |
Click the billing plan button to open the Billing status pane and set up the panel’s billing plan:
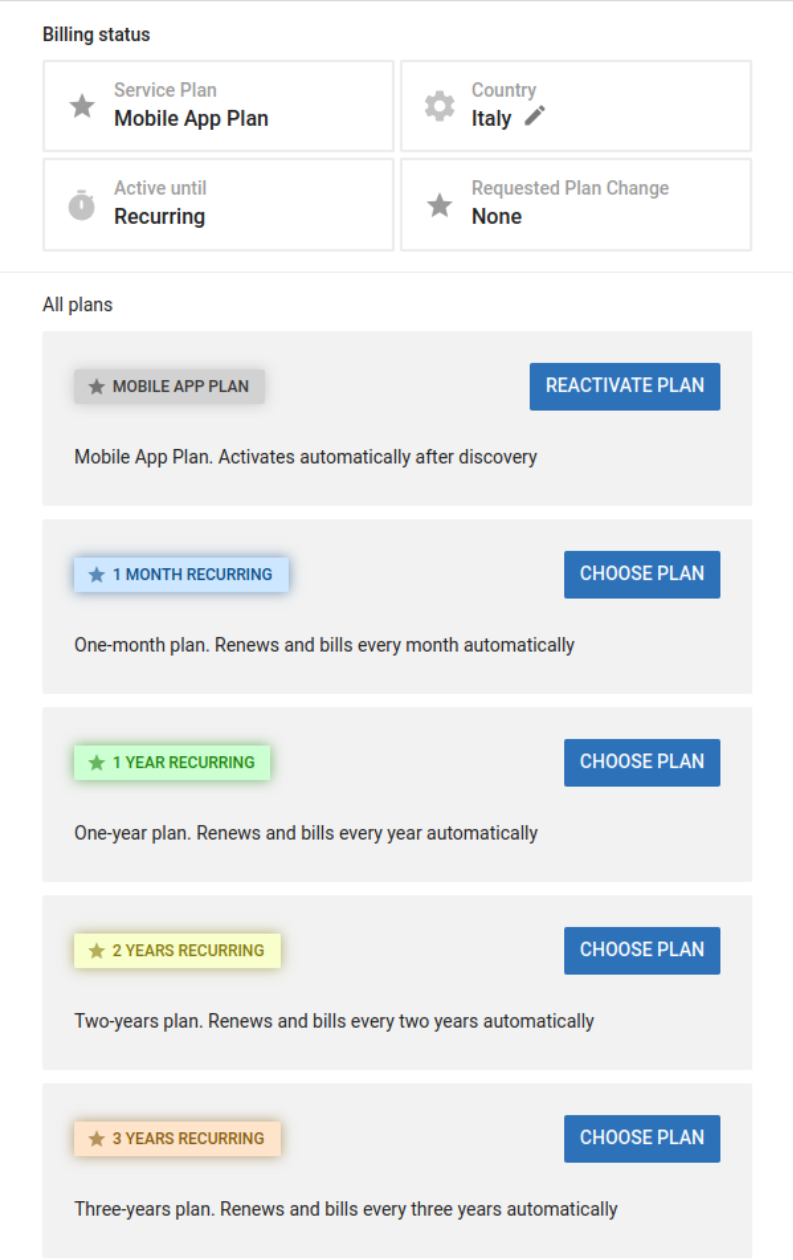
| Name | Description |
|---|---|
| Current plan | Shows the active billing plan. You can set up a different billing plan at any time, but the new billing plan starts when the current billing plan expires. |
| Country | Shows the billing plan’s country:
note If you select the incorrect country, the system rejects the billing plan request. |
| Renewal date | Shows the start date of the new billing plan, if set, otherwise shows Unlimited. |
| Future plan | Shows the billing plan that activates at the Renewal date, if set, otherwise shows Not specified. |
| All plans | Shows the available billing plans. |
To set up the billing plan for an IQ panel, complete the following steps.
- In the Equipment page, click on the billing plan icon of the panel: PowerManage displays the panel’s Billing status pane.
- In the Billing status pane, click the CHOOSE PLAN button of the desired billing plan.
- In the window that opens, select the country where the panel is installed, then click CONFIRM.
note
If you select the incorrect country, the system rejects the billing plan request.
- In the SUBMIT FORM window, click CONFIRM.
To deactivate the billing plan, click DEACTIVATE PLAN in the Billing status pane.
Billing status view
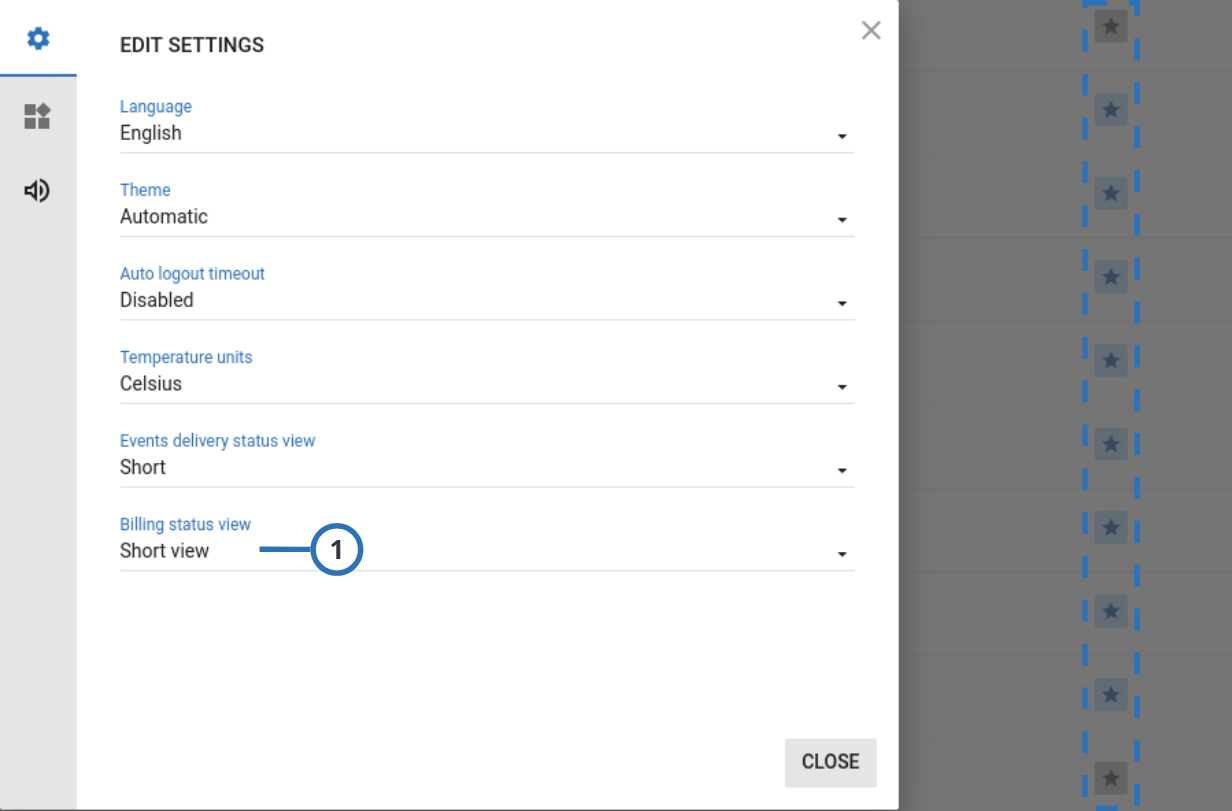
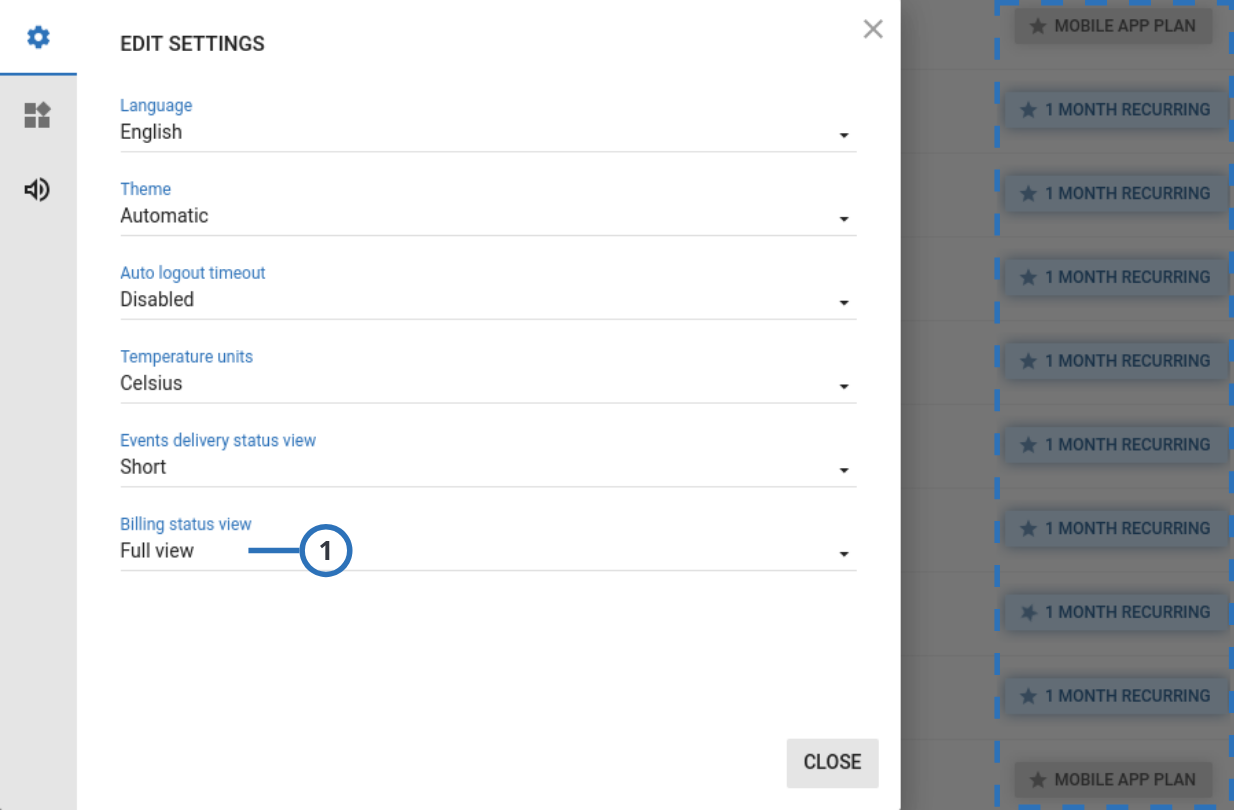
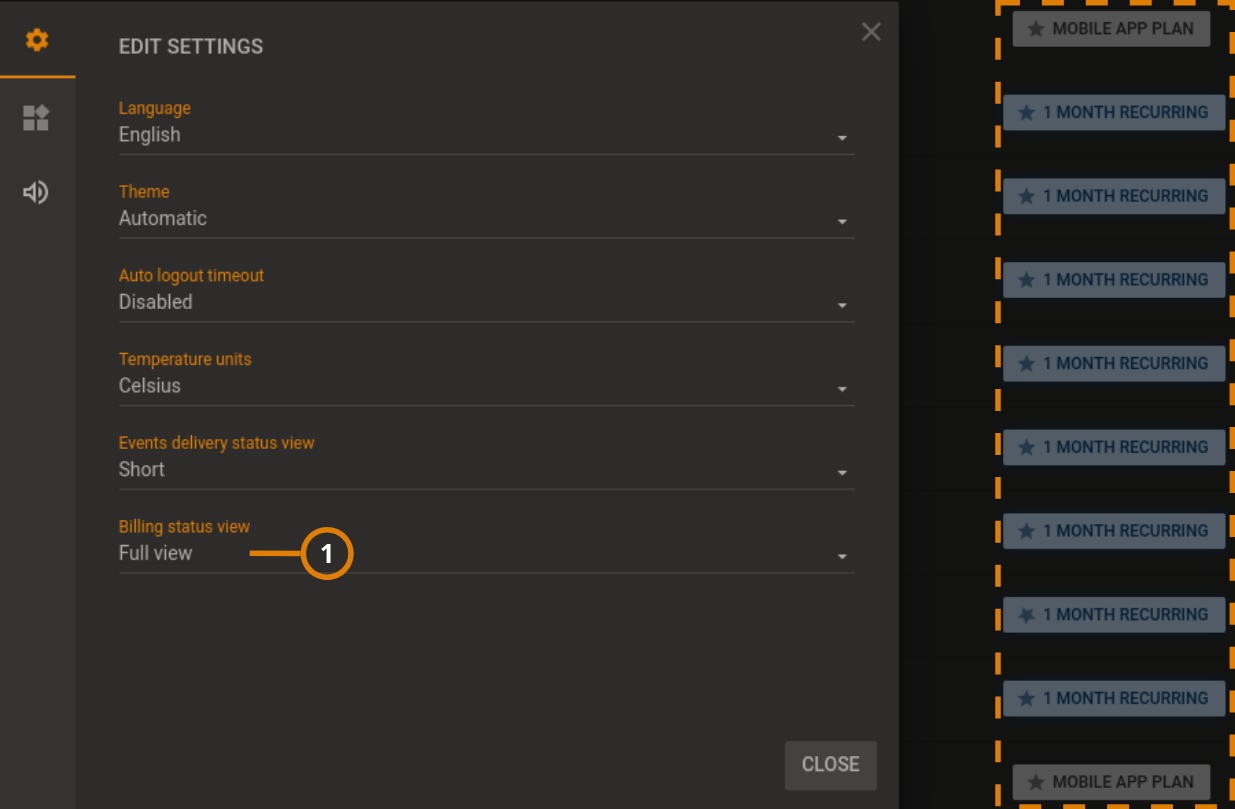
To display the Billing status view option, click on the user icon on the top right of the PowerManage window, then click on Settings > EDIT SETTINGS:
Figure. Billing status short view
| Callout | Name | Description |
|---|---|---|
| 1 | Billing status view | Use the Billing status view option to set up the display mode of the billing status button in the Equipment page. |
| 2 | Billing status button | Short view |
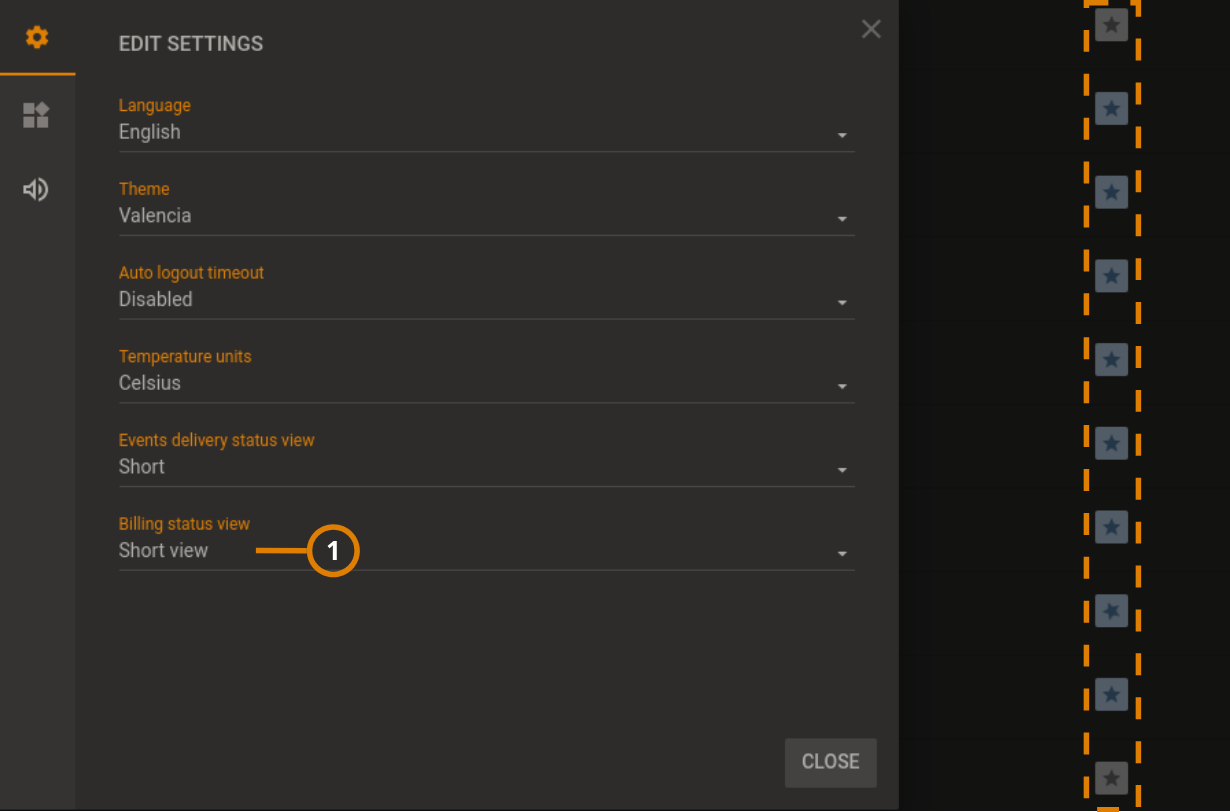
Figure. Billing status full view
| Callout | Name | Description |
|---|---|---|
| 1 | Billing status view | Use the Billing status view option to set up the display mode of the billing status button in the Equipment page. |
| 2 | Billing status button | Full view |